Happy Lunar New Year ~ Japchae Cups with Prosciutto
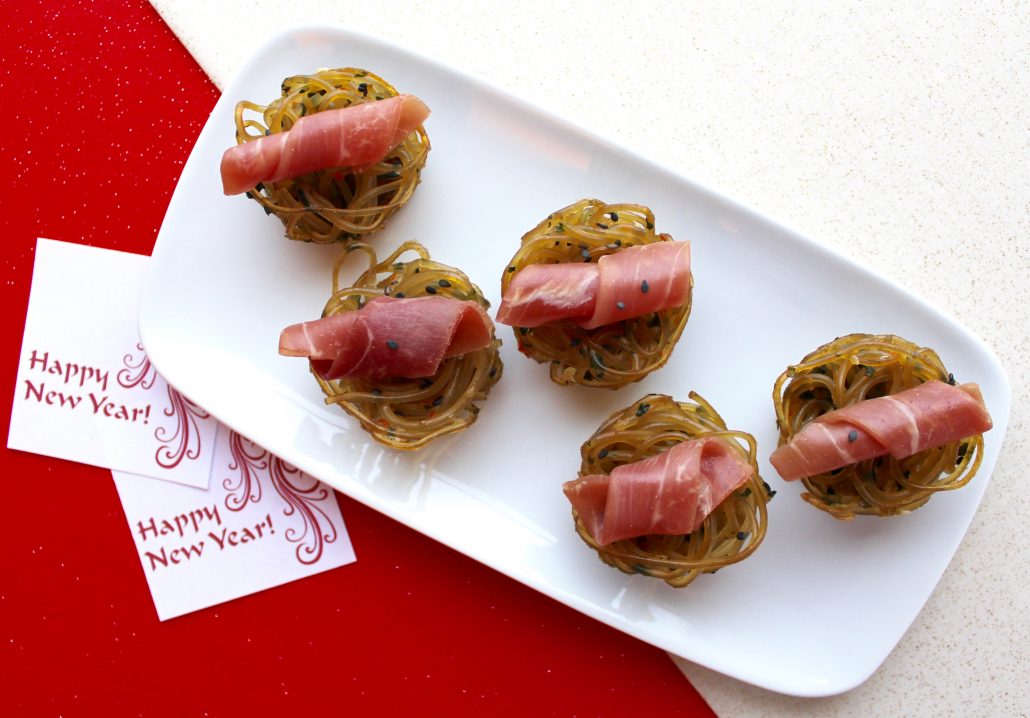
To celebrate the Lunar New Year, I made a recipe that combines delicious flavors from the East and West. Japchae is a classic Korean noodle dish that I love. The main ingredient is a special kind of noodle made with sweet potato starch, so the dish is delightfully chewy. It is usually made with beef and often has strips of egg on top. In my version, I coated the noodles with egg and baked them into a mini muffin tin to make one-bite appetizers. The finishing touch is a little prosciutto on top, since this is the year of the pig after all. 😉

The cute little printable decoration is from a website called Hoosier Homemade.

Japchae Cups with Prosciutto

Makes about 40 cups

To make japchae:

3 tablespoons soy sauce

2 1/2 tablespoons granulated sugar

2 tablespoons toasted sesame oil

2 tablespoons lightly toasted sesame seeds, plus more for garnish (I used a mixture of white and black seeds)

8 ounces Korean sweet potato starch noodles

2 tablespoons high-heat cooking oil, divided

1 medium carrot, small diced

1/2 sweet onion, small diced

2 cloves of garlic, minced

2 large scallions, finely chopped

6 dried shitake mushrooms, rehydrated, stems removed, and cut into a small dice

5 ounces fresh baby spinach

To assemble cups:

Cooking spray

2 large eggs

3 ounces thinly sliced prosciutto

To make japchae:

In a small bowl, combine all of the sauce ingredients, from the soy sauce to the sesame seeds. Set aside.

Cook the noodles according to package instructions. Strain, but reserve the boiling water. Rinse the noodles in cold water. Place the noodles into a large bowl. Cut the noodles to a more manageable size with kitchen shears, about 8 inches long. Set aside.

Blanch the spinach for a few seconds in the reserved boiling water. Strain and run under cold water to stop the cooking. Squeeze out the excess water. Cut the spinach into small pieces. Transfer to the large bowl next to the noodles.

In a large sauté pan, heat 1 tablespoon of cooking oil over medium heat until shimmering, but not smoking. Sauté the carrot and onion with a little salt and pepper until softened. Add the garlic, and cook until fragrant. Transfer the mixture to the same large bowl as the noodles.

Add the remaining tablespoon of oil to the pan, heat, and then add the mushrooms. Sauté until they are a little caramelized. Transfer to the large bowl with all of the other ingredients.

Add the sauce to the noodles and toss everything with your hands until well combined.

To assemble cups:

Preheat oven to 325 F.

Coat a mini muffin pan well with cooking spray.

Crack the eggs into the japchae mixture, and combine with your hands until everything is evenly coated.

Fill each hole in the mini muffin pan with about 1 1/2 tablespoons of the japchae mixture. Make sure you get the vegetables mixed in, since they have a tendency to fall through the noodles.

Bake for 15 minutes, or until the egg is cooked through.

Let cool in the pan for about 10 minutes. To remove, run an offset spatula or butter knife around each cup.

Top with prosciutto.

Serve immediately or at room temperature. The easiest and least messy way to eat these is with chopsticks in one bite. I hope you enjoy!

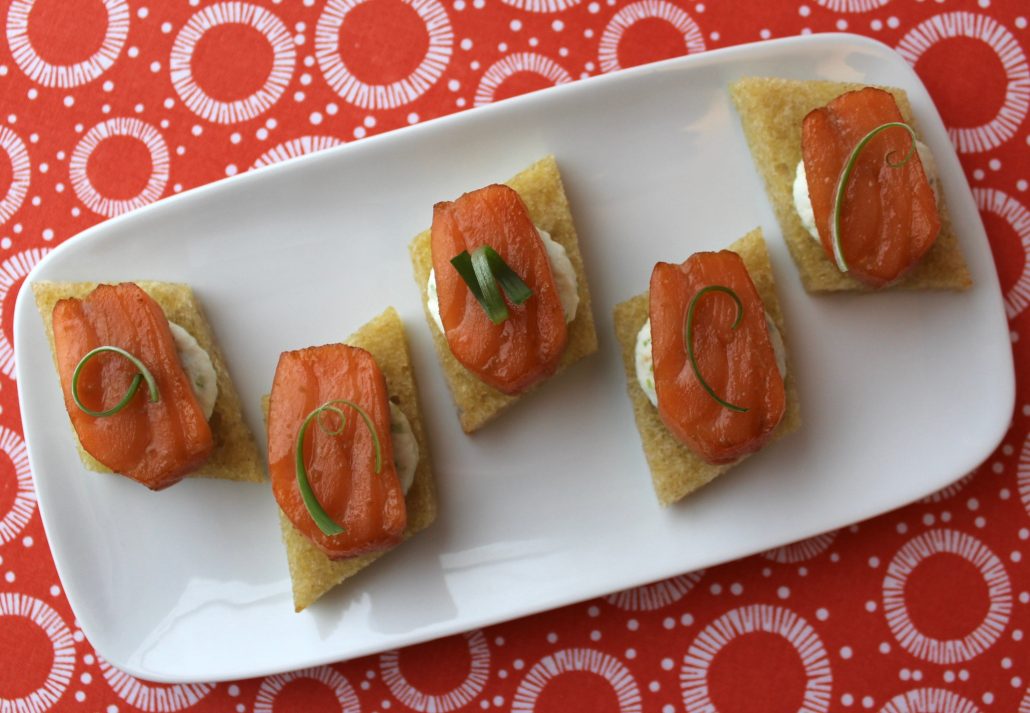
Welcome 2019 ~ Bulgogi Salmon and Scallion Ricotta Canapés

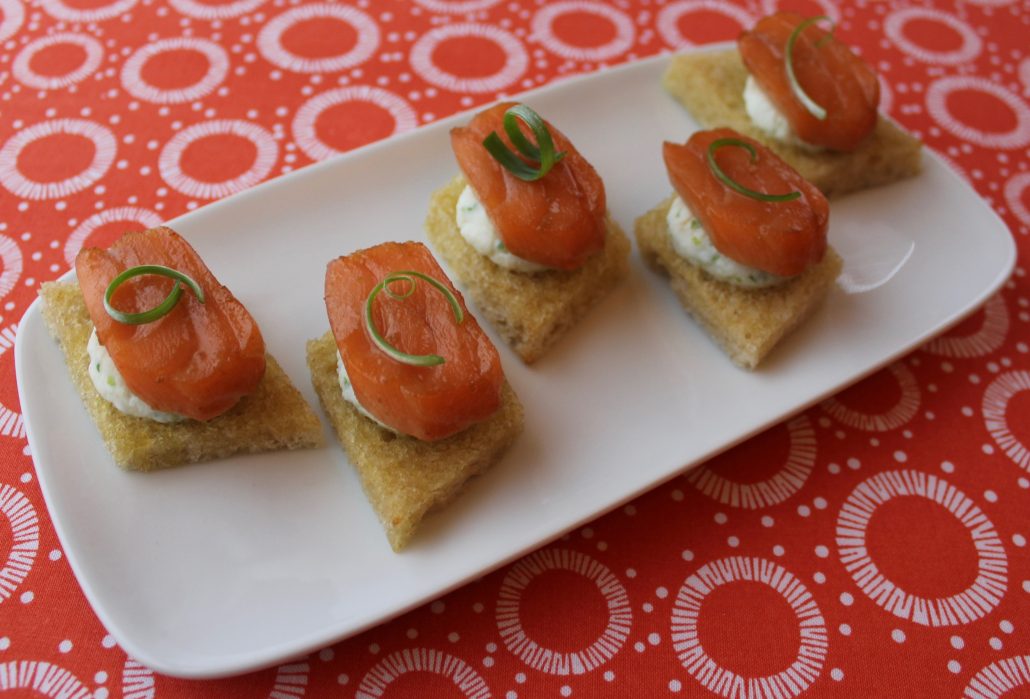
Happy New Year! To kick off the new year, I made a version of this appetizer for our New Year’s Eve party. Everyone seemed to like it, so I thought I’d share the recipe here!

I’ve made this recipe as a more rustic crostini on sliced and toasted pieces of baguette, but I thought I’d make it a little fancier for the occasion by cutting sliced artisan bread into different shapes (and calling them canapés! Doesn’t that sound fancier than crostini? 😉 ) The extra bits of bread can be popped under the broiler to make the odds and ends toasty. Perfect for dipping into a runny egg on New Year’s Day morning.

Bulgogi Salmon and Scallion Ricotta Canapés

Inspired by a recipe from Korean Bapsang

Makes approximately 15 appetizers

For the bread layer:

Sliced artisan bread

Olive oil

Salt to taste

For the cheese layer:

3 scallions, finely minced

1 cup part skim ricotta

Salt to taste

For the salmon layer:

1/3 pound of salmon, skin removed (I used a beautiful piece of trimmed sushi grade salmon from my local Japanese grocery store)

1 1/2 tablespoons soy sauce

1/2 tablespoon mirin

1 teaspoon toasted sesame oil

1/2 tablespoon lemon juice

1 tablespoon granulated sugar

1 teaspoon minced garlic

1 teaspoon grated ginger

To assemble:

More scallions, curled (For a tutorial on how to make pretty curls, you can find it here.)

For the bread layer:

Preheat broiler. Line a sheet pan with parchment paper.

Cut the bread into the shapes you would like for the base of your canapés. Mine were about 1 1/2 inches long. On one side, brush the bread with olive oil and sprinkle with a little salt. Broil until toasty and just beginning to brown. Set aside.

For the cheese layer:

Mix the ricotta with scallions. Salt to taste. Place the cheese mixture into a piping bag fitted with a large round tip.

For the salmon layer:

Lower the oven temperature to 325 F. Let the high heat from the broiler dissipate.

Line a quarter sheet pan with parchment paper.

Cut the salmon into approximately 1/4-inch thick slices.

In a small bowl, mix the remaining ingredients.

Marinate the salmon for 5 minutes in the soy sauce mixture.

Remove the salmon from the marinade and lay in a single layer on the prepared sheet pan.

Cook 3-5 minutes, until warmed through. If your salmon is not sushi grade, cook a little longer until just cooked through.

To assemble:

Pipe a dollop of the ricotta mixture onto each piece of bread. Top with salmon. Garnish with curled scallions.

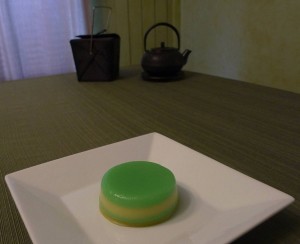
Happy Lunar New Year ~ Vietnamese Steamed Layer Cakes

We had a little culinary adventure this year in honor of the Lunar New Year in Vietnam (Tết). Rob and I love Vietnamese food, and we often go out for it in the International District. I also attended a Tết festival in Seattle Center this year where they had dragon dancers, firecrackers, and a chef demonstration. The chef made steamed rice cakes, which inspired me to give this type of cake a try at home!

I found this recipe on a Vietnamese cooking website called DanangCuisine.com. They were very pretty little desserts, with several layers of color from pandan and mung beans. I followed the recipe rather closely since I had never tried anything quite like this before in my kitchen. I did use light coconut milk instead of the full fat version, and I reduced the sugar a little bit, but otherwise followed the expert. 🙂

BÁNH DA LỢN – STEAMED LAYER CAKES

Based on a recipe from DanangCuisine.com

200 g tapioca starch (7 oz)

50 g rice flour (1.76 oz)

1 tsp pandan extract (or 5 fresh pandan leaves)

100 g peeled mung bean (3.5 oz)

200 g sugar (8.8 oz)

pinch of salt

400 ml light coconut milk (14 fl. oz)

300 ml water (10 fl. oz)

Rinse the mung beans a few times until the water becomes clear and soak in water for at least 1 hour (or overnight). Add just enough water to barely cover the beans and cook in a rice cooker until done. Alternatively, you can steam the beans for 15-20 minutes or until soft.

In a saucepan over low heat, dissolve sugar and salt in coconut milk and water. Let cool. In a large bowl, combine tapioca starch, rice flour and the coconut mixture. Stir well until dissolved.

In a blender, combine 350ml (1 + 1/2 cups) of the above batter with the cooked mung beans and blend until smooth. You will get a yellow batter.

Add pandan extract to the remaining batter. You will get a green batter. (To make pandan extract, blend 5 finely chopped pandan leaves with 120ml (1/2 cup) water and extract the juice.)

Grease the mold (or several smaller molds, such as ramekins) with vegetable oil. Fill the mold(s) with the green batter to a depth of about ½ inch (1cm). Cover and steam for a few minutes until slightly set. Then add the same amount of the yellow batter. Continue pouring and steaming the alternate colors until the molds are filled to the top.

After the last layer, steam the whole cake for another 15 minutes. When you poke the center of the cake with a chopstick and see no batter spilling, it is done.

Let cool completely and cut into pieces with a greased knife. You can keep the cake(s) in the refrigerator for up to 2-3 days. Warm slightly in the microwave before serving.

Happy New Year!

PS. If you live in the Northwest, Uwajimaya has all of the ingredients in this recipe. I love to visit my local store and explore the ingredients that most American markets don’t carry.

Valentine’s Day/Chinese New Year ~ Moo Shu Pork and Homemade Fortune Cookies

This year Valentine’s Day (and our engagement anniversary) and Chinese New Year happened to fall on the same day, so we celebrated everything together with a romantic Chinese dinner at home. I love to celebrate holidays from all over the world in my own little way. It gives me one more way to spice things up with special moments. Who can’t use another reason to celebrate in the dark winter months? I tried two new recipes, and I would recommend them both if you would like a quiet night at home with Chinese take-in ~ Moo shu pork and homemade fortune cookies. It was an adventure in the kitchen, and I now have a greater appreciation for what my favorite local Chinese restaurant does after trying these dishes! The dishes were a little healthier since I could control the salt, cuts of meat, etc. Plus, we could make our own personal fortunes for each other to open, which was a fun bonus of making our own fortune cookies. (Is it cheating if you write your own fortunes?) 🙂 The first recipe I tried was Moo Shu Pork. The original recipe was from my favorite Cooking Light magazine, and it can be found at MyRecipes.com. I used simple cremini mushrooms instead of shiitake and wood ear to save quite a bit of money. But other than that detail, I followed the recipe pretty closely since it was already a lightened version of the dish.Moo Shu Pork2 tablespoons low-sodium soy sauce

2 tablespoons sake

1 teaspoon dark sesame oil

2 teaspoons cornstarch

1 (1 1/2-pound) pork tenderloin, trimmed of excess fat, and cut into 1 x 1/4-inch strips

4 ounces sliced cremini mushrooms

1/2 cup sliced green onions

3 tablespoons minced garlic (about 12 cloves)

2 tablespoons fresh ginger grated on a Microplane

3 tablespoons sake

3 tablespoons low-sodium soy sauce

1/2 teaspoon cornstarch

1/2 teaspoon sugar

1/4 teaspoon black pepper

1 tablespoon vegetable oil

2 eggs, lightly beaten

3 cups thinly sliced napa cabbage stalks

4 cups thinly sliced napa cabbage leaves

2 tablespoons sake

Hoisin sauce and flour tortillas for serving

Combine the first 4 ingredients in a zip top plastic bag. Add the pork. Seal and marinate in the refrigerator for about an hour, turning occasionally. Remove the pork from the bag, and discard the marinade.

Combine the sliced mushrooms, green onions, garlic, and ginger in a small bowl, and set aside.

Combine 3 tablespoons of sake and the next 4 ingredients (through black pepper) in a small bowl. Stir well with a whisk, and set aside.

Heat 1 1/2 teaspoons vegetable oil in a large nonstick skillet over medium-high heat. Add the pork, and stir-fry for 3 minutes.

Remove the pork from the pan. Add 1 1/2 teaspoons of vegetable oil to the pan. Add the eggs, and stir-fry 30 seconds or until soft-scrambled. Add the mushroom mixture and stir-fry 1 1/2 minutes. Add the cabbage stalks and stir-fry 30 seconds. Add the cabbage leaves and 2 tablespoons of sake. Stir-fry for 1 minute. Add the pork and the cornstarch mixture. Stir-fry 2 minutes or until the sauce is thickened.

Serve wrapped in warmed tortillas with hoisin sauce.

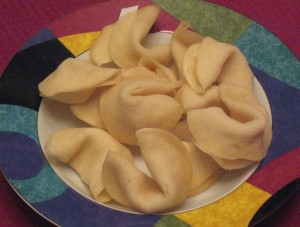
The second thing my husband and I made together was a batch of fortune cookies. I would recommend doing these with a partner, since they harden very quickly once they come out of the oven. We each filled out personalized little strips of paper for the fortunes, and then opened each other’s for a surprise. The original recipe was from the Food Network.

Homemade Fortune Cookies

1/2 cup all-purpose flour

1 teaspoon cornstarch

1/2 cup sugar

2 large egg whites

1 teaspoon vanilla extract

2 tablespoons canola oil

1 tablespoon water

Cooking spray for the pans

Write your fortunes on little pieces of paper before you begin.

Preheat the oven to 300 degrees.

In a small bowl, sift together the flour, cornstarch and sugar.

In a medium bowl, whisk together the egg whites, vanilla, oil, and water. Add the dry ingredients into the wet ingredients and mix until smooth.

Working in batches of 4, drop the batter by tablespoons on a baking sheet covered with a silicone mat. Tilt the baking sheet in a circular motion (and use your finger if need be) to spread the batter into 4-inch diameter circles.

Bake until the edges of the cookies are golden brown, about 10 minutes. Remove from the oven, and working quickly, use a spatula to remove the cookies from the baking sheet. Put a fortune into the center of a cookie and fold it in half. Bring the points together with open seams on the outside. Arrange in muffin tins to help keep their shape while they are cooling.

Repeat with the remaining fortunes and cookies.

We paired the meal with Sofia Blanc de Blancs (the same kind of sparkling wine that we enjoyed on New Year’s Day, which seemed fitting) with mandarin orange slices floating in the bubbles for the occasion.

I decorated the table with red (the color of both holidays) and a blend of Chinese New Year and heart decorations for Valentine’s Day and our engagement anniversary. For example, I printed a Year of the Rat image and a Year of the Dragon image, since they were the years that Rob and I were born. That added a little personal romantic touch. I also printed a matching Year of the Tiger image for the middle of the table, which was the year we celebrated today.