Maypole Cakes ~ Hummingbird Mini Bundt Cakes with Cream Cheese Filling
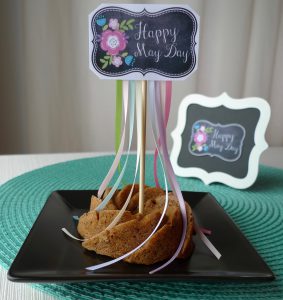
Today is May Day, which is also Lei Day in Hawaii! After the chilly and wet winter we’ve had in Seattle this year, I can appreciate a day that celebrates the arrival of springtime and the warm tropical state of Hawaii. (This holiday also gave me an excuse to bake more cake. 😉 ) I celebrated the occasion by making Maypole cakes out of one more batch of tropical hummingbird cakes!

I found the cute May Day printable design that inspired these cakes at ThePolkaDotPosie.com. They are absolutely adorable and free to use for personal use. 🙂 I hope you go over to their website to check out all of the cute designs they have.

I attached thin pastel ribbons to the printout, and mounted it all on a skewer. Then I attached the skewer near the middle of the cake for a cute edible display. I love how the swirl of the Bundt cake design gives the ribbons a little swirl.

Hummingbird Mini Bundt Cakes with Cream Cheese Filling

Makes 6 mini Bundt cakes (and 6 muffins)

For the filling:

8 ounces reduced-fat cream cheese, room temperature

1/4 cup granulated sugar

1 egg

1/4 cup all-purpose flour

For the cake:

Butter, softened, for preparing the pan

1 1/2 cups whole-wheat pastry flour

1/2 cup granulated sugar

1 1/2 teaspoons ground cinnamon

1/2 teaspoon baking soda

Pinch of salt

1/4 cup reduced-fat sour cream

2 tablespoons coconut oil, liquefied

1 egg

1 teaspoon vanilla extract

1 cup mashed ripe banana (about 2 or 3 bananas, depending on the size)

1/2 cup canned crushed pineapple, drained

3/4 cup pecans, toasted and chopped

1/2 cup desiccated unsweetened coconut (optional)

Powdered sugar, for dusting the cakes (optional)

For the filling:

In the bowl of a stand mixer fitted with a paddle attachment, add the cream cheese, sugar, and egg. Blend until everything is well combined. Then add the flour, and beat until just combined. Scoop the mixture into a piping bag fitted with a medium round nozzle. Set aside.

For the cake:

Evenly spread a thin layer of butter over all the nooks and crannies of the mini Bundt pan.

(Line a muffin pan with 6 paper liners for the leftover batter and filling if you wish.)

Preheat oven to 350 F.

In a large bowl, whisk together the flour, sugar, cinnamon, baking soda, and salt.

In a medium bowl, whisk together the sour cream, oil, egg, and vanilla. Add the banana and pineapple, and stir until well combined.

Add the wet ingredients to the dry ingredients, and stir until everything is just combined. Add the nuts and coconut (if using), and stir until they are evenly distributed in the batter.

Fill each well of the mini Bundt pan about 1/3 full. With the back of a small spoon, make a channel in the batter all around the pan. Pipe a layer of cream cheese filling into the channel, taking care to keep it away from the sides of the pan. Top the filling with batter until each well is about 3/4 full.

(With the remaining batter and filling, you can make muffins in the same manner, each with a dollop of filling in the middle. Bake for about 20 minutes, or until a toothpick inserted into the middle of a muffin comes out clean. Remove the muffins from the pan to cool on a wire rack.)

Bake the Bundt cakes for about 27 minutes, or until a toothpick inserted into the middle of a cake comes out clean.

Let the Bundt cakes cool in the pan. Once cooled, invert the cakes. If desired, dust with powdered sugar before serving.

Happy Easter! ~ Easter Bunny Rolls

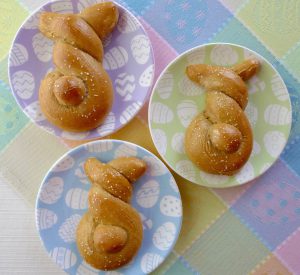
The Easter bunny came to our house today! 😉

I found this bunny roll idea in several places online, and I couldn’t resist making a batch of my own. They are simple and quite adorable.

I made these rolls with my basic whole-wheat dinner roll recipe. I didn’t use dill this time around, but I think an herb of some sort would be delicious. I love this recipe because I can make the rolls in the evening, let them rest in the refrigerator overnight, and then bake them in the morning. There is nothing quite like fresh bread on Easter morning (without having to get up early to make it! 😉 )

Easter Bunny Rolls

Makes 5 dinner rolls

2 tablespoons warm water (about 80 degrees F.)

1/2 tablespoon dry active yeast

1 teaspoon granulated sugar

1/2 teaspoon kosher salt

1 tablespoon unsalted butter, melted

1 large egg

1/2 cup low-fat buttermilk

1 3/4 cups white whole-wheat flour

All-purpose flour for dusting work surface

Approximately 1 tablespoon beaten egg

Approximately 1/2 tablespoon coarse salt

Place a piece of parchment paper on a half sheet pan, and spray the parchment with cooking spray. Make sure you have enough room in your refrigerator for the sheet pan where the rolls will rest overnight.

In the bowl of a stand mixer with a dough hook attachment, add the water. Sprinkle the yeast over the water. Let stand until the yeast and water mixture looks creamy, about 5 minutes. Next, add the ingredients from the sugar through the whole-wheat flour to the bowl. Let the mixer knead the dough for about 10 minutes. The dough will be elastic and sticky.

Remove the dough from the bowl onto a clean work surface that is lightly dusted with all-purpose flour. Divide the dough into 6 equal pieces. Sprinkle a little extra all-purpose flour over the dough and on your hands if the dough sticks.

To make bunnies, roll 5 of the pieces of dough into long ropes, each about 12 inches long. Take the two ends of each rope and twist them over each other twice, leaving about an inch of both ends sticking out on top for the ears. Make sure the bottom has a loop with a hole in the middle to make room for the tail. Cut the remaining piece of dough into small pieces for the tails. Roll each piece into a ball, and place the ball in the center of the loop. (If you have leftover dough, you can form a little Easter egg shape to go with the bunnies!) Place all of the rolls on the prepared baking sheet. Take care to leave enough space between the rolls to allow them to rise without touching each other.

Spray the tops of the rolls with nonstick cooking spray and cover with plastic wrap. Let the rolls rest in the refrigerator overnight.

The next day, remove the rolls from the refrigerator. Let the dough rise in a warm place for about 90 minutes, or until close to doubled in size.

Preheat your oven to 350 F. Brush the rolls with the beaten egg, and sprinkle a little coarse salt on top. Bake for about 20 minutes, or until the rolls are golden brown and cooked through.

Easter Eggs ~ Pickled Rainbow Deviled Eggs

Happy Easter!

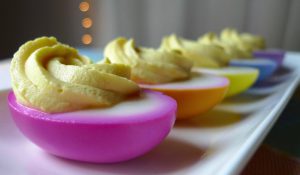
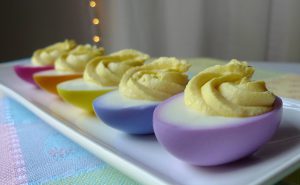
My mom makes pickled eggs with beets for Easter, just the way my grandma used to make. I think it’s an old Pennsylvania Dutch tradition that made its way into our family. I decided to expand on our tradition this year by dying my eggs pink…and yellow, orange, blue, and purple, and I was delighted with all of the bright colors, which were, amazingly, totally natural! 🙂

After I dyed the eggs, I made them into deviled eggs. Use your favorite deviled egg recipe. I like to use Greek yogurt in mine, so between the pickling and the filling, they have a bit of a tang. These deviled eggs are perfect for an Easter afternoon snack—if they make it that long. 😉

Pickled Rainbow Deviled Eggs

(Inspired by Food52)

For the pickled eggs:

3/4 cup white-wine vinegar

3/4 cup water

1/2 teaspoon kosher salt

3 hard-boiled eggs, peeled (for all 5 colors, use 15 whole eggs)

(Each coloring recipe below is for 1 batch of the basic pickling blend above. To make all 5 colors, make the basic pickling blend in 5 separate batches.)

For pink:

1 small red beet, roasted, peeled, and cut into large pieces

For yellow:

1/2 tablespoon ground dried turmeric

For orange:

1/2 tablespoon ground dried turmeric

1 small piece (the equivalent of approximately 1 1/2 tablespoons) roasted and peeled red beet

For blue:

1/4 small red cabbage, thinly sliced

1 1/2 teaspoons baking soda

For purple:

1/4 small red cabbage, thinly sliced

1 1/8 teaspoons baking soda

Divide the eggs into five glass containers that are big enough for three eggs and one batch of the pickling liquid.

In a small saucepan, bring one batch of vinegar, water, and salt to a simmer. Whisk the mixture to ensure the salt fully dissolves. Then, turn off the heat and add the coloring of your choice.

Pour the colored pickling blend over the top of three eggs, making sure they are fully submerged. Repeat with the remaining four colors.

Refrigerate the submerged eggs until they are the color you desire. I left mine in the pickling blend for a few hours, stirring every hour or so, to ensure they colored evenly. (I found that the pink, orange, and yellow took less time to reach the color I wanted than the blue and purple, so I left the latter colored eggs in the pickling blend longer.) The eggs will also become more pickled with time.

If you make all 5 colors, you’ll end up with 15 whole eggs or 30 deviled egg halves.

Deviled eggs:

Prepared pickled eggs

5 ounces nonfat plain Greek yogurt

2 teaspoons Dijon mustard

2 tablespoons mayonnaise

Salt to taste

Cut each egg in half and remove the yolks.

In a medium bowl, mash the yolks with a fork. Add the yogurt, mustard, mayonnaise, and salt, and mix until the filling is well incorporated and smooth.

Scoop the filling into a piping bag fitted with a star tip, and then, pipe the filling into each egg white half.

Easter Treats ~ Hummingbird Mini Bundt Cakes with Cream Cheese Filling

Happy Easter!

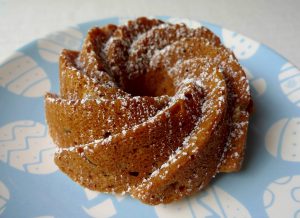
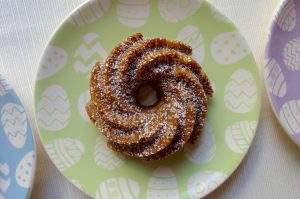
To celebrate the holiday this year I made hummingbird cakes, which are a Southern classic with a tropical twist. They are filled with banana, pineapple, pecans, and sometimes coconut. That combination leads me to dream about warmer weather and palm trees! 😉 Plus the name of the dessert just sounds like springtime to me. I thought they would be perfect for Easter this year.

Hummingbird cakes are usually frosted with a cream cheese icing, but rather than cover the pretty Bundt cake design, I decided to fill mine with a cream cheese filling. The sweet cream cheese is a nice surprise to find when you cut into the cakes.

I used a mini Bundt pan that makes 6 small individual cakes. The pan holds about 4 cups of batter between the cakes. After filling the pan I still had some leftover batter and filling, so I made muffins with the extra in cute Easter liners. The muffins go well with coffee for breakfast. 🙂

Hummingbird Mini Bundt Cakes with Cream Cheese Filling

Makes 6 mini Bundt cakes (and 6 muffins)

For the filling:

8 ounces reduced-fat cream cheese, room temperature

1/4 cup granulated sugar

1 egg

1/4 cup all-purpose flour

For the cake:

Butter, softened, for preparing the pan

1 1/2 cups whole-wheat pastry flour

1/2 cup granulated sugar

1 1/2 teaspoons ground cinnamon

1/2 teaspoon baking soda

Pinch of salt

1/4 cup reduced-fat sour cream

2 tablespoons coconut oil, liquefied

1 egg

1 teaspoon vanilla extract

1 cup mashed ripe banana (about 2 or 3 bananas, depending on the size)

1/2 cup canned crushed pineapple, drained

3/4 cup pecans, toasted and chopped

1/2 cup desiccated unsweetened coconut (optional)

Powdered sugar, for dusting the cakes

For the filling:

In the bowl of a stand mixer fitted with a paddle attachment, add the cream cheese, sugar, and egg. Blend until everything is well combined. Then add the flour, and beat until just combined. Scoop the mixture into a piping bag fitted with a medium round nozzle. Set aside.

For the cake:

Evenly spread a thin layer of butter over all the nooks and crannies of the mini Bundt pan.

(Line a muffin pan with 6 paper liners for the leftover batter and filling if you wish.)

Preheat oven to 350 F.

In a large bowl, whisk together the flour, sugar, cinnamon, baking soda, and salt.

In a medium bowl, whisk together the sour cream, oil, egg, and vanilla. Add the banana and pineapple, and stir until well combined.

Add the wet ingredients to the dry ingredients, and stir until everything is just combined. Add the nuts and coconut (if using), and stir until they are evenly distributed in the batter.

Fill each well of the mini Bundt pan about 1/3 full. With the back of a small spoon, make a channel in the batter all around the pan. Pipe a layer of cream cheese filling into the channel, taking care to keep it away from the sides of the pan. Top the filling with batter until each well is about 3/4 full.

(With the remaining batter and filling, you can make muffins in the same manner, each with a dollop of filling in the middle. Bake for about 20 minutes, or until a toothpick inserted into the middle of a muffin comes out clean. Remove the muffins from the pan to cool on a wire rack.)

Bake the Bundt cakes for about 27 minutes, or until a toothpick inserted into the middle of a cake comes out clean.

Let the Bundt cakes cool in the pan. Once cooled, invert the cakes. Dust with powdered sugar before serving.

Easter Treats ~ Simnel Cupcakes

Simnel CupcakesHappy Easter!

To celebrate the holiday this year, I made a batch of simnel cupcakes. 🙂

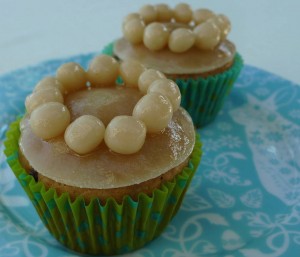
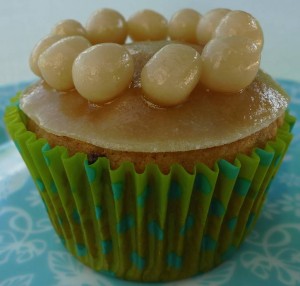
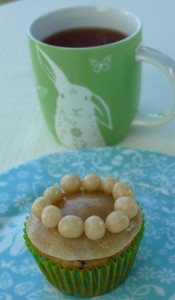
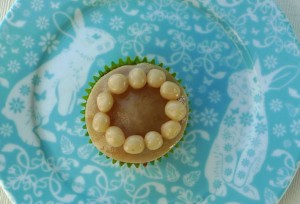
Simnel cake is a British confection eaten around Easter time. It is a type of fruit cake with some warm holiday spices mixed in, but I think the most interesting part about this dish is the decoration. These cakes are decorated with a ring of 11 small balls of marzipan symbolizing 11 Apostles, with the exception of Judas. I love dishes such as this one that combine culture, history, and deliciousness! 😉

Simnel CupcakesI only decorated a few of the cupcakes, and I froze the rest of them without any decoration to keep them fresh for later. (By the way, microwave one frozen cupcake for 30 seconds, and it tastes like it came right out of the oven. I like to eat them plain as a snack.) I ended up using one small 150 gram package of marzipan because I only decorated a few of the cakes. This amount will be enough to decorate about 8 cupcakes, depending on how thin you roll it. If you would like to decorate the whole batch, you will probably need three packages to be on the safe side. Marzipan keeps well in the refrigerator for later if you don’t use all of it. I also only used about ¼ cup of apricot jam. Again, if you plan to decorate all of your cupcakes, you will probably need more.

Simnel CupcakesSimnel Cupcakes

Makes 20

¾ cup light olive oil

½ cup plain nonfat yogurt

6 tablespoons skim milk

½ cup fine or caster sugar

3 eggs

2 ¼ cups whole wheat pastry flour

3 teaspoons baking powder

Pinch of salt

1 ¼ teaspoons mixed spice or pumpkin pie spice

½ teaspoon freshly grated nutmeg

1 ½ cups mixed dry fruit (finely chopped apricots, currants, etc.)

Marzipan (one 150 g package will cover and decorate about 8 cupcakes)

Powdered sugar, for dusting work surface

Apricot jam (¼ cup will be enough for about 8 cupcakes)

Preheat oven to 350. Line 2 cupcake tins with 20 paper liners.

Combine oil, yogurt, milk, sugar, and eggs in a medium bowl. Whisk to combine. In a separate large bowl, whisk together the flour, baking powder, salt, and spices. Add the wet ingredients to the dry, and stir until just combined. Add the fruit, and mix until evenly distributed.

Fill each baking cup about ½ full. Bake for about 25 minutes, or until a toothpick inserted comes out clean.

In the meantime heat jam until it is more viscous, and sieve it through a fine mesh strainer. Reserve the smooth portion of the jam, and discard the solids.

On a clean and smooth surface, sprinkle some powdered sugar to keep the marzipan from sticking. Roll out the marzipan with a rolling pin until it is very thin. Cut out rounds with a round cookie cutter that is approximately the size of the top of a cupcake. With remaining bits of marzipan, make small, evenly sized balls.

When the cupcakes are cooked and cooled, brush a small amount of the jam over the top of each one that you would like to decorate. Place a round of marzipan over the jam, and press gently to adhere to the cake. Lightly brush the top of the marzipan with jam, and also lightly coat 11 little balls with jam. Stick the balls in a circle on top of each cupcake.

Simnel Cupcakes

April Fool’s Day ~ Rhubarb Fool

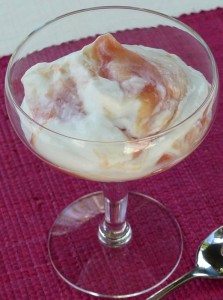
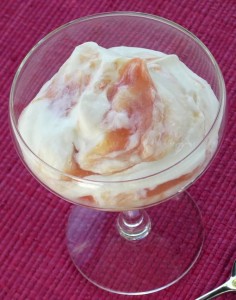
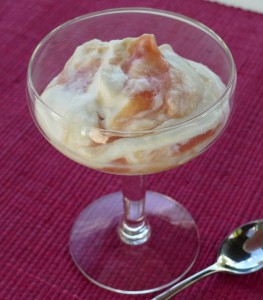
Rhubarb FoolWhat’s the perfect way to celebrate April Fool’s Day? With an English fool, of course! 😉 I couldn’t think of anything more fitting for the occasion. (Except perhaps this. 😉 Love it!)

A fool is a blend of cooked and puréed fruit combined with a creamy base. It is typically made with whipped cream or custard, but I cut down on the fat and calories by combining the cream with nonfat plain Greek yogurt. I also boiled the rhubarb with orange juice to sweeten it without a lot of refined sugar.

Rhubarb FoolRhubarb Fool

½ pound rhubarb, cut into ½ inch pieces

¼ cup fresh orange juice

Zest of ½ an orange

¼ cup sugar

½ cup heavy whipping cream

½ cup nonfat plain Greek yogurt

Place the rhubarb, orange juice, orange zest, and sugar in a small saucepan. Bring to a boil, and simmer until the rhubarb is soft. Strain the excess liquid. Purée the rhubarb in a food processor until smooth. Chill.

Beat the cream until soft peaks form. Whisk in the Greek yogurt. Then stir the cooled rhubarb mixture into the cream mixture, leaving some streaks. Serve immediately.

I hope you have an April Fool’s Day filled with fun and surprising twists and turns!

Rhubarb Fool

Sweet Ending to Easter Dinner ~ Rhubarb Rice Pudding

We enjoyed a simple and elegant Easter dinner at home this year. I tried three recipes that were inspired by Sophie Dahl’s cookbook entitled Very Fond of Food: A Year in Recipes. She’s a British cook I recently discovered, and I like her style. 🙂 She has two cookbooks, and she also had a little cooking show on the BBC.

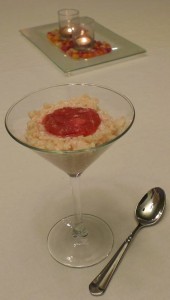
For our Easter dinner, we enjoyed bruschetta with an artichoke spread, lobster and crab salad, and this rhubarb rice pudding. I have a sweet tooth, so this was my favorite dish of the evening. 🙂 I love the subtle edition of orange flower water and rose water. It made it a little special and spring-like without being overwhelming.

Rhubarb Rice Pudding

Based on a recipe by Sophie Dahl

For the rice:

4 cups skim milk

¾ cup basmati rice

1 cinnamon stick

¼ cup honey

½ teaspoon orange flower water

For the rhubarb:

12 oz rhubarb, cut into 1-inch lengths

½ cup water

1 star anise

½ teaspoon rose water

2 tablespoons honey

First, make the rice pudding. Pour the milk and rice into a medium sized saucepan, add the cinnamon stick, bring to a boil, and then simmer over very low heat, stirring frequently, for about 15 minutes. At this point, stir in the honey and orange flower water and cook for another 5 to 10 minutes until the pudding is to the consistency that you like. Remove the cinnamon.

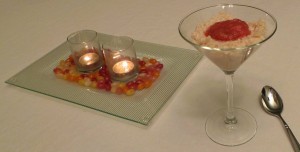
In a separate heavy bottomed saucepan, combine the rhubarb, water, star anise, rose water, and honey. Bring to a boil and simmer on low for about 10 minutes, turning once or twice, until you have a lovely tender pink softness. Remove the anise. Plate the rice pudding and swirl the rhubarb through. Or, conversely, serve the rice with a small dollop of the rhubarb on the top as I did.

Happy Spring! ~ Parsley Cupcakes

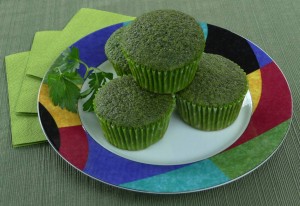
Spring is finally here! To celebrate the new season, I made a recipe for parsley cupcakes. It is one of the most interesting recipes I’ve come across in a long time, and I’m glad I tried it. 🙂  They have a unique herb flavor, and they are intensely green without the use of any food coloring. The original recipe was posted on Food52.com for St. Patrick’s Day. If you haven’t visited that website, I’d recommend it! They have a collection of very unique and delicious recipes to spice up (or in this case, herb up!) your kitchen. 🙂

I substituted the all-purpose flour with whole-wheat pastry flour, and I reduced the amount of salt and sugar a bit. I also made this recipe into individual cupcakes rather than a large cake.

Parsley Cupcakes

Based on a recipe from Food52.com

4 cups tightly packed parsley leaves, from about 5 bunches

1 cup tightly packed mint leaves, from 2 bunches

3/4 cup good olive oil

2 cups whole-wheat pastry flour

1 tablespoon plus 2 teaspoons cornstarch

1 teaspoon kosher salt

1 1/2 teaspoons baking powder

4 large eggs, at room temperature

2/3 plus 3/4 cups sugar

Preheat the oven to 340°F. Line 2 cupcake pans with paper liners. (The recipe makes about 17 cupcakes.)

To make the herb-oil mixture, put a fourth of the parsley and mint in a strong blender or food processor, and blend it on low speed. Use a blender stick to help crush the herbs while the blade is spinning (or stop the machine from time to time to push the herbs back down toward the blade). Slowly increase the speed to medium (or a steady puree, in a food processor) and continue adding the rest of the herbs until you have added all of them.

In a steady stream, add half of the olive oil. Mix on medium-low speed (or pulsing, if using a food processor) until all is combined. Add the remaining olive oil and blend for no longer than 10 seconds. The mixture will look loose and stringy. Scrape out the blender to get all of the parsley mixture, transfer it to a bowl, and refrigerate until ready to use.

In a bowl, combine the flour, cornstarch, salt, and baking powder and set aside.

In a stand mixer fitted with the paddle attachment, whip the eggs for about 30 seconds. Add the sugar and mix on high speed until the mixture is very thick and turns a pale yellow color, about 3 minutes. Turn the mixer speed down to low and add the herb-oil mixture.

With the machine still running, add the flour mixture and mix until just combined. Do not over mix.

Fill each cupcake liner about ¾ full with the batter.

Bake for about 18 to 20 minutes, rotating halfway through. When a cake tester inserted in the center of one cupcake comes out clean, they are done. Let the cupcakes cool in the pan.

The Cottage at Glass Beach ~ Rhubarb Muffins

I am enjoying a summery book named The Cottage at Glass Beach by a local Seattle author, Heather Barbieri. I discovered the book on a fun little book and food website called Books and Bites. I’ve been choosing a lot of my recent book selections from the recommendations on that site. Not only do I get many good book suggestions from other authors I enjoy, but I also get a recipe that fits the theme of every book. So fun!

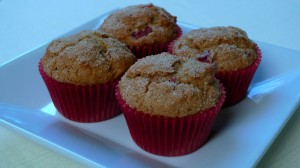
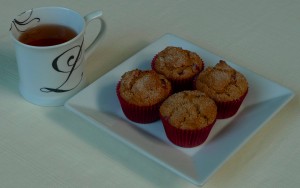
I tried the rhubarb muffins that the website pairs with The Cottage at Glass Beach. The author shared her own recipe for her delicious muffins. I put my own spin on them by using whole-wheat pastry flour instead of all-purpose flour and sprinkling simple cinnamon sugar on the top without the butter. They are so good for breakfast, or for a little mid day snack (while taking an afternoon break to read, of course! ;-))

Rhubarb Muffins

1 1/4 cups firmly packed brown sugar

1/2 cup light olive oil

1 egg

2 teaspoon vanilla

1 cup buttermilk

1 1/2 cups diced rhubarb

2 1/2 cups whole wheat pastry flour

1 teaspoon baking soda

1 teaspoon baking powder

Pinch of salt

3 tablespoons granulated sugar

½ teaspoon ground cinnamon

Combine the brown sugar, oil, egg, vanilla and buttermilk in a mixer bowl, and beat until well incorporated. Stir in the rhubarb by hand. In a separate bowl, combine the flour, baking soda, baking powder and salt. Stir into the rhubarb mixture until just blended.

Spoon the batter into a muffin tin filled with paper linings, about 2/3 full.

For the topping, combine the granulated sugar and cinnamon, and sprinkle evenly over the muffins.

Bake at 400 degrees for 20-25 minutes, or until a toothpick comes out clean when inserted into the center of a muffin.

Elegant Spring Anniversary Brunch, Part 3 ~ Strawberries Dusted With Cardamom Sugar

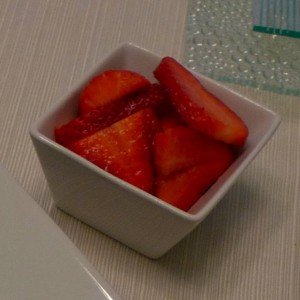
We enjoyed a sweet finale to our spring anniversary brunch – Strawberries Dusted With Cardamom Sugar. It was such a refreshing and unique flavor combination. It felt like a special dish, even though it only took a couple of minutes to assemble. This would be a very nice addition to any special brunch. (Easter and Mother’s Day are coming! :)) I used the original recipe as a guide, but I really made everything to taste. I sliced my berries before serving, and I only used a light dusting of sugar. (Now I have some leftover cardamom sugar for another recipe.)

Strawberries Dusted With Cardamom Sugar

Adapted from Bon Appétit magazine

1/4 cup sugar, or to taste

1/4 teaspoon ground cardamom, or to taste

2 tablespoons Grand Marnier or other orange liqueur or orange juice

1 16-ounce basket strawberries, hulled, left whole or sliced

Whisk sugar and cardamom in small bowl to blend.

Pour Grand Marnier into large bowl. Add strawberries to bowl and toss to coat. Sprinkle to taste with cardamom sugar. Serve.

Elegant Spring Anniversary Brunch, Part 1 ~ Roasted Asparagus with Goat Cheese and Crispy Prosciutto

Every year on March 24th, my hubby and I celebrate the anniversary from the day that we met. We love to mark our little milestone anniversaries, which gives us a reason for a nice meal. I’m always up for another excuse for a celebration! 😉

This year we made a nice brunch at home. The first meal of the day to celebrate the beginning of us :).

I found a menu from Bon Appétit magazine that was both simple and elegant. We made three of the dishes, and we thought they all turned out really well. They would be perfect for Easter, or Mother’s Day, or any other spring celebration. I will definitely keep these recipes at the front of my list when I need a special, but quick, brunch recipe.  I am rarely up for a big cooking project first thing in the morning ;-).

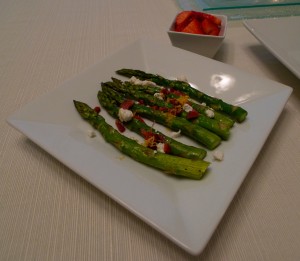
First we made Roasted Asparagus with Goat Cheese and Crispy Prosciutto. It was a fresh and light dish. Prosciutto can be fried in a dry, non-stick sauté pan until it gets crispy just like bacon, which is a little healthier option than traditional bacon. I also didn’t drizzle olive oil over the asparagus at the end, as the original recipe called for, to keep the dish a little bit lighter. Other than that, I followed this recipe pretty closely. Just be sure to keep a close eye on the asparagus in the oven so it doesn’t over cook.

Roasted Asparagus with Goat Cheese and Crispy Prosciutto

Based on a recipe from Bon Appétit magazine

6 prosciutto slices

2 pounds medium asparagus, tough ends trimmed

2 tablespoons olive oil

1 3 1/2- to 4-ounce log soft fresh goat cheese, crumbled

2 teaspoons fresh lemon juice

1 teaspoon grated lemon peel

Cook prosciutto in large non-stick skillet over medium heat until brown and crisp. Transfer to paper towels and drain. Crumble prosciutto; set aside.

Position rack in center of oven and preheat to 500°F.

Arrange asparagus on large rimmed baking sheet. Drizzle with 2 tablespoons oil and turn asparagus to coat well. Sprinkle generously with salt and pepper. Roast asparagus until crisp-tender when pierced with knife, about 7 minutes.

Arrange asparagus in single layer on platter. Sprinkle with goat cheese, then prosciutto. Drizzle with lemon juice. Sprinkle grated lemon peel over. (Can be prepared 1 hour ahead. Cover with plastic wrap. Let stand at room temperature.)

The School of Essential Ingredients ~ Spring Risotto

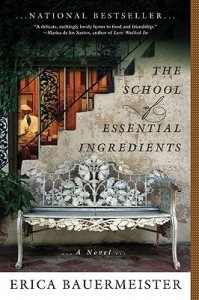
I’ve been working at two separate cooking schools this spring, which inspired me to pick up a book about a group of people who meet every week for a cooking class. It is entitled The School of Essential Ingredients by Erica Bauermeister. The way she writes about cooking and food is so descriptive that it encouraged me to stop and really take in all of the experiences at my own cooking schools…The smells, textures, colors and tastes, as well as the people, places and experiences associated with every dish.

Her website includes a few recipes to bring the experience home, so I decided to try her spring risotto to celebrate the end of the season :).

Spring Risotto

From www.EricaBauermeister.com

4 cups chicken or vegetable broth

1/2 lb asparagus

3 T butter (I actually used Earth Balance instead, which worked beautifully)

3 T olive oil

1 cup chopped onions

1 1/3 cup arborio rice

1/2 cup white wine

1 bay leaf

salt and pepper (to taste)

lemon zest (optional)

shaved parmesan

Cut asparagus tips into 1 1/2 inch pieces. Cut half of the stocks into finely chopped pieces; cut the other half into 1 inch pieces.

Heat broth in a heavy saucepan. When boiling, add asparagus and cook until just tender (3-5 minutes). Take out asparagus with a slotted spoon and set aside in a bowl. Turn down heat under broth to a low simmer.

In a different heavy saucepan, melt butter and add olive oil. Add chopped onions and saute until translucent (about 5 minutes). Add rice and bay leaf and stir until well coated with the butter. Add wine and cook, stirring, until liquid has evaporated.

Add a ladleful of heated broth to the rice, stirring until liquid is absorbed. Continue adding a ladleful at a time, until broth is gone and rice is creamy but grains are still firm.

Add the asparagus and a pinch of lemon zest (optional). Add salt and pepper to taste. Put in a serving bowl and top with Parmesan shavings.

Prep time: 45-50 minutes (with much contemplative stirring)

Serves 6

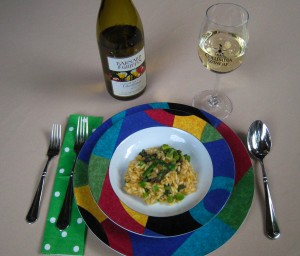
I paired it with a local wine called Barnard Griffin 2010 Chardonnay. The tulips on the label always remind me of spring :). I also used this wine in the dish.

Happy Mother’s Day Weekend ~ Fresh Asparagus, Pine Nut and Tarragon Ravioli


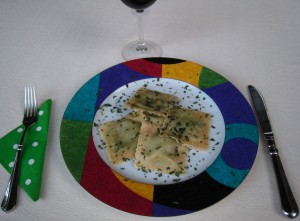
To celebrate Mother’s Day weekend this year, my mom came up for a visit filled with the things we love to do together! Things like shopping at some of our favorite stores, taking a cooking class, and enjoying this fresh ravioli for dinner.

I have recently learned that fresh pasta is actually amazingly easy, and it feels so much more special than dried. It is a little time consuming, but it freezes beautifully, so you can make it on a night when you have time and enjoy it whenever you’d like.

This dish was based on a recipe from one of Sur La Table’s cooking classes. They offer many fresh pasta classes that have really demystified the process for me. The original dish was tossed in a mushroom cream sauce, but I simply tossed the finished ravioli in a little bit of melted Earth Balance buttery spread and sprinkled them with fresh tarragon. I also used less vinegar than called for. Just add the filling ingredients to your taste, and sample as you go before you fill the ravioli.

Fresh Pasta Dough

Yield: 4 servings

2 1/2 cups (12 ounces) all-purpose flour or “00” flour, plus more for dusting

1 tablespoon kosher salt

4 large eggs

1 tablespoon extra-virgin olive oil (optional)

Place flour and salt in a large mixing bowl and whisk to combine. Make a “well” in the center of the flour mixture and add eggs and oil, if using. Using your fingers, blend the eggs into the flour mixture, stirring the flour in from the sides of the well and working outwards. When the pasta dough is thoroughly mixed, turn it out on a lightly floured work surface. Knead dough until it is smooth and flexible but not sticky, about 5 to 10 minutes, adding small amounts of flour as needed. Gather the dough into a ball and flatten into a disk. Cover in plastic wrap and allow dough to rest for at least 10 minutes and up to 1 hour at room temperature.

To roll dough, secure a pasta machine to the edge of a long countertop. Using a bench scraper, cut dough into thirds. Keep extra dough covered in plastic while working with one piece. Flatten the piece of dough into a rough square that will fit inside the width of the pasta machine. Place the rollers on the widest setting and roll the dough through the machine, catching it with one hand as you roll with the other. Take the dough and fold into thirds towards the center of the dough. Turn the dough so one open end faces the machine and roll it through on the widest setting again. Fold, turn, and roll once more on the widest setting. Continue rolling the pasta through machine without folding, adjusting the rollers to the next smallest setting each time, until the desired thickness is reached. If the pasta sheet becomes too large to handle, use a bench scraper to cut it into more manageable lengths and continue rolling until pasta is less than 1/16-inch thick.

(This whole process can also be done with a rolling pin. It takes some muscle, but it works really well).

Asparagus, Pine Nut and Tarragon Ravioli

Yield: 4 servings

2 cloves garlic, peeled

1/2 cup pine nuts, toasted

1 large bunch tarragon, washed and dried, stems removed

1/2 pound asparagus spears, trimmed, cut into 2-inch lengths, blanched and cooled

1/3 cup extra-virgin olive oil

1/3 cup grated Parmesan cheese

3 tablespoons white wine vinegar, plus more as needed

Kosher salt and freshly ground black pepper

1 recipe Fresh Pasta Dough

To prepare filling, place garlic, pine nuts, tarragon, and asparagus pieces in the bowl of a food processor fitted with a metal blade. Pulse to a rough chop. Add 1/3 cup olive oil in a steady steam and process to a smooth paste. Stop motor and add cheese and vinegar, stirring by hand to combine. Taste and season with salt, pepper and more vinegar as needed. Set aside.

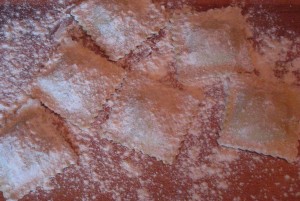
Place pasta sheets on a lightly floured work surface. Place tablespoons of filling in rows down the length of the pasta sheet, leaving at least 2 inches of space around each tablespoon of filling. Using a pastry brush, moisten the surface of the pasta around the filling with water or egg wash. Place a similarly sized pasta sheet on top of the filling, gently pressing to seal the pasta around the filling without creating air pockets inside the ravioli. Cut the ravioli using a cookie cutter, a ravioli stamp, a pizza wheel, or a ravioli maker. Place ravioli on a rimmed baking sheet lightly coated with flour. Dust the tops of the ravioli with flour and cover loosely with a clean kitchen towel. The filled ravioli can be cooked immediately or covered with plastic wrap and refrigerated for up to 1 hour before cooking.

To cook ravioli, heat a large pot over high heat until boiling. Add enough kosher salt to season the water like seawater. While salted water boils vigorously, add ravioli and stir immediately to prevent them from sticking. Boil until ravioli are al dente, about 4 to 5 minutes. Reserve about 1/4 cup pasta water and drain ravioli through a colander. Alternately, remove the cooked ravioli with a slotted spoon or spider and reheat water to boiling before cooking another batch.

Toss hot ravioli with your sauce of choice, using the reserved pasta water to thin the mixture as needed. Garnish as desired and serve immediately.

(If you decide to freeze your ravioli, don’t thaw them before placing in boiling water. They will just take about a minute or two longer than room temperature dough to thaw and cook).

I hope you’ll give these a try for a spring dinner! 🙂

It’s Spring ~ Pea, Mint and Parmesan Crostini

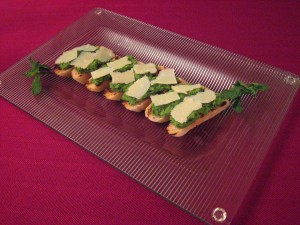
I brought home some delicious homemade bread from Sur La Table’s artisan bread class, so we decided to make a spring crostini dish with one of the baguettes. I think there is something extraordinary about peas and fresh mint together. Top that slightly sweet combination with salty Parmesan, and it’s a really special dish. Simple, fresh and delicious. A recipe from Bon Appétit magazine inspired me, but we made it our own. Just add as much or as little of each component until it tastes good to you. 🙂 This is really more of an idea than an actual recipe to follow.

Pea, Mint and Parmesan Crostini

Adapted from Bon Appétit magazine

Fresh baguette

1 ½ cups frozen peas

Handful of fresh mint

Salt and pepper

Drizzle of extra virgin olive oil

Blanch the peas in salty water for about a minute. Drain well. In a food processor, add blanched peas, mint, olive oil, salt and pepper to taste. Process until it is blended, but still has some texture. Scrape down the bowl to ensure it is all evenly mixed.

Slice the baguette into thin slices, and grill lightly on a grill pan.

Spread a dollop of the pea mixture onto the baguette slices, and then top with thinly sliced Parmesan cheese. Garnish with extra mint and some freshly ground pepper if you’d like.

These would be great appetizers for a spring cocktail party, or even for an Easter meal. They are so easy to make that they would also be perfect for a late night snack with a nice bottle of wine. Or in this case, they were a part of one of our little anniversary celebrations. Saturday marked the day that Rob and I met 14 years ago. We do something special every year on that date when we unknowingly met our future spouse. 🙂 These little crostini definitely felt like a treat fitting for a special celebration.

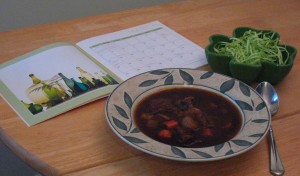
Irish Week ~ Guinness and Beef Stew

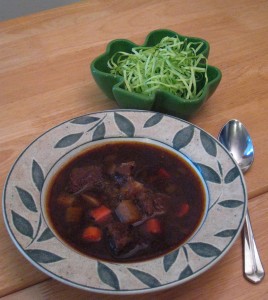
Since Saint Patrick’s Day is fast approaching, I was in the mood for something a little Irish. To celebrate, I made Guinness and Beef Stew tonight. It’s one of those dishes that simmers on the stove all afternoon and makes the whole house smell inviting until the beef falls apart with a spoon. My Irish hubby said it’s one of the best stews he has ever had. I hope you’ll give it a try!

I followed the recipe from Cooking Light pretty closely, since it was already a fairly healthy dish. The biggest adjustment I made was replacing the chuck roast with a round roast of beef, since it is a little leaner cut of meat that also braises beautifully. I also omitted the raisins, simply because I don’t like raisins in most dishes. I found that I didn’t need the full amount of salt, either. Just taste as you go.

Guinness and Beef Stew

Adapted from Cooking Light magazine

3 tablespoons canola oil, divided

1/4 cup all-purpose flour

2 pounds boneless round roast, trimmed and cut into 1-inch cubes

5 cups chopped onion (about 3 onions)

1 tablespoon tomato paste

4 cups fat-free, lower-sodium beef broth (my favorite store bought beef broth is from Kitchen Basics)

1 (11.2-ounce) bottle Guinness Stout

1 teaspoon caraway seeds

Black pepper to taste

Salt to taste

1 1/2 cups (1/2-inch-thick) diagonal slices carrot (about 8 ounces)

1 1/2 cups (1/2-inch-thick) diagonal slices parsnip (about 8 ounces)

1 cup (1/2-inch) cubed peeled turnip (about 8 ounces)

2 tablespoons finely chopped fresh flat-leaf parsley

Heat 1 1/2 tablespoons oil in a Dutch oven over medium-high heat. Place flour in a shallow dish. Sprinkle beef with salt; dredge beef in flour. Add half of beef to pan; cook 5 minutes, turning to brown on all sides. Remove beef from pan with a slotted spoon. Repeat procedure with remaining 1 1/2 tablespoons oil and beef.

Add onion to pan; cook 5 minutes or until tender, stirring occasionally. Stir in tomato paste; cook 1 minute, stirring frequently. Stir in broth and beer, scraping pan to loosen browned bits. Return meat to pan. Stir in salt, caraway seeds, and pepper; bring to a boil. Cover, reduce heat, and simmer 1 hour, stirring occasionally. Uncover and bring to a boil. Cook 50 minutes, stirring occasionally. Add carrot, parsnip, and turnip. Cover, reduce heat to low, and simmer 30 minutes, stirring occasionally. Uncover and bring to a boil; cook 10 minutes or until vegetables are tender. Sprinkle with parsley.

Happy Easter ~ “Potted” Chocolate Mint Pudding


Happy Easter!

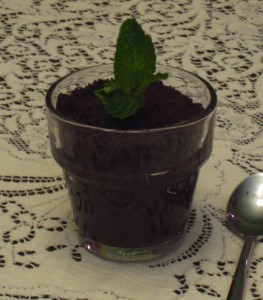
I ran across a very cute idea for a spring dessert this Easter. We had little potted chocolate mint puddings with a sprig of mint “growing” out of them. The original Martha Stewart recipe is a very rich pudding, so I used my recipe from St. Patrick’s Day (with a couple changes for this dish) to lighten it. Follow the chocolate Guinness pudding recipe, but exchange the Guinness for more skim milk and add ½ teaspoon of mint extract in addition to the vanilla. Fill a little flowerpot shaped container with the pudding, and top with crumbled chocolate cocoa cookies. Then “plant” a sprig of mint in the top.

These would also be perfect for Mother’s Day :).

Happy spring!