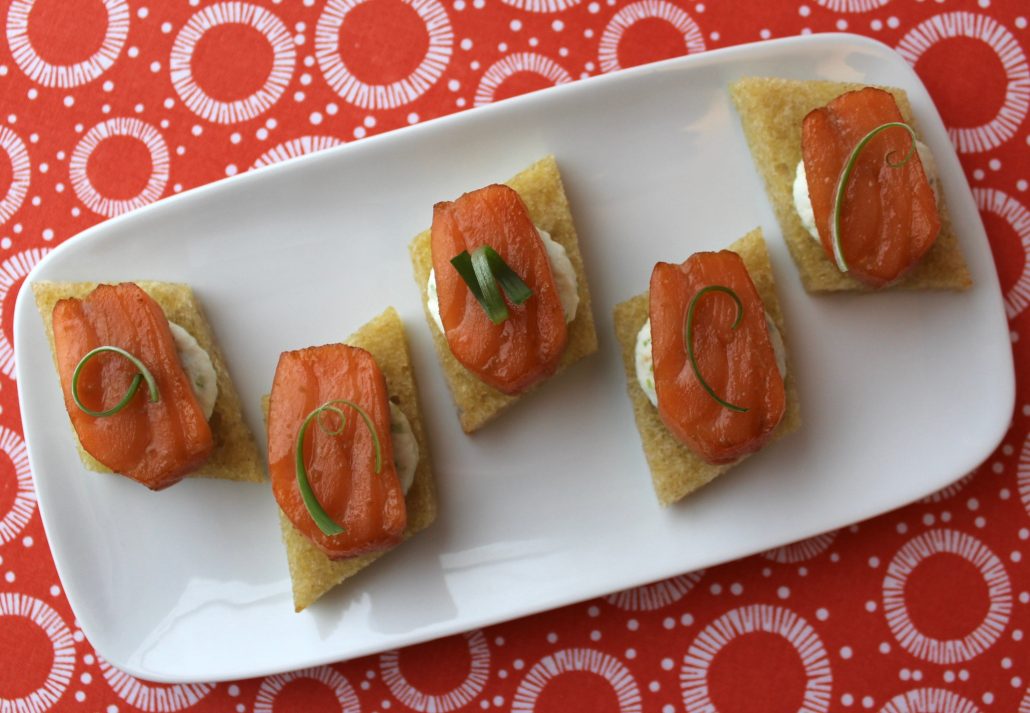
Welcome 2019 ~ Bulgogi Salmon and Scallion Ricotta Canapés
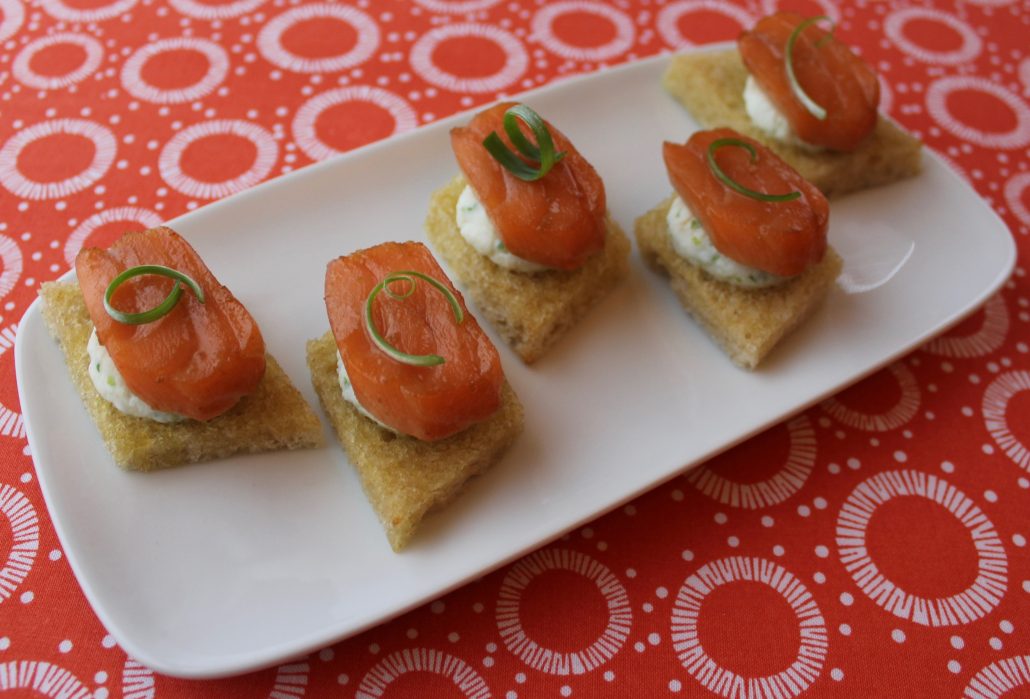
Happy New Year! To kick off the new year, I made a version of this appetizer for our New Year’s Eve party. Everyone seemed to like it, so I thought I’d share the recipe here!

I’ve made this recipe as a more rustic crostini on sliced and toasted pieces of baguette, but I thought I’d make it a little fancier for the occasion by cutting sliced artisan bread into different shapes (and calling them canapés! Doesn’t that sound fancier than crostini? 😉 ) The extra bits of bread can be popped under the broiler to make the odds and ends toasty. Perfect for dipping into a runny egg on New Year’s Day morning.

Bulgogi Salmon and Scallion Ricotta Canapés

Inspired by a recipe from Korean Bapsang

Makes approximately 15 appetizers

For the bread layer:

Sliced artisan bread

Olive oil

Salt to taste

For the cheese layer:

3 scallions, finely minced

1 cup part skim ricotta

Salt to taste

For the salmon layer:

1/3 pound of salmon, skin removed (I used a beautiful piece of trimmed sushi grade salmon from my local Japanese grocery store)

1 1/2 tablespoons soy sauce

1/2 tablespoon mirin

1 teaspoon toasted sesame oil

1/2 tablespoon lemon juice

1 tablespoon granulated sugar

1 teaspoon minced garlic

1 teaspoon grated ginger

To assemble:

More scallions, curled (For a tutorial on how to make pretty curls, you can find it here.)

For the bread layer:

Preheat broiler. Line a sheet pan with parchment paper.

Cut the bread into the shapes you would like for the base of your canapés. Mine were about 1 1/2 inches long. On one side, brush the bread with olive oil and sprinkle with a little salt. Broil until toasty and just beginning to brown. Set aside.

For the cheese layer:

Mix the ricotta with scallions. Salt to taste. Place the cheese mixture into a piping bag fitted with a large round tip.

For the salmon layer:

Lower the oven temperature to 325 F. Let the high heat from the broiler dissipate.

Line a quarter sheet pan with parchment paper.

Cut the salmon into approximately 1/4-inch thick slices.

In a small bowl, mix the remaining ingredients.

Marinate the salmon for 5 minutes in the soy sauce mixture.

Remove the salmon from the marinade and lay in a single layer on the prepared sheet pan.

Cook 3-5 minutes, until warmed through. If your salmon is not sushi grade, cook a little longer until just cooked through.

To assemble:

Pipe a dollop of the ricotta mixture onto each piece of bread. Top with salmon. Garnish with curled scallions.
Happy Birthday! ~ Hidden Surprise Squirrel Cake

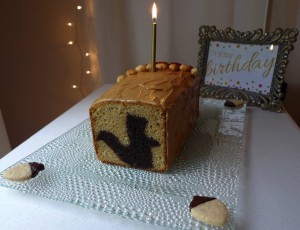
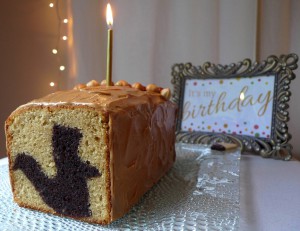
Hidden Surprise Squirrel CakeTo celebrate my hubby’s birthday, I surprised him with this hidden squirrel cake. He was certainly not expecting a cake quite like this, but he loved it. 🙂 Since we enjoy watching the active little squirrel community in our backyard so much, I chose this design. But you could make this cake with whatever shape suits your fancy. I think a pumpkin hidden in the middle would be rather cute for Thanksgiving, or a hidden star would make a festive Christmas cake!

I made this cake using two recipes, which I’ve already posted on Noon Café. I used a double batch of chocolate devil’s food cake for the interior and a double batch of yellow cake for the exterior. I had a little leftover cake and batter, which I just used in a few cupcakes on the side … And I ate a few of the leftover chocolate cake bits while I was working on this project! 😉

I think almost any basic cake recipe would work for this idea, but the most important thing when choosing what kind of cake to use is that the colors between the two cakes need to be distinctly different.

The tools I used were a 4 x 9-inch loaf pan and a squirrel cookie cutter that was about 7 inches high. You could use a smaller loaf pan if you like, and, as I said before, a different cutter. The cutter you choose just needs to be smaller than the pan.

So, first grease your loaf pan and line with parchment paper to make sure the cake comes out in one piece without sticking. Then, make the cake batter that you will use for your cutout design. Fill the pan about 3/4 of the way full.

Then get baking. The cake is done when a skewer inserted in the center comes out clean and the top springs back to the touch. My double batch of devil’s food cake took about 80 minutes to cook through. Be sure to let the cake cool completely.

Remove the cake from the pan. Cut it into slices that are not thicker than the depth of your cookie cutter. Then cut each slice with your cutter, stack them together, and set aside.

Next, it’s time to make the second cake batter for the outside of the cake. Put some of the batter into a piping bag.

Clean and grease the same loaf pan you used before and line with new parchment paper to make sure the cake comes out in one piece without sticking.

Now you’re ready to pipe a line of batter lengthwise into the bottom of the pan. This will help “glue” the shapes to the bottom and keep them from moving while they bake.

Set the cutout cake shapes upright in a row along the line of batter. The row of cutouts should go the full length of the pan, touching both ends to help keep it all in place. Pipe the batter with a pastry bag to get into the crevices of the shape. Fill the pan about 3/4 full with the batter, and gently smooth the top.

We don’t want any big air bubbles, so rap the pan on the counter to make sure the batter is settled.

Now get baking once more. Again, the cake is done when a skewer inserted in the center comes out clean and the top springs back to the touch. My yellow cake took about 70 minutes to cook through. Again, let the cake cool completely, and then when you slice into the cake, you should see your cutout design!

This is more of a technique than a recipe, so there is a lot of room for creativity with different flavors and shapes. I am excited to try some different variations after we eat this one. 🙂 I hope you’ll give it a try!

If you’re like me, you might find it easier to learn these techniques by seeing them rather than reading about them. So here’s a little video of a bunny cake that uses the same technique I used for my squirrel cake.Hidden Surprise Squirrel Cake

Special Dinner ~ Salmon Wellington

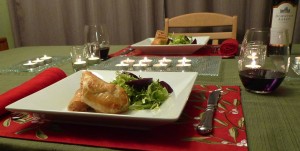
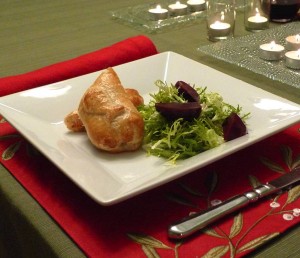
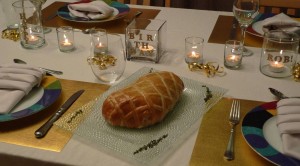
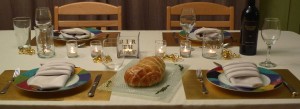
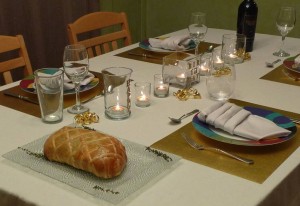
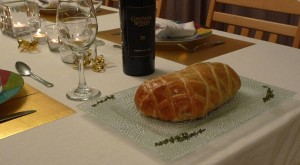
Salmon WellingtonBack in November, I made my hubby a beef Wellington for his birthday. Ever since, I have been interested in trying other versions of the dish with different savory fillings. When my birthday rolled around this month, I thought I would make a simple salmon Wellington to celebrate. 🙂 I was out all day, but these little Wellingtons came together quickly and easily. (Much easier than the beef version!) The tarragon really makes the dish, and the little fish cut out of the extra puff pastry on top made me smile. 🙂

Salmon Wellington

From Bon Appétit magazine

1 17.3-ounce package frozen puff pastry (2 sheets), thawed

4 3/4-inch-thick 6-ounce skinless salmon fillets

6 tablespoons minced shallots

4 tablespoons plus 2 teaspoons chopped fresh tarragon

1 egg beaten to blend (for glaze)

Preheat oven to 425°F. Roll out each pastry sheet on lightly floured surface to 12-inch square. Cut each in half, forming four 12×6-inch rectangles. Place 1 salmon fillet in center of each rectangle, about 3 inches in from and parallel to 1 short edge. Sprinkle each fillet with salt, pepper, 1 tablespoon shallots and 1 tablespoon tarragon. Brush edges of rectangles with some glaze. Fold long sides of pastry over fillets. Fold short edge of pastry over fillets and roll up pastry, enclosing fillets. Cut off any excess pastry if necessary. Seal edges of pastry. Place pastries, seam side down, on baking sheet. Brush with glaze.

Bake pastries until dough is golden brown, about 20 minutes. Remove from oven; let stand 10 minutes.

Salmon Wellington

Happy Birthday! ~ Beef Wellington, one more time around

Beef WellingtonWe celebrated a special birthday at our house this week – Happy birthday to my hubby!

We enjoyed Beef Wellington with good friends to mark the special occasion. 🙂 I made the dish last year for his birthday, and it was such a favorite, that I made it again this year. It may become a birthday tradition from now on!

Beef WellingtonI tried something a little fancier to finish the dish this time around. I cut thin strips of puff pastry, and placed them in a cross pattern over the top. I think it really added an extra “wow factor” to the presentation, and it was so easy to do. 🙂

Beef WellingtonHere is the recipe I used once again:

Beef Wellington

Based on a recipe from BBC Good Food

2 lbs beef tenderloin

Olive oil

10 oz crimini mushrooms

1 large sprig fresh thyme

Splash dry white wine

12 pieces thinly sliced prosciutto

1 pack frozen puff pastry, thawed

Flour for dusting

3 egg yolks beaten with 2 tsp water

1. Heat oven to 350 degrees F. Heat a large skillet over medium heat. Drizzle olive oil in pan until it is hot, but not smoking. Season beef with salt and pepper. Sear on all sides until golden. Then place beef on a roasting rack and cook in oven for about 20 minutes. (It will not be cooked through.) Remove from the oven to cool, and then chill in the refrigerator for about 20 minutes.

2. While beef is cooling, place the cleaned mushrooms in a food processor and pulse until fine. It should be the texture of coarse bread crumbs.

3. Preheat a large skillet over medium heat. Cook the mushrooms with the sprig of thyme in a dry pan with no oil, stirring often, about 10 minutes. When the liquid has cooked out of the mushrooms, pour a splash of white wine into the pan. Cook until dry once more. Remove thyme and season to taste with salt and pepper. Set aside.

4. Overlap 2 pieces of cling film (otherwise known as Saran wrap for us American cooks :)) over a large chopping board. Lay the prosciutto onto the cling film, slightly overlapping one another, in a double row. Spread the cooled mushrooms over the prosciutto evenly. Remove the beef from the refrigerator, and pat dry with a paper towel. Place it in the middle of the cling film with the prosciutto and mushrooms. Use the cling film’s edges to draw the prosciutto around the fillet tightly, and then roll it into a sausage shape, twisting the ends of the cling film to tighten. Chill the fillet once again.

5. Dust your clean work surface with a little flour. Roll out one piece of puff pastry until it is large enough to wrap around the fillet. Unravel the fillet from the cling film and set it in the center of the pastry. Beat the egg yolks and water together for an egg wash. Brush the pastry edges and the top and sides of the fillet with the egg wash. Wrap the pastry around the beef as tightly as you can, overlapping slightly to cover the whole fillet. Tuck the sides in as you would a package, so the beef is completely wrapped. Use the egg wash as a “glue” to make sure it stays together. Trim with kitchen shears if need be. Glaze the entire package with the egg wash. Using the back of a knife, mark the beef Wellington with long diagonal lines taking care not to cut through the pastry. (Or, as an alternative to scoring the pastry with a knife, cut thin strips of a second rolled puff pastry sheet with a pizza cutter. Lay the strips over the top of the Wellington in a crosshatch pattern. Tuck under, so there are no loose ends on the bottom. Then coat the entire package with egg wash.) Chill for at least 30 minutes.

6. Heat oven to 375 degrees F. Brush the Wellington with a little more egg wash and cook on a rack until golden and crisp, about 30 minutes, or until it is done to your liking. (Ours was still pink, but cooked through.) Allow to rest for about 20 minutes once it comes out of the oven. Serve in thick slices.

Beef Wellington

Happy Birthday! ~ Beef Wellington

Happy birthday to my hubby!

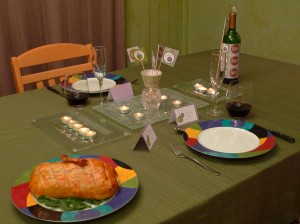
Every year he likes to have a fillet of beef dish for his birthday, so I decided to try beef Wellington this time around. I have tried several British/UK dishes this year, so this added to my collection. 🙂 He said it was within his top 1% of anything I have ever made for him, so I might make it a birthday tradition!

I used a recipe from the BBC, but tweaked it a bit for my American kitchen and for our tastes.

Beef Wellington

Based on a recipe from BBC Good Food

2 lbs beef tenderloin

Olive oil

10 oz crimini mushrooms

1 large sprig fresh thyme

Splash dry white wine

12 pieces thinly sliced prosciutto

1 pack frozen puff pastry, thawed

Flour for dusting

3 egg yolks beaten with 2 tsp water

1. Heat oven to 350 degrees F. Heat a large skillet over medium heat. Drizzle olive oil in pan until it is hot, but not smoking. Season beef with salt and pepper. Sear on all sides until golden. Then place beef on a roasting rack and cook in oven for about 20 minutes. (It will not be cooked through.) Remove from the oven to cool, and then chill in the refrigerator for about 20 minutes.

2. While beef is cooling, place the cleaned mushrooms in a food processor and pulse until fine. It should be the texture of coarse bread crumbs.

3. Preheat a large skillet over medium heat. Cook the mushrooms with the sprig of thyme in a dry pan with no oil, stirring often, about 10 minutes. When the liquid has cooked out of the mushrooms, pour a splash of white wine into the pan. Cook until dry once more. Remove thyme and season to taste with salt and pepper. Set aside.

4. Overlap 2 pieces of cling film (otherwise known as Saran wrap for us American cooks :)) over a large chopping board. Lay the prosciutto onto the cling film, slightly overlapping one another, in a double row. Spread the cooled mushrooms over the prosciutto evenly. Remove the beef from the refrigerator, and pat dry with a paper towel. Place it in the middle of the cling film with the prosciutto and mushrooms. Use the cling film’s edges to draw the prosciutto around the fillet tightly, and then roll it into a sausage shape, twisting the ends of the cling film to tighten. Chill the fillet once again.

5. Dust your clean work surface with a little flour. Roll out one piece of puff pastry until it is large enough to wrap around the fillet. Unravel the fillet from the cling film and set it in the center of the pastry. Beat the egg yolks and water together for an egg wash. Brush the pastry edges and the top and sides of the fillet with the egg wash. Wrap the pastry around the beef as tightly as you can, overlapping slightly to cover the whole fillet. Tuck the sides in as you would a package, so the beef is completely wrapped. Use the egg wash as a “glue” to make sure it stays together. Trim with kitchen shears if need be. Glaze the entire package with the egg wash. Using the back of a knife, mark the beef Wellington with long diagonal lines taking care not to cut through the pastry. Chill for at least 30 minutes.

6. Heat oven to 375 degrees F. Brush the Wellington with a little more egg wash and cook on a rack until golden and crisp, about 30 minutes, or until it is done to your liking. (Ours was still pink, but cooked through.) Allow to rest for about 20 minutes once it comes out of the oven. Serve in thick slices.

PS. I also made a little puff pastry “bow” with the extra pastry. Since this meal was part of Rob’s birthday gift, I thought I should wrap it like a present. 🙂 Just cut the rolled puff pastry into a ribbon shape, and twist once in the middle so it looks like a bow. Brush with the extra egg wash. Bake with the Wellington, but separately, on the side. It will cook faster than the Wellington, so remove when golden.

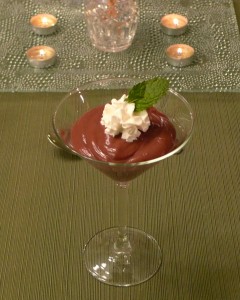
PPS. Rob asked for my chocolate mint pudding for dessert, so I served it in martini glasses with a little whipped cream and a sprig of mint for a classy presentation, fitting for a birthday! 🙂 The recipe can be found here.

PPPS. I used some adorable little printable decorations to make his birthday table unique and festive. I found them on a website called CatchMyParty.com. So cute! If you need some festive decorations for a party, they are easy and free. 🙂 I wrapped his wine bottle with them, made little flags, made a banner, used a cupcake wrap around a little vase, and wrote little birthday notes on the place cards.

Happy 100th Birthday, Julia Child ~ Cheese Soufflé

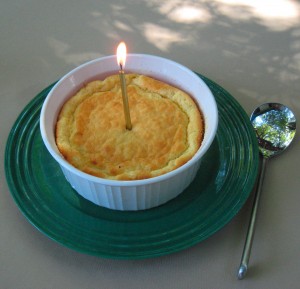
Julia Child would have turned 100 years old today. That milestone has inspired cooks everywhere to remember her and to cook something a little French this evening :).

Sur La Table is hosting cooking classes this month to celebrate her birthday including 4 of Julia’s recipes. I recreated my favorite of the 4 at home ~ The cheese soufflé. The original is published in The Way to Cook, and Bon Appétit magazine also published an adaptation of the recipe a few years ago.

I used Earth Balance instead of butter, because ever since I discovered it, I don’t buy butter anymore. It does everything I need. I also used skim milk instead of whole. Other than that, I followed the recipe closely, since Julia was known for testing her recipes thoroughly. Don’t want to question the master! 😉

Cheese Soufflé

Adapted from The Way to Cook

2 tablespoons finely grated Parmesan cheese (or other hard cheese)

1 cup skim milk

2 1/2 tablespoons Earth Balance, plus more for greasing pan

3 tablespoons unbleached all purpose flour

1/2 teaspoon paprika

1/2 teaspoon salt

3 grinds of pepper

Speck of ground nutmeg

4 large egg yolks

5 large egg whites

1 cup (packed) coarsely grated Gruyère cheese (about 4 ounces)

Position rack in lower third of oven and preheat to 400 F.

Grease 6-cup (1 1/2-quart) soufflé dish with Earth Balance. Add Parmesan cheese and tilt dish, coating bottom and sides.

Warm milk in heavy small saucepan over medium-low heat until steaming.

Meanwhile, melt Earth Balance in heavy large saucepan over medium heat. Add flour and whisk until mixture begins to foam and loses raw taste, about 3 minutes (do not allow mixture to brown). Remove saucepan from heat; let stand 1 minute. Pour in warm milk, whisking until smooth. Return to heat and cook, whisking constantly until very thick, 2 to 3 minutes. Remove from heat; whisk in paprika, salt, pepper, and nutmeg. Add egg yolks 1 at a time, whisking to blend after each addition. Scrape soufflé base into large bowl. Cool to lukewarm. DO AHEAD: Can be made 2 hours ahead. Cover and let stand at room temperature.

Using electric mixer, beat egg whites in another large bowl until stiff but not dry. Fold 1/4 of whites into lukewarm or room temperature soufflé base to lighten. Fold in remaining whites in 2 additions while gradually sprinkling in Gruyère cheese. Transfer batter to prepared dish.

Place dish in oven and immediately reduce oven temperature to 375_F. Bake until soufflé is puffed and golden brown on top and center moves only slightly when dish is shaken gently, about 25 minutes (do not open oven door during first 20 minutes). Serve immediately.

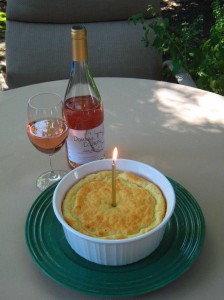
This pairs well with a summery rosé wine. French of course ;-). Our house rosé at the moment is Domaine Couron Grenache Rosé from France, which was perfect.

Bon appétit!

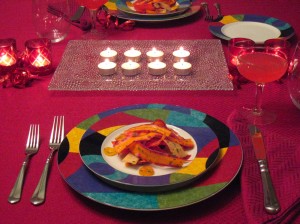
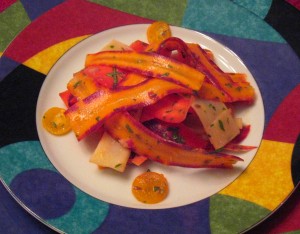
Birthday Celebration ~ Carrot and Hearts of Palm Salad with Kumquats, Cumin Seeds, and Tangerine-Curry Vinaigrette

Happy birthday to my hubby!

We celebrated the day with a little culinary adventure :). I went to DomaineChandon.com for some out of the ordinary ideas to inspire us. We decided on a menu of Carrot and Hearts of Palm Salad with Kumquats, Cumin Seeds, and Tangerine-Curry Vinaigrette for the first course and Roasted Quail with Israeli Couscous, Black Mission Figs, and Bacon Vinaigrette as the main course. We paired the meal with Chandon Blood Orange Mimosas and one of Rob’s favorite wines by Columbia Winery called Otis Vineyard Cabernet Sauvignon. Everything was delicious! It truly felt like a gourmet meal at home inspired by the chef from Etoile.

The carrot salad was so unique and a surprising flavor combination that I would highly recommend! I would have never imagined cumin, kumquats, carrots and curry could meld together so nicely. If you’d like a salad that is very much off the beaten path, I hope you’ll give this a try! It would be great for the upcoming holidays, as well. If you can find purple and pink carrots, it is even more special :).

Carrot and Hearts of Palm Salad with Kumquats, Cumin Seeds, and Tangerine-Curry Vinaigrette

From DomaineChandon.com

1 tbsp cumin seeds

10 medium carrots, peeled and cut into thin strips or ribbons about 2 in/5 cm long (about 4 cups/570 g)

1 can (14 oz/400 g) hearts of palm, rinsed, drained, and cut into thin strips or ribbons about 2 in/5 cm long

6 kumquats, halved lengthwise, seeded, and cut crosswise into thin slices

3 tbsp finely diced red onion

1/3 cup/10 g minced fresh cilantro/fresh coriander, plus sprigs for garnish

3 tbsp extra-virgin olive oil

1/4 cup/60 ml fresh tangerine juice or orange juice

1 tbsp white wine vinegar

1 tbsp Dijon mustard

1 tsp curry powder

Salt and freshly ground pepper

In a small frying pan over medium heat, toast the cumin seeds, stirring frequently, until fragrant, 3–4 minutes. Transfer to a plate and set aside.

In a large bowl, combine the carrots, hearts of palm, kumquats, red onion, minced cilantro/coriander, and cumin seeds. Toss gently to mix.

In a small bowl, whisk together the olive oil, tangerine juice, vinegar, mustard, and curry powder until the dressing thickens and all the ingredients are thoroughly blended.

Pour the dressing over the carrot mixture and toss thoroughly to coat evenly. Season with salt and pepper to taste. Divide among salad plates, garnish with the cilantro sprigs, and serve at once.

Happy Birthday ~ Truffled Asparagus Crostini

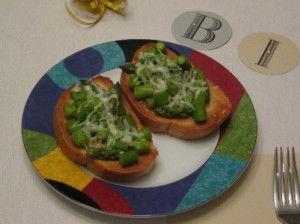
Happy birthday to Rob! On this day, I usually make him dinner with his favorite ingredients including beef tenderloin, asparagus and carrot cake. This year he said it might be fun to try a less traditional main course to shake things up :). After searching my favorite markets, I found a rabbit! The menu included recipes that were new as well as a couple of old favorites – Braised rabbit with mustard sauce, truffled asparagus crostini, golden beets in a cider vinaigrette and carrot cupcakes. I have already written about our favorite carrot cupcakes on this blog, and the truffled asparagus crostini are also one of our favorite appetizers. They are simple to make and they have a touch of class for any special occasion.

Truffled Asparagus Crostini

Baguette, sliced into ¾ inch pieces

1 pound asparagus

2 teaspoons truffle oil

Salt to taste

Freshly ground black pepper to taste

1/4 cup fontina cheese, grated (or any semi-hard cheese that you like)

Preheat you broiler.

Place the slices of bread in a single layer on a baking sheet. Broil for about 1 minute or until they are lightly browned. Turn them over and do the same on the other side. Cool on the pan.

Steam the asparagus for about 2 minutes or until slightly tender. Place in an ice bath to stop the cooking. Chop the asparagus into small pieces. Add oil, salt and pepper, and toss well.

Top each piece of bread with the asparagus mixture. Sprinkle the cheese over each crostini. Broil for about 1 minute or until the cheese melts a little. Serve warm.

We paired the meal with one of Rob’s favorite wines from Columbia Winery called Otis Vineyard Cabernet Sauvignon. I decided on this wine since we held our wedding reception at Columbia Winery, and both Rob’s birthday and our anniversary fall on the 2nd of a month. I almost always try to find some special significance with any bottle of wine I choose for a special occasion :). Cheers!

Our favorite recipe for birthdays or any special occasion ~ Whole Wheat Carrot Cupcakes

One dessert that I make over and over again for special occasions is my favorite carrot cupcake recipe. Most recently, I made a batch for my mom’s birthday this month! (Pictured) They have a surprising amount of carrots, and you really can’t tell you are sneaking in a whole grain with your dessert either. I hope you like them as much as we do!

Whole Wheat Carrot Cupcakes

1 1/2 cups sugar

1 1/3 cups of light olive oil and water mixture (3/4 cup light olive oil, and then top it off with water)

1 teaspoon vanilla extract

3 large eggs

2 cups whole-wheat pastry flour

2 teaspoons cinnamon

2 teaspoons baking soda

Pinch of salt

3 cups grated carrots

Preheat your oven to 400 degrees.

In a medium bowl, beat the sugar, oil/water mixture, and vanilla with an electric mixer or a whisk. Add the eggs, 1 at a time. In another bowl, whisk together the flour, cinnamon, baking soda, and salt. Then incorporate half of the dry ingredients into the wet ingredients. Mix the grated carrots into the remaining flour, and add it all to the batter. Mix until combined.

Line your muffin pans with paper liners. (About 20). Scoop the batter into the muffin cups a little over 3/4 full. Bake at 400 degrees for 10 minutes, and then reduce the oven temperature to 350 degrees and cook for 30 minutes more, or until a toothpick comes out clean. Check after 25 minutes or so, since ovens can vary.

You can sprinkle them with powdered sugar if you desire, or they are great plain.

Hope you enjoy!