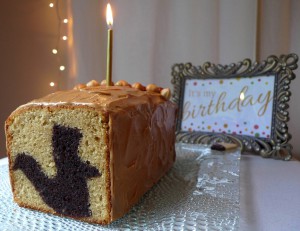
Happy Birthday! ~ Hidden Surprise Squirrel Cake
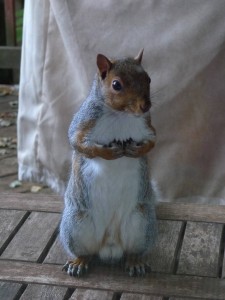
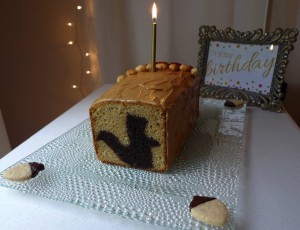 To celebrate my hubby’s birthday, I surprised him with this hidden squirrel cake. He was certainly not expecting a cake quite like this, but he loved it. 🙂 Since we enjoy watching the active little squirrel community in our backyard so much, I chose this design. But you could make this cake with whatever shape suits your fancy. I think a pumpkin hidden in the middle would be rather cute for Thanksgiving, or a hidden star would make a festive Christmas cake!
I made this cake using two recipes, which I’ve already posted on Noon Café. I used a double batch of chocolate devil’s food cake for the interior and a double batch of yellow cake for the exterior. I had a little leftover cake and batter, which I just used in a few cupcakes on the side … And I ate a few of the leftover chocolate cake bits while I was working on this project! 😉
I think almost any basic cake recipe would work for this idea, but the most important thing when choosing what kind of cake to use is that the colors between the two cakes need to be distinctly different.
The tools I used were a 4 x 9-inch loaf pan and a squirrel cookie cutter that was about 7 inches high. You could use a smaller loaf pan if you like, and, as I said before, a different cutter. The cutter you choose just needs to be smaller than the pan.
So, first grease your loaf pan and line with parchment paper to make sure the cake comes out in one piece without sticking. Then, make the cake batter that you will use for your cutout design. Fill the pan about 3/4 of the way full.
Then get baking. The cake is done when a skewer inserted in the center comes out clean and the top springs back to the touch. My double batch of devil’s food cake took about 80 minutes to cook through. Be sure to let the cake cool completely.
Remove the cake from the pan. Cut it into slices that are not thicker than the depth of your cookie cutter. Then cut each slice with your cutter, stack them together, and set aside.
Next, it’s time to make the second cake batter for the outside of the cake. Put some of the batter into a piping bag.
Clean and grease the same loaf pan you used before and line with new parchment paper to make sure the cake comes out in one piece without sticking.
Now you’re ready to pipe a line of batter lengthwise into the bottom of the pan. This will help “glue” the shapes to the bottom and keep them from moving while they bake.
Set the cutout cake shapes upright in a row along the line of batter. The row of cutouts should go the full length of the pan, touching both ends to help keep it all in place. Pipe the batter with a pastry bag to get into the crevices of the shape. Fill the pan about 3/4 full with the batter, and gently smooth the top.
We don’t want any big air bubbles, so rap the pan on the counter to make sure the batter is settled.
Now get baking once more. Again, the cake is done when a skewer inserted in the center comes out clean and the top springs back to the touch. My yellow cake took about 70 minutes to cook through. Again, let the cake cool completely, and then when you slice into the cake, you should see your cutout design!
This is more of a technique than a recipe, so there is a lot of room for creativity with different flavors and shapes. I am excited to try some different variations after we eat this one. 🙂 I hope you’ll give it a try!
If you’re like me, you might find it easier to learn these techniques by seeing them rather than reading about them. So here’s a little video of a bunny cake that uses the same technique I used for my squirrel cake.