A Tropical Treat for Santa ~ Macadamia Nut Chocolate Chip Cookies

Merry Christmas! I hope you enjoy these tropical Christmas cookies as much as we did. 🙂 If you use coconut oil instead of butter, they make your whole house smell like a tropical oasis as they bake. Ahh…

Macadamia Nut Chocolate Chip Cookies

1/4 cup brown sugar, lightly packed

1/4 cup granulated sugar

1/2 cup coconut oil or butter, room temperature

1 egg

1 teaspoon vanilla

1 1/4 cups whole-wheat pastry flour

1/2 teaspoon baking soda

Pinch of salt

1/2 cup macadamia nuts, coarsely chopped

1/2 cup milk chocolate chips

Preheat your oven to 350 F. Line 2 baking sheets with parchment paper.

In the bowl of a stand mixer fitted with a paddle attachment, beat the sugars and the oil or butter, whichever you are using, until well combined. Add the egg and vanilla, and beat until well incorporated.

Add the flour, baking soda, and salt, and beat until just combined.

Add the nuts and the chocolate. Mix them into the dough by hand with a spatula.

For each cookie, scoop out 1 tablespoon of dough and roll between your hands to form a dough ball. Place the balls on the prepared baking sheets, pressing down slightly to make them discs. Make sure to give them about an inch and a half to spread while baking.

Bake for about 12 minutes, or until cooked through, rotating the pans halfway through to ensure even baking.

Valentine Sweets ~ Pink Heart Meringue Cookies

I made something sweet for my sweet to celebrate Valentine’s Day. 🙂

These crisp meringue cookies are tinted a lovely shade of pink with the simple addition of a little beet juice. For those of you without a juicer (like me!), I processed a couple of roasted red beets in a food processor. Then I put the beets into a few layers of cheesecloth and squeezed out as much juice as I could. Voila…nature’s red food coloring!

Use these little hearts to make a schaum torte, an Eton mess, or just eat them on their own. 🙂

Pink Heart Meringue Cookies

4 egg whites, room temperature

1/2 teaspoon cream of tartar

1/2 cup granulated sugar

Pinch of salt

1 teaspoon cornstarch

1 teaspoon vanilla extract

1 teaspoon red beet juice

Preheat oven to 225 F. Line 2 baking sheets with parchment paper. Wipe the bowl and whisk attachment of a stand mixer with vinegar to ensure it is free of any oil.

Add the egg whites and cream of tartar to the bowl of the stand mixer, and whisk until they begin to look frothy. Very slowly sprinkle in the sugar while continuing to whisk. The mixture will become thick and glossy with stiff peaks. Rub a small amount of the mixture between your fingers, and if it is smooth with no sugar granules remaining, you are there. At this point, add the salt, cornstarch, vanilla, and beet juice, and whisk until just combined.

Transfer the mixture to a piping bag fitted with a large star tip.

On the prepared baking sheets, pipe the mixture into heart shapes.

Bake for about 1 hour and 15 minutes. Then turn off the oven, but leave the meringues in the oven for another 30 minutes. Let cool completely.

One more Christmas cookie for the season ~ Eggnog Sugar Cookies with Eggnog Glaze

Eggnog Sugar Cookies with Eggnog GlazeI couldn’t resist making one more batch of Christmas cookies before the holiday. 🙂 I altered my sugar cookie recipe to make them eggnog sugar cookies! I added a good amount of nutmeg to the batter, and replaced a little of the butter in the original recipe with eggnog. Then I made a simple eggnog glaze as the finishing touch.

Merry Christmas from my kitchen to yours!

Eggnog Sugar Cookies with Eggnog Glaze

For the cookies:

2 cups whole-wheat pastry flour

1/4 teaspoon freshly ground nutmeg

Pinch of salt

1/4 cup + 2 tablespoons unsalted room temperature butter

1/2 cup granulated sugar

2 eggs

2 tablespoons eggnog (I used Organic Valley Eggnog)

1 teaspoon vanilla extract

For the glaze:

1/2 cup powdered sugar, or more to make a thicker glaze

1/4 cup eggnog

For the cookies:

In a large bowl, whisk together the flour, nutmeg, and salt. In the bowl of a stand mixer fitted with a paddle attachment, cream the butter and sugar until light and fluffy. Beat in the eggs, one at a time. Add the eggnog and vanilla, and continue beating until all of the wet ingredients are well combined. Add the flour mixture, and beat until just combined. Wrap the dough in plastic wrap and refrigerate for at least an hour.

Preheat oven to 350 F.

Prepare two baking sheets with parchment paper.

On a floured work surface, roll the dough until it is slightly thicker than 1/8 inch. Cut into desired shapes with a cookie cutter.

Place the cookies on the prepared baking sheets.

Bake for about 7 minutes, or until slightly firm in the middle, rotating the pan halfway through. Cool the cookies completely on a wire rack.

For the glaze:

Whisk the sugar and eggnog together until the mixture is completely smooth. Either spread or pipe the glaze onto your cookies.

Christmas Cookies! ~ Mexican Hot Cocoa Cookies

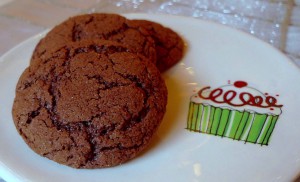
Mexican Hot Cocoa CookiesIt’s Christmastime again! I hope you are enjoying all of the things this season has to offer…the lights, the decorations, the music…and of course, the cookies. 🙂

I made these festive little Mexican hot cocoa cookies this year. They are sweet and tender bites with a little spicy heat from cayenne pepper. I also love that Mexican hot cocoa naturally includes Christmassy spices like cinnamon, and sometimes nutmeg, so these cookies seemed like a perfect choice for this time of the year. 🙂

Mexican Hot Cocoa Cookies

Inspired by a recipe from Martha Stewart

Makes about 18 cookies

1 cup whole-wheat pastry flour

1/4 cup unsweetened cocoa powder, sifted

1 teaspoon cream of tartar

1/2 teaspoon baking soda

Pinch of salt

1/8 teaspoon freshly ground nutmeg

1/8 teaspoon cayenne pepper

1/2 teaspoon + 1 teaspoon ground cinnamon, divided

6 tablespoons room temperature butter

1/2 cup + 1/4 cup granulated sugar, divided

1/2 teaspoon vanilla extract

2 tablespoons skim milk

1 egg

Move your oven rack so that it is about 1/3 of the way down from the top. Preheat to 400 F. Line two sheet pans with parchment paper.

In a medium bowl, whisk together the flour, cocoa powder, cream of tartar, baking soda, salt, nutmeg, cayenne, and 1/2 teaspoon of cinnamon.

In the bowl of a stand mixer fitted with a paddle attachment, beat the butter and 1/2 cup of sugar until light and fluffy. Add the vanilla, milk, and egg. Beat until well combined. The mixture will look a bit broken when you start mixing at this point, but just keep at it, and it will come together. Add the dry ingredients and mix until just combined. The dough will be rather sticky.

In a shallow bowl, add the remaining sugar (1/4 cup) and cinnamon (1 teaspoon.) Whisk until combined.

Using a tablespoon, scoop out balls of dough. Roll the balls between your hands. Drop them into the sugar and cinnamon mixture and coat well. Place the dough balls on your prepared baking sheet. Repeat the process until you use all of the dough. Make sure the cookies have a couple of inches to spread on the sheet.

Bake for about 10 minutes, or until the cookies are set and a bit cracked on top.

Wedding Anniversary Dinner ~ Lemon Verbena Whole-Wheat Shortbread Cookies

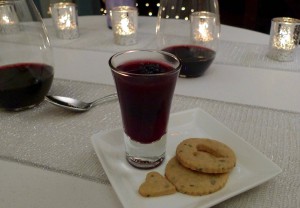
Lemon Verbena ShortbreadI made two desserts for our sweet sixteenth wedding anniversary dinner – The blackberry cabernet gelée I blogged about earlier, and these lemon verbena whole-wheat shortbread cookies. I love the bright citrusy flavor of lemon verbena, which is a nice compliment to these buttery cookies. They were the perfect ending to a beautiful summer evening celebration!

Lemon Verbena Whole-Wheat Shortbread Cookies

Approximately 20 leaves of fresh lemon verbena, stems removed, roughly chopped

1 cup whole-wheat pastry flour

Pinch of salt

1/2 cup unsalted butter, room temperature

1/4 cup confectioner’s sugar

1/2 teaspoon vanilla extract or vanilla bean paste

1/2 teaspoon lemon zest

All-purpose flour for dusting work surface

In the bowl of a food processor, add the lemon verbena, whole-wheat pastry flour, and salt. Process until the lemon verbena leaves are cut into tiny pieces.

In the bowl of a stand mixer fitted with a paddle attachment, cream the butter, sugar, vanilla, and lemon zest until light and fluffy. Add the flour mixture, and mix until just combined. Be careful not to overmix at this point.

Form the dough into a disc and cover with plastic wrap. Let chill in the refrigerator at least 2 hours or overnight.

Preheat oven to 325 degrees F.

Line a baking sheet with parchment paper.

Sprinkle a little all-purpose flour on a rolling pin and a clean work surface. Roll out the dough until it is about 1/8-inch thick. Cut into desired shapes with cookie cutters. Place the cookies on the prepared baking sheet. Bake for about 12 minutes, or until cooked through.Lemon Verbena Shortbread

Kentucky Derby Day Treats ~ Horseshoe Sugar Cookies with Mint Julep Glaze

Horseshoe CookiesThe traditional cocktail of the Kentucky Derby is the mint julep, which has been associated with the race ever since 1938. Along with the horses and the hats, the cocktail is one of the things that makes the Kentucky Derby what it is. I wanted to bake something inspired by this iconic drink for the occasion, and I couldn’t think of anything more fun and festive than horseshoe shaped cookies with a mint julep glaze. 🙂

I used my whole-wheat sugar cookie dough as the base, cut the dough into horseshoe shapes, and then topped them with a sugary glaze made with mint and bourbon. Yum!

Horseshoe Sugar Cookies with Mint Julep Glaze

For the cookies:

2 cups whole-wheat pastry flour

Pinch of salt

1/2 cup unsalted room temperature butter

1/2 cup granulated sugar

1 teaspoon vanilla extract

2 eggs

For the glaze:

1/4 cup powdered sugar

3 drops mint extract

1/2 teaspoon water, or more for a thinner consistency

1 teaspoon bourbon

For the cookies:

In a large bowl, whisk together the flour and salt. In a second large bowl, beat the butter and sugar with an electric mixer until light and fluffy. Add the vanilla. Beat in the eggs, one at a time. Add the flour mixture, and beat until just combined. You may need to hand mix the last bit if the dough becomes too thick for the mixer.

Wrap the dough in plastic wrap and refrigerate for at least an hour.

Preheat oven to 350 F.

Prepare a baking sheet with parchment paper.

On a floured work surface, roll the dough until it is slightly thicker than 1/8 inch. Cut into desired shapes with a cookie cutter.

Place the cookies on the prepared baking sheet.

Bake for about 7 minutes, or until slightly firm, rotating the pan halfway through. Cool the cookies completely on a wire rack.

For the glaze:

In a small bowl, whisk all of the ingredients very well until silky smooth. Add more water if you would like a thinner glaze. With an offset spatula, apply the glaze to the cookies.

Let dry before serving.

Happy Easter! ~ Bird’s Nest Sugar Cookies

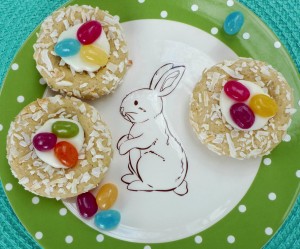
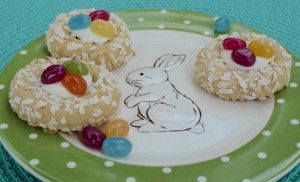
Bird's Nest Sugar CookiesTo celebrate Easter this year, I made these sweet little bird’s nest sugar cookies. This is a popular Easter cookie idea, and for good reason…They are adorable and easy to make. I used my whole-wheat sugar cookie recipe to make my version of these little nests. It’s a fun challenge to dress up the same dough for different holidays. 🙂 Using this same recipe, I made hot cocoa cookie cups for Christmas, double heart cookies for Valentine’s Day, and now these little nests for Easter. Hmm…What can I make for Mother’s Day, or for a summer celebration cookie?

Bird’s Nest Sugar Cookies

2 cups whole-wheat pastry flour

Pinch of salt

1/2 cup unsalted room temperature butter

1/2 cup granulated sugar

1 teaspoon vanilla extract

2 eggs

Unsweetened shredded coconut (approximately 1 1/2 cups)

White chocolate (approximately 1/4 cup to attach the jelly beans)

Jelly beans (approximately 1 cup) (I used the naturally flavored and colored beans from Trader Joe’s)

In a large bowl, whisk together the flour and salt. In a second large bowl, beat the butter and sugar with an electric mixer until light and fluffy. Add the vanilla. Beat in the eggs, one at a time. Add the flour mixture, and beat until just combined. You may need to hand mix the last bit if the dough becomes too thick for the mixer.

Wrap the dough in plastic wrap and refrigerate for at least an hour.

Preheat oven to 350 F.

Prepare a baking sheet with parchment paper.

Roll the dough into approximately 1-inch balls between your hands. Flatten the balls slightly and form a small well in the center of each so they are the shape of nests. Roll each cookie into the coconut, gently pressing the coconut into the dough to make sure it sticks. Place the cookies on the prepared baking sheet.

Bake for about 12 minutes, or until slightly firm, rotating the pan halfway through. Cool the cookies completely on a wire rack.

In a double boiler, melt the white chocolate. Spoon a small amount of the melted chocolate into the middle of each cooled cookie, and attach three jelly beans to the chocolate. Allow to set completely before serving.

I hope you all have a lovely Easter Sunday!Bird's Nest Sugar Cookies

Valentine Sweets ~ Double Heart Cookies

Double Heart CookiesI just love all of the cute Valentine desserts at this time of the year, so I decided to get an early start to give myself plenty of time to make a few! I started with these sweet little sugar cookies. This idea was inspired by a British baker named Cupcake Jemma. I love watching her weekly recipe videos, which are filled with some very cute and festive ideas throughout the year.Double Heart CookiesI used my whole-wheat sugar cookie recipe from my Christmas cookies last year, and I dyed half of them pink with beet juice. The beet flavor doesn’t come through, but the color is very pretty. For a little variety, I also made some of them into stained glass window cookies with cinnamon hard candy melted in the middle.Double Heart CookiesDouble Heart Cookies

2 raw beets

Approximately 1/4 cup cinnamon hard candies (if you would like to make some of the stained glass window cookies…otherwise, omit)

2 cups whole-wheat pastry flour

Pinch of salt

1/2 cup unsalted room temperature butter

1/2 cup granulated sugar

1 teaspoon vanilla extract

2 eggs

To make the beet juice to dye the pink cookies, start by putting on latex gloves if you have them. Peel the beets with a vegetable peeler. Grate the beets on a grater or with a grater attachment of a food processor. With cheesecloth or a thin kitchen towel you don’t care about, squeeze out as much juice as you can. (Reserve the pulp for the red velvet cake recipe to follow!)

To prepare the candy for the stained glass cookies, place the hard candy in a plastic zip lock bag. With a meat mallet, smash the candy into fine pieces.

In a large bowl, whisk together the flour and salt. In a second large bowl, beat the butter and sugar with an electric mixer until light and fluffy. Add the vanilla. Beat in the eggs, one at a time. Add the flour mixture, and beat until just combined. You may need to hand mix the last bit if the dough becomes too thick for the mixer.

Divide the dough in half. Into one half of the dough, add as much of the beet juice as you like for the color you desire. (Keep in mind, the color fades slightly when baked.) Thoroughly knead the juice into the dough for an even color.

Wrap the two pieces of dough separately in plastic wrap and refrigerate for at least an hour or overnight.

Preheat oven to 350 F.

On a lightly floured surface, roll out the two pieces of dough until they are between about 1/8 to 1/4 inch thick.

Cut out the dough with a large heart-shaped cookie cutter. In the middle of each large heart use a smaller heart-shaped cookie cutter to cut out a smaller heart in the center. Reserve the smaller hearts.

Transfer the larger hearts to a cookie sheet.

For the stained glass window cookies, fill the center of each large heart with an even layer of the crushed candy. The candy will bubble up slightly when baked, so don’t fill the cookies to the top.

For the remaining cookies, fill the hole with the smaller hearts in the opposite colored dough.

Bake for approximately 7 minutes, turning the pan once, until the cookies are cooked through and the candy is melted.Double Heart Cookies

Merry Christmas! ~ Peppermint Hot Cocoa Cookie Cups

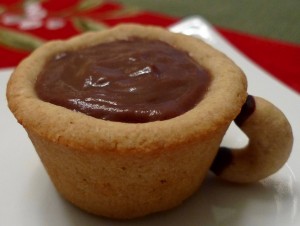
Peppermint Hot Cocoa Cup CookiesThese festive little cookie cups will make a perfect dessert for your Christmas meal. I think Santa might like them too! 😉Peppermint Hot Cocoa Cup CookiesI made a simple whole-wheat sugar cookie dough for the cups and handles. They have a lot less sugar and butter than many recipes to keep them a little lighter. Then I filled the cute little cups with my favorite chocolate mint pudding that is a regular at our house.

If you are looking for a fun way to spend a few hours in the kitchen, I think you’ll enjoy these. (Or if your holiday schedule is already full, make them next month. 🙂 I think hot cocoa is just as fitting in January as it is in December! Why should December get all the fun cookies? 😉 ) Either way, I hope you’ll enjoy giving these a try.Peppermint Hot Cocoa Cup CookiesPeppermint Hot Cocoa Cookie Cups
Cookies:

2 cups whole-wheat pastry flour

Pinch of salt

1/2 cup unsalted room temperature butter

1/2 cup granulated sugar

1 teaspoon vanilla extract

2 eggs

Approximately 1/8 cup milk, dark, or white chocolate (to attach the cup handles)

Pudding:

2/3 cup granulated sugar

1/4 cup cornstarch

Pinch of salt

1/3 cup unsweetened cocoa powder

2 1/2 cups skim milk

2 egg yolks

1 teaspoon vanilla extract

1/2 teaspoon peppermint (or mint) extract

To make the cookies:

In a large bowl, whisk together the flour and salt. In a second large bowl, beat the butter and sugar with an electric mixer until light and fluffy. Add the vanilla. Beat in the eggs, one at a time. Add the flour mixture, and beat until just combined. You may need to hand mix the last bit if the dough becomes too thick for the mixer.

Wrap the dough in plastic wrap and refrigerate for at least an hour.

Preheat oven to 350 F.

Prepare a mini muffin pan by greasing it very well. Prepare a baking sheet with parchment paper.

Reserve about 1/4 cup of the dough for the cup handles.

With the remaining dough, roll approximately 1-inch balls between your hands, and place them in the prepared muffin tin. Push the center of each ball until it squishes up the side of each hole. Make sure to press the sides and bottom firmly so there are no gaps in between the dough and the pan, and make sure the top is neat. The sides and top will be visible in the final product.

With the reserved dough, roll small pieces into thin lines, and fashion them into tiny cup handles. Place the handles on the prepared baking sheet.

Bake the cups for about 15 minutes, or until firm, rotating the pan halfway though. Let cool for a couple of minutes before removing the cookies from the pan. Bake the handles for about 7 minutes, or until firm, rotating the pan halfway through. Cool the cups and handles completely on a wire rack.

To attach the cup handles:

Over a double boiler, melt the chocolate. Place all of your cups on their sides in the cleaned mini muffin pan to prop them up. The side of each cup should be facing up. Dip the edges of the cup handles in the chocolate, and gently place on the side of the cups. Let stand to dry for at least an hour.

To make the pudding:

Begin by placing a fine mesh strainer over a medium bowl. Set aside.

Off the heat, in a medium saucepan, whisk the sugar, cornstarch, salt, and cocoa powder. Turn the heat onto medium high. Gradually add the milk, whisking well to dissolve the cornstarch. Add the egg yolks, and whisk until incorporated.

Continue to whisk occasionally, until big bubbles begin to form. At that point, reduce the heat to low. Cook one more minute, whisking constantly. The consistency should be creamy and thick.

Remove the pudding from the heat and pour it through the strainer into the bowl. Add the vanilla and mint to the hot pudding, and whisk until well incorporated.

Cover the pudding directly on the surface with plastic wrap. Refrigerate for at least three hours. Before serving, whisk it one more time to make sure the consistency is smooth.

To assemble:

Place the pudding into a piping bag to neatly fill the hot cocoa cups. Use the back of a small spoon to smooth the top.Peppermint Hot Cocoa Cup Cookies

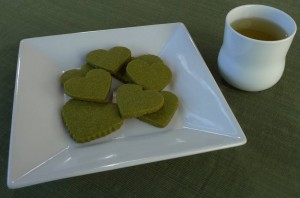
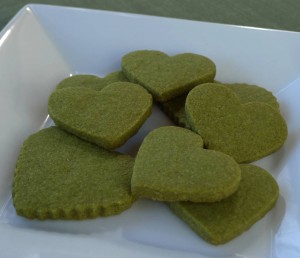
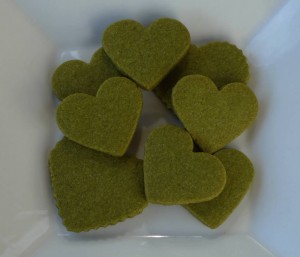
Happy White Day ~ Green Tea Shortbread

Happy White Day!

Last month, as I was looking through recipes for our Japanese Valentine’s Day dinner, I also looked at how people in Japan celebrate Valentine’s Day. Through that research, I stumbled upon a Japanese holiday called White Day. I learned that in Japan, women typically give men chocolates on Valentine’s Day rather than the other way around, as we usually do in the States. White Day is exactly one month after Valentine’s Day, and it is a chance for the men to give back. I thought it was such an interesting and cool tradition, so I wanted to mark it in some way. Here’s a Japanese-inspired cookie recipe for the guys out there! 😉

I used Martha Stewart’s recipe for Green Tea Shortbread. I substituted all of the butter with Earth Balance, which worked beautifully. We really didn’t miss the butter. I also omitted the salt, since Earth Balance already has a little salt incorporated into the product.

Green Tea Shortbread

Based on a recipe from Martha Stewart

2 cups all-purpose flour, plus more for rolling

2 tablespoons green-tea powder (matcha)

1/2 pound Earth Balance, room temperature

1/2 cup granulated sugar

Sift flour and tea powder into a small bowl; set aside. Place Earth Balance in the bowl of an electric mixer fitted with the paddle attachment. Cream on medium speed, 3 to 5 minutes. Add sugar; continue to beat until very light in color, about 2 minutes more. Add flour mixture; combine on low, scraping sides of bowl with a spatula if necessary, until flour is just incorporated and dough sticks together when squeezed with fingers.

Place a piece of parchment on a clean surface; dust with flour. Roll dough to 1/4-inch thickness; chill in refrigerator or freezer until firm, about 30 minutes.

Preheat oven to 325 degrees. Line two baking sheets with parchment. Cut chilled dough with 2-inch leaf cutters. Using a wide spatula, transfer to baking sheets. Chill until firm. Gather scraps together, re-roll, chill, and cut shapes. Bake until firm and barely starting to color, 15 to 20 minutes, rotating halfway through. Cool completely on wire rack; store in an airtight container for up to 3 to 4 weeks.

PS. Since these cookies are a vibrant green color, they could also be good for St. Patrick’s Day! Just cut them into shamrock shapes. 🙂

Christmas Cookies ~ Pine Nut Biscotti

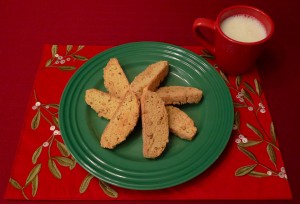
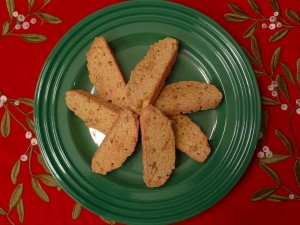
Santa needs to have some cookies on Christmas Eve, so I baked up a batch of my favorite pine nut biscotti for him ;).  This recipe makes me think of Christmas since the creamy nuts are another part of the Christmas tree! I think it’s a fun but sophisticated version of a Christmas cookie. I’ve made these cookies for several years now, and they’ve become a favorite at our house. They also ship well if you’d like to send them to loved ones far away. They are naturally low in fat since there is no added oil or butter, so they are a good choice in lieu of some of the decadent Christmas goodies of the season. I hope you enjoy them as much as we do! And don’t forget to save a few for Santa ;).

Pine Nut Biscotti

From Cooking Light magazine

3 cups all-purpose flour (about 13 1/2 ounces)

1 cup sugar

1 teaspoon baking powder

1/2 teaspoon salt

1/2 teaspoon baking soda

1/2 cup pine nuts, toasted

1/4 cup plus 2 tablespoons water

1 teaspoon grated lemon rind

1 teaspoon vanilla extract

3 large eggs

Preheat oven to 325°.

Lightly spoon flour into dry measuring cups; level with a knife. Combine flour, sugar, baking powder, salt, and baking soda in a large bowl, stirring with a whisk. Stir in pine nuts. Combine 1/4 cup plus 2 tablespoons water, rind, vanilla, and eggs, stirring with a whisk. Add egg mixture to flour mixture, stirring until well blended (dough will be dry and crumbly). Knead dough lightly in bowl 7 or 8 times or until a dough forms (dough will be sticky).

Divide dough in half. Shape each portion into an 8-inch-long roll. Place rolls 6 inches apart on a baking sheet lined with parchment paper; flatten each roll to 1-inch thickness.

Bake at 325° for 30 minutes. Remove rolls from baking sheet (do not turn oven off); cool 10 minutes on a wire rack.

Cut each roll diagonally into 15 (1/2-inch-thick) slices using a serrated knife. Place slices, cut sides down, on baking sheet.

Bake at 325° for 15 minutes. Turn cookies over, and bake an additional 10 minutes (cookies will be slightly soft in center but will harden as they cool).

Remove from baking sheet; cool completely on wire racks.

Yield:  2 1/2 dozen (serving size: 1 biscotto)

Would you like a cookie? ~ Old Fashioned Oatmeal Cookies

Care for a cookie?

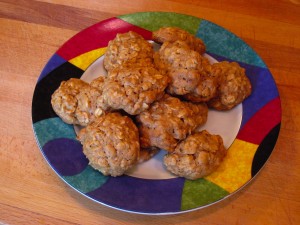
Today I made old-fashioned oatmeal cookies with a modern day twist. I totally swapped out the butter for a cool product I just discovered called Earth Balance. It is an all-natural replacement for butter without all of the saturated fat. I also omitted the salt from the original recipe since there is already a little salt in Earth Balance, and I omitted the raisins (simply because I don’t like raisins in my cookies or other baked goods). If you do like raisins, add ½ cup at the end.

I just get so excited when I find healthier ways to make some old favorites and they still taste like my old favorites! I hope you’ll give these a whirl!

The original recipe that I used as my inspiration was already a lightened version from America’s Test Kitchen’s book called The Best Light Recipe.

Old Fashioned Oatmeal Cookies

1 cup old fashioned rolled oats

¾ cup all purpose flour

¼ teaspoon cinnamon

¼ teaspoon baking soda

4 tablespoons Earth Balance, melted and cooled (I used the original stick version, but the kind that comes in the tub should be fine, as well)

1 large egg

1 tablespoon vanilla extract

1 cup packed dark brown sugar

Adjust your oven rack to the middle position, and preheat to 350.

Line 2 baking sheets with parchment paper.

Whisk the dry ingredients together in a medium bowl (oats through baking soda) and set aside.

In a large bowl, whisk the melted and cooled Earth Balance, egg and vanilla. Stir in the brown sugar, taking care that there are no big clumps remaining. Then stir in the dry mixture to the wet until everything is well combined.

Roll the dough into 24 balls (one leveled tablespoon each) and place them about 2 ½ inches apart on the baking sheets. Squish the tops down slightly.

Bake one tray at a time for about 12 minutes, rotating the pan once halfway through. They should be slightly brown on the edges.

Pair with a big glass of skim milk! 🙂


Christmas Cookie Day

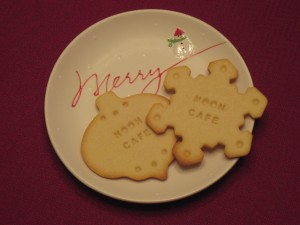
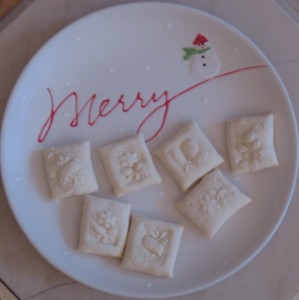
Today was Christmas cookie day at our house :). I spent a fun afternoon baking a couple of batches. I found the cutest little cookie cutters at Williams-Sonoma this year that made them extra special. They are shaped like a gingerbread man, a snowflake and a Christmas ornament, but the cool thing about them is that you can add personalized messages that press into the cookie dough design. I made some of our cookies with special inscriptions like the names of our nephews, Miro, Ivan and Zach and this website name.

I used a classic sugar cookie recipe from Cooking Light magazine that can be found at MyRecipes.com. It is a lightened version of the classic, so I followed it pretty closely. It uses less butter than most recipes as well as only egg whites with no yolks, but it has a great trick for rolling so you can get away with less fat without cracking the dough. This recipe doubles nicely if you desire. They are also good with a little icing, though I opted for plain cookies this time around to show off the cute design.

Classic Sugar Cookies

2 1/2 cups all-purpose flour

1/2 teaspoon baking powder

Pinch of salt

1 cup granulated sugar

10 tablespoons softened butter

1 1/2 teaspoons vanilla extract

2 egg whites

Combine the flour, baking powder and salt with a whisk in a medium bowl. Place the sugar and butter in a large bowl and beat with a mixer until fluffy. Next, beat in the vanilla and egg whites. Gradually add the flour mixture to butter mixture and beat at low speed until just combined. Divide the dough in half. Shape each half into a puck, about 4 inches across. Wrap each puck in plastic wrap and chill 1 hour.

Unwrap 1 dough puck at a time. Smooth the plastic wrap on your work surface, and put the dough in the middle. Add another sheet of plastic wrap on top, so the dough is surrounded on both sides. Roll the dough in between the plastic until it is about ¼ inch thick. (The plastic allows the dough to stay in one nice piece without more fat.) Chill the dough another 30 minutes.

Preheat your oven to 375.

Remove one portion of dough from the refrigerator at a time. Remove the top sheet of plastic wrap and replace it with a sheet of parchment paper. Run the rolling pin over the parchment a couple of times to smooth the top of the dough. Remove the parchment, and using a cookie cutter, cut your dough into the shapes you desire. Place the cookies about 2 inches apart on the baking sheets lined with parchment paper. Bake at 375 for about 10 minutes or until lightly browned. Cool on the pans for 5 minutes. Then transfer to a wire rack to cool completely. Repeat with the remaining dough.

Happy December ~ Springerle

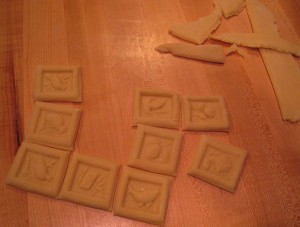
It is Christmas cookie season again, and I decided to try my hand at something new this year called springerle. They are traditional German anise cookies that use a special mold. My parents gave me a metal springerle board last Christmas, and I am part German, so I thought I would give them a try! They are really sweet little pieces of art. 🙂

Springerle

2 eggs

4 oz powdered sugar

1 teaspoon anise extract

2 cups all purpose flour, plus a little more for the board and rolling pin if the dough is too sticky

1 teaspoon baking powder

Beat the eggs until light with an electric mixer on high speed in a large bowl. Reduce the speed and add the anise and sifted sugar. Beat until well combined. Sift the flour and baking powder and stir them into the egg mixture. The dough will be rather stiff.

Roll the dough to about 3/8 inch thickness. Imprint the dough onto the springerle board and cut apart with a pizza cutter. Place the cookies on a baking sheet (this recipe will make about 2 sheets worth of cookies), and let them dry uncovered overnight. This will allow the designs to stay crisp when they are baked.

In the morning, preheat your oven to 350. Bake the cookies for about 8-10 minutes, until cooked through but not golden.

Valentine’s Day/Chinese New Year ~ Moo Shu Pork and Homemade Fortune Cookies

This year Valentine’s Day (and our engagement anniversary) and Chinese New Year happened to fall on the same day, so we celebrated everything together with a romantic Chinese dinner at home. I love to celebrate holidays from all over the world in my own little way. It gives me one more way to spice things up with special moments. Who can’t use another reason to celebrate in the dark winter months? I tried two new recipes, and I would recommend them both if you would like a quiet night at home with Chinese take-in ~ Moo shu pork and homemade fortune cookies. It was an adventure in the kitchen, and I now have a greater appreciation for what my favorite local Chinese restaurant does after trying these dishes! The dishes were a little healthier since I could control the salt, cuts of meat, etc. Plus, we could make our own personal fortunes for each other to open, which was a fun bonus of making our own fortune cookies. (Is it cheating if you write your own fortunes?) 🙂 The first recipe I tried was Moo Shu Pork. The original recipe was from my favorite Cooking Light magazine, and it can be found at MyRecipes.com. I used simple cremini mushrooms instead of shiitake and wood ear to save quite a bit of money. But other than that detail, I followed the recipe pretty closely since it was already a lightened version of the dish.Moo Shu Pork2 tablespoons low-sodium soy sauce

2 tablespoons sake

1 teaspoon dark sesame oil

2 teaspoons cornstarch

1 (1 1/2-pound) pork tenderloin, trimmed of excess fat, and cut into 1 x 1/4-inch strips

4 ounces sliced cremini mushrooms

1/2 cup sliced green onions

3 tablespoons minced garlic (about 12 cloves)

2 tablespoons fresh ginger grated on a Microplane

3 tablespoons sake

3 tablespoons low-sodium soy sauce

1/2 teaspoon cornstarch

1/2 teaspoon sugar

1/4 teaspoon black pepper

1 tablespoon vegetable oil

2 eggs, lightly beaten

3 cups thinly sliced napa cabbage stalks

4 cups thinly sliced napa cabbage leaves

2 tablespoons sake

Hoisin sauce and flour tortillas for serving

Combine the first 4 ingredients in a zip top plastic bag. Add the pork. Seal and marinate in the refrigerator for about an hour, turning occasionally. Remove the pork from the bag, and discard the marinade.

Combine the sliced mushrooms, green onions, garlic, and ginger in a small bowl, and set aside.

Combine 3 tablespoons of sake and the next 4 ingredients (through black pepper) in a small bowl. Stir well with a whisk, and set aside.

Heat 1 1/2 teaspoons vegetable oil in a large nonstick skillet over medium-high heat. Add the pork, and stir-fry for 3 minutes.

Remove the pork from the pan. Add 1 1/2 teaspoons of vegetable oil to the pan. Add the eggs, and stir-fry 30 seconds or until soft-scrambled. Add the mushroom mixture and stir-fry 1 1/2 minutes. Add the cabbage stalks and stir-fry 30 seconds. Add the cabbage leaves and 2 tablespoons of sake. Stir-fry for 1 minute. Add the pork and the cornstarch mixture. Stir-fry 2 minutes or until the sauce is thickened.

Serve wrapped in warmed tortillas with hoisin sauce.

The second thing my husband and I made together was a batch of fortune cookies. I would recommend doing these with a partner, since they harden very quickly once they come out of the oven. We each filled out personalized little strips of paper for the fortunes, and then opened each other’s for a surprise. The original recipe was from the Food Network.

Homemade Fortune Cookies

1/2 cup all-purpose flour

1 teaspoon cornstarch

1/2 cup sugar

2 large egg whites

1 teaspoon vanilla extract

2 tablespoons canola oil

1 tablespoon water

Cooking spray for the pans

Write your fortunes on little pieces of paper before you begin.

Preheat the oven to 300 degrees.

In a small bowl, sift together the flour, cornstarch and sugar.

In a medium bowl, whisk together the egg whites, vanilla, oil, and water. Add the dry ingredients into the wet ingredients and mix until smooth.

Working in batches of 4, drop the batter by tablespoons on a baking sheet covered with a silicone mat. Tilt the baking sheet in a circular motion (and use your finger if need be) to spread the batter into 4-inch diameter circles.

Bake until the edges of the cookies are golden brown, about 10 minutes. Remove from the oven, and working quickly, use a spatula to remove the cookies from the baking sheet. Put a fortune into the center of a cookie and fold it in half. Bring the points together with open seams on the outside. Arrange in muffin tins to help keep their shape while they are cooling.

Repeat with the remaining fortunes and cookies.

We paired the meal with Sofia Blanc de Blancs (the same kind of sparkling wine that we enjoyed on New Year’s Day, which seemed fitting) with mandarin orange slices floating in the bubbles for the occasion.

I decorated the table with red (the color of both holidays) and a blend of Chinese New Year and heart decorations for Valentine’s Day and our engagement anniversary. For example, I printed a Year of the Rat image and a Year of the Dragon image, since they were the years that Rob and I were born. That added a little personal romantic touch. I also printed a matching Year of the Tiger image for the middle of the table, which was the year we celebrated today.