Summer is (almost) here ~ Dungeness Crab Cakes
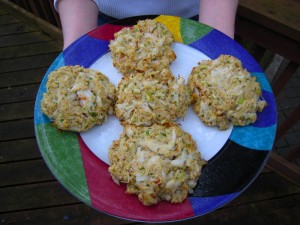
We tend to do a little more entertaining as the weather (slowly but surely!) gets warmer and sunnier. It’s a treat to have dinner alfresco after staying inside over the winter.

One dish that I make time and time again for entertaining in the warmer months is my Dungeness crab cakes. They are one of our very favorite things…Ever! One thing I love about them is that they can be made ahead of time, stored in the refrigerator, and then baked off once our guests arrive. I am not mussing and fussing in the kitchen, so I can enjoy a glass of wine with our friends out on the deck while the cakes bake in the oven. They are also full of crab…Very little filler. That’s how we like our crab cakes! I would highly recommend them for easy gourmet entertaining. 🙂

Dungeness Crab Cakes

Based on a recipe from Sunset magazine

1 pound cooked and shelled Dungeness crab meat

1/4 cup finely diced celery

2 tablespoons minced fresh chives

2 tablespoons mayonnaise

1 large egg

2 teaspoons Dijon mustard

1/4 teaspoon hot sauce

1 1/4 cups panko, divided

Preheat your oven to 475 F. Make sure your crab doesn’t have any hidden bits of shell mixed in before you begin. In a large bowl, mix the celery, chives, mayonnaise, egg, mustard, and hot sauce with a fork. Then add the crab and 1/4 cup panko. Stir gently until everything is well blended.

Place the remaining 1 cup of panko in a shallow bowl. Shape the crab mixture into cakes. (I usually get about 6 or 7 large cakes, but make them the size you prefer. Whatever size you choose, they should be about 1/2 inch thick.) Place each cake in the panko and coat on all sides. Press gently to make sure the crumbs stick. Lay the panko-covered cakes slightly apart on a parchment-lined baking sheet. (You can make them up to this point earlier in the day. Just cover the pan lightly with plastic wrap and refrigerate until you are ready to bake.)

Bake until golden brown, 15 to 18 minutes. Serve immediately.

I usually serve them with a good store-bought tartar sauce.

I hope you enjoy these as much as we do!

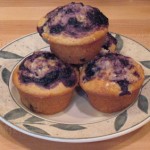
Happy Seafair ~ Blueberry Blue Angel Muffins

*About the photos

This is Seafair weekend in Seattle, which is an annual summer celebration including hydroplane racing and an air show featuring the Blue Angels. We live very close to the flight path where the Blue Angels fly, so I get a great view of the synchronized air show from my kitchen. Occasionally, the jets come close to breaking the sound barrier and they cause the kitchen to rumble and shake a bit as they fly over!

This year happens to be a cooler and wetter weekend than usual.  I find that when the weather cools down I like to make our home cozy and warm with baked goodies. That along with all of the Seafair festivities inspired me to bake what I’d like to call “Blueberry Blue Angel Muffins!” 🙂

I found a really good blueberry muffin recipe from America’s Test Kitchen and I changed a few things to make it a little healthier. (I used less sugar, I substituted whole-wheat pastry flour for the all-purpose flour and I switched the butter to applesauce.) It takes advantage of the fresh summer blueberries at the market now. The extra non-traditional step of swirling homemade blueberry jam into the muffins makes them very flavorful and special. The lemon zest and sugar topping also gives them a fresh and crunchy finishing touch.

Blueberry Blue Angel Muffins

Ingredients:

Cooking spray

1/2 tablespoon lemon zest

2
cups fresh blueberries

1
cup sugar, plus 1 teaspoon, plus 2 tablespoons

2 1/2
cups whole-wheat pastry flour

2 1/2
teaspoons baking powder

1/4 teaspoon salt

2
eggs

1/4 cup applesauce

1/4
cup canola oil

1
cup buttermilk

1 1/2
teaspoons vanilla extract

Preheat your oven to 425 degrees with the rack in the upper middle position. Spray a muffin tin with nonstick cooking spray.

Bring 1 cup of blueberries and 1 teaspoon of sugar to a simmer in a small saucepan over medium heat. Mash the berries with a potato masher and stir frequently until the mixture is a little thickened and reduced to about ¼ cup. Take off the heat, and let cool.

For the topping, stir together 2 tablespoons of sugar and the lemon zest in a small bowl until combined.

Whisk the flour, baking powder, and salt together in a large bowl. In a medium bowl, whisk 1 cup of sugar and the eggs together until they are well incorporated. Slowly whisk in the applesauce and oil. Then whisk in the buttermilk and vanilla until everything is blended well. Using a rubber spatula, fold the egg mixture and the remaining blueberries into the flour mixture until everything is just moistened.

Divide the batter equally into the 12 muffin cups. Each cup should be completely full. Then put about a teaspoon of the cooked berry jam mixture onto the center of each muffin. Using a chopstick or other skewer, swirl the jam into the batter. Then sprinkle the lemon sugar equally over the muffins.

Bake about 17 minutes, until the muffin tops are firm and a toothpick inserted comes out clean. Cool slightly before serving.

Happy Seafair!

*Watching the Blue Angels air show while enjoying a plate of blueberry muffins on the deck :). As a funny side note, the right photo would have been very very cool since the plane on the right proceded to come straight over our house, but I ran into the kitchen when he got closer! Ha ha! They are *loud.*

A little anniversary celebration ~ Fresh Sweet Corn Flan and Affogato

Every August 1st, Rob and I celebrate two little anniversaries. It marks the day I moved to Seattle, as well as the day Rob and I moved into our current house together. We celebrate all kinds of little anniversaries like this one. They give us an excuse to have a nice dinner or to do something special. I figure who can’t use more excuses for little celebrations? 🙂

This year we had dinner in our backyard under our grape trellis with a bunch of candles glowing all around. I chose a summery menu that was a reflection of the best of the Northwest, since we were celebrating our home. Along with that theme, we had local Dungeness crab for the main course. It’s a special meal that we don’t have everyday, and it’s one of our very favorite things.

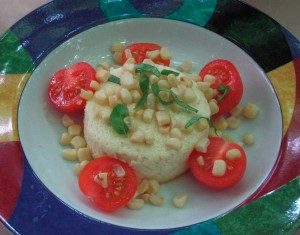
To go with the crab, I made fresh sweet corn flan with tomatoes and basil. This recipe uses very basic summer ingredients and transforms them into something unexpected. I followed the original recipe pretty closely (from Cooking Light magazine, which can be found at MyRecipes.com), so I am passing it along since we enjoyed it so much! I hope you do, too.

Fresh Sweet Corn Flan

Ingredients:

Cooking spray

2 1/2  cups fresh corn kernels (about 5 ears)

1 cup skim milk

1/3 cup freshly grated Parmesan cheese

1 teaspoon unbleached all-purpose flour

1/2 teaspoon salt

1/4 teaspoon freshly ground black pepper

4 eggs

A handful of cherry tomatoes, halved, to taste

A few leaves of sliced basil, to taste

Preheat your oven to 350 degrees.

Cook the corn kernels in a skillet coated with cooking spray for about 5 minutes or until they are tender. Set aside 1 cup of the kernels for garnish.

Place the remaining corn in a food processor, and pulse until coarsely chopped. Add the milk, cheese, flour, salt, pepper and eggs to the food processor, and pulse until well combined. (It will never be completely smooth, but the kernels will give the mix a little texture).

Pour about 1/2 cup of the corn mixture into 6 ramekins coated with cooking spray. Place the ramekins in a 13 x 9 inch baking pan. Add hot water to the pan to a depth of about an inch up the sides of the ramekins. Bake for 35 minutes or until set. Remove the ramekins from the pan, and cool for about 5 minutes. Invert each flan onto individual plates. Garnish each with corn kernels, tomato halves and basil.

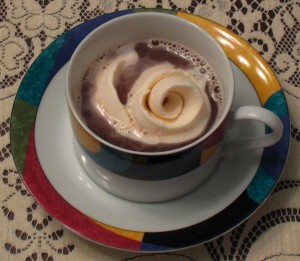
We ended the meal with another very easy, but very delicious dish called affogato. It is just a scoop of ice cream in a cup of coffee. It doesn’t get much simpler than that! 🙂 (As a side note, it means “drowned” in Italian as the ice cream ends up swimming in the coffee.) Since the Northwest is known for coffee, I thought this was a perfect ending to a dinner celebrating the Northwest. I originally saw this dish on the Barefoot Contessa on the Food Network. It is so simple, but we think it is a really extraordinary dessert. I hope you do, too!

Affogato

Ingredients:

Vanilla ice cream or frozen custard

Strong decaf coffee or espresso

Scoop as much ice cream or custard as you would like for each individual serving into a coffee cup, and pour the warm coffee over the top immediately before serving or at the table.

Aah, summer ~ Strawberry Cheesecake Tart

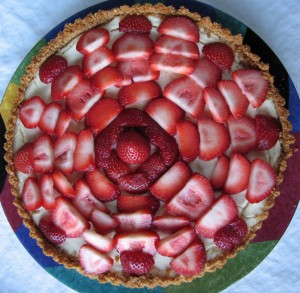
I promised to share my recipe for our favorite strawberry cheesecake tart, and here it is! 🙂 I usually make at least a couple of these tarts in the summertime when strawberries are at their peak. It’s one of our very favorite recipes. It is also pretty enough to share with company. The original recipe is from MarthaStewart.com, but as usual, I changed it a little to make it a tad healthier.

Strawberry Cheesecake Tart

6 full graham cracker sheets

1/3 cup almonds

3/4 cup sugar

4 tablespoons unsalted melted butter, or just enough until the crust is moistened

2 8-oz bars of Neufchatel cream cheese

1/2 cup fat free sour cream

1 egg

1/2 teaspoon vanilla extract

Pinch of salt

Pint of fresh strawberries

Preheat your oven to 350 degrees.

In a food processor, grind the graham crackers, almonds, and 1/4 cup of sugar until they are finely ground. Add the butter slowly, and process until moistened. (You may not need the full 4 tablespoons). Transfer to a 9-inch tart pan, preferably with a removable bottom. Press the mixture firmly into the pan, and up the sides. Freeze for 15 minutes.

If you have a second food processor bowl, I’d recommend using it now. Otherwise, just clean your bowl and blade very well. Then blend the cream cheese, sour cream, 1/2 cup sugar, egg, vanilla, and salt until the mixture is smooth.

Place your tart pan on a rimmed baking sheet, and fill with the cheesecake mixture. Bake until filling is set, about 30 to 35 minutes.

Cool completely. (The hardest part is waiting!)

I like to top it with fresh cut strawberries. After removing the green portion, slice each berry into 4 or 5 pieces, top to bottom. Then splay them from the center to the edges. (See picture above).

I hope you enjoy this recipe as much as we do! It’s a little bite of summer 🙂

Enjoy a virtual trip to the tropics…Individual Key Lime Cheesecakes

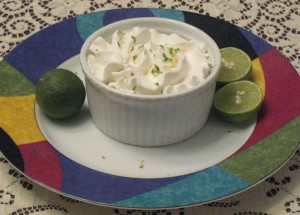
I am reading a summery beach book that is set in the Florida Keys called Happiness Key by Emilie Richards. It’s such a good book that it inspired me to make a recipe with some Key limes! One of our favorite summertime desserts is a strawberry cheesecake tart (I promise to add that recipe soon), so I decided to put a spin on that with limes. I also thought it would be cute to make individual cheesecakes instead of a big one. Tiny little cheesecakes for tiny little fruits. 🙂

Individual Key Lime Cheesecakes

4 ramekins

Cooking spray

1 oz vanilla wafers

1 8-oz package of Neufchatel reduced fat cream cheese

1/4 cup and 1 tablespoon of sugar

1 egg

1 1/2 tablespoons Key lime juice (preferably fresh squeezed)

1/2 teaspoon vanilla extract

Whipped topping such as Reddi Wip

Preheat your oven to 350 degrees.

Grind the vanilla wafers in a food processor until they are the consistency of sand. Wipe out the food processor well for the next step.

Spray the ramekins with cooking spray. Sprinkle the crumbled vanilla wafers into a thin even layer on the bottom of each.

In the cleaned food processor, blend the cheese, sugar, eggs, juice and extract until very smooth. Spoon the cheese mixture evenly between the four ramekins, covering the cookie crumbs.

Bake until set, about 20 minutes.

Cool for about 10 minutes, and then refrigerate for at least a couple of hours until they are very cold.

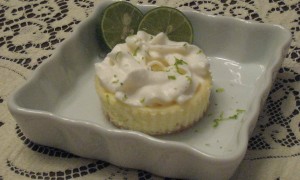
Serve with a little dollop of whipped topping and lime zest grated over the top. Maybe even add a couple of the cute little limes on the side of the dish to display what’s inside.

Now I can curl up with my book out on our deck in the sunshine and virtually escape to a beach on the Florida Keys with a mini Key lime cheesecake :). I hope you’ll join me!

PS. You can also make a smaller version of these cheescakes in a muffin tin with aluminum baking cups. Follow the same recipe, but just cook them for a little less time until they are set. After chilling, take them out of the baking cups, and they look like miniature tarts. (Below)

Make an ordinary summer night special ~ Steamed Clams

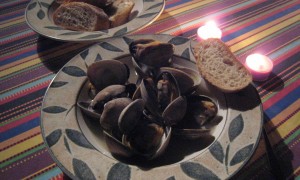
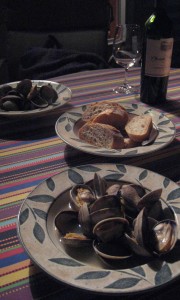
Rob and I have started a new little tradition that makes an ordinary evening feel like a special occasion to us. We light some candles and our tiki torches outside, have a glass of wine and enjoy this steamed clam dish together. We used to go out for a similar dish at a nearby restaurant called BluWater Bistro, but I figured out a comparable recipe that we like even more at home. I don’t use nearly the amount of butter they use, but I think it still needs a tiny bit for flavor. I also think half the fun of clams is watching them pop open as they cook…Something we miss when we go out to eat. Not to mention, it is much less spendy to make at home :). This is not a strict recipe. Just taste as you go to make sure you have the flavors you like.

Steamed Clams

1 or 2 cloves minced garlic (depending on how much garlic you like)

1/2 tablespoon butter

2 cups low sodium free-range chicken stock

Splash of dry white wine, such as Chardonnay or Sauvignon Blanc

About 2 lbs of farmed clams

Salt to taste

2 tablespoons fresh flat leaf parsley (optional)

French bread (optional)

Scrub your clams very well and discard any that are cracked or open. (If any clams are just a tiny bit open, tap them on the counter…If they close, they are still alive and good to use. If they don’t, they are not safe to eat, so toss them.) Melt the butter in a large pan (one that has a lid), and sauté the garlic for a minute or until fragrant. Pour the chicken broth and white wine into the pan and bring to a boil. Taste for seasoning once it is hot, and add salt if you desire. When the mixture is boiling, put all of the clams in the pan and cover with the lid. Watch them closely. When all of them have opened, take the lid off and take the pan off the heat. (If any did not open, discard them.) Spoon the clams and broth into two big bowls. If you desire, finish with a sprinkling of fresh chopped parsley and serve with slices of French bread to soak up the extra broth. Also, be sure to serve with an extra bowl for the shells.

Celebrate Farmer’s Markets ~ Cantaloupe and Spring Green Salad

Now that the weather is getting warmer, farmer’s markets are in full swing again. I love to try the different foods they carry that I can’t find everywhere. Plus I’m helping to support local farmers, which is a big added bonus. Last week I bought homemade raspberry vinegar and I tried a cut of goat meat. We’ve never tried goat before and would have to say we really enjoyed it! It’s a little culinary adventure right in our backyard. I can’t wait to see what I can find next week.

The raspberry vinegar made its way into a recipe based on one I found in a cookbook called Giada’s Kitchen. It’s a recipe that includes ingredients you can find at farmer’s markets right now.

Cantaloupe and Spring Green Salad

Vinaigrette

¼ cup fresh orange juice

1 tablespoon fresh lemon juice

1 ½ tablespoons raspberry vinegar

3 tablespoons extra virgin olive oil

Salt and pepper to taste

Salad

1 cantaloupe, cut into 1 inch cubes

2 cups spring greens, such as baby romaine or arugula

Whisk the ingredients for the vinaigrette together in a small bowl and toss with the salad. Enjoy!