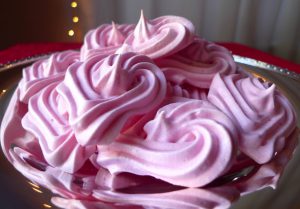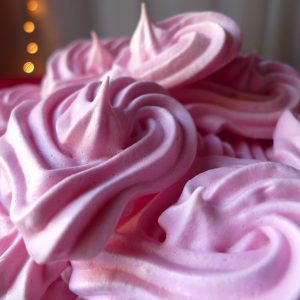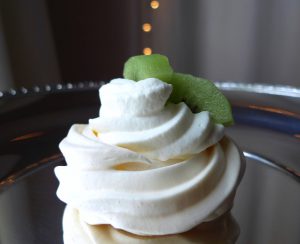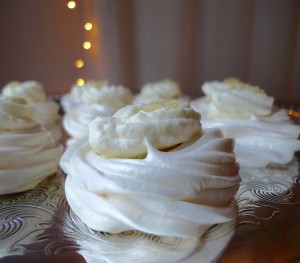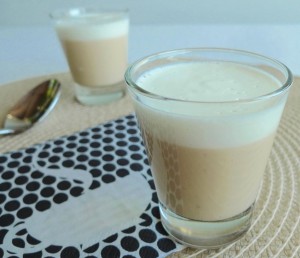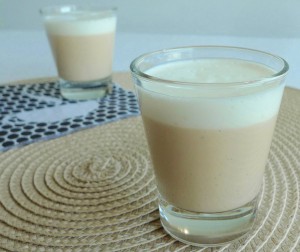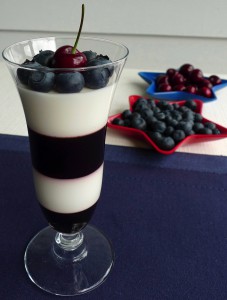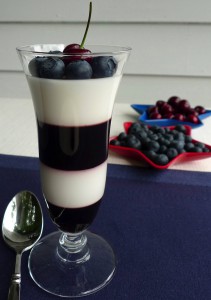
Autumn Treat ~ Pumpkin Spice Latte Panna Cotta

This pumpkin spice latte panna cotta couldn’t be simpler. If you are looking for an elegant but ridiculously easy dessert for Thanksgiving, this is it! It can also be made a day ahead, which is an added bonus.

I first tried this recipe with a pumpkin spice latte the way I usually order them at Starbucks, which is with skim milk and only about half of the sweetener. I found that the way they naturally make them (if you don’t ask for anything special) is remarkably better in this recipe. I really needed the whole milk and the full amount of syrup to make a good panna cotta. Since panna cotta means “cooked cream,” and is usually made with heavy cream, I figured the whole milk was still a healthy swap. 🙂

The cute pumpkin spice printable is from a blog called Lost Bumblebee. I thought it was the perfect accompaniment to the dessert!

Pumpkin Spice Latte Panna Cotta

1 teaspoon unsweetened powdered gelatin

1 short pumpkin spice latte (8 ounces with whole milk and the full amount of syrup)

Lightly sweetened whipped cream

Cool the latte to room temperature. Sprinkle the gelatin over the top. Make sure all of the gelatin is touching the liquid. Let sit for about 3 minutes to soften. In a small saucepan, bring the mixture up to a simmer. Pour the mixture into a vessel with a pour spout and pour into your desired containers. Refrigerate until set, or overnight.

Serve chilled, topped with whipped cream.

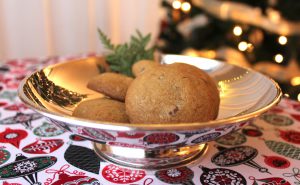
A Tropical Treat for Santa ~ Macadamia Nut Chocolate Chip Cookies

Merry Christmas! I hope you enjoy these tropical Christmas cookies as much as we did. 🙂 If you use coconut oil instead of butter, they make your whole house smell like a tropical oasis as they bake. Ahh…

Macadamia Nut Chocolate Chip Cookies

1/4 cup brown sugar, lightly packed

1/4 cup granulated sugar

1/2 cup coconut oil or butter, room temperature

1 egg

1 teaspoon vanilla

1 1/4 cups whole-wheat pastry flour

1/2 teaspoon baking soda

Pinch of salt

1/2 cup macadamia nuts, coarsely chopped

1/2 cup milk chocolate chips

Preheat your oven to 350 F. Line 2 baking sheets with parchment paper.

In the bowl of a stand mixer fitted with a paddle attachment, beat the sugars and the oil or butter, whichever you are using, until well combined. Add the egg and vanilla, and beat until well incorporated.

Add the flour, baking soda, and salt, and beat until just combined.

Add the nuts and the chocolate. Mix them into the dough by hand with a spatula.

For each cookie, scoop out 1 tablespoon of dough and roll between your hands to form a dough ball. Place the balls on the prepared baking sheets, pressing down slightly to make them discs. Make sure to give them about an inch and a half to spread while baking.

Bake for about 12 minutes, or until cooked through, rotating the pans halfway through to ensure even baking.

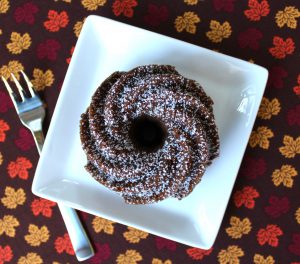
Celebrating Autumn! ~ Spiced Honeycrisp Apple Mini Bundt Cakes

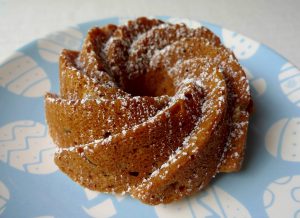
I absolutely love fall. 🙂 Now is the time to enjoy crisp evenings, harvest colors, and some of my favorite flavors of the year! I kicked off this fresh fall season with these spiced Honeycrisp apple mini Bundt cakes.

I used a mini Bundt pan that holds 4 cups of batter. Alternatively, this recipe also makes 10 standard-sized muffins. These cakes also freeze well so you can enjoy fresh cake with your morning coffee. Just microwave for about 30 seconds to defrost, and they taste like they came fresh out of the oven. 🙂

Spiced Honeycrisp Apple Mini Bundt Cakes

Makes 6 mini Bundt cakes

Butter (for greasing the pan)

1 large Honeycrisp apple

1 cup whole-wheat pastry flour

1 teaspoon baking soda

1 1/2 teaspoons ground cinnamon

1/4 teaspoon ground ginger

1/8 teaspoon freshly ground nutmeg

1/8 teaspoon ground cloves

Pinch of salt

1/4 cup light olive oil

2 tablespoons skim milk

1/2 cup granulated sugar

1 large egg

1/2 teaspoon vanilla extract

Powdered sugar (for dusting)

Preheat your oven to 350 F.

Butter a mini Bundt pan. Make sure you get the butter into all of the crevasses to make sure the cake will come out cleanly.

Peel the apple and cut out the core. Grate all of the apple flesh on a coarse grater. Set aside.

In a medium bowl, whisk together the flour, baking soda, spices, and salt.

In a large bowl, whisk together the oil, milk, sugar, egg, and vanilla. Add the shredded apple and stir well.

Add the dry ingredients to the wet ingredients and stir until just combined. Take care not to over mix at this point.

Fill each mold in the Bundt pan about 3/4 of the way full. Tap the pan on the counter to help any air bubbles escape.

Bake for about 20 minutes, or until a toothpick inserted into one of the cakes comes out clean.

Let the cakes cool in the pan for about 10 minutes. Then invert onto a cooling rack.

Sprinkle with powdered sugar to serve.

Happy Fourth of July! ~ Haupia Stars

I hope you had a festive and fun Fourth!

You might have noticed I am on a Hawaiian kick this summer, exploring the many foods of Hawaii. It’s fun to take a virtual vacation through my kitchen!

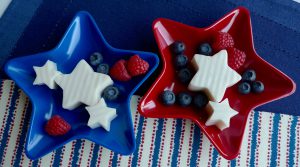
I stayed with that theme for the Fourth of July. To celebrate America’s birthday, I barbequed some huli huli chicken from a Cook’s Country recipe, which I would highly recommend. Then the grand finale of our dinner was haupia with fresh summer berries.

Haupia is a traditional Hawaiian coconut pudding with a mild sweet flavor. The consistency is much thicker than most pudding recipes, so it can be cut into shapes with a cookie cutter. I cut mine into stars, and then chose red and blue summer berries to round out the colors of the holiday. 🙂

Haupia

6 tablespoons cornstarch

1/4 cup water

1 can organic coconut milk (Note: Light coconut milk really doesn’t work very well in this recipe)

3 tablespoons granulated sugar

1/2 teaspoon vanilla extract

In a small bowl, whisk together the cornstarch and the water until they make a slurry.

In a medium saucepan, whisk together the coconut milk and sugar. While continuing to whisk, cook the mixture over medium heat until it just begins to boil.

Slowly pour the cornstarch and water mixture into the pan while whisking constantly. Cook until very thick, which will only take about a minute.

Take the pan off the heat. Add the vanilla and whisk well.

Pour the haupia into a 9 by 4 inch loaf pan. Spread until the pudding is an even layer in the pan.

Refrigerate overnight until the pudding is set.

Invert the haupia onto a cutting board. (The smooth side on the bottom makes a better presentation than the top side.) Cut into desired shapes with a knife or cookie cutter.

Serve and enjoy!

Maypole Cakes ~ Hummingbird Mini Bundt Cakes with Cream Cheese Filling

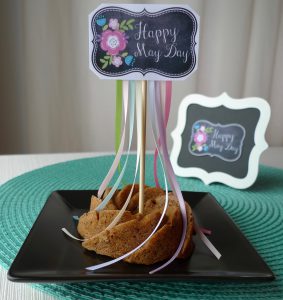
Today is May Day, which is also Lei Day in Hawaii! After the chilly and wet winter we’ve had in Seattle this year, I can appreciate a day that celebrates the arrival of springtime and the warm tropical state of Hawaii. (This holiday also gave me an excuse to bake more cake. 😉 ) I celebrated the occasion by making Maypole cakes out of one more batch of tropical hummingbird cakes!

I found the cute May Day printable design that inspired these cakes at ThePolkaDotPosie.com. They are absolutely adorable and free to use for personal use. 🙂 I hope you go over to their website to check out all of the cute designs they have.

I attached thin pastel ribbons to the printout, and mounted it all on a skewer. Then I attached the skewer near the middle of the cake for a cute edible display. I love how the swirl of the Bundt cake design gives the ribbons a little swirl.

Hummingbird Mini Bundt Cakes with Cream Cheese Filling

Makes 6 mini Bundt cakes (and 6 muffins)

For the filling:

8 ounces reduced-fat cream cheese, room temperature

1/4 cup granulated sugar

1 egg

1/4 cup all-purpose flour

For the cake:

Butter, softened, for preparing the pan

1 1/2 cups whole-wheat pastry flour

1/2 cup granulated sugar

1 1/2 teaspoons ground cinnamon

1/2 teaspoon baking soda

Pinch of salt

1/4 cup reduced-fat sour cream

2 tablespoons coconut oil, liquefied

1 egg

1 teaspoon vanilla extract

1 cup mashed ripe banana (about 2 or 3 bananas, depending on the size)

1/2 cup canned crushed pineapple, drained

3/4 cup pecans, toasted and chopped

1/2 cup desiccated unsweetened coconut (optional)

Powdered sugar, for dusting the cakes (optional)

For the filling:

In the bowl of a stand mixer fitted with a paddle attachment, add the cream cheese, sugar, and egg. Blend until everything is well combined. Then add the flour, and beat until just combined. Scoop the mixture into a piping bag fitted with a medium round nozzle. Set aside.

For the cake:

Evenly spread a thin layer of butter over all the nooks and crannies of the mini Bundt pan.

(Line a muffin pan with 6 paper liners for the leftover batter and filling if you wish.)

Preheat oven to 350 F.

In a large bowl, whisk together the flour, sugar, cinnamon, baking soda, and salt.

In a medium bowl, whisk together the sour cream, oil, egg, and vanilla. Add the banana and pineapple, and stir until well combined.

Add the wet ingredients to the dry ingredients, and stir until everything is just combined. Add the nuts and coconut (if using), and stir until they are evenly distributed in the batter.

Fill each well of the mini Bundt pan about 1/3 full. With the back of a small spoon, make a channel in the batter all around the pan. Pipe a layer of cream cheese filling into the channel, taking care to keep it away from the sides of the pan. Top the filling with batter until each well is about 3/4 full.

(With the remaining batter and filling, you can make muffins in the same manner, each with a dollop of filling in the middle. Bake for about 20 minutes, or until a toothpick inserted into the middle of a muffin comes out clean. Remove the muffins from the pan to cool on a wire rack.)

Bake the Bundt cakes for about 27 minutes, or until a toothpick inserted into the middle of a cake comes out clean.

Let the Bundt cakes cool in the pan. Once cooled, invert the cakes. If desired, dust with powdered sugar before serving.

Easter Treats ~ Hummingbird Mini Bundt Cakes with Cream Cheese Filling

Happy Easter!

To celebrate the holiday this year I made hummingbird cakes, which are a Southern classic with a tropical twist. They are filled with banana, pineapple, pecans, and sometimes coconut. That combination leads me to dream about warmer weather and palm trees! 😉 Plus the name of the dessert just sounds like springtime to me. I thought they would be perfect for Easter this year.

Hummingbird cakes are usually frosted with a cream cheese icing, but rather than cover the pretty Bundt cake design, I decided to fill mine with a cream cheese filling. The sweet cream cheese is a nice surprise to find when you cut into the cakes.

I used a mini Bundt pan that makes 6 small individual cakes. The pan holds about 4 cups of batter between the cakes. After filling the pan I still had some leftover batter and filling, so I made muffins with the extra in cute Easter liners. The muffins go well with coffee for breakfast. 🙂

Hummingbird Mini Bundt Cakes with Cream Cheese Filling

Makes 6 mini Bundt cakes (and 6 muffins)

For the filling:

8 ounces reduced-fat cream cheese, room temperature

1/4 cup granulated sugar

1 egg

1/4 cup all-purpose flour

For the cake:

Butter, softened, for preparing the pan

1 1/2 cups whole-wheat pastry flour

1/2 cup granulated sugar

1 1/2 teaspoons ground cinnamon

1/2 teaspoon baking soda

Pinch of salt

1/4 cup reduced-fat sour cream

2 tablespoons coconut oil, liquefied

1 egg

1 teaspoon vanilla extract

1 cup mashed ripe banana (about 2 or 3 bananas, depending on the size)

1/2 cup canned crushed pineapple, drained

3/4 cup pecans, toasted and chopped

1/2 cup desiccated unsweetened coconut (optional)

Powdered sugar, for dusting the cakes

For the filling:

In the bowl of a stand mixer fitted with a paddle attachment, add the cream cheese, sugar, and egg. Blend until everything is well combined. Then add the flour, and beat until just combined. Scoop the mixture into a piping bag fitted with a medium round nozzle. Set aside.

For the cake:

Evenly spread a thin layer of butter over all the nooks and crannies of the mini Bundt pan.

(Line a muffin pan with 6 paper liners for the leftover batter and filling if you wish.)

Preheat oven to 350 F.

In a large bowl, whisk together the flour, sugar, cinnamon, baking soda, and salt.

In a medium bowl, whisk together the sour cream, oil, egg, and vanilla. Add the banana and pineapple, and stir until well combined.

Add the wet ingredients to the dry ingredients, and stir until everything is just combined. Add the nuts and coconut (if using), and stir until they are evenly distributed in the batter.

Fill each well of the mini Bundt pan about 1/3 full. With the back of a small spoon, make a channel in the batter all around the pan. Pipe a layer of cream cheese filling into the channel, taking care to keep it away from the sides of the pan. Top the filling with batter until each well is about 3/4 full.

(With the remaining batter and filling, you can make muffins in the same manner, each with a dollop of filling in the middle. Bake for about 20 minutes, or until a toothpick inserted into the middle of a muffin comes out clean. Remove the muffins from the pan to cool on a wire rack.)

Bake the Bundt cakes for about 27 minutes, or until a toothpick inserted into the middle of a cake comes out clean.

Let the Bundt cakes cool in the pan. Once cooled, invert the cakes. Dust with powdered sugar before serving.
Double Irish Cheer ~ Stout and Whiskey Cupcakes

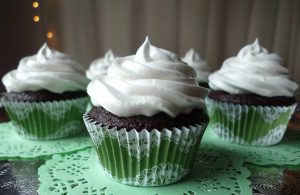
What’s even more Irish than chocolate Guinness cupcakes? Chocolate Guinness cupcakes topped with Irish whiskey frosting! I wanted to make one more round of cupcakes for the day. 🙂 These cupcakes celebrate two of the most famous flavors of Ireland – stout and whiskey.

I love how versatile the frosting I made in the last blog entry can be. It is a classic 7-minute frosting, which is fluffy and meringue-like. Unlike most frosting, this one is quite a bit lighter with no butter or cream. It is wonderful to work with and pipes beautifully. It doesn’t hold as well over time as a buttercream, so make it shortly before you need it, but it stays together for a few hours. I was so interested and excited about this frosting that I played with the recipe by making small batches in different flavors that I thought may pair well with the chocolate Guinness cupcakes. I made a sparkling wine frosting, a Harp beer frosting, and even an IPA beer frosting! But I settled on this Irish whiskey frosting to top one more batch of cupcakes for St. Patrick’s Day. This flavor was my pot of gold at the end of a rainbow of flavors. 😉

Stout and Whiskey Cupcakes

Makes about 24 standard-sized cupcakes

For the cupcakes:

1 cup Guinness stout

1/2 cup light olive oil

2 tablespoons skim milk

3/4 cup reduced-fat sour cream

2 eggs, beaten

1 teaspoon vanilla extract

3/4 cup unsweetened cocoa powder, sifted

1 1/4 cups granulated sugar

2 cups whole-wheat pastry flour

2 1/2 teaspoons baking soda

For the frosting:

1 cup granulated sugar

1/4 teaspoon cream of tartar

1/4 cup water

4 egg whites

Pinch of salt

3 tablespoons Irish whiskey (I used Jameson)

For the cupcakes:

Preheat oven to 350 F. Line 2 muffin tins with cupcake liners.

In a medium bowl, whisk together the stout, oil, milk, sour cream, eggs, and vanilla until everything is very well combined.

In a large bowl, whisk together the cocoa powder, sugar, flour, and baking soda.

Add the wet mixture in the medium bowl to the dry mixture in the large bowl, and whisk until just combined.

Divide the batter between the muffin tins, filling each cup about 2/3 full.

Bake for about 20 minutes, or until a toothpick inserted into the center of a cupcake comes out clean.

Let cool completely before frosting.

For the frosting:

Find a big pot in which the bowl of a stand mixer can fit inside without touching the bottom. Fill the pot with about 2 inches of water. (Take care that the water doesn’t touch the bottom of the bowl.) Bring the water to a simmer.

In a small bowl or measuring cup, mix the sugar and cream of tartar. In the bowl of the stand mixer, add all of the frosting ingredients except for the whiskey, and whisk until combined.

Place the bowl over the pot of simmering water. Attach a candy thermometer to the side of the bowl. Whisking often, let the mixture come up to 160 F. It will look a little frothy.

Once the mixture is at 160 F, remove the bowl from the pot and place it on the stand mixer fitted with a whisk attachment.

Whisk on high speed for about 7 minutes, or until the mixture is fluffy, cool, and very stiff. Add the whiskey, and whisk until just combined.

Pipe or spoon the frosting onto your cupcakes.

Happy St. Patrick’s Day ~ Chocolate Guinness Cupcakes

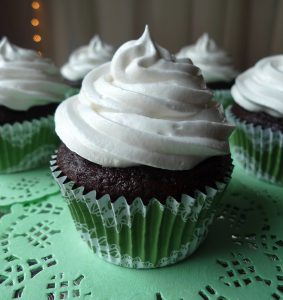
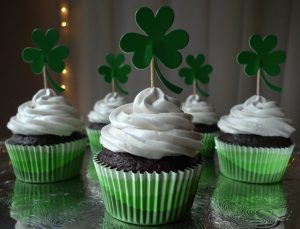
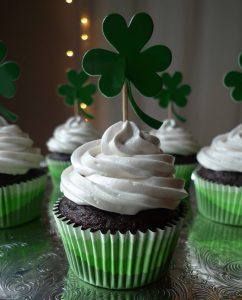
Happy St. Patrick’s Day! Even though I am not even a wee bit Irish, I still love this festive holiday. 🙂 I wore green all day, enjoyed an Irish cozy mystery, and made these chocolate Guinness cupcakes to celebrate!

For the cupcakes, I was inspired by a recipe from Nigella Lawson, and a recipe by Yolanda Gampp inspired the frosting.

Chocolate Guinness Cupcakes

Makes about 24 standard-sized cupcakes

For the cupcakes:

1 cup Guinness stout

1/2 cup light olive oil

2 tablespoons skim milk

3/4 cup reduced-fat sour cream

2 eggs, beaten

1 teaspoon vanilla extract

3/4 cup unsweetened cocoa powder, sifted

1 1/4 cups granulated sugar

2 cups whole-wheat pastry flour

2 1/2 teaspoons baking soda

For the frosting:

1 cup granulated sugar

1/4 teaspoon cream of tartar

1/4 cup Guinness stout

4 egg whites

Pinch of salt

For the cupcakes:

Preheat oven to 350 F. Line 2 muffin tins with cupcake liners.

In a medium bowl, whisk together the stout, oil, milk, sour cream, eggs, and vanilla until everything is very well combined.

In a large bowl, whisk together the cocoa powder, sugar, flour, and baking soda.

Add the wet mixture in the medium bowl to the dry mixture in the large bowl, and whisk until just combined.

Divide the batter between the muffin tins, filling each cup about 2/3 full.

Bake for about 20 minutes, or until a toothpick inserted into the center of a cupcake comes out clean.

Let cool completely before frosting.

For the frosting:

Find a big pot in which the bowl of a stand mixer can fit inside without touching the bottom. Fill the pot with about 2 inches of water. (Take care that the water doesn’t touch the bottom of the bowl.) Bring the water to a simmer.

In a small bowl or measuring cup, mix the sugar and cream of tartar. In the bowl of the stand mixer, add all of the frosting ingredients, and whisk until combined.

Place the bowl over the pot of simmering water. Attach a candy thermometer to the side of the bowl. Whisking often, let the mixture come up to 160 F. It will look a little frothy.

Once the mixture is at 160 F, remove the bowl from the pot and place it on the stand mixer fitted with a whisk attachment.

Whisk on high speed for about 7 minutes, or until the mixture is fluffy, cool, and very stiff.

Pipe or spoon the frosting onto your cupcakes for a nice fluffy head on your Guinness!

Valentine Sweets ~ Pink Heart Meringue Cookies

I made something sweet for my sweet to celebrate Valentine’s Day. 🙂

These crisp meringue cookies are tinted a lovely shade of pink with the simple addition of a little beet juice. For those of you without a juicer (like me!), I processed a couple of roasted red beets in a food processor. Then I put the beets into a few layers of cheesecloth and squeezed out as much juice as I could. Voila…nature’s red food coloring!

Use these little hearts to make a schaum torte, an Eton mess, or just eat them on their own. 🙂

Pink Heart Meringue Cookies

4 egg whites, room temperature

1/2 teaspoon cream of tartar

1/2 cup granulated sugar

Pinch of salt

1 teaspoon cornstarch

1 teaspoon vanilla extract

1 teaspoon red beet juice

Preheat oven to 225 F. Line 2 baking sheets with parchment paper. Wipe the bowl and whisk attachment of a stand mixer with vinegar to ensure it is free of any oil.

Add the egg whites and cream of tartar to the bowl of the stand mixer, and whisk until they begin to look frothy. Very slowly sprinkle in the sugar while continuing to whisk. The mixture will become thick and glossy with stiff peaks. Rub a small amount of the mixture between your fingers, and if it is smooth with no sugar granules remaining, you are there. At this point, add the salt, cornstarch, vanilla, and beet juice, and whisk until just combined.

Transfer the mixture to a piping bag fitted with a large star tip.

On the prepared baking sheets, pipe the mixture into heart shapes.

Bake for about 1 hour and 15 minutes. Then turn off the oven, but leave the meringues in the oven for another 30 minutes. Let cool completely.

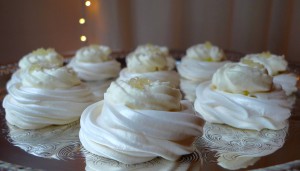
Waitangi Day ~ Mini Pavlovas with Kiwi Fruit

Australia isn’t the only country Down Under with a holiday this season. (See my last Australia Day post.) New Zealand also has a national holiday today called Waitangi Day! The occasion inspired me to learn more about the beautiful country of New Zealand, and to celebrate New Zealand’s culture in my own small way.

As usual, celebrating my way begins in the kitchen! I made another batch of mini Pavlovas for the special day. 🙂 No one really knows if the first Pavlova was made in Australia or New Zealand, so I thought I’d give both countries recognition. (And if I’m perfectly honest, it just gave me an excuse to make another batch of this dreamy dessert! 😉 ) I topped these New Zealand Pavlovas with sliced kiwi fruit.

Mini Pavlovas with Kiwi Fruit

For the meringue:

4 egg whites, room temperature

1/2 teaspoon cream of tartar

1/2 cup granulated sugar

Pinch of salt

1 teaspoon cornstarch

1 teaspoon vanilla extract

For the finishing touches:

Approximately 1 cup heavy whipping cream

Approximately 1 tablespoon granulated sugar

2 kiwi fruit, peeled and sliced

For the meringue:

Preheat oven to 225 F. Line 2 baking sheets with parchment paper. Wipe the bowl and whisk attachment of a stand mixer with vinegar to ensure it is free of any oil.

Add the egg whites and cream of tartar to the bowl of the stand mixer, and whisk until they begin to look frothy. Very slowly sprinkle in the sugar while continuing to whisk. The mixture will become thick and glossy with stiff peaks. Rub a small amount of the mixture between your fingers, and if it is smooth with no sugar granules remaining, you are there. At this point, add the salt, cornstarch, and vanilla, and whisk until just combined.

Transfer the mixture to a piping bag fitted with a large star tip.

On the prepared baking sheets, pipe the mixture into small rounds, leaving a small indentation in the middle of each meringue.

Bake for about 1 hour and 15 minutes. Then turn off the oven, but leave the meringues in the oven for another 30 minutes. Let cool completely.

For the finishing touches:

In the bowl of a stand mixer fitted with the whisk attachment, whip the heavy cream and sugar until soft peaks form. (You want to whip it slightly less than you would like your finished product to be, since piping the cream will continue to stiffen it.) Transfer the whipped cream to a piping bag fitted with the same star tip used for the meringues.

Pipe a little whipped cream over the top of each meringue, and finish with a few pieces of sliced kiwi on top.

Australia Day ~ Mini Pavlovas with Lime Curd and Finger Limes

Mini Pavlovas with Lime Curd and Finger LimesEvery January, the good people Down Under celebrate Australia Day! It is summertime in the Southern Hemisphere, so much like we celebrate the Fourth of July, Australians enjoy barbeques, concerts, and fireworks on this summery holiday.

Those of us in the middle of winter in the Northern Hemisphere could use a little summer right about now! 😉 It is quite chilly, dark, and wet in Seattle. These little Pavlovas with lime curd and finger limes were just the things to brighten up a winter day. Pavlovas are a quintessential dessert of Australia, where finger limes are also native. I couldn’t think of anything more perfect to celebrate this special day.

Mini Pavlovas with Lime Curd and Finger Limes

For the curd:

1/4 cup + 2 tablespoons granulated sugar

2 eggs or 3 egg yolks

1/4 cup lime juice (juice from approximately 2 limes)

3 teaspoons lime zest, divided (zest from approximately 3 limes)

2 tablespoons unsalted butter, cut into pieces

For the meringue:

4 egg whites, room temperature

1/2 teaspoon cream of tartar

1/2 cup granulated sugar

Pinch of salt

1 teaspoon cornstarch

1 teaspoon vanilla extract

For the finishing touches:

Approximately 1 cup heavy whipping cream

Approximately 1 tablespoon granulated sugar

1 large finger lime

For the curd:

In a medium saucepan, add the sugar, eggs, juice, and 2 teaspoons of zest. Heat over medium high heat. Whisk steadily until the mixture begins to bubble gently and thicken. Remove the pan from the heat, and whisk in the butter. Strain the mixture. Then add the remaining zest, and stir well. Chill the curd.

For the meringue:

Preheat oven to 225 F. Line 2 baking sheets with parchment paper. Wipe the bowl and whisk attachment of a stand mixer with vinegar to ensure it is free of any oil.

Add the egg whites and cream of tartar to the bowl of the stand mixer, and whisk until they begin to look frothy. Very slowly sprinkle in the sugar while continuing to whisk. The mixture will become thick and glossy with stiff peaks. Rub a small amount of the mixture between your fingers, and if it is smooth with no sugar granules remaining, you are there. At this point, add the salt, cornstarch, and vanilla, and whisk until just combined.

Transfer the mixture to a piping bag fitted with a large star tip.

On the prepared baking sheets, pipe the mixture into small rounds, leaving a small indentation in the middle of each meringue.

Bake for about 1 hour and 15 minutes. Then turn off the oven, but leave the meringues in the oven for another 30 minutes. Let cool completely.

For the finishing touches:

In the bowl of a stand mixer fitted with the whisk attachment, whip the heavy cream and sugar until soft peaks form. (You want to whip it slightly less than you would like your finished product to be, since piping the cream will continue to stiffen it.) Transfer the whipped cream to a piping bag fitted with the same star tip used for the meringues.

Dollop a little lime curd in the middle of each meringue. Pipe a little whipped cream over the top. Finish with a few pieces of finger lime on top of each Pavlova.Mini Pavlovas with Lime Curd and Finger Limes

One more Christmas cookie for the season ~ Eggnog Sugar Cookies with Eggnog Glaze

Eggnog Sugar Cookies with Eggnog GlazeI couldn’t resist making one more batch of Christmas cookies before the holiday. 🙂 I altered my sugar cookie recipe to make them eggnog sugar cookies! I added a good amount of nutmeg to the batter, and replaced a little of the butter in the original recipe with eggnog. Then I made a simple eggnog glaze as the finishing touch.

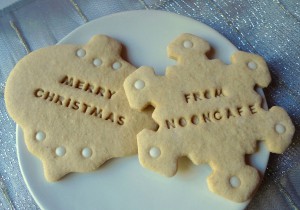
Merry Christmas from my kitchen to yours!

Eggnog Sugar Cookies with Eggnog Glaze

For the cookies:

2 cups whole-wheat pastry flour

1/4 teaspoon freshly ground nutmeg

Pinch of salt

1/4 cup + 2 tablespoons unsalted room temperature butter

1/2 cup granulated sugar

2 eggs

2 tablespoons eggnog (I used Organic Valley Eggnog)

1 teaspoon vanilla extract

For the glaze:

1/2 cup powdered sugar, or more to make a thicker glaze

1/4 cup eggnog

For the cookies:

In a large bowl, whisk together the flour, nutmeg, and salt. In the bowl of a stand mixer fitted with a paddle attachment, cream the butter and sugar until light and fluffy. Beat in the eggs, one at a time. Add the eggnog and vanilla, and continue beating until all of the wet ingredients are well combined. Add the flour mixture, and beat until just combined. Wrap the dough in plastic wrap and refrigerate for at least an hour.

Preheat oven to 350 F.

Prepare two baking sheets with parchment paper.

On a floured work surface, roll the dough until it is slightly thicker than 1/8 inch. Cut into desired shapes with a cookie cutter.

Place the cookies on the prepared baking sheets.

Bake for about 7 minutes, or until slightly firm in the middle, rotating the pan halfway through. Cool the cookies completely on a wire rack.

For the glaze:

Whisk the sugar and eggnog together until the mixture is completely smooth. Either spread or pipe the glaze onto your cookies.

Christmas Cookies! ~ Mexican Hot Cocoa Cookies

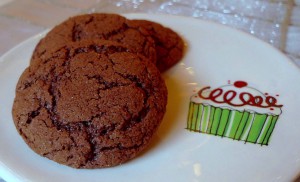
Mexican Hot Cocoa CookiesIt’s Christmastime again! I hope you are enjoying all of the things this season has to offer…the lights, the decorations, the music…and of course, the cookies. 🙂

I made these festive little Mexican hot cocoa cookies this year. They are sweet and tender bites with a little spicy heat from cayenne pepper. I also love that Mexican hot cocoa naturally includes Christmassy spices like cinnamon, and sometimes nutmeg, so these cookies seemed like a perfect choice for this time of the year. 🙂

Mexican Hot Cocoa Cookies

Inspired by a recipe from Martha Stewart

Makes about 18 cookies

1 cup whole-wheat pastry flour

1/4 cup unsweetened cocoa powder, sifted

1 teaspoon cream of tartar

1/2 teaspoon baking soda

Pinch of salt

1/8 teaspoon freshly ground nutmeg

1/8 teaspoon cayenne pepper

1/2 teaspoon + 1 teaspoon ground cinnamon, divided

6 tablespoons room temperature butter

1/2 cup + 1/4 cup granulated sugar, divided

1/2 teaspoon vanilla extract

2 tablespoons skim milk

1 egg

Move your oven rack so that it is about 1/3 of the way down from the top. Preheat to 400 F. Line two sheet pans with parchment paper.

In a medium bowl, whisk together the flour, cocoa powder, cream of tartar, baking soda, salt, nutmeg, cayenne, and 1/2 teaspoon of cinnamon.

In the bowl of a stand mixer fitted with a paddle attachment, beat the butter and 1/2 cup of sugar until light and fluffy. Add the vanilla, milk, and egg. Beat until well combined. The mixture will look a bit broken when you start mixing at this point, but just keep at it, and it will come together. Add the dry ingredients and mix until just combined. The dough will be rather sticky.

In a shallow bowl, add the remaining sugar (1/4 cup) and cinnamon (1 teaspoon.) Whisk until combined.

Using a tablespoon, scoop out balls of dough. Roll the balls between your hands. Drop them into the sugar and cinnamon mixture and coat well. Place the dough balls on your prepared baking sheet. Repeat the process until you use all of the dough. Make sure the cookies have a couple of inches to spread on the sheet.

Bake for about 10 minutes, or until the cookies are set and a bit cracked on top.

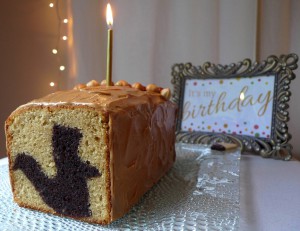
Happy Birthday! ~ Hidden Surprise Squirrel Cake

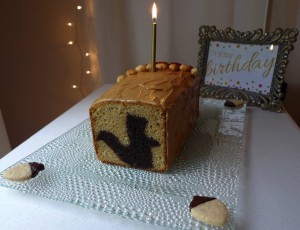
Hidden Surprise Squirrel CakeTo celebrate my hubby’s birthday, I surprised him with this hidden squirrel cake. He was certainly not expecting a cake quite like this, but he loved it. 🙂 Since we enjoy watching the active little squirrel community in our backyard so much, I chose this design. But you could make this cake with whatever shape suits your fancy. I think a pumpkin hidden in the middle would be rather cute for Thanksgiving, or a hidden star would make a festive Christmas cake!

I made this cake using two recipes, which I’ve already posted on Noon Café. I used a double batch of chocolate devil’s food cake for the interior and a double batch of yellow cake for the exterior. I had a little leftover cake and batter, which I just used in a few cupcakes on the side … And I ate a few of the leftover chocolate cake bits while I was working on this project! 😉

I think almost any basic cake recipe would work for this idea, but the most important thing when choosing what kind of cake to use is that the colors between the two cakes need to be distinctly different.

The tools I used were a 4 x 9-inch loaf pan and a squirrel cookie cutter that was about 7 inches high. You could use a smaller loaf pan if you like, and, as I said before, a different cutter. The cutter you choose just needs to be smaller than the pan.

So, first grease your loaf pan and line with parchment paper to make sure the cake comes out in one piece without sticking. Then, make the cake batter that you will use for your cutout design. Fill the pan about 3/4 of the way full.

Then get baking. The cake is done when a skewer inserted in the center comes out clean and the top springs back to the touch. My double batch of devil’s food cake took about 80 minutes to cook through. Be sure to let the cake cool completely.

Remove the cake from the pan. Cut it into slices that are not thicker than the depth of your cookie cutter. Then cut each slice with your cutter, stack them together, and set aside.

Next, it’s time to make the second cake batter for the outside of the cake. Put some of the batter into a piping bag.

Clean and grease the same loaf pan you used before and line with new parchment paper to make sure the cake comes out in one piece without sticking.

Now you’re ready to pipe a line of batter lengthwise into the bottom of the pan. This will help “glue” the shapes to the bottom and keep them from moving while they bake.

Set the cutout cake shapes upright in a row along the line of batter. The row of cutouts should go the full length of the pan, touching both ends to help keep it all in place. Pipe the batter with a pastry bag to get into the crevices of the shape. Fill the pan about 3/4 full with the batter, and gently smooth the top.

We don’t want any big air bubbles, so rap the pan on the counter to make sure the batter is settled.

Now get baking once more. Again, the cake is done when a skewer inserted in the center comes out clean and the top springs back to the touch. My yellow cake took about 70 minutes to cook through. Again, let the cake cool completely, and then when you slice into the cake, you should see your cutout design!

This is more of a technique than a recipe, so there is a lot of room for creativity with different flavors and shapes. I am excited to try some different variations after we eat this one. 🙂 I hope you’ll give it a try!

If you’re like me, you might find it easier to learn these techniques by seeing them rather than reading about them. So here’s a little video of a bunny cake that uses the same technique I used for my squirrel cake.Hidden Surprise Squirrel Cake

Wedding Anniversary Dinner ~ Lemon Verbena Whole-Wheat Shortbread Cookies

Lemon Verbena ShortbreadI made two desserts for our sweet sixteenth wedding anniversary dinner – The blackberry cabernet gelée I blogged about earlier, and these lemon verbena whole-wheat shortbread cookies. I love the bright citrusy flavor of lemon verbena, which is a nice compliment to these buttery cookies. They were the perfect ending to a beautiful summer evening celebration!

Lemon Verbena Whole-Wheat Shortbread Cookies

Approximately 20 leaves of fresh lemon verbena, stems removed, roughly chopped

1 cup whole-wheat pastry flour

Pinch of salt

1/2 cup unsalted butter, room temperature

1/4 cup confectioner’s sugar

1/2 teaspoon vanilla extract or vanilla bean paste

1/2 teaspoon lemon zest

All-purpose flour for dusting work surface

In the bowl of a food processor, add the lemon verbena, whole-wheat pastry flour, and salt. Process until the lemon verbena leaves are cut into tiny pieces.

In the bowl of a stand mixer fitted with a paddle attachment, cream the butter, sugar, vanilla, and lemon zest until light and fluffy. Add the flour mixture, and mix until just combined. Be careful not to overmix at this point.

Form the dough into a disc and cover with plastic wrap. Let chill in the refrigerator at least 2 hours or overnight.

Preheat oven to 325 degrees F.

Line a baking sheet with parchment paper.

Sprinkle a little all-purpose flour on a rolling pin and a clean work surface. Roll out the dough until it is about 1/8-inch thick. Cut into desired shapes with cookie cutters. Place the cookies on the prepared baking sheet. Bake for about 12 minutes, or until cooked through.Lemon Verbena Shortbread

Wedding Anniversary Dinner ~ Blackberry Cabernet Gelée

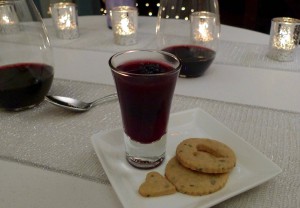
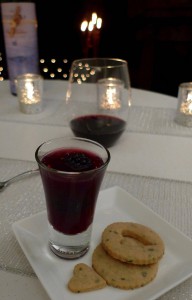
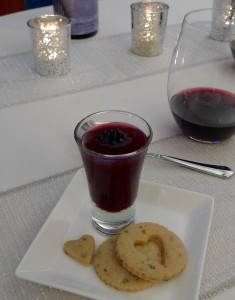
Blackberry Cabernet GeléeAfter the main course of duck breast with a farmers’ market plum sauce, the grand finale of our anniversary dinner was a duo of desserts. (Since this anniversary was our sweet sixteen, I thought two desserts were in order! 😉 ) I made blackberry cabernet gelée accompanied by lemon verbena shortbread cookies. (The cookie recipe will follow in my next post.)

I have enjoyed making several gelatin desserts this summer, and I thought this blackberry and cabernet gelée was an elegant way to close the season. I also loved that they could be made a day in advance, so I wasn’t in the kitchen all day on our anniversary.

Blackberry Cabernet Gelée

Based on a recipe from Martha Stewart

1/2 cup apple juice

1/2 cup cold water

1 packet or 2 1/2 teaspoons of Knox powdered gelatin

1 cup Cabernet Sauvignon (I used one from 14 Hands Winery)

3 tablespoons granulated sugar

1 pint of blackberries

Set aside pretty serving glasses. Add several blackberries to each glass.

In a medium bowl, add the apple juice and water. Sprinkle the gelatin over the top of the liquids. Let stand about 5 minutes, or until the gelatin has bloomed.

In a medium saucepan, add the wine and the sugar. Bring to a boil and let the sugar dissolve.

Once the sugar has dissolved, pour the wine mixture into the apple juice mixture. Whisk to combine.

Transfer the mixture to a vessel with a spout. Fill the serving glasses. Refrigerate until the gelatin has set. I let mine chill overnight.

Seattle Anniversary ~ Cappuccino Panna Cotta

Cappuccino Panna CottaToday I am celebrating 21 years living in Seattle and 18 years in Leschi! Seattle is full of coffee shops, so I couldn’t think of anything more fitting to make to celebrate my home than an espresso dessert. In honor of the day, I made cappuccino panna cotta!

I used the creamy gelatin dessert recipe I have used a few times this summer. It is made with whole milk and 2% Greek-style yogurt rather than the heavy cream that is traditional in panna cotta. Even without the cream, I think it is quite luscious. 🙂 I just added a little espresso powder to the original recipe to make this version coffee-flavored.

Cappuccino Panna Cotta

1 1/2 teaspoons plain powdered gelatin

2 teaspoons cold water

2 cups 2% Greek-style yogurt

1/2 teaspoon vanilla extract or vanilla bean paste

1 cup whole milk

1/3 cup granulated sugar

2 teaspoons espresso powder

In a small bowl, add the gelatin to the water and let it bloom. In a medium bowl, add the yogurt and vanilla. In a medium saucepan, bring the milk and sugar to a simmer, whisking to dissolve the sugar. Once the milk is simmering, remove from the heat, add the bloomed gelatin, and whisk to combine. Let the milk cool to room temperature. Pour the milk mixture into the bowl with the yogurt mixture and whisk until well combined.

Transfer 1/3 of the mixture to a container with a spout.

Add the espresso powder to the remaining mixture, and whisk until the powder is dissolved and well combined.

Transfer the mixture with the espresso into a second container with a spout.

Pour the espresso-flavored mixture into serving glasses, leaving a little room on top for a thin white layer. Let the first layer completely set in the refrigerator. Then top with the reserved white mixture to make the cappuccino’s “foam.” Let the dessert set completely in the refrigerator before serving.Cappuccino Panna Cotta

Summertime Sweets ~ Orange and Cream Gelatin Cups

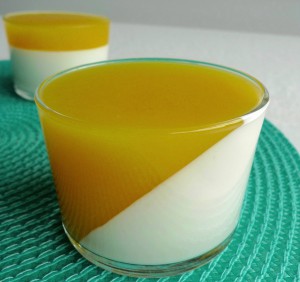
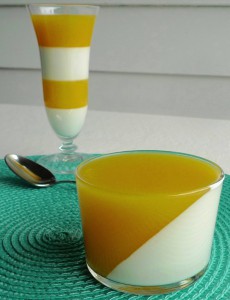
Orange and Cream GelatinNothing says summer to me more than the classic pairing of orange and cream. To get into the season, I made these layered gelatin desserts. The white layer is lusciously creamy, even though there is no actual cream in the recipe. And the orange juice layer gives it the perfect amount of tang and sweetness. It’s delicious and bikini friendly. 😉 That’s my kind of summer treat!

I used my red, white, and blue parfait recipe, but I just swapped the cherry juice for orange.

Orange and Cream Gelatin Cups

For the white layer:

1 1/2 teaspoons plain powdered gelatin

2 teaspoons cold water

2 cups 2% Greek-style yogurt

1/2 teaspoon vanilla extract or vanilla bean paste

1 cup whole milk

1/3 cup granulated sugar

For the orange layer:

3 teaspoons plain powdered gelatin

3 cups freshly squeezed orange juice, strained

Set aside 4 serving glasses.

For the white layer:

In a small bowl, add the gelatin to the water and let it bloom. In a medium bowl, add the yogurt and vanilla. In a medium saucepan, bring the milk and sugar to a simmer, whisking to dissolve the sugar. Once the milk is simmering, remove from the heat, add the bloomed gelatin, and whisk to combine. Let the milk cool to room temperature. Pour the milk mixture into the bowl with the yogurt mixture and whisk until well combined. Transfer the mixture to a container with a spout.

To get the diagonal look, prop your serving glasses at an angle in a muffin tin. Pour the white layer into the angled glasses. Keeping the glasses at an angle, refrigerate until the white layer is set.

For the orange layer:

In a medium bowl, sprinkle the gelatin over 1 cup of orange juice. Let the gelatin bloom. In a medium saucepan, bring the remaining 2 cups of orange juice to a boil. Once it is boiling, remove from the heat. Add the bowl with the gelatin to the hot juice and whisk well. Transfer the mixture to a container with a spout.

Once the white gelatin is completely set, set the glasses upright. Fill the serving glasses to the top with the orange gelatin. Chill until well set, preferably overnight.Orange and Cream Gelatin

Fourth of July Sweets ~ Red, White, and Blue Parfaits

Red, White, and Blue ParfaitFor the grand finale of our Fourth of July dinner, I made red, white, and blue parfaits layered with tart cherry and vanilla yogurt gelatin topped with a layer of blueberries. 🙂 Yum!

The little desserts did take a bit of time to make since I needed to wait for each layer to set before I could pour the next, but most of that time was not spent actively in the kitchen. I could kick back and read a Fourth of July mystery out on the deck while I waited. 🙂 But I think they were well worth the effort. Plus, they can be made a day or two ahead, which is an added bonus.
If you didn’t have time to cook all of the red, white, and blue dishes you wanted to make this weekend, this one would also be perfect for Bastille Day on the 14th!

Red, White, and Blue Parfaits

For the red layer:

3 teaspoons plain powdered gelatin

3 cups tart cherry juice (or really any natural red 100% fruit juice you like!)

For the white layer:

1 1/2 teaspoons plain powdered gelatin

2 teaspoons cold water

2 cups 2% Greek-style yogurt

1/2 teaspoon vanilla extract or vanilla bean paste

1 cup whole milk

1/3 cup granulated sugar

Set aside 4 serving glasses. I used two tall parfait glasses and two martini glasses. I think wine glasses would also be pretty.

For the red layer:

In a medium bowl, sprinkle the gelatin over 1 cup of cherry juice. Let the gelatin bloom. In a medium saucepan, bring the remaining 2 cups of cherry juice to a boil. Once it is boiling, remove from the heat. Add the bowl with the gelatin to the hot juice and whisk well. Transfer the mixture to a container with a spout.

Fill the serving glasses about 1/4 full with the cherry gelatin. Refrigerate the glasses until the red layer is set. (Mine took a couple of hours.) Set aside the remaining cherry gelatin and hold at room temperature.

For the white layer:

In a small bowl, add the gelatin to the water and let it bloom. In a medium bowl, add the yogurt and vanilla. In a medium saucepan, bring the milk and sugar to a simmer, whisking to dissolve the sugar. Once the milk is simmering, remove from the heat, add the bloomed gelatin, and whisk to combine. Let the milk cool to room temperature. Pour the milk mixture into the bowl with the yogurt mixture and whisk until well combined. Transfer the mixture to a container with a spout.

Pour the white gelatin onto the set layer of red gelatin so the height of the white layer is approximately the same as the red. (Make sure the gelatin layer below is truly set before pouring the next layer on top.) Refrigerate the glasses until the white layer is set. Set aside the remaining white gelatin and hold at room temperature.

Repeat the layers until you have two layers of red and two of white. Chill until well set, preferably overnight. Top with blueberries and a cherry in the middle right before serving.Red, White, and Blue Parfait

A Culinary Trip to Vietnam ~ Banh Bot Bang

Banh Bo BangMy hubby just returned from a business trip to Danang, Vietnam. While he was gone, I spent a lot of time learning about Vietnamese food! Cooking is one way I like to explore different cultures and “travel” in a way. Since I couldn’t go with him on this particular trip, spending time in my kitchen making Vietnamese dishes was a close second for me. 🙂 On my cooking adventure, I made Bo La Lot, Banh Xeo, and these little tapioca pearl balls filled with a sweet mung bean paste called Banh Bot Bang.

I used a recipe from my favorite Vietnamese recipe website that I discovered a couple of years ago called Danang Cuisine. The texture of this dessert is really what makes it interesting – It is springy and chewy on the outside and dense and rich on the inside. Then the luscious coconut sauce raises the bar to make this quite a remarkable dessert!

Banh Bot Bang

Based on a recipe from DanangCuisine.com

For the balls:

½ cup peeled split mung beans, rinsed, soaked in water for at least 2 hours or overnight, drained

4 tablespoons plus 3 teaspoons granulated sugar

½ cup unsweetened canned coconut milk

1 ½ cups small tapioca pearls, soaked in water for about 30 minutes, drained

3 teaspoons cornstarch

For the sauce:

½ cup unsweetened canned coconut milk

1 teaspoon cornstarch

2 tablespoons granulated sugar

Pinch of salt

2 pandan leaves (optional)

For the balls:

In a small saucepan with a lid, add the mung beans and enough water to cover the beans. Cover the pot with the lid. Bring the beans to a low boil and cook until they are soft enough to smash with a spoon. Drain the excess water. Add the cooked mung beans, 4 tablespoons of sugar, and ½ cup coconut milk to a food processor. Process until smooth. Return the mixture to the saucepan. Over medium heat, stirring occasionally, cook down the mung bean mixture until it is the consistency of paste.

Scoop the paste out onto a plate and let cool.

When the mung bean paste is cool, roll it into small balls, each about 1 centimeter in diameter. Set aside while you make the outer tapioca portion of the dessert.

Preheat a large steamer pot or a bamboo steamer on medium heat. Cut a piece a parchment to cover the portion of the steamer that will come in contact with the food. Wrap the pot’s lid with a kitchen towel so the condensation from the steam doesn’t drip down into the pot.

Mix ½ cup of the tapioca pearls with 1 teaspoon of cornstarch and 1 teaspoon of granulated sugar. Microwave the mixture on high for about 20 seconds, or until it is a little sticky.

Lay a piece of plastic wrap on a clean work surface. Place a small amount (approximately 1 ½ tablespoons) of the sticky tapioca pearls to the center of the plastic wrap, and press down into a disc. Add one of the mung bean balls in the center of the disc. Using the plastic wrap to help, wrap the mung bean ball completely with the tapioca mixture. Then remove the plastic wrap.

Place the balls into the prepared steamer basket. Be sure they don’t touch, or they will stick together. Cover and steam for about 15 minutes. Remove the pot from the heat, but keep the lid in place. Let sit for another 10 minutes, or until the tapioca is translucent.

Repeat the process with the remaining ingredients, working in 2 more batches.

For the sauce:

In the meantime, make the coconut sauce. In a small saucepan, combine the coconut milk, cornstarch, sugar, and salt. Whisk well. Then add the pandan leaves to the pot. Bring the mixture to a boil, and cook for 30 seconds. Remove from the heat, and let the mixture cool to room temperature. Remove the pandan leaves.

Serve the tapioca balls with the sauce.