 Happy Easter!
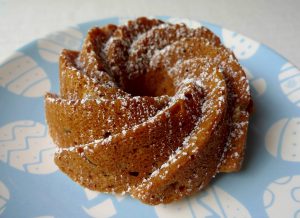
To celebrate the holiday this year I made hummingbird cakes, which are a Southern classic with a tropical twist. They are filled with banana, pineapple, pecans, and sometimes coconut. That combination leads me to dream about warmer weather and palm trees! 😉 Plus the name of the dessert just sounds like springtime to me. I thought they would be perfect for Easter this year.
Hummingbird cakes are usually frosted with a cream cheese icing, but rather than cover the pretty Bundt cake design, I decided to fill mine with a cream cheese filling. The sweet cream cheese is a nice surprise to find when you cut into the cakes.
I used a mini Bundt pan that makes 6 small individual cakes. The pan holds about 4 cups of batter between the cakes. After filling the pan I still had some leftover batter and filling, so I made muffins with the extra in cute Easter liners. The muffins go well with coffee for breakfast. 🙂
Hummingbird Mini Bundt Cakes with Cream Cheese Filling
Makes 6 mini Bundt cakes (and 6 muffins)
For the filling:
8 ounces reduced-fat cream cheese, room temperature
1/4 cup granulated sugar
1 egg
1/4 cup all-purpose flour
For the cake:
Butter, softened, for preparing the pan
1 1/2 cups whole-wheat pastry flour
1/2 cup granulated sugar
1 1/2 teaspoons ground cinnamon
1/2 teaspoon baking soda
Pinch of salt
1/4 cup reduced-fat sour cream
2 tablespoons coconut oil, liquefied
1 egg
1 teaspoon vanilla extract
1 cup mashed ripe banana (about 2 or 3 bananas, depending on the size)
1/2 cup canned crushed pineapple, drained
3/4 cup pecans, toasted and chopped
1/2 cup desiccated unsweetened coconut (optional)
Powdered sugar, for dusting the cakes
For the filling:
In the bowl of a stand mixer fitted with a paddle attachment, add the cream cheese, sugar, and egg. Blend until everything is well combined. Then add the flour, and beat until just combined. Scoop the mixture into a piping bag fitted with a medium round nozzle. Set aside.
For the cake:
Evenly spread a thin layer of butter over all the nooks and crannies of the mini Bundt pan.
(Line a muffin pan with 6 paper liners for the leftover batter and filling if you wish.)
Preheat oven to 350 F.
In a large bowl, whisk together the flour, sugar, cinnamon, baking soda, and salt.
In a medium bowl, whisk together the sour cream, oil, egg, and vanilla. Add the banana and pineapple, and stir until well combined.
Add the wet ingredients to the dry ingredients, and stir until everything is just combined. Add the nuts and coconut (if using), and stir until they are evenly distributed in the batter.
Fill each well of the mini Bundt pan about 1/3 full. With the back of a small spoon, make a channel in the batter all around the pan. Pipe a layer of cream cheese filling into the channel, taking care to keep it away from the sides of the pan. Top the filling with batter until each well is about 3/4 full.
(With the remaining batter and filling, you can make muffins in the same manner, each with a dollop of filling in the middle. Bake for about 20 minutes, or until a toothpick inserted into the middle of a muffin comes out clean. Remove the muffins from the pan to cool on a wire rack.)
Bake the Bundt cakes for about 27 minutes, or until a toothpick inserted into the middle of a cake comes out clean.
Let the Bundt cakes cool in the pan. Once cooled, invert the cakes. Dust with powdered sugar before serving.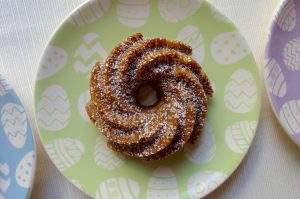
Happy Fourth of July! ~ Haupia Stars
/0 Comments/in Dessert, Fourth of July /by LauraYou might have noticed I am on a Hawaiian kick this summer, exploring the many foods of Hawaii. It’s fun to take a virtual vacation through my kitchen!
I stayed with that theme for the Fourth of July. To celebrate America’s birthday, I barbequed some huli huli chicken from a Cook’s Country recipe, which I would highly recommend. Then the grand finale of our dinner was haupia with fresh summer berries.
Haupia is a traditional Hawaiian coconut pudding with a mild sweet flavor. The consistency is much thicker than most pudding recipes, so it can be cut into shapes with a cookie cutter. I cut mine into stars, and then chose red and blue summer berries to round out the colors of the holiday. 🙂
Haupia
6 tablespoons cornstarch
1/4 cup water
1 can organic coconut milk (Note: Light coconut milk really doesn’t work very well in this recipe)
3 tablespoons granulated sugar
1/2 teaspoon vanilla extract
In a small bowl, whisk together the cornstarch and the water until they make a slurry.
In a medium saucepan, whisk together the coconut milk and sugar. While continuing to whisk, cook the mixture over medium heat until it just begins to boil.
Slowly pour the cornstarch and water mixture into the pan while whisking constantly. Cook until very thick, which will only take about a minute.
Take the pan off the heat. Add the vanilla and whisk well.
Pour the haupia into a 9 by 4 inch loaf pan. Spread until the pudding is an even layer in the pan.
Refrigerate overnight until the pudding is set.
Invert the haupia onto a cutting board. (The smooth side on the bottom makes a better presentation than the top side.) Cut into desired shapes with a knife or cookie cutter.
Serve and enjoy!
Warm Weather Appetizers ~ Chicken Lau Lau on Purple Sweet Potatoes with Taro Chips
/0 Comments/in Appetizer, Chicken, Snack, Summer /by LauraI served some of the shredded lau lau as an appetizer on rectangles of purple sweet potato with taro chips to garnish. I love how the colors of the potato and taro compliment one another, and I also think using both the leaf and the root of the taro plant balances the dish nicely.
We enjoyed the remaining lau lau as a main course for a few days (with the extra bits of baked sweet potato!) It is a bit of a project to make this dish, so I recommend making a lot for leftovers. Or, this is a great dish to serve a big crowd. Perfect for a summer backyard luau!
Chicken Lau Lau on Purple Sweet Potatoes with Taro Chips
9 chicken thighs, skin removed, trimmed of excess fat
About 18 fresh taro leaves
About 18 ti leaves or 2 large banana leaves
Hawaiian sea salt
2 large purple sweet potatoes (I used Okinawan sweet potatoes)
Olive oil
Taro chips
Preheat oven to 350 F.
Set aside either a large pot with a lid, or a large casserole dish with two layers of aluminum foil to cover.
Salt the chicken liberally, and rub the salt into the meat with your fingers.
Remove the tough stems from the taro leaves. If using ti leaves, remove the tough stems. If using banana leaves, cut into manageable pieces, approximately 8 or 9 inches in length.
Nestle 2 taro leaves together. Place 1 chicken thigh in the middle of the leaves. Wrap it into a bundle so the chicken is completely covered by the leaves.
Then wrap the taro bundle in the ti or banana leaves so it is completely covered. Either tie the bundles with kitchen twine (or traditionally, the stem of the ti leaf) or make sure the last fold is on the bottom so they stay closed while cooking.
Place the bundles in the prepared pot or dish. Bake for approximately 3 1/2 hours, or until the chicken falls off the bone and shreds easily.
The ti and banana leaves are not edible, so remove before serving.
Shred two or three bundles of chicken for the appetizers. Reserve the remaining lau lau for an easy weeknight main course.
Turn up your oven to 400 F.
Prepare two baking sheets with parchment paper.
Cut 2 large purple sweet potatoes into approximately 1/3-inch slices. Then cut the slices into rectangles.
Toss the rectangles (and the extra bits) in olive oil so every side is well coated. Sprinkle with sea salt, and toss to evenly coat. Arrange the potatoes on the baking sheets in a single layer.
Bake for about 10 minutes, turn the potatoes over, and continue to bake until fork tender.
To serve, top the potato squares with some shredded lau lau chicken. Top each with a piece of taro chip for garnish.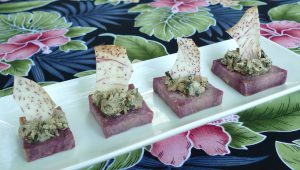
Beachside Snack ~ Crunchy Roasted Chickpeas with Hawaiian Sea Salt
/0 Comments/in Snack /by LauraI have tried several variations of this snack. They are wonderful simply seasoned with salt, but for extra flavor, add a dash of pimentón and cumin with just a hint of cayenne. The sky is the limit on the flavors you can create.
Crunchy Roasted Chickpeas with Hawaiian Sea Salt
1 15-ounce can of chickpeas with no salt added (I used Eden Organic Garbanzo Beans)
Approximately 1 1/2 tablespoons olive oil
Sea salt, ground, to taste
Spices such as pimentón, cumin, or cayenne, to taste (optional)
Make sure your oven rack is in the middle. Preheat your oven to 350 F.
Drain the chickpeas and rinse well. Then spin them in a salad spinner to get off the excess moisture. Gently roll the chickpeas between two layers of paper towels to make sure they are very dry.
In a medium bowl, toss the chickpeas with the oil, salt, and spices (if using), until evenly coated.
Spread the chickpeas onto a rimmed baking sheet, making sure they are in a single layer.
Bake for 35 minutes, tossing once midway through. Then turn off the oven, but leave the chickpeas in for another hour until they are dry and crunchy.
Cool completely. Store in an airtight container.
Maypole Cakes ~ Hummingbird Mini Bundt Cakes with Cream Cheese Filling
/0 Comments/in Dessert, Lei Day, May Day, Spring /by LauraI found the cute May Day printable design that inspired these cakes at ThePolkaDotPosie.com. They are absolutely adorable and free to use for personal use. 🙂 I hope you go over to their website to check out all of the cute designs they have.
I attached thin pastel ribbons to the printout, and mounted it all on a skewer. Then I attached the skewer near the middle of the cake for a cute edible display. I love how the swirl of the Bundt cake design gives the ribbons a little swirl.
Hummingbird Mini Bundt Cakes with Cream Cheese Filling
Makes 6 mini Bundt cakes (and 6 muffins)
For the filling:
8 ounces reduced-fat cream cheese, room temperature
1/4 cup granulated sugar
1 egg
1/4 cup all-purpose flour
For the cake:
Butter, softened, for preparing the pan
1 1/2 cups whole-wheat pastry flour
1/2 cup granulated sugar
1 1/2 teaspoons ground cinnamon
1/2 teaspoon baking soda
Pinch of salt
1/4 cup reduced-fat sour cream
2 tablespoons coconut oil, liquefied
1 egg
1 teaspoon vanilla extract
1 cup mashed ripe banana (about 2 or 3 bananas, depending on the size)
1/2 cup canned crushed pineapple, drained
3/4 cup pecans, toasted and chopped
1/2 cup desiccated unsweetened coconut (optional)
Powdered sugar, for dusting the cakes (optional)
For the filling:
In the bowl of a stand mixer fitted with a paddle attachment, add the cream cheese, sugar, and egg. Blend until everything is well combined. Then add the flour, and beat until just combined. Scoop the mixture into a piping bag fitted with a medium round nozzle. Set aside.
For the cake:
Evenly spread a thin layer of butter over all the nooks and crannies of the mini Bundt pan.
(Line a muffin pan with 6 paper liners for the leftover batter and filling if you wish.)
Preheat oven to 350 F.
In a large bowl, whisk together the flour, sugar, cinnamon, baking soda, and salt.
In a medium bowl, whisk together the sour cream, oil, egg, and vanilla. Add the banana and pineapple, and stir until well combined.
Add the wet ingredients to the dry ingredients, and stir until everything is just combined. Add the nuts and coconut (if using), and stir until they are evenly distributed in the batter.
Fill each well of the mini Bundt pan about 1/3 full. With the back of a small spoon, make a channel in the batter all around the pan. Pipe a layer of cream cheese filling into the channel, taking care to keep it away from the sides of the pan. Top the filling with batter until each well is about 3/4 full.
(With the remaining batter and filling, you can make muffins in the same manner, each with a dollop of filling in the middle. Bake for about 20 minutes, or until a toothpick inserted into the middle of a muffin comes out clean. Remove the muffins from the pan to cool on a wire rack.)
Bake the Bundt cakes for about 27 minutes, or until a toothpick inserted into the middle of a cake comes out clean.
Let the Bundt cakes cool in the pan. Once cooled, invert the cakes. If desired, dust with powdered sugar before serving.
Happy Easter! ~ Easter Bunny Rolls
/0 Comments/in Bread, Easter, Spring /by LauraI found this bunny roll idea in several places online, and I couldn’t resist making a batch of my own. They are simple and quite adorable.
I made these rolls with my basic whole-wheat dinner roll recipe. I didn’t use dill this time around, but I think an herb of some sort would be delicious. I love this recipe because I can make the rolls in the evening, let them rest in the refrigerator overnight, and then bake them in the morning. There is nothing quite like fresh bread on Easter morning (without having to get up early to make it! 😉 )
Easter Bunny Rolls
Makes 5 dinner rolls
2 tablespoons warm water (about 80 degrees F.)
1/2 tablespoon dry active yeast
1 teaspoon granulated sugar
1/2 teaspoon kosher salt
1 tablespoon unsalted butter, melted
1 large egg
1/2 cup low-fat buttermilk
1 3/4 cups white whole-wheat flour
All-purpose flour for dusting work surface
Approximately 1 tablespoon beaten egg
Approximately 1/2 tablespoon coarse salt
Place a piece of parchment paper on a half sheet pan, and spray the parchment with cooking spray. Make sure you have enough room in your refrigerator for the sheet pan where the rolls will rest overnight.
In the bowl of a stand mixer with a dough hook attachment, add the water. Sprinkle the yeast over the water. Let stand until the yeast and water mixture looks creamy, about 5 minutes. Next, add the ingredients from the sugar through the whole-wheat flour to the bowl. Let the mixer knead the dough for about 10 minutes. The dough will be elastic and sticky.
Remove the dough from the bowl onto a clean work surface that is lightly dusted with all-purpose flour. Divide the dough into 6 equal pieces. Sprinkle a little extra all-purpose flour over the dough and on your hands if the dough sticks.
To make bunnies, roll 5 of the pieces of dough into long ropes, each about 12 inches long. Take the two ends of each rope and twist them over each other twice, leaving about an inch of both ends sticking out on top for the ears. Make sure the bottom has a loop with a hole in the middle to make room for the tail. Cut the remaining piece of dough into small pieces for the tails. Roll each piece into a ball, and place the ball in the center of the loop. (If you have leftover dough, you can form a little Easter egg shape to go with the bunnies!) Place all of the rolls on the prepared baking sheet. Take care to leave enough space between the rolls to allow them to rise without touching each other.
Spray the tops of the rolls with nonstick cooking spray and cover with plastic wrap. Let the rolls rest in the refrigerator overnight.
The next day, remove the rolls from the refrigerator. Let the dough rise in a warm place for about 90 minutes, or until close to doubled in size.
Preheat your oven to 350 F. Brush the rolls with the beaten egg, and sprinkle a little coarse salt on top. Bake for about 20 minutes, or until the rolls are golden brown and cooked through.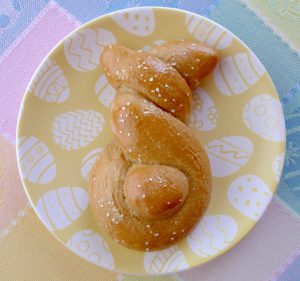
Easter Eggs ~ Pickled Rainbow Deviled Eggs
/0 Comments/in Appetizer, Easter, Snack, Spring /by LauraMy mom makes pickled eggs with beets for Easter, just the way my grandma used to make. I think it’s an old Pennsylvania Dutch tradition that made its way into our family. I decided to expand on our tradition this year by dying my eggs pink…and yellow, orange, blue, and purple, and I was delighted with all of the bright colors, which were, amazingly, totally natural! 🙂
After I dyed the eggs, I made them into deviled eggs. Use your favorite deviled egg recipe. I like to use Greek yogurt in mine, so between the pickling and the filling, they have a bit of a tang. These deviled eggs are perfect for an Easter afternoon snack—if they make it that long. 😉
Pickled Rainbow Deviled Eggs
(Inspired by Food52)
For the pickled eggs:
3/4 cup white-wine vinegar
3/4 cup water
1/2 teaspoon kosher salt
3 hard-boiled eggs, peeled (for all 5 colors, use 15 whole eggs)
(Each coloring recipe below is for 1 batch of the basic pickling blend above. To make all 5 colors, make the basic pickling blend in 5 separate batches.)
For pink:
1 small red beet, roasted, peeled, and cut into large pieces
For yellow:
1/2 tablespoon ground dried turmeric
For orange:
1/2 tablespoon ground dried turmeric
1 small piece (the equivalent of approximately 1 1/2 tablespoons) roasted and peeled red beet
For blue:
1/4 small red cabbage, thinly sliced
1 1/2 teaspoons baking soda
For purple:
1/4 small red cabbage, thinly sliced
1 1/8 teaspoons baking soda
Divide the eggs into five glass containers that are big enough for three eggs and one batch of the pickling liquid.
In a small saucepan, bring one batch of vinegar, water, and salt to a simmer. Whisk the mixture to ensure the salt fully dissolves. Then, turn off the heat and add the coloring of your choice.
Pour the colored pickling blend over the top of three eggs, making sure they are fully submerged. Repeat with the remaining four colors.
Refrigerate the submerged eggs until they are the color you desire. I left mine in the pickling blend for a few hours, stirring every hour or so, to ensure they colored evenly. (I found that the pink, orange, and yellow took less time to reach the color I wanted than the blue and purple, so I left the latter colored eggs in the pickling blend longer.) The eggs will also become more pickled with time.
If you make all 5 colors, you’ll end up with 15 whole eggs or 30 deviled egg halves.
Deviled eggs:
Prepared pickled eggs
5 ounces nonfat plain Greek yogurt
2 teaspoons Dijon mustard
2 tablespoons mayonnaise
Salt to taste
Cut each egg in half and remove the yolks.
In a medium bowl, mash the yolks with a fork. Add the yogurt, mustard, mayonnaise, and salt, and mix until the filling is well incorporated and smooth.
Scoop the filling into a piping bag fitted with a star tip, and then, pipe the filling into each egg white half.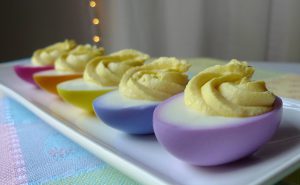
Easter Treats ~ Hummingbird Mini Bundt Cakes with Cream Cheese Filling
/0 Comments/in Dessert, Easter, Spring /by LauraTo celebrate the holiday this year I made hummingbird cakes, which are a Southern classic with a tropical twist. They are filled with banana, pineapple, pecans, and sometimes coconut. That combination leads me to dream about warmer weather and palm trees! 😉 Plus the name of the dessert just sounds like springtime to me. I thought they would be perfect for Easter this year.
Hummingbird cakes are usually frosted with a cream cheese icing, but rather than cover the pretty Bundt cake design, I decided to fill mine with a cream cheese filling. The sweet cream cheese is a nice surprise to find when you cut into the cakes.
I used a mini Bundt pan that makes 6 small individual cakes. The pan holds about 4 cups of batter between the cakes. After filling the pan I still had some leftover batter and filling, so I made muffins with the extra in cute Easter liners. The muffins go well with coffee for breakfast. 🙂
Hummingbird Mini Bundt Cakes with Cream Cheese Filling
Makes 6 mini Bundt cakes (and 6 muffins)
For the filling:
8 ounces reduced-fat cream cheese, room temperature
1/4 cup granulated sugar
1 egg
1/4 cup all-purpose flour
For the cake:
Butter, softened, for preparing the pan
1 1/2 cups whole-wheat pastry flour
1/2 cup granulated sugar
1 1/2 teaspoons ground cinnamon
1/2 teaspoon baking soda
Pinch of salt
1/4 cup reduced-fat sour cream
2 tablespoons coconut oil, liquefied
1 egg
1 teaspoon vanilla extract
1 cup mashed ripe banana (about 2 or 3 bananas, depending on the size)
1/2 cup canned crushed pineapple, drained
3/4 cup pecans, toasted and chopped
1/2 cup desiccated unsweetened coconut (optional)
Powdered sugar, for dusting the cakes
For the filling:
In the bowl of a stand mixer fitted with a paddle attachment, add the cream cheese, sugar, and egg. Blend until everything is well combined. Then add the flour, and beat until just combined. Scoop the mixture into a piping bag fitted with a medium round nozzle. Set aside.
For the cake:
Evenly spread a thin layer of butter over all the nooks and crannies of the mini Bundt pan.
(Line a muffin pan with 6 paper liners for the leftover batter and filling if you wish.)
Preheat oven to 350 F.
In a large bowl, whisk together the flour, sugar, cinnamon, baking soda, and salt.
In a medium bowl, whisk together the sour cream, oil, egg, and vanilla. Add the banana and pineapple, and stir until well combined.
Add the wet ingredients to the dry ingredients, and stir until everything is just combined. Add the nuts and coconut (if using), and stir until they are evenly distributed in the batter.
Fill each well of the mini Bundt pan about 1/3 full. With the back of a small spoon, make a channel in the batter all around the pan. Pipe a layer of cream cheese filling into the channel, taking care to keep it away from the sides of the pan. Top the filling with batter until each well is about 3/4 full.
(With the remaining batter and filling, you can make muffins in the same manner, each with a dollop of filling in the middle. Bake for about 20 minutes, or until a toothpick inserted into the middle of a muffin comes out clean. Remove the muffins from the pan to cool on a wire rack.)
Bake the Bundt cakes for about 27 minutes, or until a toothpick inserted into the middle of a cake comes out clean.
Let the Bundt cakes cool in the pan. Once cooled, invert the cakes. Dust with powdered sugar before serving.
Double Irish Cheer ~ Stout and Whiskey Cupcakes
/0 Comments/in Cupcake, Dessert, St. Patrick's Day /by LauraI love how versatile the frosting I made in the last blog entry can be. It is a classic 7-minute frosting, which is fluffy and meringue-like. Unlike most frosting, this one is quite a bit lighter with no butter or cream. It is wonderful to work with and pipes beautifully. It doesn’t hold as well over time as a buttercream, so make it shortly before you need it, but it stays together for a few hours. I was so interested and excited about this frosting that I played with the recipe by making small batches in different flavors that I thought may pair well with the chocolate Guinness cupcakes. I made a sparkling wine frosting, a Harp beer frosting, and even an IPA beer frosting! But I settled on this Irish whiskey frosting to top one more batch of cupcakes for St. Patrick’s Day. This flavor was my pot of gold at the end of a rainbow of flavors. 😉
Stout and Whiskey Cupcakes
Makes about 24 standard-sized cupcakes
For the cupcakes:
1 cup Guinness stout
1/2 cup light olive oil
2 tablespoons skim milk
3/4 cup reduced-fat sour cream
2 eggs, beaten
1 teaspoon vanilla extract
3/4 cup unsweetened cocoa powder, sifted
1 1/4 cups granulated sugar
2 cups whole-wheat pastry flour
2 1/2 teaspoons baking soda
For the frosting:
1 cup granulated sugar
1/4 teaspoon cream of tartar
1/4 cup water
4 egg whites
Pinch of salt
3 tablespoons Irish whiskey (I used Jameson)
For the cupcakes:
Preheat oven to 350 F. Line 2 muffin tins with cupcake liners.
In a medium bowl, whisk together the stout, oil, milk, sour cream, eggs, and vanilla until everything is very well combined.
In a large bowl, whisk together the cocoa powder, sugar, flour, and baking soda.
Add the wet mixture in the medium bowl to the dry mixture in the large bowl, and whisk until just combined.
Divide the batter between the muffin tins, filling each cup about 2/3 full.
Bake for about 20 minutes, or until a toothpick inserted into the center of a cupcake comes out clean.
Let cool completely before frosting.
For the frosting:
Find a big pot in which the bowl of a stand mixer can fit inside without touching the bottom. Fill the pot with about 2 inches of water. (Take care that the water doesn’t touch the bottom of the bowl.) Bring the water to a simmer.
In a small bowl or measuring cup, mix the sugar and cream of tartar. In the bowl of the stand mixer, add all of the frosting ingredients except for the whiskey, and whisk until combined.
Place the bowl over the pot of simmering water. Attach a candy thermometer to the side of the bowl. Whisking often, let the mixture come up to 160 F. It will look a little frothy.
Once the mixture is at 160 F, remove the bowl from the pot and place it on the stand mixer fitted with a whisk attachment.
Whisk on high speed for about 7 minutes, or until the mixture is fluffy, cool, and very stiff. Add the whiskey, and whisk until just combined.
Pipe or spoon the frosting onto your cupcakes.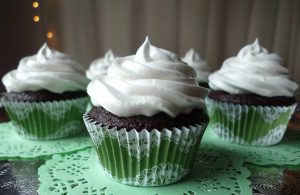
Happy St. Patrick’s Day ~ Chocolate Guinness Cupcakes
/0 Comments/in Cupcake, Dessert, St. Patrick's Day /by LauraFor the cupcakes, I was inspired by a recipe from Nigella Lawson, and a recipe by Yolanda Gampp inspired the frosting.
Chocolate Guinness Cupcakes
Makes about 24 standard-sized cupcakes
For the cupcakes:
1 cup Guinness stout
1/2 cup light olive oil
2 tablespoons skim milk
3/4 cup reduced-fat sour cream
2 eggs, beaten
1 teaspoon vanilla extract
3/4 cup unsweetened cocoa powder, sifted
1 1/4 cups granulated sugar
2 cups whole-wheat pastry flour
2 1/2 teaspoons baking soda
For the frosting:
1 cup granulated sugar
1/4 teaspoon cream of tartar
1/4 cup Guinness stout
4 egg whites
Pinch of salt
For the cupcakes:
Preheat oven to 350 F. Line 2 muffin tins with cupcake liners.
In a medium bowl, whisk together the stout, oil, milk, sour cream, eggs, and vanilla until everything is very well combined.
In a large bowl, whisk together the cocoa powder, sugar, flour, and baking soda.
Add the wet mixture in the medium bowl to the dry mixture in the large bowl, and whisk until just combined.
Divide the batter between the muffin tins, filling each cup about 2/3 full.
Bake for about 20 minutes, or until a toothpick inserted into the center of a cupcake comes out clean.
Let cool completely before frosting.
For the frosting:
Find a big pot in which the bowl of a stand mixer can fit inside without touching the bottom. Fill the pot with about 2 inches of water. (Take care that the water doesn’t touch the bottom of the bowl.) Bring the water to a simmer.
In a small bowl or measuring cup, mix the sugar and cream of tartar. In the bowl of the stand mixer, add all of the frosting ingredients, and whisk until combined.
Place the bowl over the pot of simmering water. Attach a candy thermometer to the side of the bowl. Whisking often, let the mixture come up to 160 F. It will look a little frothy.
Once the mixture is at 160 F, remove the bowl from the pot and place it on the stand mixer fitted with a whisk attachment.
Whisk on high speed for about 7 minutes, or until the mixture is fluffy, cool, and very stiff.
Pipe or spoon the frosting onto your cupcakes for a nice fluffy head on your Guinness!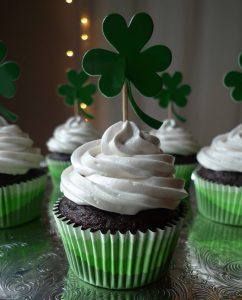
Retro Boder’s Night ~ Coquilles St.-Jacques
/0 Comments/in Appetizer, Seafood /by LauraThe classic restaurant came to my mind recently, and I thought it would be fun to have a retro Boder’s night dinner! I cooked a few of the dishes that used to be on the menu over the years. The dinner started with coquilles St.-Jacques for the appetizer. Then the main course was a crab-stuffed sole, and the grand finale was the famous schaum torte dessert.
It was a fun celebration dinner, and a lovely way to make an ordinary night special!
Coquilles St.-Jacques
Makes 6 small appetizers
2 tablespoons unsalted butter, divided
1 medium shallot, minced
Approximately 4 ounces white mushrooms, sliced
1/2 cup dry white wine (I used a Chardonnay)
6 large dry-packed sea scallops, the tough muscle on the side of each removed
1 tablespoon all-purpose flour
1/4 cup skim milk
Pinch of cayenne
1 teaspoon fresh tarragon, minced
1/2 teaspoon lemon zest, finely grated
Salt, to taste
Gruyère cheese, finely grated
Paprika, to taste
Preheat broiler. Set aside either 6 scallop shells or 6 shallow ramekins. If using scallop shells rather than ramekins, crumple some aluminum foil on top of a sheet pan to keep the shells level when broiling.
Over medium heat, in a medium sauté pan, melt 1 tablespoon of butter. Add the shallots, and sauté until they are translucent. Then add the mushrooms and cook until they release most of their moisture. Add the wine, and bring to a simmer. Add the scallops, and gently poach on both sides until they are just cooked through.
Remove the scallops, and set aside on a plate. Strain the remaining ingredients, reserving both the liquid and the solids.
In a food processor, pulse the mushrooms and shallots until they are the consistency of small pebbles. Set aside.
Wipe out the pan to make sure there are no bits of mushroom or shallot left that may burn.
In the same pan, melt the remaining 1 tablespoon of butter over medium heat. Once the bubbles subside, whisk in the flour to make a roux. Once the roux is golden, whisk in the milk, the strained liquid, and any liquid that may have accumulated under the scallops. While continuing to whisk, let the mixture cook until it is thickened.
Strain the mixture to ensure there are no lumps.
Off the heat, whisk the cayenne, tarragon, and lemon zest into the wine/milk mixture. Add salt to taste, (but keep in mind the scallops are naturally salty and the cheese added at the end will also be salty.)
Divide the mushrooms between either scallop shells or ramekins, and spread onto the bottom of each. On top of the mushrooms, add one scallop to each shell or ramekin. Top each scallop with the sauce. Grate a little cheese over the top of each.
Broil until the cheese is melted and beginning to brown. Watch very closely, because they can get too dark quickly. Remove from the broiler.
To finish, sprinkle the scallops lightly with paprika.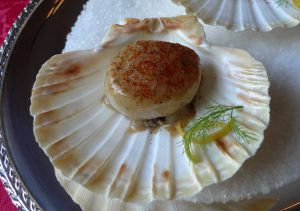
Iced Under ~ Lobster Fra Diavolo in Angel Hair Pasta Cups
/4 Comments/in Appetizer, Pasta, Seafood, Snack /by LauraIn the back of each Maine Clambake mystery, there is a recipe for a lobster dish. This one happened to have a lobster fra diavolo recipe, which combines lobster and other shellfish with a spicy tomato sauce and pasta. I decided to transform the dish from a main course into hors d’oeuvres that can be eaten in one bite. It’s a perfect snack to enjoy while you read!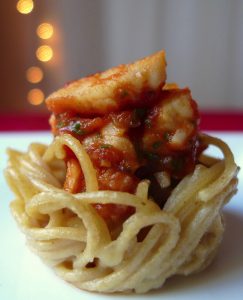 Lobster Fra Diavolo in Angel Hair Pasta Cups
Makes about 24 hors d’oeuvres
For the cups:
Approximately 4 ounces whole-wheat angel hair pasta, broken in half
1 cup Parmesan cheese, finely grated
1 egg, beaten
For the filling:
1 tablespoon high heat cooking oil
1 small shallot, minced
Red pepper flakes, to taste
1 garlic clove, minced
1/4 teaspoon dried oregano
1/2 cup dry white wine
3/4 cup crushed canned tomatoes (I used San Marzano)
Salt, to taste
Freshly ground black pepper, to taste
Approximately 8 ounces precooked lobster meat, cut into a small dice
About 1 tablespoon Italian flat leaf parsley, minced
About 1 tablespoon fresh basil, cut into thin ribbons
For the cups:
Preheat oven to 375 F. Spray a mini muffin pan with cooking spray.
Cook the pasta according to the package instructions. Aim for a softer texture rather than a firmer texture, since they will dry out slightly in the oven.
Drain the pasta. Toss with cheese and egg until all of the strands of pasta are well coated. Divide the pasta between 24 mini muffin cups. Arrange the pasta strands in the muffin cups so they cover the bottom of each and form cuplike shapes.
Bake for about 7 minutes, or until the egg is set.
Cool slightly, and then remove the pasta cups carefully from the pan.
These can be made the day ahead and refrigerated in an airtight container. Gently warm the cups for a few seconds in the microwave before filling and serving.
For the filling:
Preheat a medium sauté pan over medium high heat. Add the oil, and allow it get hot and shimmering. Then add the shallot, and cook until translucent. Next, add the red pepper flakes, garlic, and oregano. Cook until just fragrant, about 30 seconds. Add the wine, and bring to a boil. Scrape any fond from the bottom of the pan. Then add the tomatoes. Cook until the mixture reduces and thickens to your liking. Season with salt and black pepper.
Add the lobster meat to the tomato mixture, and cook until it is just heated through.
Turn off the heat, and stir in the parsley and basil.
Spoon a little of the lobster/tomato mixture into each pasta cup. Serve immediately.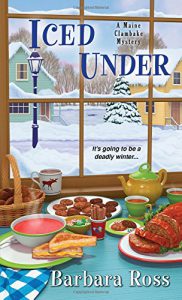
More Elegant Bites for Valentine’s Day ~ Lobster Thermidor Tartlets
/0 Comments/in Anniversary, Appetizer, Seafood, Valentine's Day /by LauraYou can buy premade tartlet shells or make your own with store-bought phyllo dough. I made my own, but only because my local stores didn’t have the shells. I think there was a run on them for Valentine’s Day! 😉 The filling for this appetizer can be made ahead and reheated in a warm pan. I love recipes I can make ahead. Then I can focus on the celebration instead of being back in the kitchen. This recipe also works really well with shrimp. This month, my Valentine tasted three batches with shrimp while I was testing the recipe before we enjoyed the lobster version on the big day, (but I don’t think he minded. 😉 )
Lobster Thermidor Tartlets
4 tablespoons unsalted butter, divided
2 small raw lobster tails, split in half lengthwise
About 4 ounces white mushrooms, finely diced
1 small shallot, minced
2 tablespoons all-purpose flour
1 tablespoon dry sherry
1 tablespoon brandy
1 cup skim milk
1/4 teaspoon paprika
1 1/2 teaspoons Dijon mustard
White pepper to taste
Salt to taste
Mini phyllo tartlet shells
Parmesan and/or Gruyère cheese
In a medium sauté pan over medium heat, melt 2 tablespoons of butter. Add the lobster tails, including the shells, and cook until the shells are red. They do not need to be completely cooked through at this point.
Pull out the lobster and set aside on a plate to cool.
In the same pan, add the mushrooms and shallot, and cook until they soften and brown slightly.
Remove the mushrooms and shallot with a slotted spoon and set aside.
Wipe out the pan to make sure you don’t have any bits of shallot or mushroom left that may burn. Over medium heat, melt the remaining 2 tablespoons of butter. Let the bubbles subside. Sprinkle the flour in the pan, and whisk to make a roux. Cook until the roux turns golden. While continuing to whisk, add the sherry, brandy, and milk, and cook until the mixture is thickened. Add the paprika, mustard, and pepper, and whisk to combine.
Strain the mixture for any lumps. Return the sauce to the pan off the heat.
Take the lobster meat out of the shells and cut into a small dice.
Add the lobster meat, mushrooms, and shallots back to the pan with the sauce. Mix until everything is well coated. Over low heat, cook until the lobster meat is just cooked through. Season with salt if needed, (but remember there will be salty cheese added as a final edition, so be careful not to over salt.)
Spoon the mixture into the tartlet shells. Grate a little cheese over the top of each tartlet. With a kitchen torch, melt the cheese. Add a little more grated cheese on top for a pretty presentation.
Serve immediately.
Elegant Bites for Valentine’s Day ~ Lobster Newburg Canapés
/1 Comment/in Anniversary, Appetizer, Seafood, Valentine's Day /by LauraI’ll start with the canapés. I love that the topping can be made ahead and reheated in a warm pan, and the lobster can totally be substituted for shrimp for a more modest dish. I made a couple batches with shrimp as I was testing the recipe this month, and my taste tester (AKA, my hubby) loved it! The lobster was perfect for our special Valentine’s Day celebration, though. I think this is a recipe I will go back to again and again. It is fancy enough for a special occasion, but simple enough to make on a weeknight.
Lobster Newburg Canapés
Sliced artisan bread, cut into approximately 1 1/2-inch rounds with a cookie cutter
Extra virgin olive oil
3 tablespoons unsalted butter
2 small raw lobster tails, split in half lengthwise
2 tablespoons all-purpose flour
1 tablespoon dry sherry
1 tablespoon brandy
1 cup skim milk
Pinch of freshly ground nutmeg
Pinch of cayenne pepper
Ground white pepper to taste
Salt to taste
Preheat broiler. Cover a sheet pan with parchment paper.
Brush the tops of the bread with a little olive oil. Arrange the bread with the oil side facing up on the prepared sheet pan. Broil for a minute or two until the bread is golden on top. Watch them closely, because they can burn very quickly. Set aside.
In a medium sauté pan, heat the butter over medium heat until melted. Add the lobster tails, including the shells, and cook until the shells are red. They do not need to be completely cooked through at this point. Set aside to cool.
Continuing to cook over medium heat, sprinkle the flour in the pan, and whisk to combine with the remaining butter. Cook until the roux is golden brown. While whisking, add the sherry, brandy, and milk. Continue to whisk until the mixture is thickened. Add the nutmeg, cayenne, and white pepper, and whisk until well combined.
Strain the mixture for any lumps. Return the sauce to the pan off the heat.
Take the lobster meat out of the shells, and cut into a small dice.
Add the lobster meat back to the pan with the sauce. Mix until the lobster is well coated. Over low heat, cook until the meat is just cooked through. Season with salt if needed.
Spoon a small amount of the lobster mixture onto the toast rounds. Serve immediately.
Valentine Sweets ~ Pink Heart Meringue Cookies
/0 Comments/in Cookie, Dessert, Valentine's Day /by LauraThese crisp meringue cookies are tinted a lovely shade of pink with the simple addition of a little beet juice. For those of you without a juicer (like me!), I processed a couple of roasted red beets in a food processor. Then I put the beets into a few layers of cheesecloth and squeezed out as much juice as I could. Voila…nature’s red food coloring!
Use these little hearts to make a schaum torte, an Eton mess, or just eat them on their own. 🙂
Pink Heart Meringue Cookies
4 egg whites, room temperature
1/2 teaspoon cream of tartar
1/2 cup granulated sugar
Pinch of salt
1 teaspoon cornstarch
1 teaspoon vanilla extract
1 teaspoon red beet juice
Preheat oven to 225 F. Line 2 baking sheets with parchment paper. Wipe the bowl and whisk attachment of a stand mixer with vinegar to ensure it is free of any oil.
Add the egg whites and cream of tartar to the bowl of the stand mixer, and whisk until they begin to look frothy. Very slowly sprinkle in the sugar while continuing to whisk. The mixture will become thick and glossy with stiff peaks. Rub a small amount of the mixture between your fingers, and if it is smooth with no sugar granules remaining, you are there. At this point, add the salt, cornstarch, vanilla, and beet juice, and whisk until just combined.
Transfer the mixture to a piping bag fitted with a large star tip.
On the prepared baking sheets, pipe the mixture into heart shapes.
Bake for about 1 hour and 15 minutes. Then turn off the oven, but leave the meringues in the oven for another 30 minutes. Let cool completely.
Waitangi Day ~ Mini Pavlovas with Kiwi Fruit
/0 Comments/in Dessert, Waitangi Day /by LauraAs usual, celebrating my way begins in the kitchen! I made another batch of mini Pavlovas for the special day. 🙂 No one really knows if the first Pavlova was made in Australia or New Zealand, so I thought I’d give both countries recognition. (And if I’m perfectly honest, it just gave me an excuse to make another batch of this dreamy dessert! 😉 ) I topped these New Zealand Pavlovas with sliced kiwi fruit.
Mini Pavlovas with Kiwi Fruit
For the meringue:
4 egg whites, room temperature
1/2 teaspoon cream of tartar
1/2 cup granulated sugar
Pinch of salt
1 teaspoon cornstarch
1 teaspoon vanilla extract
For the finishing touches:
Approximately 1 cup heavy whipping cream
Approximately 1 tablespoon granulated sugar
2 kiwi fruit, peeled and sliced
For the meringue:
Preheat oven to 225 F. Line 2 baking sheets with parchment paper. Wipe the bowl and whisk attachment of a stand mixer with vinegar to ensure it is free of any oil.
Add the egg whites and cream of tartar to the bowl of the stand mixer, and whisk until they begin to look frothy. Very slowly sprinkle in the sugar while continuing to whisk. The mixture will become thick and glossy with stiff peaks. Rub a small amount of the mixture between your fingers, and if it is smooth with no sugar granules remaining, you are there. At this point, add the salt, cornstarch, and vanilla, and whisk until just combined.
Transfer the mixture to a piping bag fitted with a large star tip.
On the prepared baking sheets, pipe the mixture into small rounds, leaving a small indentation in the middle of each meringue.
Bake for about 1 hour and 15 minutes. Then turn off the oven, but leave the meringues in the oven for another 30 minutes. Let cool completely.
For the finishing touches:
In the bowl of a stand mixer fitted with the whisk attachment, whip the heavy cream and sugar until soft peaks form. (You want to whip it slightly less than you would like your finished product to be, since piping the cream will continue to stiffen it.) Transfer the whipped cream to a piping bag fitted with the same star tip used for the meringues.
Pipe a little whipped cream over the top of each meringue, and finish with a few pieces of sliced kiwi on top.
Australia Day ~ Mini Pavlovas with Lime Curd and Finger Limes
/1 Comment/in Australia Day, Dessert /by LauraThose of us in the middle of winter in the Northern Hemisphere could use a little summer right about now! 😉 It is quite chilly, dark, and wet in Seattle. These little Pavlovas with lime curd and finger limes were just the things to brighten up a winter day. Pavlovas are a quintessential dessert of Australia, where finger limes are also native. I couldn’t think of anything more perfect to celebrate this special day.
Mini Pavlovas with Lime Curd and Finger Limes
For the curd:
1/4 cup + 2 tablespoons granulated sugar
2 eggs or 3 egg yolks
1/4 cup lime juice (juice from approximately 2 limes)
3 teaspoons lime zest, divided (zest from approximately 3 limes)
2 tablespoons unsalted butter, cut into pieces
For the meringue:
4 egg whites, room temperature
1/2 teaspoon cream of tartar
1/2 cup granulated sugar
Pinch of salt
1 teaspoon cornstarch
1 teaspoon vanilla extract
For the finishing touches:
Approximately 1 cup heavy whipping cream
Approximately 1 tablespoon granulated sugar
1 large finger lime
For the curd:
In a medium saucepan, add the sugar, eggs, juice, and 2 teaspoons of zest. Heat over medium high heat. Whisk steadily until the mixture begins to bubble gently and thicken. Remove the pan from the heat, and whisk in the butter. Strain the mixture. Then add the remaining zest, and stir well. Chill the curd.
For the meringue:
Preheat oven to 225 F. Line 2 baking sheets with parchment paper. Wipe the bowl and whisk attachment of a stand mixer with vinegar to ensure it is free of any oil.
Add the egg whites and cream of tartar to the bowl of the stand mixer, and whisk until they begin to look frothy. Very slowly sprinkle in the sugar while continuing to whisk. The mixture will become thick and glossy with stiff peaks. Rub a small amount of the mixture between your fingers, and if it is smooth with no sugar granules remaining, you are there. At this point, add the salt, cornstarch, and vanilla, and whisk until just combined.
Transfer the mixture to a piping bag fitted with a large star tip.
On the prepared baking sheets, pipe the mixture into small rounds, leaving a small indentation in the middle of each meringue.
Bake for about 1 hour and 15 minutes. Then turn off the oven, but leave the meringues in the oven for another 30 minutes. Let cool completely.
For the finishing touches:
In the bowl of a stand mixer fitted with the whisk attachment, whip the heavy cream and sugar until soft peaks form. (You want to whip it slightly less than you would like your finished product to be, since piping the cream will continue to stiffen it.) Transfer the whipped cream to a piping bag fitted with the same star tip used for the meringues.
Dollop a little lime curd in the middle of each meringue. Pipe a little whipped cream over the top. Finish with a few pieces of finger lime on top of each Pavlova.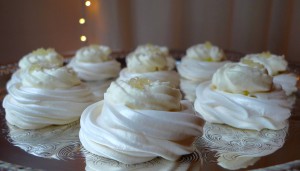
It’s 2017! ~ Cucumber Rolls with Shrimp and Finger Limes
/0 Comments/in Appetizer, New Year, Seafood /by LauraI made these little appetizers to help ring in 2017. They are fresh and flavorful with the unique addition of finger limes. The little vesicles of the finger limes pop in your mouth with a burst of freshness. It is almost like citrus caviar! Or nature’s Pop Rocks. 😉 If you ever see finger limes, I would highly recommend trying them. I think you’ll find them delightful!
Cucumber Rolls with Shrimp and Finger Limes
Makes 30 appetizers
1/2 block (4 ounces) reduced fat cream cheese, room temperature
1/2 large ripe avocado
Handful of fresh cilantro, big stems removed
Salt to taste
Freshly ground black pepper to taste
Approximately 3 English cucumbers
30 medium shrimp, peeled and deveined
Approximately 1 tablespoon high heat cooking oil
Approximately 6 finger limes
In the bowl of a food processor, add the cream cheese, avocado, cilantro, salt, and pepper. Process until fully combined and smooth.
With a large peeler, peel strips of cucumber lengthwise. Stop when you reach the seedy centers. Neaten the ends of the strips with a knife. Gently pat the strips dry with a paper towel. Set aside.
Preheat a large sauté pan over medium high heat. Season the shrimp on both sides with salt and pepper. Once the pan is hot, add the oil. Wait until the oil is hot and shimming, and then add the shrimp. Sauté on both sides until the shrimp are just cooked through. Transfer to a plate, and let cool.
Spread a thin layer of the cream cheese mixture onto one side of each strip of cucumber. The spread should cover the whole length of cucumber. Place one shrimp on the end of each strip of cucumber. Make sure the tail is sticking up over the side. Roll the cucumber strip. Repeat until you have 30 appetizers.
To finish, squeeze a little finger lime over the top of each appetizer.
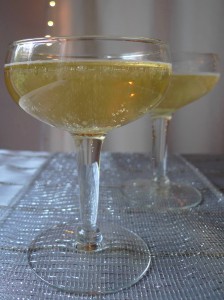
Serve immediately. They are best when they are freshly made.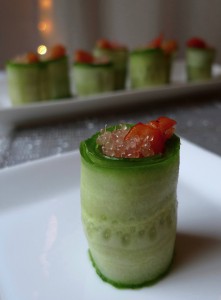 PS. Finger limes are also fun to add to your midnight sparkling wine! The little juice vesicles float up and down in the bubbles and give the drink a nice little pop of acidity.
One more Christmas cookie for the season ~ Eggnog Sugar Cookies with Eggnog Glaze
/0 Comments/in Christmas, Cookie, Dessert, Winter /by LauraMerry Christmas from my kitchen to yours!
Eggnog Sugar Cookies with Eggnog Glaze
For the cookies:
2 cups whole-wheat pastry flour
1/4 teaspoon freshly ground nutmeg
Pinch of salt
1/4 cup + 2 tablespoons unsalted room temperature butter
1/2 cup granulated sugar
2 eggs
2 tablespoons eggnog (I used Organic Valley Eggnog)
1 teaspoon vanilla extract
For the glaze:
1/2 cup powdered sugar, or more to make a thicker glaze
1/4 cup eggnog
For the cookies:
In a large bowl, whisk together the flour, nutmeg, and salt. In the bowl of a stand mixer fitted with a paddle attachment, cream the butter and sugar until light and fluffy. Beat in the eggs, one at a time. Add the eggnog and vanilla, and continue beating until all of the wet ingredients are well combined. Add the flour mixture, and beat until just combined. Wrap the dough in plastic wrap and refrigerate for at least an hour.
Preheat oven to 350 F.
Prepare two baking sheets with parchment paper.
On a floured work surface, roll the dough until it is slightly thicker than 1/8 inch. Cut into desired shapes with a cookie cutter.
Place the cookies on the prepared baking sheets.
Bake for about 7 minutes, or until slightly firm in the middle, rotating the pan halfway through. Cool the cookies completely on a wire rack.
For the glaze:
Whisk the sugar and eggnog together until the mixture is completely smooth. Either spread or pipe the glaze onto your cookies.
Christmas Cookies! ~ Mexican Hot Cocoa Cookies
/0 Comments/in Christmas, Cookie, Dessert, Winter /by LauraI made these festive little Mexican hot cocoa cookies this year. They are sweet and tender bites with a little spicy heat from cayenne pepper. I also love that Mexican hot cocoa naturally includes Christmassy spices like cinnamon, and sometimes nutmeg, so these cookies seemed like a perfect choice for this time of the year. 🙂
Mexican Hot Cocoa Cookies
Inspired by a recipe from Martha Stewart
Makes about 18 cookies
1 cup whole-wheat pastry flour
1/4 cup unsweetened cocoa powder, sifted
1 teaspoon cream of tartar
1/2 teaspoon baking soda
Pinch of salt
1/8 teaspoon freshly ground nutmeg
1/8 teaspoon cayenne pepper
1/2 teaspoon + 1 teaspoon ground cinnamon, divided
6 tablespoons room temperature butter
1/2 cup + 1/4 cup granulated sugar, divided
1/2 teaspoon vanilla extract
2 tablespoons skim milk
1 egg
Move your oven rack so that it is about 1/3 of the way down from the top. Preheat to 400 F. Line two sheet pans with parchment paper.
In a medium bowl, whisk together the flour, cocoa powder, cream of tartar, baking soda, salt, nutmeg, cayenne, and 1/2 teaspoon of cinnamon.
In the bowl of a stand mixer fitted with a paddle attachment, beat the butter and 1/2 cup of sugar until light and fluffy. Add the vanilla, milk, and egg. Beat until well combined. The mixture will look a bit broken when you start mixing at this point, but just keep at it, and it will come together. Add the dry ingredients and mix until just combined. The dough will be rather sticky.
In a shallow bowl, add the remaining sugar (1/4 cup) and cinnamon (1 teaspoon.) Whisk until combined.
Using a tablespoon, scoop out balls of dough. Roll the balls between your hands. Drop them into the sugar and cinnamon mixture and coat well. Place the dough balls on your prepared baking sheet. Repeat the process until you use all of the dough. Make sure the cookies have a couple of inches to spread on the sheet.
Bake for about 10 minutes, or until the cookies are set and a bit cracked on top.
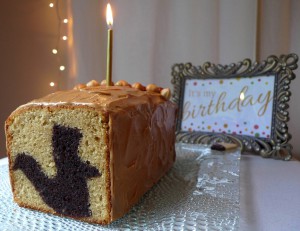
Happy Birthday! ~ Hidden Surprise Squirrel Cake
/0 Comments/in Birthday, Dessert, Squirrel Appreciation Day /by LauraI made this cake using two recipes, which I’ve already posted on Noon Café. I used a double batch of chocolate devil’s food cake for the interior and a double batch of yellow cake for the exterior. I had a little leftover cake and batter, which I just used in a few cupcakes on the side … And I ate a few of the leftover chocolate cake bits while I was working on this project! 😉
I think almost any basic cake recipe would work for this idea, but the most important thing when choosing what kind of cake to use is that the colors between the two cakes need to be distinctly different.
The tools I used were a 4 x 9-inch loaf pan and a squirrel cookie cutter that was about 7 inches high. You could use a smaller loaf pan if you like, and, as I said before, a different cutter. The cutter you choose just needs to be smaller than the pan.
So, first grease your loaf pan and line with parchment paper to make sure the cake comes out in one piece without sticking. Then, make the cake batter that you will use for your cutout design. Fill the pan about 3/4 of the way full.
Then get baking. The cake is done when a skewer inserted in the center comes out clean and the top springs back to the touch. My double batch of devil’s food cake took about 80 minutes to cook through. Be sure to let the cake cool completely.
Remove the cake from the pan. Cut it into slices that are not thicker than the depth of your cookie cutter. Then cut each slice with your cutter, stack them together, and set aside.
Next, it’s time to make the second cake batter for the outside of the cake. Put some of the batter into a piping bag.
Clean and grease the same loaf pan you used before and line with new parchment paper to make sure the cake comes out in one piece without sticking.
Now you’re ready to pipe a line of batter lengthwise into the bottom of the pan. This will help “glue” the shapes to the bottom and keep them from moving while they bake.
Set the cutout cake shapes upright in a row along the line of batter. The row of cutouts should go the full length of the pan, touching both ends to help keep it all in place. Pipe the batter with a pastry bag to get into the crevices of the shape. Fill the pan about 3/4 full with the batter, and gently smooth the top.
We don’t want any big air bubbles, so rap the pan on the counter to make sure the batter is settled.
Now get baking once more. Again, the cake is done when a skewer inserted in the center comes out clean and the top springs back to the touch. My yellow cake took about 70 minutes to cook through. Again, let the cake cool completely, and then when you slice into the cake, you should see your cutout design!
This is more of a technique than a recipe, so there is a lot of room for creativity with different flavors and shapes. I am excited to try some different variations after we eat this one. 🙂 I hope you’ll give it a try!
If you’re like me, you might find it easier to learn these techniques by seeing them rather than reading about them. So here’s a little video of a bunny cake that uses the same technique I used for my squirrel cake.