Wedding Anniversary, Part 4 ~ Sparkling Wine Sabayon

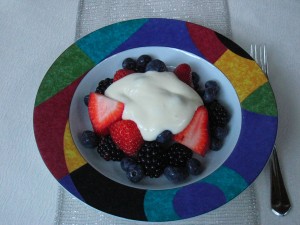
The grand finale of our wedding anniversary dinner was a decadent custard dessert called a Sparkling Wine Sabayon served over fresh berries. I followed this recipe closely, however I quartered it to accommodate fewer guests. I used an individual can of Sophia Blanc de Blancs instead of a whole bottle of bubbly since it was just a romantic dinner for two, not 12. We still ended up with quite a bit leftover for the next few days. With the portions I served we ended up with about 7 servings using a lot of fruit and a little custard. That’s the way I lighted this one a bit. 🙂 The ingredients are very rich, but you only need a little bit on top of fresh berries to make a splash. I hope you’ll give this one a try! It’s simple but special.

Sparkling Wine Sabayon

From DomaineChandon.com

1 cup water

1 cup sugar

1 tsp vanilla extract

One 750ml bottle of Chandon Brut Classic

1 dozen large egg yolks

2 cups heavy cream

Whisk

Double boiler or Pyrex® bowl and saucepan

(If you’d like to quarter the recipe like we did, the amounts are as follows:

1/4 cup water

1/4 cup sugar

1/4 tsp vanilla extract

One can of Sophia Blanc de Blancs or about 187 milliliters of another inexpensive sparkling wine

3 large egg yolks

1/2 cup heavy cream­)

Preparation time: 50 minutes.

1. In a saucepan, bring the water, sugar and vanilla extract to a boil. Reduce heat to medium high and cook, without stirring, to a light golden caramel (about 10 minutes). Add wine and simmer until reduced to 2 cups (about 20 minutes).

2. Beat the egg yolks lightly in the Pyrex bowl or the top of the double boiler. Very slowly, whisk in 1/4 cup of the hot wine and caramel mixture until blended. Slowly whisk in the remaining caramel. Set the mixture over a saucepan, or the bottom of the double boiler, filled with 1 inch of simmering water. Cook over low heat, whisking constantly, until the custard thickens enough to form a ribbon when it falls from the whisk (about 10 minutes). Transfer the custard to a bowl and let cool, then refrigerate until chilled.

3. Whip the cream just until firm. Fold into the wine custard and transfer to a serving bowl; serve cold.

The mixture obtained in steps 1 and 2 can be refrigerated up to two days.

Serve over fresh berries, peaches or figs.

Makes 12 servings.

A sweet ending to a sweet celebration. Bon appétit!

Wedding Anniversary, Part 3 ~ Duck Breasts with Celeriac Root Potato Purée and Caramelized Carrots

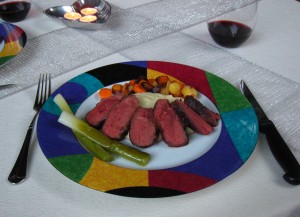
The main course for our wedding anniversary dinner was something new to our kitchen…Duck! We have had duck out in restaurants, but I’ve never tried making it at home before. I changed the original recipe from Domaine Chandon quite a bit to replace the turnip puree with a celeriac and potato puree. We love that flavor combination. Plus, I omitted the heavy cream and butter by using these vegetables with a naturally creamy texture. I also omitted the canola oil, since the duck breasts have enough fat in the skin to sauté them in a dry pan. Lastly, I used Earth Balance instead of butter when called for.

Duck Breasts with Celeriac Root Potato Purée and Caramelized Carrots

2 medium Yukon gold potatoes

3 medium celeriac roots (about the same total size as the potatoes)

Earth Balance to taste (I used about 2 tablespoons in the potato mixture and about 1 tablespoon for the carrots)

Skim Milk to taste

Salt and freshly ground pepper

2 large carrots, peeled and cut into thin rounds

2 boneless duck breasts

Peel and chop the potatoes and celeriac roots into approximately 2 inch pieces to speed up the cooking time. In a large pot, boil enough water to cover the potatoes and celeriac. Boil until everything is very tender. Drain the water, and place the potatoes and celeriac into a food processor. Pulse the mixture while adding a little skim milk until it is smooth. (Be careful not to over mix, however, since potatoes can get goopy if over mixed.) Add a little Earth Balance, salt and pepper to taste, and pulse the mixture until everything is well incorporated.

In a small frying pan, melt about 1 tablespoon of Earth Balance over medium low heat. Add the carrots and sauté until tender and golden brown. Season with salt to taste.

Trim away any excess fat on the duck breasts. Score the skin in a crosshatch pattern using a chef’s knife to allow the fat to render. Salt and pepper on both sides.

Preheat a large frying pan over medium heat. Place the breasts skin-side down and cook until the skin is crispy, about 6 to 8 minutes. Pour off and discard the rendered fat from the pan as you go. Turn the breasts, and cook until medium-rare. (Adjust the heat to a lower temperature if they begin to get a little too brown before they are cooked.) Transfer the breasts to a carving board and let rest for 5 minutes before carving. Cut into thin slices crosswise. We also carved away most of the skin for a leaner cut.

To serve, place a bed of the potato mixture in the middle of each plate. Fan several thin slices of the duck meat over the bed, and sprinkle the carrots on the other side. Serve immediately.

Serves 2 with leftovers.

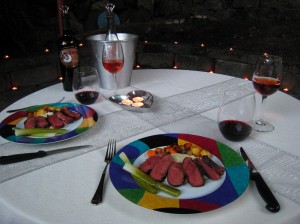
We paired our dinner with a California wine called Steele 2008 Cabernet Sauvignon. The traditional anniversary gift for the 11th wedding anniversary is made of steel, so I thought it was a fitting choice! 🙂 We thought it was very delicious…Fruit forward but full bodied, which is our favorite style.

Rob also picked up a French Marsannay Rosé by Domaine Charles Audoin as a part of his gift to me. It was recommended to him by our local wine store when he asked for something to pair well with duck. Duck is fairly rich tasting meat, and the rose was light and crisp. Perfect combination :).

Wedding Anniversary, Part 2 ~ Curried Apple Salad with Mizuna, Sprouts and Prosciutto

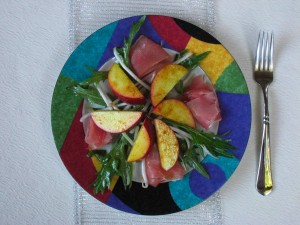
The first course of our anniversary dinner was a curried apple salad with mizuna, sprouts and prosciutto. It blends Asian, Indian and Italian ingredients, but we thought it really worked well together. We love trying new things, and this is something I would never have thought to combine on my own. That’s why I love the creativity of the etoile chef! It keeps things fresh and new. If you’d like to try something a little off the beaten path, I would highly recommend it!

I based this salad on Domaine Chandon’s Heirloom Apple With Curry And Ginger Prosciutto Salad. For my own spin, I used less olive oil for the dressing and less salt for the apples. I also used a little more mizuna and prosciutto and a little less ginger as a matter of preference.

Curried Apple Salad with Mizuna, Sprouts and Prosciutto

2 ripe apples, cut into 1/4 inch half-moon slices

1 teaspoon madras curry powder

1 teaspoon lemon juice

1 tablespoon olive oil

Salt to taste

In a small bowl, whisk all of the ingredients together except for the apples. Then toss the apples with the dressing until well coated. Set aside.

1/2 oz ginger (peeled and sliced into paper thin matchsticks)

4 ounces mung bean sprouts

8 slices of prosciutto

8 large basil leaves (cut into thin strips)

1 tablespoon olive oil

Generous handful of mizuna leaves

2 teaspoons rice wine vinegar

Salt to taste

Combine the olive oil, vinegar and salt in a large bowl, and whisk well. Toss the remaining ingredients, except for the prosciutto, into the vinaigrette.

To assemble, place the mizuna mixture on two individual salad plates. (I splayed it out so the pretty leaves all faced the edge of the plate.) Bunch up 4 pieces of prosciutto for each plate, and place them among the leaves. Then top it all with the apple slices.

Serves 2.

Wedding Anniversary, Part 1 ~ Hibiscus Royale Cocktails

To celebrate our wedding anniversary this year, we decided to try a few more recipes inspired by the Domaine Chandon website and cookbook. We tried a few of their recipes on our engagement anniversary last Valentine’s Day, so it seemed like a good choice to try a few more on our wedding anniversary to make a full circle J. On a beautiful summer night in our backyard, we got dressed up, lit a bunch of tea light candles all around the patio and enjoyed Chandon Hibiscus Royale cocktails, a curried apple salad with mizuna, sprouts and prosciutto, duck breasts with a celeriac potato purée and caramelized carrots and champagne sabayon over fresh berries.

I’ll begin with our pre-dinner cocktail and then add the other recipes over the month. It was a unique and romantic sparkling wine cocktail…Perfect for an anniversary :). I found the hibiscus flowers at a little specialty shop in Seattle called the Chef Shop. The rose water came from another specialty shop in Pike Place Market called DeLaurenti. Both are very fun places to visit if you are in the mood for a little culinary adventure! I think half the fun is exploring markets for new and different ingredients :).

Hibiscus Royale Cocktails

1 hibiscus flower (wild hibiscus flowers in syrup)

½ tbsp syrup from the jar of wild hibiscus flowers

1 small drop of rose water

Sparkling wine such as Domaine Chandon Blanc de Noirs

Combine the hibiscus flower, syrup and rose water in a champagne flute. Then top with the sparkling wine and serve immediately.

Makes one cocktail.

Cheers!

Celebrating an August Anniversary ~ Tomato, Basil and Pasta Salad and Peach and Basil Crumbles

Every summer on this day, we have a special Dungeness crab dinner. It’s one of the little anniversaries that we celebrate, and the choice of crab for dinner has turned into a tradition. To us, it’s the perfect Northwest meal on a warm summer evening. (For instructions on how to cook the crab, visit my Fourth of July post.)

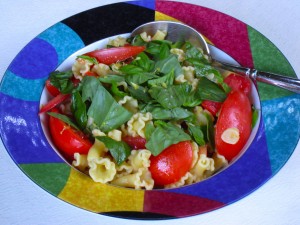
To go with our crab, I tried my take on the recipe that graces the cover of Martha Stewart Living magazine this month. I did make a few changes to make it a little healthier and to make it a little more economical. I reduced the amount of olive oil and pasta and I increased the amount of tomatoes and basil. I also used fresh red summer tomatoes instead of the heirloom variety as she did. I couldn’t find the fancy pasta she used at my local Italian market, so I used campanelle. They look like cute little flowers. Any short pasta will work for this dish, however.

Marinated Tomato, Basil and Pasta Salad

(Serves about 4)

2 garlic cloves, thinly sliced

1/8 cup extra virgin olive oil

1 1/4 lbs ripe summer tomatoes cut into ½ inch wedges

½ cup torn fresh basil

1 ½ tablespoons rinsed capers

1 teaspoon grated lemon zest, plus more for the top

Pinch of red pepper flakes

Salt and pepper

4 oz dried short pasta (I used campanelle. Martha used croxetti.)

Heat the garlic and olive oil in a saucepan over low heat until the garlic is lightly golden brown. (About 10 minutes). Strain the garlic, and reserve both the garlic chips and the oil. Let cool.

Combine the tomatoes, ¼ cup basil, capers, lemon zest, red pepper flakes and salt to taste in a large bowl. Pour the cooled oil and garlic chips over the top and mix. Marinate for about 30 minutes.

Cook the pasta according to the package instructions, and add the warm pasta to the tomato bowl. Toss gently with pepper to taste. Top with the remaining ¼ cup of basil and a sprinkling of lemon zest. Serve immediately or at room temperature.

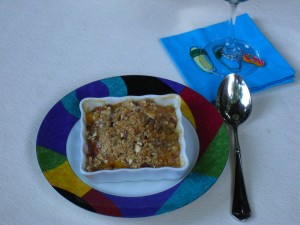
For dessert, I made one of our summer favorites….Peach and basil crumbles. The original recipe was also from MarthaStewart.com. I used frozen peaches for convenience, which also allows this recipe to be enjoyed year round. To make it a wee bit healthier, I used less sugar and substituted the butter for all natural Earth Balance “buttery” sticks. My new favorite culinary discovery. 🙂

Peach and Basil Crumbles

(Makes 2)

Filling ~

Frozen sliced peaches, thawed (The equivalent of 2 whole peaches)

1/2 tablespoon fresh basil, sliced into thin strips

1/4 teaspoon grated lemon zest

Pinch of salt

Topping ~

1 oz chopped unsalted almonds

1/8 cup packed light-brown sugar

3 tablespoons all-purpose flour

Pinch of salt

1 1/2 tablespoons cold Earth Balance, cut into 6 pieces

Preheat your oven to 400 degrees. To make the filling, simply mix all of the filling ingredients in a small bowl.

For the topping, combine all of the topping ingredients, rubbing the Earth Balance with your fingers until the mixture is crumbly.

Divide the filling between two small baking dishes, and sprinkle the topping evenly over them. Transfer to a baking sheet, and bake until they are bubbling and golden brown, about 25 minutes. Let cool slightly before serving.

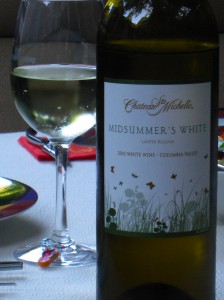
We served this summer meal with a bottle of Chateau Ste. Michelle Midsummer’s White. It was perfect for a midsummer’s celebration! Light and refreshing. It’s a blend of Viognier, Gewurztraminer, Muscat Canelli and Riesling.

Happy Valentine’s Day! ~ Orange Crème Brûlée

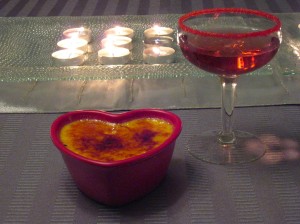
For our Valentine’s Day/engagement anniversary this year, I made a few festive and colorful recipes. I found them on the Domaine Chandon Winery website, and then I put my own personal spin on them. The menu included tiny purple potatoes with sour cream and caviar, troll-caught salmon with roasted red and yellow beets, orange crème brûlée, and Ruby Slipper cocktails. Of all of the recipes, I think the crème brûlée stood out the most. If you haven’t noticed by now, I have a sweet tooth. 😉 The dessert very often is the dish that stands out to me…Ha! I changed the cream and whole milk combination to 2 % milk and I used less egg yolks. I also amped up the flavor with a little Grand Marnier and vanilla. I tried many different variations of this dish to get it just right, and my Valentine and I agreed that this one was our favorite. I hope you like it, too!

Orange Crème Brûlée

Inspired by a recipe from Domaine Chandon Winery

Serves 2

8 ounces 2% milk

3 tablespoons granulated sugar, plus about 2 tablespoons for the top

Zest of one small orange

3 egg yolks

2 teaspoons Grand Marnier or other orange liqueur

1/2 teaspoon vanilla extract

Preheat your oven to 325 F.

Whisk together the milk, 3 tablespoons of sugar, and orange zest in a saucepan with a heavy bottom. Heat until the sugar is dissolved, taking care not to bring the mixture to a boil. Remove the pan from the heat and pour the mixture into a large bowl over ice. Cool down until lukewarm. Then whisk in the egg yolks, Grand Marnier, and vanilla extract.

Strain the mixture into a container with a spout. Pour the custard into 2 4-ounce ramekins. (Preferably heart-shaped ones if you have them for Valentine’s Day!) Place the ramekins in a baking dish. Heat some water until almost boiling, and pour the water carefully around the ramekins until it reaches about halfway up the sides. (Make sure none of the water gets into the custard.)

Bake for about 45 minutes, or until set. They should still have a slight jiggle in the middle when tapped.

Cool in the refrigerator at least 2 hours before serving, or overnight.

Right before serving, dust about 1 tablespoon of sugar evenly over the top of each custard. Caramelize the sugar with a kitchen torch.

10th Wedding Anniversary ~ Mussels, Clams and Shrimp with Saffron Risotto and Green Olive Relish and Caramelized Pear Cake

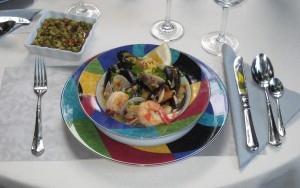
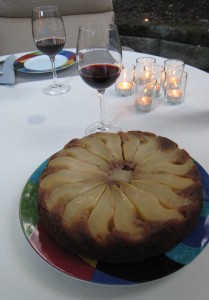
Rob and I celebrated our 10th wedding anniversary today with a romantic dinner at home. Cooking is always a fun way to spend time together, and there’s nothing we like more than to create a nice meal and enjoy it outside on a warm summer night. To us, that’s a perfect evening together…The perfect way to celebrate this milestone. The recipes I chose were adapted from the September 2000 issue of Bon Appetit magazine, which I thought was a fun and special way to choose a menu :). Both of the original recipes can be found at Epicurious.com. We had mussels, clams and shrimp with saffron risotto and green olive relish as well as caramelized pear cake for dessert. I followed the risotto recipe pretty closely, except I halved the garlic. It was a romantic anniversary after all! 😉 We also added more seafood than the recipe called for since it was a special occasion. I changed the cake recipe quite a bit, however. To lighten it up a little, I cut the sugar and the butter and I replaced some of the oil with applesauce. I have to say, we didn’t miss it one bit! The presentation looked very fancy, as well, which was perfect for a special finale.

Mussels, Clams and Shrimp with Saffron Risotto and Green Olive Relish

1/2 cup chopped green olives

1/4 cup extra-virgin olive oil

1 tablespoon chopped fresh parsley

1 ½ teaspoons lemon zest

2 cups low sodium chicken stock

1/4 teaspoon saffron threads

2 tablespoons extra-virgin olive oil

1/4 cup chopped shallots

1 cup Arborio rice

2 garlic cloves, minced

1/2 cup dry white wine

1 cup bottled clam juice

20 mussels

15 manila clams

24 uncooked large peeled shrimp

3/4 cup chopped fresh tomatoes

1/4 cup sliced green onions

Lemon wedges

To make the relish, combine the first four ingredients in a small bowl – Olives, oil, parsley and lemon peel. (This can be made the day before and refrigerated).

Bring the stock and saffron to a simmer in a small saucepan. Remove from heat and cover. Heat the olive oil in a heavy large pot over medium heat. Add the shallots and sauté about 2 minutes until they are tender. Add the rice and the garlic and stir 1 minute. Add the white wine and stir until absorbed, about 2 minutes. Add 1/2 cup saffron stock and simmer until absorbed, stirring constantly. Add the remaining stock 1/2 cup at a time, allowing the stock to be absorbed before adding more, stirring frequently until the rice is cooked halfway, about 10 minutes. Add the clam juice, seafood and chopped tomatoes. Cover and simmer until the rice is tender, the mussels and clams open, the shrimp are cooked through and the liquid is absorbed, about 10 minutes. Discard any mussels and clams that did not open. Divide the seafood and saffron risotto equally among 4 bowls. Sprinkle with sliced green onions and serve with lemon wedges and the green olive relish on the side.
Caramelized Pear Cake

4 tablespoons unsalted butter

1/2 cup (packed) golden brown sugar

About 2 pounds Bosc pears, peeled, quartered and cored

1 1/3 cups all purpose flour

2/3 cup sugar

2 tablespoons minced crystallized ginger

1 1/2 teaspoons ground cinnamon

1 teaspoon baking soda

1/2 teaspoon ground ginger

1/2 teaspoon kosher salt

3 large eggs

1/4 cup canola oil

¼ cup applesauce

1 teaspoon vanilla extract

1 teaspoon grated orange zest

1 cup grated peeled Bosc pears

Preheat your oven to 350. Melt the butter in the microwave, and mix it with the brown sugar in the bottom of a 10 inch cake pan. Spread the mixture in an even layer. Arrange the quartered pears in a flower design on top of the sugar. (One tip is to cover the pears in a little lemon juice while you are peeling and quartering the bunch. That way the first ones won’t turn brown while you work on the remaining ones. Then just give them a light rinse and dry before arranging them in the pan).

Whisk the flour, 2/3 cup sugar, crystallized ginger, cinnamon, baking soda, ground ginger and salt in medium bowl. Whisk the eggs, oil, applesauce, vanilla and orange peel in a large bowl. Then mix in the grated pears to the wet mixture. Finally, mix the dry ingredients into the wet mixture until just combined.

Carefully pour the batter over the pears in the cake pan. (It will be a pretty thick batter, but just coax it gently with a spatula to cover all of the pears). Bake until a toothpick inserted into the center comes out clean, about 40 minutes. Cool the cake in the pan for about 20 minutes. Then run a knife around the pan sides to loosen, place a serving plate over cake and invert it onto the plate. Serve warm. (It also refrigerates well if you would like to make it a day ahead. Just microwave the slices for about 20 or 30 seconds to warm through before serving).

We paired the meal with a bottle of Tin Barn Vineyards red wine that our parents gave us for our “tin” anniversary :). The winery was also founded 10 years ago. Perfect! (The Cabernet Sauvignon blend was very yummy…I’d recommend it if you like artfully crafted red Meritage blends).

A little anniversary celebration ~ Fresh Sweet Corn Flan and Affogato

Every August 1st, Rob and I celebrate two little anniversaries. It marks the day I moved to Seattle, as well as the day Rob and I moved into our current house together. We celebrate all kinds of little anniversaries like this one. They give us an excuse to have a nice dinner or to do something special. I figure who can’t use more excuses for little celebrations? 🙂

This year we had dinner in our backyard under our grape trellis with a bunch of candles glowing all around. I chose a summery menu that was a reflection of the best of the Northwest, since we were celebrating our home. Along with that theme, we had local Dungeness crab for the main course. It’s a special meal that we don’t have everyday, and it’s one of our very favorite things.

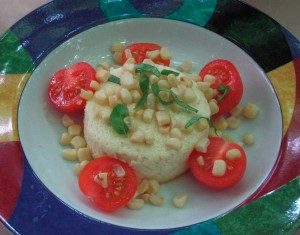
To go with the crab, I made fresh sweet corn flan with tomatoes and basil. This recipe uses very basic summer ingredients and transforms them into something unexpected. I followed the original recipe pretty closely (from Cooking Light magazine, which can be found at MyRecipes.com), so I am passing it along since we enjoyed it so much! I hope you do, too.

Fresh Sweet Corn Flan

Ingredients:

Cooking spray

2 1/2  cups fresh corn kernels (about 5 ears)

1 cup skim milk

1/3 cup freshly grated Parmesan cheese

1 teaspoon unbleached all-purpose flour

1/2 teaspoon salt

1/4 teaspoon freshly ground black pepper

4 eggs

A handful of cherry tomatoes, halved, to taste

A few leaves of sliced basil, to taste

Preheat your oven to 350 degrees.

Cook the corn kernels in a skillet coated with cooking spray for about 5 minutes or until they are tender. Set aside 1 cup of the kernels for garnish.

Place the remaining corn in a food processor, and pulse until coarsely chopped. Add the milk, cheese, flour, salt, pepper and eggs to the food processor, and pulse until well combined. (It will never be completely smooth, but the kernels will give the mix a little texture).

Pour about 1/2 cup of the corn mixture into 6 ramekins coated with cooking spray. Place the ramekins in a 13 x 9 inch baking pan. Add hot water to the pan to a depth of about an inch up the sides of the ramekins. Bake for 35 minutes or until set. Remove the ramekins from the pan, and cool for about 5 minutes. Invert each flan onto individual plates. Garnish each with corn kernels, tomato halves and basil.

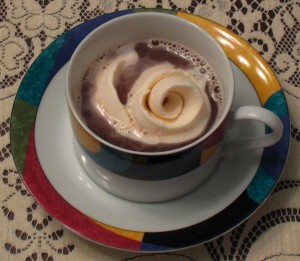
We ended the meal with another very easy, but very delicious dish called affogato. It is just a scoop of ice cream in a cup of coffee. It doesn’t get much simpler than that! 🙂 (As a side note, it means “drowned” in Italian as the ice cream ends up swimming in the coffee.) Since the Northwest is known for coffee, I thought this was a perfect ending to a dinner celebrating the Northwest. I originally saw this dish on the Barefoot Contessa on the Food Network. It is so simple, but we think it is a really extraordinary dessert. I hope you do, too!

Affogato

Ingredients:

Vanilla ice cream or frozen custard

Strong decaf coffee or espresso

Scoop as much ice cream or custard as you would like for each individual serving into a coffee cup, and pour the warm coffee over the top immediately before serving or at the table.

Valentine’s Day/Chinese New Year ~ Moo Shu Pork and Homemade Fortune Cookies

This year Valentine’s Day (and our engagement anniversary) and Chinese New Year happened to fall on the same day, so we celebrated everything together with a romantic Chinese dinner at home. I love to celebrate holidays from all over the world in my own little way. It gives me one more way to spice things up with special moments. Who can’t use another reason to celebrate in the dark winter months? I tried two new recipes, and I would recommend them both if you would like a quiet night at home with Chinese take-in ~ Moo shu pork and homemade fortune cookies. It was an adventure in the kitchen, and I now have a greater appreciation for what my favorite local Chinese restaurant does after trying these dishes! The dishes were a little healthier since I could control the salt, cuts of meat, etc. Plus, we could make our own personal fortunes for each other to open, which was a fun bonus of making our own fortune cookies. (Is it cheating if you write your own fortunes?) 🙂 The first recipe I tried was Moo Shu Pork. The original recipe was from my favorite Cooking Light magazine, and it can be found at MyRecipes.com. I used simple cremini mushrooms instead of shiitake and wood ear to save quite a bit of money. But other than that detail, I followed the recipe pretty closely since it was already a lightened version of the dish.Moo Shu Pork2 tablespoons low-sodium soy sauce

2 tablespoons sake

1 teaspoon dark sesame oil

2 teaspoons cornstarch

1 (1 1/2-pound) pork tenderloin, trimmed of excess fat, and cut into 1 x 1/4-inch strips

4 ounces sliced cremini mushrooms

1/2 cup sliced green onions

3 tablespoons minced garlic (about 12 cloves)

2 tablespoons fresh ginger grated on a Microplane

3 tablespoons sake

3 tablespoons low-sodium soy sauce

1/2 teaspoon cornstarch

1/2 teaspoon sugar

1/4 teaspoon black pepper

1 tablespoon vegetable oil

2 eggs, lightly beaten

3 cups thinly sliced napa cabbage stalks

4 cups thinly sliced napa cabbage leaves

2 tablespoons sake

Hoisin sauce and flour tortillas for serving

Combine the first 4 ingredients in a zip top plastic bag. Add the pork. Seal and marinate in the refrigerator for about an hour, turning occasionally. Remove the pork from the bag, and discard the marinade.

Combine the sliced mushrooms, green onions, garlic, and ginger in a small bowl, and set aside.

Combine 3 tablespoons of sake and the next 4 ingredients (through black pepper) in a small bowl. Stir well with a whisk, and set aside.

Heat 1 1/2 teaspoons vegetable oil in a large nonstick skillet over medium-high heat. Add the pork, and stir-fry for 3 minutes.

Remove the pork from the pan. Add 1 1/2 teaspoons of vegetable oil to the pan. Add the eggs, and stir-fry 30 seconds or until soft-scrambled. Add the mushroom mixture and stir-fry 1 1/2 minutes. Add the cabbage stalks and stir-fry 30 seconds. Add the cabbage leaves and 2 tablespoons of sake. Stir-fry for 1 minute. Add the pork and the cornstarch mixture. Stir-fry 2 minutes or until the sauce is thickened.

Serve wrapped in warmed tortillas with hoisin sauce.

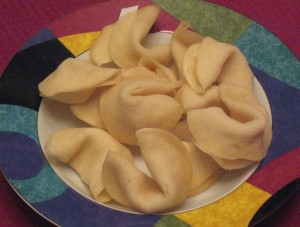
The second thing my husband and I made together was a batch of fortune cookies. I would recommend doing these with a partner, since they harden very quickly once they come out of the oven. We each filled out personalized little strips of paper for the fortunes, and then opened each other’s for a surprise. The original recipe was from the Food Network.

Homemade Fortune Cookies

1/2 cup all-purpose flour

1 teaspoon cornstarch

1/2 cup sugar

2 large egg whites

1 teaspoon vanilla extract

2 tablespoons canola oil

1 tablespoon water

Cooking spray for the pans

Write your fortunes on little pieces of paper before you begin.

Preheat the oven to 300 degrees.

In a small bowl, sift together the flour, cornstarch and sugar.

In a medium bowl, whisk together the egg whites, vanilla, oil, and water. Add the dry ingredients into the wet ingredients and mix until smooth.

Working in batches of 4, drop the batter by tablespoons on a baking sheet covered with a silicone mat. Tilt the baking sheet in a circular motion (and use your finger if need be) to spread the batter into 4-inch diameter circles.

Bake until the edges of the cookies are golden brown, about 10 minutes. Remove from the oven, and working quickly, use a spatula to remove the cookies from the baking sheet. Put a fortune into the center of a cookie and fold it in half. Bring the points together with open seams on the outside. Arrange in muffin tins to help keep their shape while they are cooling.

Repeat with the remaining fortunes and cookies.

We paired the meal with Sofia Blanc de Blancs (the same kind of sparkling wine that we enjoyed on New Year’s Day, which seemed fitting) with mandarin orange slices floating in the bubbles for the occasion.

I decorated the table with red (the color of both holidays) and a blend of Chinese New Year and heart decorations for Valentine’s Day and our engagement anniversary. For example, I printed a Year of the Rat image and a Year of the Dragon image, since they were the years that Rob and I were born. That added a little personal romantic touch. I also printed a matching Year of the Tiger image for the middle of the table, which was the year we celebrated today.

Happy Valentine’s Day!

Happy Valentine’s Day! My husband and I are planning to celebrate a little belatedly this year since he’s out of town today, but I published a little article about some of my ideas for the holiday at this link –

Valentine’s Day and Chinese New Year Celebration for February 14th

I hope you all have a good day!