Mardi Gras ~ King Cake

Happy Mardi Gras!

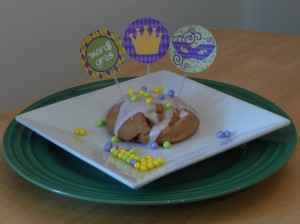
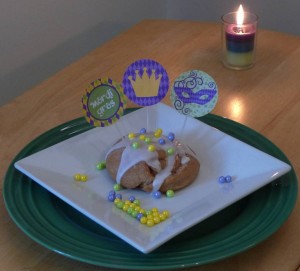
I couldn’t think of anything better to celebrate the holiday than king cake. I love the story and history surrounding the cake. In Louisiana, they decorate the top with the colors of Mardi Gras – purple, yellow, and green. They also hide a small plastic baby or a trinket inside. I made mini cakes this year based on a recipe from AllRecipes.com. I substituted all of the butter with Earth Balance, and replaced half of the all-purpose flour with whole-wheat flour. The result was nutty and delicious! With the glaze, they make a nice dessert, but without the glaze, they are perfect for breakfast. 🙂

Mardi Gras King Cake

Based on a recipe from AllRecipes.com

Pastry:

½ cup + 2 tablespoons non-fat milk

2 tablespoons Earth Balance

1 (.25 ounce) package active dry yeast

1/3 cup warm water (110 degrees F/45

degrees C)

1/4 cup white sugar

1 egg

1/4 teaspoon freshly grated nutmeg

1 ¼ cups + 2 tablespoons all-purpose flour

1 ¼ cups + 2 tablespoons whole-wheat flour

Filling:

1/2 cup packed brown sugar

1-1/2 teaspoons ground cinnamon

1/3 cup chopped pecans

1/4 cup all-purpose flour

1/4 cup melted Earth Balance

Glaze:

1/2 cup confectioners’ sugar

1-1/2 teaspoons water (approximately…add a little more or less to get the consistency you desire)

To make the pastry: Combine warmed milk and melted Earth Balance. Allow mixture to cool to room temperature. In a large bowl, dissolve yeast in the warm water with 1/2 tablespoon of the white sugar. Let stand until frothy, about 10 minutes.

When yeast mixture is bubbling, add the cooled milk mixture. Whisk in the egg. Stir in the remaining white sugar, and nutmeg. Stir both flours into the milk/egg mixture a little at a time. When the dough has pulled together, turn it out onto a lightly floured surface and knead until smooth and elastic, about 2 minutes.

Lightly oil a large bowl, place the dough in the bowl and turn to coat with oil. Cover with a damp cloth or plastic wrap and let rise in a warm place until doubled in volume, about 1 to 2 hours. When risen, punch down.

To make the filling: Combine the brown sugar, ground cinnamon, chopped pecans, and flour. Pour 1/4 cup melted Earth Balance over the cinnamon mixture and mix until crumbly.

Preheat oven to 375 degrees F (190 degrees C). Grease a cookie sheet or line with parchment paper.

Divide the dough into 8 equal pieces. Roll each piece into a rectangle (approximately 6 by 8 inches or so). Sprinkle 1/8th of the filling evenly over each piece of the dough. Roll up each piece tightly like a little jelly roll, beginning at the wide side. Bring the ends of each roll together to form 8 oval shaped rings. Place each ring on a prepared cookie sheet. If you wish, make cuts with scissors 1/3 of the way through the rings at 1 inch intervals. Let rise in a warm spot until doubled in size, about 45 minutes.

Bake in preheated oven for about 20 minutes, until golden. If you are partaking in the tradition of adding a baby or trinket, place it in the bottom of one of the cakes after it is baked. Whisk together the glaze ingredients. Frost the cakes with the glaze and purple, green, and yellow sprinkles if you wish.

I decorated with some cute Mardi Gras printables from MardiGrasOutlet.com. They are free, so help yourself! 🙂 I also found some pretty little edible beads in purple, yellow, and green. They looked like Mardi Gras beads to me, so they seemed perfect for the cake! We don’t plan to eat them, but they were too cute for me to pass up for decoration. 🙂

I hope you enjoy your Fat Tuesday!

Happy Lunar New Year ~ Vietnamese Steamed Layer Cakes

We had a little culinary adventure this year in honor of the Lunar New Year in Vietnam (Tết). Rob and I love Vietnamese food, and we often go out for it in the International District. I also attended a Tết festival in Seattle Center this year where they had dragon dancers, firecrackers, and a chef demonstration. The chef made steamed rice cakes, which inspired me to give this type of cake a try at home!

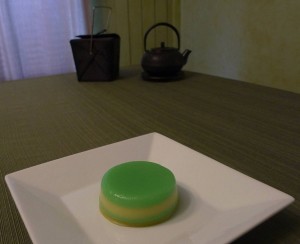
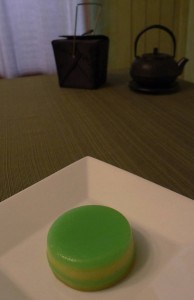
I found this recipe on a Vietnamese cooking website called DanangCuisine.com. They were very pretty little desserts, with several layers of color from pandan and mung beans. I followed the recipe rather closely since I had never tried anything quite like this before in my kitchen. I did use light coconut milk instead of the full fat version, and I reduced the sugar a little bit, but otherwise followed the expert. 🙂

BÁNH DA LỢN – STEAMED LAYER CAKES

Based on a recipe from DanangCuisine.com

200 g tapioca starch (7 oz)

50 g rice flour (1.76 oz)

1 tsp pandan extract (or 5 fresh pandan leaves)

100 g peeled mung bean (3.5 oz)

200 g sugar (8.8 oz)

pinch of salt

400 ml light coconut milk (14 fl. oz)

300 ml water (10 fl. oz)

Rinse the mung beans a few times until the water becomes clear and soak in water for at least 1 hour (or overnight). Add just enough water to barely cover the beans and cook in a rice cooker until done. Alternatively, you can steam the beans for 15-20 minutes or until soft.

In a saucepan over low heat, dissolve sugar and salt in coconut milk and water. Let cool. In a large bowl, combine tapioca starch, rice flour and the coconut mixture. Stir well until dissolved.

In a blender, combine 350ml (1 + 1/2 cups) of the above batter with the cooked mung beans and blend until smooth. You will get a yellow batter.

Add pandan extract to the remaining batter. You will get a green batter. (To make pandan extract, blend 5 finely chopped pandan leaves with 120ml (1/2 cup) water and extract the juice.)

Grease the mold (or several smaller molds, such as ramekins) with vegetable oil. Fill the mold(s) with the green batter to a depth of about ½ inch (1cm). Cover and steam for a few minutes until slightly set. Then add the same amount of the yellow batter. Continue pouring and steaming the alternate colors until the molds are filled to the top.

After the last layer, steam the whole cake for another 15 minutes. When you poke the center of the cake with a chopstick and see no batter spilling, it is done.

Let cool completely and cut into pieces with a greased knife. You can keep the cake(s) in the refrigerator for up to 2-3 days. Warm slightly in the microwave before serving.

Happy New Year!

PS. If you live in the Northwest, Uwajimaya has all of the ingredients in this recipe. I love to visit my local store and explore the ingredients that most American markets don’t carry.

Happy Christmas ~ English Christmas Pudding

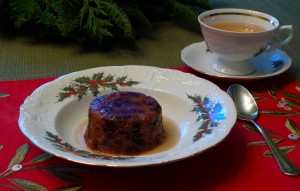
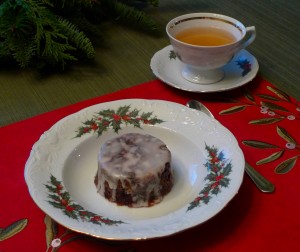
I decided to explore my British heritage a little this December by making Christmas pudding. It is also called plum pudding, but the interesting thing I learned is that there are no plums in the dish. The pre-Victorian use of the word “plum” meant “raisins,” and it does have plenty of those!

I love the tradition of making a wish as you stir the pudding. It is also traditional to pour brandy on the top of the pudding, light it, and bring it to the table with a flame. It produces a subtle, but pretty blue color. There is so much history in this little dish. I found it fascinating to take part in a tradition my great-grandparents and their parents probably also took part in.

I based my puddings on a recipe from the BBC. I halved the recipe, and made individual puddings in 6 small 8-ounce ramekins. I replaced the Bramley apple with a Granny Smith, since Bramleys are not readily available to us in the States. I only used 4 ounces of butter for half of the recipe, since American butter is packaged in 4-ounce (or 113 gram) sticks. It was a little less than half of what the recipe called for, but it was plenty. I only needed to steam the puddings for 3 hours instead of 8 since I made them in the small ramekins rather than larger bowls. I also used a simple glaze of powdered sugar and cognac instead of the buttered version.

I’ll leave the recipe in the metric format to keep it authentically British. 🙂

Classic Christmas pudding

Recipe based on BBC Good Food

25g (about 1 oz) blanched almonds

1 large Granny Smith apple

100g (3.5 oz) box candied peel (in large pieces) or all citron if you can find it

1 whole nutmeg (you’ll use a little over 1/4 of it)

500g (18 oz) raisins

70g (2.5 oz) all-purpose flour

50g (1.75 oz) soft fresh white breadcrumbs

50g (1.75 oz) light muscovado sugar, crumbled if it looks lumpy

1 large egg

1 large egg white

1 tbsp brandy or cognac, plus extra to flame and for glaze

113g (4 oz) packet butter, taken straight from the fridge

Confectioner’s sugar for glaze

Get everything prepared. Chop the almonds coarsely. Peel, core and chop the apple. Sharpen your knife and chop the candied peel. (You can chop the almonds and apple in a food processor, but the peel must be done by hand.) Grate a little over 1/4 of the nutmeg. Mix all the ingredients for the pudding, except the butter, in a large bowl.

Holding the butter in its wrapper, grate a quarter of it into the bowl, and then stir everything together. Repeat until all the butter is grated, then stir for 3-4 minutes – the mixture is ready when it subsides slightly after each stir. Ask the family to stir too, and get everyone to make a wish.

Generously butter six 226 g (8 ounce) ramekins and put a disc of greaseproof paper in the bottom of each. Pack in the pudding mixture. Cover with a double layer of greaseproof paper or baking parchment, pleating it to allow for expansion, then tie with string (keep the paper in place with a rubber band while tying). Trim off any excess paper.

Now stand each bowl on a large sheet of foil and bring the edges up over the top, then put another sheet of foil over the top and bring it down underneath to make a double package (this makes the puddings watertight). Tie with more string, and make a handle for easy lifting in and out of the pan.

Steam the puddings for 3 hours, topping up with water as necessary. (I used a big pot with a steamer basket on the stovetop, taking care to keep the puddings above the water.) Remove from the pan and leave to cool overnight. When cold, discard the messy wrappings and re-wrap in spanking new greaseproof or baking parchment, foil and string. Store in a cool, dry place until Christmas.

On Christmas Day, steam until warmed through. (Microwaving also works in a pinch.) Unwrap and turn out. To flame, warm 3-4 tbsp brandy in a small pan, pour it over the pudding and set light to it.

Top with a glaze of brandy or cognac and powdered sugar. Add a little brandy at a time to the sugar until the glaze is to the consistency you like. Pour the glaze over the puddings before serving.

Happy Christmas!

PS. The top photo has a faint blue cognac flame on my Christmas pudding. 🙂 Click on the picture for a closer view.

Holiday Treat ~ Snowflake Marshmallows

Happy holidays!

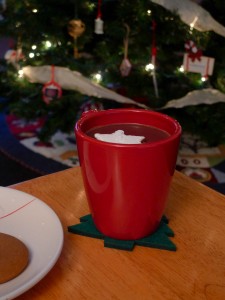
We had a festive weekend – We put up our Christmas tree, decorated the house, and baked gingerbread Christmas cookies. We also cut out some snowflake shaped marshmallows to go with our hot cocoa. Since I learned how to make homemade marshmallows last month, I am excited about all of the possibilities! This one is perfect for the season, I think. 🙂

The recipe for the marshmallows can be found here.

Happy Thanksgiving ~ Homemade Marshmallows

Happy Thanksgiving!

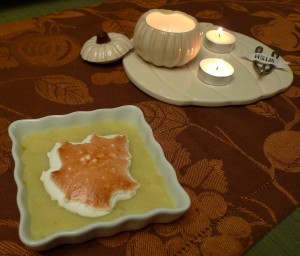
This year I learned how to make homemade marshmallows during the week of Thanksgiving. So fun! I thought it was pretty amazing to see how they come together and how easy they are to make at home. Now I have all kinds of ideas about how to use this recipe throughout the winter. You can add coloring or flavoring and cut them into any shape you’d like. Maybe I’ll make peppermint flavored marshmallows in the shape of snowflakes for hot cocoa, or red and green marshmallows for Christmas gifts. The possibilities are endless. 🙂 For Thanksgiving, I cut them into the shape of a leaf and toasted them on top of our mashed sweet potatoes. This is the basic marshmallow recipe from a candy workshop at Sur La Table.

Homemade Marshmallows

From Sur La Table cooking classes

Yield: about 60 marshmallows

2 teaspoons unsalted butter, softened

3 envelopes unflavored powdered gelatin

1 cup cold water, divided

2 cups sugar

1 cup light corn syrup

1/4 teaspoon kosher salt

1 teaspoon pure vanilla extract

Equal parts cornstarch and powdered sugar for dusting

Line a 9×14 inch baking pan with aluminum foil, allowing two opposite sides to overhang by 3 inches. Grease the foil with the softened butter. Set aside.

In the bowl of a stand mixer, add 1/2 cup cold water. Sprinkle gelatin over the water and set aside to soften.

In a large saucepan, combine remaining 1/2 cup water, sugar, corn syrup, and salt. Bring mixture to a boil, stirring occasionally. Cook, without stirring, until a candy thermometer reads 240 degrees, or the soft ball stage.

Remove saucepan from heat and gradually whisk sugar mixture into the softened gelatin, Fit the mixer with a paddle attachment and beat mixture on high speed until thick and the volume is doubled. Beat in the vanilla. Spread mixture into the prepared pan using a greased icing spatula. Cover with plastic wrap and let marshmallow mixture stand at room temperature for 6 hours or overnight.

Using the foil overhang as handles, lift the marshmallows out of pan. With a sharp chef’s knife or pizza cutter coated with cooking spray, cut marshmallows into 1 x 2 inch squares.

You can also cut them with cookie cutters into any shape you fancy. Make sure to keep all of your exposed sides coated in the mixture of cornstarch and powdered sugar. (It is incredibly sticky otherwise.) Give the final product a good dusting, as well.

To brown the top as I did, use a broiler or a kitchen torch. Just watch them closely in the broiler since they only need about a minute.

Happy holidays!

Happy Halloween ~ Ghostly Devil’s Food Cupcakes

Happy Halloween!

We made devil’s food cupcakes again this year since we enjoyed them so much last year. We tried decorating in a fun and different way this time around, however. My mom gave me some cute little ghost cupcake papers this year, which is what inspired me to make little ghosts on the top. We just used store bought fondant, and don’t plan to eat it ;-). It’s like Play-Doh for adults! We had a really fun evening playing with it. Just roll it out, cut it into circles, and place on top of the cupcakes. Secret: We used a sake glass on top of the cake to keep our little ghost suspended. Wet the end of 2 mini chocolate chips, and stick them on for eyes. So cute!

Here is the recipe for the cakes once again ~

Devil’s Food Cupcakes

Adapted from Bon Appetit magazine

1 1/4 cups sugar

1 cup buttermilk

2/3 cup vegetable oil

2 eggs

1 teaspoon vanilla

1 1/2 cups all purpose flour

1/2 cup unsweetened cocoa powder

1 1/4 teaspoons baking soda

Preheat oven to 350°F. Line baking pan with 14 cupcake papers. Whisk first 5 ingredients in large bowl to blend. Sift in flour, cocoa and baking soda. Stir to combine. Fill each cupcake about ¾ full with batter. Bake until toothpick inserted into centers comes out clean, about 20 minutes. Turn cakes out onto racks and cool completely.

Have a fun and spooky Halloween!

May Day is Lei Day ~ Coconut Cupcakes

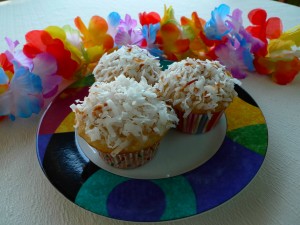
May 1st is Lei Day in Hawaii, so I thought the month of May would be a good time to bake some Hawaiian inspired coconut cupcakes! Coconut is one of my very favorite flavors, so I will take any excuse to make something with it. And Hawaii is one of my very favorite places, so I love to make anything that brings to mind that beautiful state :-).

I started with a recipe from the Barefoot Contessa, Ina Garten, for her coconut cupcakes. I changed the recipe quite a bit to make them a lot healthier, however. I omitted the butter and instead used coconut oil. I increased the amount of buttermilk to reduce the higher fat ingredients. I used 100% whole wheat pastry flour instead of all purpose flour. And I also reduced the amount of sugar.

Coconut Cupcakes

Based on a recipe from Ina Garten, the Barefoot Contessa

1/2 cup coconut oil
1 cup sugar
5 extra-large eggs at room temperature
1 1/2 teaspoons pure vanilla extract
1 1/2 teaspoons pure almond extract
3 cups whole wheat pastry flour
1 teaspoon baking powder
1/2 teaspoon baking soda
Pinch of salt
2 cups buttermilk
7 ounces sweetened, shredded coconut

Preheat the oven to 325 degrees F.

In the bowl of an electric mixer fitted with the paddle attachment, blend the coconut oil and sugar on high speed, about 5 minutes. With the mixer on low speed, add the eggs, one at a time, scraping down the bowl after each addition. Add the vanilla and almond extracts and mix well.

In a separate bowl, whisk together the flour, baking powder, baking soda, and salt. In three parts, alternately add the dry ingredients and the buttermilk to the batter, beginning and ending with the dry. Mix until just combined. Fold in the coconut.

Line a muffin pan with paper liners. Fill each liner to the top with batter. Bake for 25 to 35 minutes, until the tops are brown and a toothpick comes out clean. Allow to cool in the pan for 15 minutes. Remove to a baking rack and cool completely.

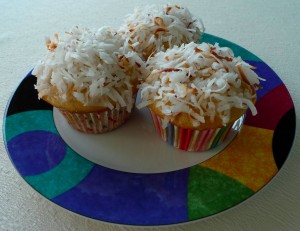
You can top the cupcakes with a glaze of confectioner’s sugar and water, and a sprinkling of toasted sweetened coconut on top. Or they are good for breakfast without any topping :-).

Aloha!

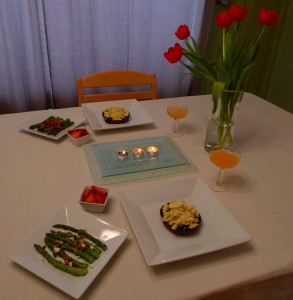
Elegant Spring Anniversary Brunch, Part 3 ~ Strawberries Dusted With Cardamom Sugar

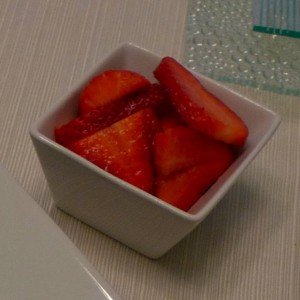
We enjoyed a sweet finale to our spring anniversary brunch – Strawberries Dusted With Cardamom Sugar. It was such a refreshing and unique flavor combination. It felt like a special dish, even though it only took a couple of minutes to assemble. This would be a very nice addition to any special brunch. (Easter and Mother’s Day are coming! :)) I used the original recipe as a guide, but I really made everything to taste. I sliced my berries before serving, and I only used a light dusting of sugar. (Now I have some leftover cardamom sugar for another recipe.)

Strawberries Dusted With Cardamom Sugar

Adapted from Bon Appétit magazine

1/4 cup sugar, or to taste

1/4 teaspoon ground cardamom, or to taste

2 tablespoons Grand Marnier or other orange liqueur or orange juice

1 16-ounce basket strawberries, hulled, left whole or sliced

Whisk sugar and cardamom in small bowl to blend.

Pour Grand Marnier into large bowl. Add strawberries to bowl and toss to coat. Sprinkle to taste with cardamom sugar. Serve.

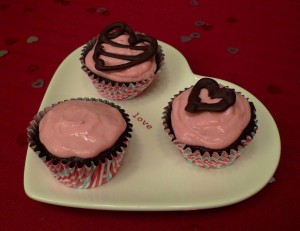
Happy Valentine’s Day! ~ Chocolate Cupcakes with Raspberry Cream Cheese Frosting and Chocolate Hearts

Happy Valentine’s Day!

I found some adorable Valentine cupcake recipes on MarthaStewart.com. I combined a few of my favorites, since there were so many cute ideas that I couldn’t decide on just one. 🙂 These are inspired by a combination of Martha’s recipes for Raspberry Cupcakes with Pink Buttercream and Lacy Chocolate Hearts as well as her Frosted Chocolate-Buttermilk Cupcakes.

For the cake recipe, I replaced the all-purpose flour with whole wheat pastry flour, I reduced the sugar slightly and I replaced the butter with coconut oil. Now they are a little more heart-healthy for heart day!
Chocolate Cupcakes

Based on a recipe from MarthaStewart.com

3/4 cup whole wheat pastry flour, (spooned and leveled)

2/3 cup sugar

1 teaspoon baking powder

1/2 teaspoon baking soda

1/4 teaspoon salt

6 tablespoons unsweetened cocoa powder, preferably Dutch-process

3 tablespoons coconut oil

6 tablespoons buttermilk

1 large egg

1 large egg white

Light Cream-Cheese Icing (recipe follows)

Chocolate Hearts decorations (recipe follows)

Directions

Preheat oven to 350 degrees. Line standard 12-cup muffin tin (or two 6-cup muffin tins) with paper liners. In a large mixing bowl, combine flour, sugar, baking powder, baking soda, and salt; set aside.

With an electric mixer, combine cocoa and 3 tablespoons hot water until a thick paste forms. Add coconut oil, buttermilk, egg, and egg white; beat until combined. Whisk in flour mixture until smooth.

Scoop (or spoon) batter into prepared tin(s). Bake until a toothpick inserted in the center of a cupcake comes out clean, about 20 minutes. Transfer cupcakes to a wire rack to cool completely.

Use an offset spatula or butter knife to spread icing over tops. Decorate as desired.

The original icing recipe was already a lightened version of a cream cheese frosting. I decided to make it a little more special and festive for the holiday by adding some raspberry puree, which made it pink! 🙂 It’s more natural than red food coloring, and I love the raspberry flavor paired with the chocolate. I used a little less sugar than the recipe called for. Just taste as you go, and add as much or as little sugar and raspberry puree as you desire.

Light Cream Cheese Icing

Based on a recipe from MarthaStewart.com

Ingredients

3 ounces reduced-fat cream cheese

1 cup confectioners’ sugar

1/2 bag of frozen raspberries

Directions

Thaw raspberries, and blend until pureed in a food processor. Strain through a fine mesh strainer to remove the seeds. With an electric mixer, beat cream cheese and as much of the confectioners’ sugar and raspberry puree as you desire. (To make without a mixer, sift sugar before stirring into cream cheese.)

I made free form chocolate hearts to go on top of the cakes. However, if you’d like more perfect and uniform shapes, below is Martha’s technique :).

Chocolate Hearts

Inspired by Martha Stewart’s Chocolate Filigree Hearts

Ingredients

Dark or milk chocolate

Directions

Trace the inside of a 2-inch heart-shaped cookie cutter (surlatable.com) onto parchment 30 times using a pencil.

Flip parchment, and transfer to a baking sheet.

Melt 4 ounces chopped bittersweet chocolate in a double boiler or heatproof bowl set over a pan of simmering water. Let cool slightly. Transfer to a parchment cone (or resealable plastic bag). Snip a tip to make a small hole.

Pipe chocolate into hearts, following outlines and filling in with squiggles (be sure squiggles are at least 1/4 inch thick so hearts won’t break when removed).

Freeze hearts until set, about 15 minutes. Remove hearts using an offset spatula. Makes 30.


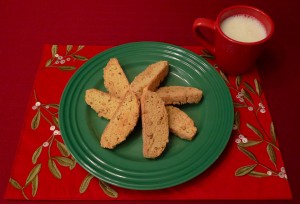
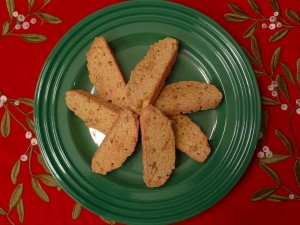
Christmas Cookies ~ Pine Nut Biscotti

Santa needs to have some cookies on Christmas Eve, so I baked up a batch of my favorite pine nut biscotti for him ;).  This recipe makes me think of Christmas since the creamy nuts are another part of the Christmas tree! I think it’s a fun but sophisticated version of a Christmas cookie. I’ve made these cookies for several years now, and they’ve become a favorite at our house. They also ship well if you’d like to send them to loved ones far away. They are naturally low in fat since there is no added oil or butter, so they are a good choice in lieu of some of the decadent Christmas goodies of the season. I hope you enjoy them as much as we do! And don’t forget to save a few for Santa ;).

Pine Nut Biscotti

From Cooking Light magazine

3 cups all-purpose flour (about 13 1/2 ounces)

1 cup sugar

1 teaspoon baking powder

1/2 teaspoon salt

1/2 teaspoon baking soda

1/2 cup pine nuts, toasted

1/4 cup plus 2 tablespoons water

1 teaspoon grated lemon rind

1 teaspoon vanilla extract

3 large eggs

Preheat oven to 325°.

Lightly spoon flour into dry measuring cups; level with a knife. Combine flour, sugar, baking powder, salt, and baking soda in a large bowl, stirring with a whisk. Stir in pine nuts. Combine 1/4 cup plus 2 tablespoons water, rind, vanilla, and eggs, stirring with a whisk. Add egg mixture to flour mixture, stirring until well blended (dough will be dry and crumbly). Knead dough lightly in bowl 7 or 8 times or until a dough forms (dough will be sticky).

Divide dough in half. Shape each portion into an 8-inch-long roll. Place rolls 6 inches apart on a baking sheet lined with parchment paper; flatten each roll to 1-inch thickness.

Bake at 325° for 30 minutes. Remove rolls from baking sheet (do not turn oven off); cool 10 minutes on a wire rack.

Cut each roll diagonally into 15 (1/2-inch-thick) slices using a serrated knife. Place slices, cut sides down, on baking sheet.

Bake at 325° for 15 minutes. Turn cookies over, and bake an additional 10 minutes (cookies will be slightly soft in center but will harden as they cool).

Remove from baking sheet; cool completely on wire racks.

Yield:  2 1/2 dozen (serving size: 1 biscotto)

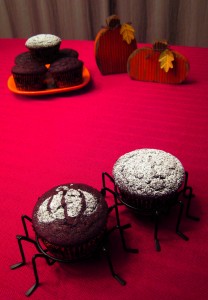
Boo! ~ Devil’s Food Cupcakes

Happy Halloween!

I was in the mood for something sweet, something chocolately, and something a bit spooky today ;-). Devil’s food cupcakes!

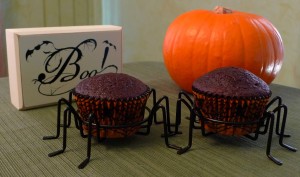
I followed a recipe from Bon Appetit magazine, but omitted the frosting. I like them plain or with a little powdered sugar on top. I also made them cupcakes instead of full cakes since I wanted to use the cute little Halloween spider cupcake papers I had :).

Devil’s Food Cupcakes

Adapted from Bon Appetit magazine

1 1/4 cups sugar

1 cup buttermilk

2/3 cup vegetable oil

2 eggs

1 teaspoon vanilla

1 1/2 cups all purpose flour

1/2 cup unsweetened cocoa powder

1 1/4 teaspoons baking soda

Preheat oven to 350°F. Line baking pan with 14 cupcake papers. Whisk first 5 ingredients in large bowl to blend. Sift in flour, cocoa and baking soda. Stir to combine. Fill each cupcake about ¾ full with batter. Bake until toothpick inserted into centers comes out clean, about 20 minutes. Turn cakes out onto racks and cool completely.

They really couldn’t be easier, so this will definitely be a go-to recipe when I am craving chocolate cake! They would be great for birthdays or showers or whenever :).

I also found a website with really cute Halloween labels for everything from wine bottles to beer bottles to water bottles. They can be found at this link from Centsational Girl’s blog. I picked my favorite, printed it on regular printer paper, and stuck it to a bottle of our house wine with two sided tape. So cute!

I hope you have a fun Halloween evening! Now it’s time for the trick or treating to begin!

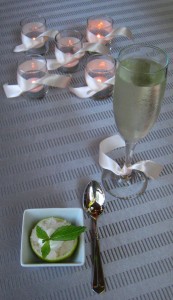
Happy wedding anniversary ~ Part 3 ~ Lime Granita with Candied Mint Leaves and Sweet Sour Cream

We finished our Italian anniversary feast with a light little dessert. It was so small and refreshing that it could actually be served in between the courses of a rich dinner, as well.

I found the original recipe from Epicurious.com, but I reduced the sugar quite a bit. We like our citrus desserts to be a little tart, so if you like things a little sweeter, you may want to add more sugar. Taste before you put it in the freezer. I used light sour cream instead of the full fat version, also.

Lime Granita with Candied Mint Leaves and Sweet Sour Cream

Based on a recipe from Epicurious.com

Granita:

1 1/2 cups water

1/2 cup sugar

1/2 cup fresh lime juice

Candied Mint Leaves:

2 tablespoons sugar

6 fresh mint leaves, washed, patted dry

1 large egg white, beaten until foamy

Sweet Sour Cream:

1/2 cup light sour cream

1 1/2 tablespoons powdered sugar

For granita:
 Bring water and sugar to boil in medium saucepan, stirring until sugar dissolves. Reduce heat to medium and simmer 5 minutes. Cool syrup. Stir in lime juice. Transfer lime syrup to 9 by 9-inch glass baking dish. Cover and place in freezer. Stir every 45 minutes until frozen, about 3 hours. DO AHEAD Granita can be made 2 days ahead. Cover and keep frozen.

For candied mint leaves:
 Place sugar on small shallow plate. Brush both sides of 1 mint leaf lightly with egg white; dredge in sugar. Transfer mint leaf to rack. Repeat with remaining mint leaves. Let mint stand at room temperature until dry, about 3 hours. DO AHEAD Can be made 1 day ahead. Store in airtight container at room temperature.

For light sour cream:
 Mix light sour cream and sugar. DO AHEAD Can be made 1 day ahead. Cover and chill.

For a fun presentation from Epicurious, serve the granita in hollowed-out lime halves. To prepare the limes, snip the membranes with scissors, and then scrape clean with a grapefruit spoon.

Using fork, scrape granita to loosen. Spoon granita into bowls or lime halves; drizzle with light sour cream, garnish with candied mint leaves, and serve immediately.

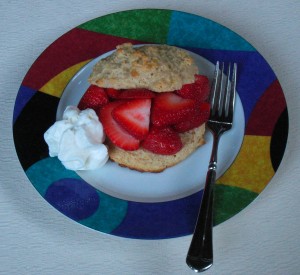
August 1st Celebration ~ Lemony Strawberry Shortcakes

We enjoyed a few delicious Dungeness crabs for dinner, as we do every year to celebrate this little anniversary. It marked 14 years since we moved into our current house together, and 17 years since I have lived in Seattle! After dinner, we needed something sweet to top off the night :).  I decided to make lemony strawberry shortcakes since Washington strawberries are wrapping up for the season. I found a recipe for the biscuits from Bon Appétit magazine, and then tweaked it to make it a bit healthier. I replaced half of the all-purpose flour with whole-wheat pastry flour and I also replaced the butter with melted Earth Balance buttery spread. Very summery and fresh with a little twist of lemon.

Lemony Strawberry Shortcakes

Adapted from Bon Appétit magazine

1 cup all-purpose flour

1 cup whole-wheat pastry flour

1/3 cup sugar

1 tablespoon baking powder

1 tablespoon grated lemon peel

1/2 teaspoon salt

1 cup low-fat buttermilk

1/4 cup (1/2 stick) Earth Balance buttery spread, melted, cooled

2 quarts fresh strawberries

Preheat oven to 400°F. Mix flour, sugar, baking powder, lemon peel and salt in large bowl. Whisk buttermilk and melted butter in medium bowl to blend. Add to flour mixture and stir just until moist dough forms. Drop 8 dough mounds (about 1/3 cup each) onto nonstick baking sheet. Using lightly floured hands, gently pat biscuits into neat 2 1/4-inch-diameter round about 1 1/4 inches high. Bake until biscuits are golden brown, about 15 minutes.

Cut warm biscuits in half horizontally. Place bottom halves of biscuits on 8 plates. Spoon strawberries over. Place top halves of biscuits over everything and serve.

We paired our dinner with 14 Hands Merlot to compliment our 14th anniversary. We first tried the wine around the anniversary of our first date back in April (also 14 years ago), and it has since become our house wine for the year. Local, delicious, and inexpensive :). Perfect combination!

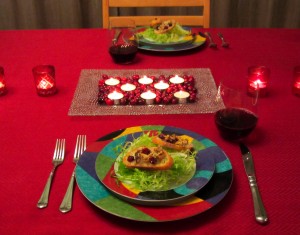
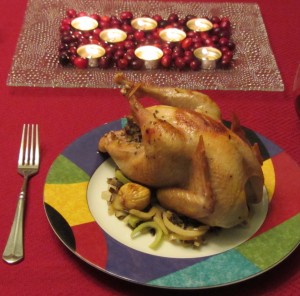
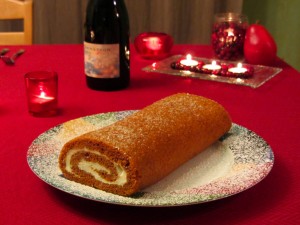
Lots to be thankful for ~ Roasted Pheasant with Chestnuts, Wild Rice and Fennel, Frisée Salad with Blue Cheese, Walnut and Cranberry Crostini and a Pumpkin Cake Roll with Cream Cheese Frosting

Happy Thanksgiving!

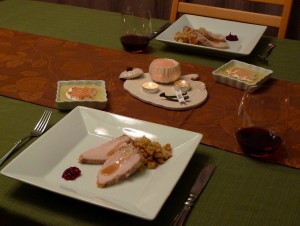
We celebrated a little early with family this year, so Rob and I had a quiet and cozy Thanksgiving for two on the actual holiday. I decided to shake things up a bit since we had the traditional turkey and sweet potatoes and all of that last week. For our own little celebration, we had Roasted Pheasant with Chestnuts, Wild Rice and Fennel, Frisée Salad with Blue Cheese, Walnut and Cranberry Crostini and a Pumpkin Cake Roll with Cream Cheese Frosting. If you would like to try something off the beaten path for your holidays, we both thought all three were exceptional! The recipes were twists on the traditional fare, so it still felt like Thanksgiving, but it was fun to try a few new things.

The frisée salad was a festive little starter for our meal. I have to admit, I am not a big cranberry sauce fan, and so the addition of dried cranberries on the crostini was my version of “cranberry sauce.” 😉 I used quite a bit less blue cheese than the original recipe called for, and I was actually able to find a reduced fat cheese by Stella that had a very full flavor. I also used a baguette instead of ciabatta since I liked the size better, and it has fewer holes to let the goodies fall through ;). I made the whole recipe for the crostini, so as to have leftovers as snacks in the coming days.


Frisée Salad with Blue Cheese, Walnut, and Cranberry Crostini

Adapted from Bon Appétit magazine

24 ½ or ¼ inch-thick slices of a French baguette, depending on your preference

3 tablespoons walnut oil, divided

1/2 cup chopped toasted walnuts

1/4 cup reduced fat blue cheese, crumbled

5 tablespoons minced shallots, divided

1/3 cup dried cranberries

1 bunch of frisée lettuce

1 teaspoon red wine vinegar

Preheat oven to 400°F. Arrange bread slices on baking sheet. Brush bread slices on top side with 2 tablespoons walnut oil. Bake until crisp, about 5 minutes.

Mix walnuts, cheese, 4 tablespoons shallots, and dried cranberries in medium bowl. Sprinkle mixture on toasts. Bake until cheese melts, about 4 minutes.

Meanwhile, combine frisée, 1 tablespoon shallots, 1 tablespoon walnut oil, and vinegar in bowl. Serve with crostini on top of the frisée.

For the pheasant dish, I followed the recipe pretty closely. I did omit the butter when called for and used olive oil instead. I also needed to cook the pheasant longer than 40 minutes to get the breast meat to 160 degrees. If you haven’t ever had pheasant before (like we hadn’t) it has a very mild taste, but it is definitely not chicken or turkey. It was less gamey than I expected. A nice refreshing change from our usual poultry choices :). The sizes of the pheasants were also perfect for two with leftovers. I used two little 2 lb birds. (If you are in the Seattle area, Don and Joe’s Meats in Pike Place Market carries pheasant along with many other specialty meats. It’s a fun place to visit if you are looking for a little culinary adventure!)


Roasted Pheasant with Chestnuts, Wild Rice and Fennel

Adapted from MarthaStewart.com

2 cups fresh chestnuts

3/4 cup wild rice

1 teaspoon salt, plus more to taste

2 pheasants (about 2 pounds each)

1/4 cup fresh rosemary, finely chopped

1 clove garlic, minced

6 shallots, 2 minced and 4 slivered lengthwise

Freshly ground pepper

2 tablespoons plus 2 teaspoons olive oil

2 fennel bulbs (about 8 ounces each), sliced thinly crosswise

1 cup homemade chicken stock, or canned low-sodium chicken broth, skimmed of fat

Preheat oven to 425 degrees. With a sharp knife, make two crosscut gashes on flat side of chestnuts. Place on a baking sheet, and roast for 15 to 20 minutes. When cool enough to handle, peel off skins and set aside.

Rinse rice well. In a medium saucepan, combine with 3 cups water. Bring to a boil, reduce heat, cover loosely, and allow to simmer for 25 minutes. Remove from heat, add 1/2 teaspoon salt, and let sit for 10 minutes. Drain, and set aside.

Rinse pheasant, and pat dry. Combine rosemary, garlic, minced shallots, and salt and pepper to taste. Rub cavity with mixture. Season outside with salt and pepper. Tie pheasant’s legs together with kitchen twine. Tuck wings under breast.

Reduce heat to 350 degrees. Pour 1 tablespoon oil in a roasting pan over medium heat. Brown bird evenly on all sides, about 15 minutes. Place breast side up; transfer to oven. Cook for about 40 more minutes, basting often, until legs are a little loose when you shake them.

Meanwhile, pour 1 teaspoon oil in a skillet. Add slivered shallots, and cook over medium heat for 5 to 6 minutes. Transfer shallots to a bowl.

Pour another 1 teaspoon oil in skillet. Add fennel slices, and cook for 5 minutes. Transfer to bowl.

Pour remaining tablespoon oil in skillet. Add chestnuts; cook for 2 minutes. Add 1/2 cup stock and 1/2 teaspoon salt. Bring to a boil and simmer until reduced to a glaze, about 10 minutes. Add remaining stock; simmer until again reduced to a glaze, about 5 minutes. Transfer to a plate.

Add rice, shallots, fennel, and 1 cup water to skillet and cook for 5 minutes. Add chestnuts. Season to taste with salt and pepper. Serve with pheasant.

For dessert, we had a pumpkin cake roll with cream cheese frosting. I reduced the sugar from the original recipe and I made a simple Neufchatel frosting for the middle instead of the traditional full fat cream cheese filling. The presentation was quite beautiful, but I must say, it looks harder to make than it actually was. My favorite kind of recipe! 😉


Pumpkin Cake Roll with Cream Cheese Frosting

Adapted from Cook’s Country magazine

1
cup cake flour, sifted

2
teaspoons pumpkin pie spice

1/2
teaspoon baking soda

Pinch of salt

5
large eggs

1
cup sugar

1
cup canned pumpkin puree

16 ounces Neufchatel, room temperature

3/4 cup confectioners’ sugar, plus more for garnish

For the Cake: Adjust oven rack to middle position and heat oven to 350 degrees. Grease 18- by 13-inch rimmed baking sheet and line with greased parchment paper. Whisk flour, spice, baking soda, and salt in medium bowl; set aside. With electric mixer on medium-high speed, beat eggs and sugar until pale yellow and thick, 6 to 10 minutes. Add pumpkin and mix on low until incorporated. Fold in flour mixture until combined. Spread batter evenly in prepared pan. Bake until cake is firm and springs back when touched, about 15 minutes. Before cooling, run knife around edge of cake to loosen, and turn out onto clean sheet of parchment paper that has been dusted with confectioners’ sugar. Gently peel off parchment attached to cake and discard. Roll cake and fresh parchment into log and cool completely, about 1 hour.

For the Filling: Place the room temperature Neufchatel cheese in a food processor, and blend with ¾ cup confectioner’s sugar until smooth.

To Assemble: Gently unroll cake and spread with frosting, leaving 1-inch border at edges. Re-roll cake snugly, leaving parchment behind. Wrap cake firmly in plastic wrap and chill completely, at least 1 hour or up to 2 days. Remove plastic, dust with confectioners’ sugar.

Wedding Anniversary, Part 4 ~ Sparkling Wine Sabayon

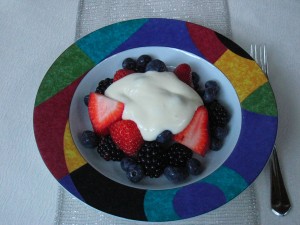
The grand finale of our wedding anniversary dinner was a decadent custard dessert called a Sparkling Wine Sabayon served over fresh berries. I followed this recipe closely, however I quartered it to accommodate fewer guests. I used an individual can of Sophia Blanc de Blancs instead of a whole bottle of bubbly since it was just a romantic dinner for two, not 12. We still ended up with quite a bit leftover for the next few days. With the portions I served we ended up with about 7 servings using a lot of fruit and a little custard. That’s the way I lighted this one a bit. 🙂 The ingredients are very rich, but you only need a little bit on top of fresh berries to make a splash. I hope you’ll give this one a try! It’s simple but special.

Sparkling Wine Sabayon

From DomaineChandon.com

1 cup water

1 cup sugar

1 tsp vanilla extract

One 750ml bottle of Chandon Brut Classic

1 dozen large egg yolks

2 cups heavy cream

Whisk

Double boiler or Pyrex® bowl and saucepan

(If you’d like to quarter the recipe like we did, the amounts are as follows:

1/4 cup water

1/4 cup sugar

1/4 tsp vanilla extract

One can of Sophia Blanc de Blancs or about 187 milliliters of another inexpensive sparkling wine

3 large egg yolks

1/2 cup heavy cream­)

Preparation time: 50 minutes.

1. In a saucepan, bring the water, sugar and vanilla extract to a boil. Reduce heat to medium high and cook, without stirring, to a light golden caramel (about 10 minutes). Add wine and simmer until reduced to 2 cups (about 20 minutes).

2. Beat the egg yolks lightly in the Pyrex bowl or the top of the double boiler. Very slowly, whisk in 1/4 cup of the hot wine and caramel mixture until blended. Slowly whisk in the remaining caramel. Set the mixture over a saucepan, or the bottom of the double boiler, filled with 1 inch of simmering water. Cook over low heat, whisking constantly, until the custard thickens enough to form a ribbon when it falls from the whisk (about 10 minutes). Transfer the custard to a bowl and let cool, then refrigerate until chilled.

3. Whip the cream just until firm. Fold into the wine custard and transfer to a serving bowl; serve cold.

The mixture obtained in steps 1 and 2 can be refrigerated up to two days.

Serve over fresh berries, peaches or figs.

Makes 12 servings.

A sweet ending to a sweet celebration. Bon appétit!

Celebrating an August Anniversary ~ Tomato, Basil and Pasta Salad and Peach and Basil Crumbles

Every summer on this day, we have a special Dungeness crab dinner. It’s one of the little anniversaries that we celebrate, and the choice of crab for dinner has turned into a tradition. To us, it’s the perfect Northwest meal on a warm summer evening. (For instructions on how to cook the crab, visit my Fourth of July post.)

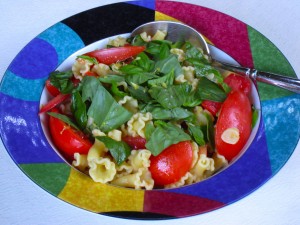
To go with our crab, I tried my take on the recipe that graces the cover of Martha Stewart Living magazine this month. I did make a few changes to make it a little healthier and to make it a little more economical. I reduced the amount of olive oil and pasta and I increased the amount of tomatoes and basil. I also used fresh red summer tomatoes instead of the heirloom variety as she did. I couldn’t find the fancy pasta she used at my local Italian market, so I used campanelle. They look like cute little flowers. Any short pasta will work for this dish, however.

Marinated Tomato, Basil and Pasta Salad

(Serves about 4)

2 garlic cloves, thinly sliced

1/8 cup extra virgin olive oil

1 1/4 lbs ripe summer tomatoes cut into ½ inch wedges

½ cup torn fresh basil

1 ½ tablespoons rinsed capers

1 teaspoon grated lemon zest, plus more for the top

Pinch of red pepper flakes

Salt and pepper

4 oz dried short pasta (I used campanelle. Martha used croxetti.)

Heat the garlic and olive oil in a saucepan over low heat until the garlic is lightly golden brown. (About 10 minutes). Strain the garlic, and reserve both the garlic chips and the oil. Let cool.

Combine the tomatoes, ¼ cup basil, capers, lemon zest, red pepper flakes and salt to taste in a large bowl. Pour the cooled oil and garlic chips over the top and mix. Marinate for about 30 minutes.

Cook the pasta according to the package instructions, and add the warm pasta to the tomato bowl. Toss gently with pepper to taste. Top with the remaining ¼ cup of basil and a sprinkling of lemon zest. Serve immediately or at room temperature.

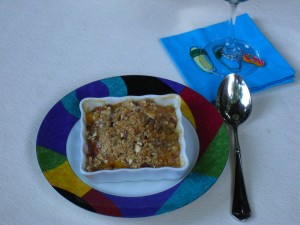
For dessert, I made one of our summer favorites….Peach and basil crumbles. The original recipe was also from MarthaStewart.com. I used frozen peaches for convenience, which also allows this recipe to be enjoyed year round. To make it a wee bit healthier, I used less sugar and substituted the butter for all natural Earth Balance “buttery” sticks. My new favorite culinary discovery. 🙂

Peach and Basil Crumbles

(Makes 2)

Filling ~

Frozen sliced peaches, thawed (The equivalent of 2 whole peaches)

1/2 tablespoon fresh basil, sliced into thin strips

1/4 teaspoon grated lemon zest

Pinch of salt

Topping ~

1 oz chopped unsalted almonds

1/8 cup packed light-brown sugar

3 tablespoons all-purpose flour

Pinch of salt

1 1/2 tablespoons cold Earth Balance, cut into 6 pieces

Preheat your oven to 400 degrees. To make the filling, simply mix all of the filling ingredients in a small bowl.

For the topping, combine all of the topping ingredients, rubbing the Earth Balance with your fingers until the mixture is crumbly.

Divide the filling between two small baking dishes, and sprinkle the topping evenly over them. Transfer to a baking sheet, and bake until they are bubbling and golden brown, about 25 minutes. Let cool slightly before serving.

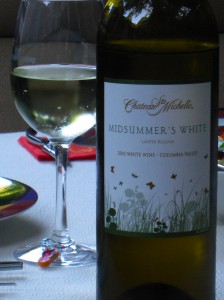
We served this summer meal with a bottle of Chateau Ste. Michelle Midsummer’s White. It was perfect for a midsummer’s celebration! Light and refreshing. It’s a blend of Viognier, Gewurztraminer, Muscat Canelli and Riesling.

Would you like a cookie? ~ Old Fashioned Oatmeal Cookies

Care for a cookie?

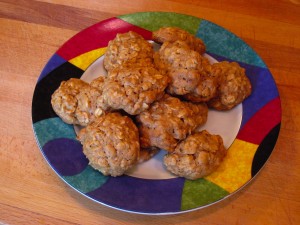
Today I made old-fashioned oatmeal cookies with a modern day twist. I totally swapped out the butter for a cool product I just discovered called Earth Balance. It is an all-natural replacement for butter without all of the saturated fat. I also omitted the salt from the original recipe since there is already a little salt in Earth Balance, and I omitted the raisins (simply because I don’t like raisins in my cookies or other baked goods). If you do like raisins, add ½ cup at the end.

I just get so excited when I find healthier ways to make some old favorites and they still taste like my old favorites! I hope you’ll give these a whirl!

The original recipe that I used as my inspiration was already a lightened version from America’s Test Kitchen’s book called The Best Light Recipe.

Old Fashioned Oatmeal Cookies

1 cup old fashioned rolled oats

¾ cup all purpose flour

¼ teaspoon cinnamon

¼ teaspoon baking soda

4 tablespoons Earth Balance, melted and cooled (I used the original stick version, but the kind that comes in the tub should be fine, as well)

1 large egg

1 tablespoon vanilla extract

1 cup packed dark brown sugar

Adjust your oven rack to the middle position, and preheat to 350.

Line 2 baking sheets with parchment paper.

Whisk the dry ingredients together in a medium bowl (oats through baking soda) and set aside.

In a large bowl, whisk the melted and cooled Earth Balance, egg and vanilla. Stir in the brown sugar, taking care that there are no big clumps remaining. Then stir in the dry mixture to the wet until everything is well combined.

Roll the dough into 24 balls (one leveled tablespoon each) and place them about 2 ½ inches apart on the baking sheets. Squish the tops down slightly.

Bake one tray at a time for about 12 minutes, rotating the pan once halfway through. They should be slightly brown on the edges.

Pair with a big glass of skim milk! 🙂


Happy Easter ~ “Potted” Chocolate Mint Pudding


Happy Easter!

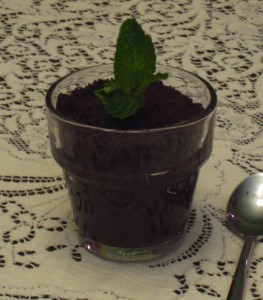
I ran across a very cute idea for a spring dessert this Easter. We had little potted chocolate mint puddings with a sprig of mint “growing” out of them. The original Martha Stewart recipe is a very rich pudding, so I used my recipe from St. Patrick’s Day (with a couple changes for this dish) to lighten it. Follow the chocolate Guinness pudding recipe, but exchange the Guinness for more skim milk and add ½ teaspoon of mint extract in addition to the vanilla. Fill a little flowerpot shaped container with the pudding, and top with crumbled chocolate cocoa cookies. Then “plant” a sprig of mint in the top.

These would also be perfect for Mother’s Day :).

Happy spring!

May you have the luck of the Irish ~ Chocolate Guinness Goodness

Happy March 17th!

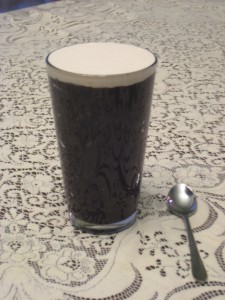
Guinness combines surprisingly well with chocolate, and those two together make the perfect St. Patrick’s Day pair. I made a very fun and festive dessert tonight called Chocolate Guinness Goodness :). It is chocolate and Guinness pudding served in a beer glass with Guinness flavored whipped cream smoothed over the top. The result is a dessert that really looks like a pint of beer!

I borrowed the idea from Epicurious.com, and then I mixed and matched bits of that recipe with a MarthaStewart.com recipe. That lightened the original quite a bit. In addition, I omitted the butter, I used only two egg yolks and I replaced skim milk for whole.

Chocolate Guinness Goodness

2/3 cup sugar

1/4 cup cornstarch

Pinch of salt

1/3 cup unsweetened cocoa powder

2 cups skim milk

½ cup Guinness

2 large egg yolks

1 teaspoon vanilla extract

1/4 cup whipping cream


Put a fine mesh sieve over a medium bowl and set aside. In a medium saucepan off the heat, whisk together the sugar, cornstarch, salt and cocoa powder. Very gradually whisk in the milk and ½ cup Guinness, taking care to dissolve cornstarch. Then whisk in the egg yolks.

Whisking constantly, cook over medium heat until the first large bubble forms. Reduce the heat to low. Still whisking, cook 1 minute. It will be thick and creamy at this point. Remove from the heat and immediately pour through the sieve into the bowl. Stir the vanilla into the hot pudding.

Place plastic wrap directly on the surface of the pudding and chill at least 3 hours or up to 3 days. Before serving, whisk the pudding again until smooth.

For the whipped cream topping, reduce a cup of Guinness in a pan on medium low heat for about 20 minutes, or until it is thicker. Cool completely. Whip the whipping cream with a hand held mixer until soft peaks form on the beaters. (It can quickly turn to butter, so watch it closely.) Add a tablespoon of the reduced Guinness and blend it evenly into the whipped cream.

Carefully spoon the pudding into a beer glass and then cover with an even layer of the whipped cream. Each pint serves about 4. This recipe makes a little more than a pint’s worth, but leftovers aren’t a bad thing ;).

These pair perfectly with a glass of green sparkling wine for the occasion :).

P.S. For another chocolate and Guinness recipe, check out my cupcakes on this website from last St. Patrick’s Day.

Happy Valentine’s Day! ~ Orange Crème Brûlée
For our Valentine’s Day/engagement anniversary this year, I made a few festive and colorful recipes. I found them on the Domaine Chandon Winery website, and then I put my own personal spin on them. The menu included tiny purple potatoes with sour cream and caviar, troll-caught salmon with roasted red and yellow beets, orange crème brûlée, and Ruby Slipper cocktails. Of all of the recipes, I think the crème brûlée stood out the most. If you haven’t noticed by now, I have a sweet tooth. 😉 The dessert very often is the dish that stands out to me…Ha! I changed the cream and whole milk combination to 2 % milk and I used less egg yolks. I also amped up the flavor with a little Grand Marnier and vanilla. I tried many different variations of this dish to get it just right, and my Valentine and I agreed that this one was our favorite. I hope you like it, too!
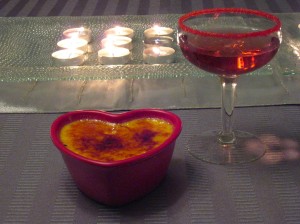
Orange Crème Brûlée

Inspired by a recipe from Domaine Chandon Winery

Serves 2

8 ounces 2% milk

3 tablespoons granulated sugar, plus about 2 tablespoons for the top

Zest of one small orange

3 egg yolks

2 teaspoons Grand Marnier or other orange liqueur

1/2 teaspoon vanilla extract

Preheat your oven to 325 F.

Whisk together the milk, 3 tablespoons of sugar, and orange zest in a saucepan with a heavy bottom. Heat until the sugar is dissolved, taking care not to bring the mixture to a boil. Remove the pan from the heat and pour the mixture into a large bowl over ice. Cool down until lukewarm. Then whisk in the egg yolks, Grand Marnier, and vanilla extract.

Strain the mixture into a container with a spout. Pour the custard into 2 4-ounce ramekins. (Preferably heart-shaped ones if you have them for Valentine’s Day!) Place the ramekins in a baking dish. Heat some water until almost boiling, and pour the water carefully around the ramekins until it reaches about halfway up the sides. (Make sure none of the water gets into the custard.)

Bake for about 45 minutes, or until set. They should still have a slight jiggle in the middle when tapped.

Cool in the refrigerator at least 2 hours before serving, or overnight.

Right before serving, dust about 1 tablespoon of sugar evenly over the top of each custard. Caramelize the sugar with a kitchen torch.