Downton Abbey Valentine Dinner, Final Course ~ Battenberg Cake
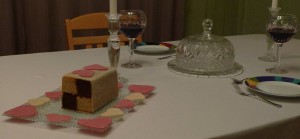
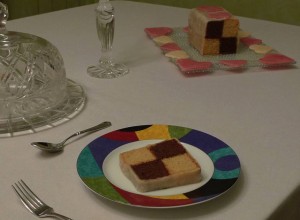
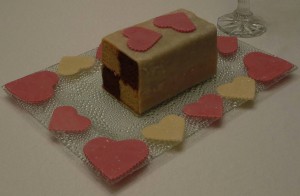
Battenberg CakeFor the grand finale of our Downton Abbey-inspired Valentine dinner, I made a Battenberg cake! It is a classic British checkerboard-style cake, held together with jam and a marzipan coating.

The tale behind the cake is that it was created to celebrate the wedding of Princess Victoria (Queen Victoria’s granddaughter) to Prince Louis of Battenberg in 1884. Given the romantic story about the cake, I think it is the perfect dessert for Valentine’s Day! A little more about the cake’s background and some fun facts can be found at SeriousEats.com.

I decided to make a chocolate and vanilla version rather than a traditional pink and yellow version, so I would not require any food coloring. (Or rather, since I am in a British state of mind, I should say “colouring.” 😉 ) I started with a recipe from Jamie Oliver, but I changed it so significantly that the final result was a completely different cake. For my healthier Nooncafe Battenberg, I wanted to use whole grains rather than self rising flour, so I used whole-wheat pastry flour with the addition of baking powder and salt. I also didn’t want to use butter, so I replaced it with coconut oil, and added less oil than the recipe called for. To offset that change, I added more milk for moisture. I also reduced the sugar quite a bit in the batter, since the jam and marzipan also added a lot of sweetness. The final product was denser and heartier than a traditional sponge cake, but it was quite delicious!

For decoration, I dyed some of the marzipan pink with beet juice. Just grate a raw beet on a cheese grater, place the grated beet inside of 2 or 3 layers of cheese cloth, and squeeze out the juice. Knead a little of the juice into the marzipan until it is uniformly pink. It’s a little messy, but so pretty! In the book A Year in the Life of Downton Abbey: Seasonal Celebrations, Traditions, and Recipes, it mentions that in the era of Downton Abbey, the food was highly decorated. Even the serving platters would have been decorated. Inspired by that fact, I cut out hearts with my pink marzipan and placed them all around my cake platter, as well as on top of the cake.

Since this is a very British recipe, I wrote most of the measurements in grams (and even gave you the Celsius temperature for the oven if you please!)

Battenberg CakeBattenberg Cake

200g coconut oil, plus extra for greasing the pans

250g fine or caster sugar

6 eggs

½ tbsp vanilla extract

6 tbsp milk

285g whole-wheat pastry flour

3 tsp baking powder

Pinch of salt

50g ground almonds

40g cocoa

125g apricot jam

450g marzipan

Preheat oven to 180C/350F. Grease 2 small loaf pans, line the bottom with parchment paper, and grease the parchment as well. This will ensure the cakes come out of the pans in one piece.

In a bowl, whisk the flour, baking powder and salt until very well combined. Set aside. Divide the coconut oil and sugar evenly between 2 bowls, and whisk until well incorporated. Beat 3 eggs into each bowl. Stir the vanilla and half the milk into one bowl, then fold in 175g of the flour mixture until just combined.
 In the other bowl, fold in the remaining flour mixture, almonds, cocoa and remaining milk. Mix until just combined. Take care not to over mix the flour. Spoon the two batters into the greased pans. Bake both together for about 40–50 minutes, or until a wooden skewer comes out clean. The chocolate cake may take longer to cook than the vanilla, so check often towards the end of the baking time. Cool for 10 minutes, and then turn the cakes out onto a rack.

To assemble, warm and strain the jam. Level off the tops and sides of the cakes with a serrated knife so each cake is a rectangle and the same size. Cut in half lengthwise so you have 2 long strips of each. Place 1 of the vanilla cakes on a board and brush the top and sides generously with jam, then do the same with a strip of chocolate cake and stick the 2 together, side by side. Gently place the remaining cakes on top, opposite colors on each, brushing all the edges with jam. Trim the cake so the sides are straight, if necessary.

Roll out the marzipan on a board sprinkled with confectioner’s sugar so it is large enough to completely cover the cake (with a little extra to use for decoration.) Place the cake on one of the shorter sides, and bring the marzipan up and over the top to cover 4 sides. Pat to make sure the marzipan adheres to the jam on all 4 sides. Trim to neaten the two exposed checkerboard edges with a serrated knife.

I find that videos are easier to follow than words when I have a technical recipe such as this one, so here is a link to a video I found helpful when assembling my Battenberg.

Battenberg Cake

Valentine’s Day Treats ~ Chocolate Coconut Truffles

Chocolate Coconut TrufflesHappy Valentine’s Day!

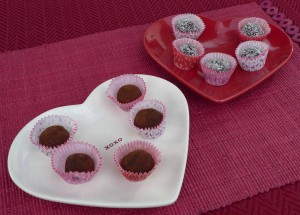
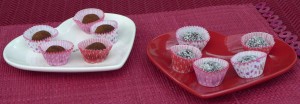
I can’t think of anything that says Valentine’s Day more than chocolate truffles! Traditional truffle recipes are decidedly heavy, made from a combination of chocolate and cream, so I wanted to make something that I would feel better about eating and sharing. These little chocolate coconut truffles fit the order. 🙂 They are a rich treat, but they use ingredients that are good for my Valentine and me. 🙂 I hope you’ll give them a try!
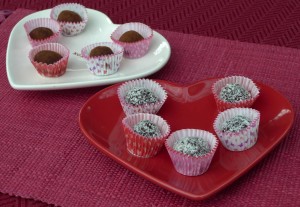
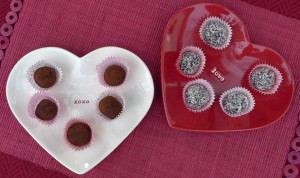
Chocolate Coconut TrufflesI coated my truffles in cocoa powder as the recipe calls for, but I also made some with a coating of unsweetened coconut. The color contrast was really pretty. 🙂 I also used a food processor rather than a high speed blender, which worked very well.

Chocolate Coconut Truffles

Chocolate Coconut Truffles

From Epicurious.com

Makes about 40 truffles

1/2 cup coconut butter/oil, warmed to soften

3/4 cup agave nectar

2 teaspoons vanilla extract

1/4 teaspoon sea salt

1 cup dried shredded coconut

2 1/4 cups cocoa powder, sifted

In a high-speed blender, blend the warmed coconut butter/oil, agave nectar, vanilla, and salt. Add the shredded coconut, 1/2 cup at a time, and blend until smooth.

Transfer the mixture to a bowl and stir in 2 cups of the cocoa powder until thoroughly combined. Place the bowl in the refrigerator for about 10 minutes or more to set slightly.

Place the remaining 1/4 cup cocoa powder onto a small plate. Spoon heaping tablespoons of the chocolate mixture and roll them into balls. Roll these in the cocoa powder. Store the finished truffles in the refrigerator.

Chocolate Coconut Truffles

A dessert that fits into your New Year’s resolutions ~ Mint Chip “Ice Cream”

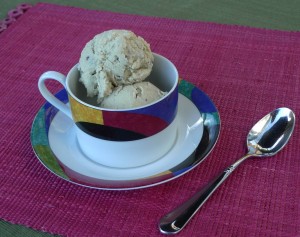
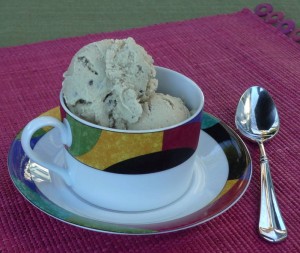
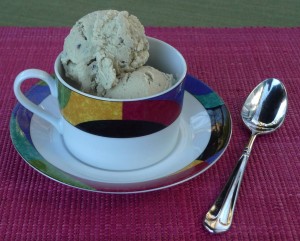
Mint Chip Frozen DessertI am fascinated with recipes that find creative ways of using and combining raw, plant-based ingredients. It’s a different way of thinking about food, and I think it’s really interesting and exciting! (Not to mention, exceptionally healthy, which is kind of the whole point of eating that way. 🙂 ) For example, this recipe uses raw ingredients to make something similar to mint chip ice cream. It is a rich dish with the coconut and the nuts, but it is quite a bit healthier than a classic mint chip ice cream. If you are going to have a frozen dessert in January, the month filled with resolutions of healthier eating, this is a good one! I hope you’ll give it a try. 🙂

The recipe is from Laura Miller, who hosts an online food show called Raw. Vegan. Not Gross. Her style is as fun and quirky as the title implies. 😉 You can find the episodes on a cooking channel called Tastemade.

Mint Chip Frozen DessertMint Chip “Ice Cream”

Based on a recipe from Laura Miller

2 cups soaked raw cashews

2 cups coconut meat

3/4 cup coconut water

3/4 cup agave

2 teaspoons mint extract

1/2 cup coconut oil, liquefied

1/2 teaspoon salt

2 tablespoons cacao nibs, finely chopped

1 teaspoon matcha powder or spirulina

Open your coconuts, scrape out the flesh/meat, and add it into a high speed blender, along with agave, mint extract, matcha powder, salt, cashews, and coconut water.

Next, add in oil, and blend again. The more you blend, the creamier your finished product will be.

Pour the mixture in a medium-sized bowl, and just stir in the cocoa nibs.

If you have an ice cream maker, use it according to the machine’s instructions. If not, place your bowl in the freezer and come back to stir every 30 minutes or so for 3-4 hours.

Mint Chip Frozen Dessert

Christmas Baking ~ Gingerbread Cupcakes

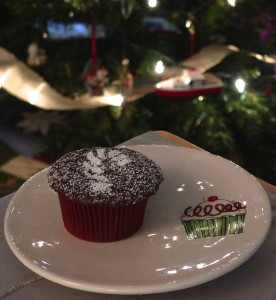
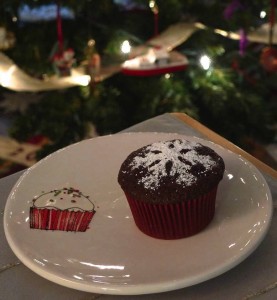
Gingerbread CupcakesI baked a batch of gingerbread cupcakes to go with my gingerbread caramels. (Sensing a gingerbread theme this month?? I figured Santa might like choices! 😉 )

I based the recipe on Martha Stewart’s Gingerbread Snacking Cake. It is such a flavorful recipe with the addition of fresh ginger, but I wanted individual cupcakes instead of one big sheet cake. I replaced the butter with light olive oil, and I replaced the all-purpose flour with whole-wheat pastry flour. The bold flavors of the cake stand up the whole grains beautifully. I hope you’ll give this recipe a try! I will definitely keep these cupcakes in my holiday recipe collection. 🙂 Yum!

Gingerbread Cupcakes

Based on a recipe from MarthaStewart.com

½ cup light olive oil

2 1/2 cups whole-wheat pastry flour

1 cup boiling water

2 teaspoons baking soda

2 teaspoons ground ginger

1 1/2 teaspoons ground cinnamon

1/2 teaspoon ground cloves

1/2 teaspoon ground nutmeg

Pinch of salt

2 teaspoons baking powder

2/3 cup packed dark-brown sugar

1 cup unsulfured molasses

1 tablespoon freshly grated ginger

2 large eggs, room temperature, lightly beaten

Confectioners’ sugar, for dusting

Heat oven to 350 degrees. In a bowl, combine boiling water and baking soda; set aside. In a large bowl, sift together flour, ground spices, salt, and baking powder; set aside.

In an electric mixer with the paddle attachment, mix oil and brown sugar. Beat in molasses and grated ginger, baking-soda mixture, and flour mixture. Beat in eggs.

Pour batter into a muffin pan lined with paper liners, filling each about ½ full. Bake until a toothpick inserted in center comes out clean, about 20 minutes. Let cool on a wire rack. Dust with confectioners’ sugar.

Merry Christmas!!

Gingerbread Cupcakes

A Decadent Holiday Treat ~ Gingerbread Caramels

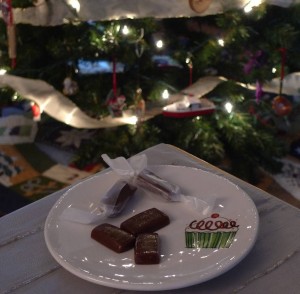
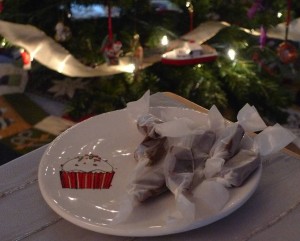
Gingerbread CaramelsI typically don’t make treats quite as rich as these, but a small bite is all you need to feel like you’ve had a decadent treat. Share them with friends and family since they travel well, or leave them by the tree for Santa. He might like them even better than cookies. 😉

I have never made caramels from scratch on my own before, so I followed the recipe from Martha Stewart to the letter. Candy making is really a science, and a few degrees can be the difference between a success and a dud. I learned two important lessons through this experience. The first is to make sure your thermometer is calibrated. I learned this the hard way, as my first attempt was a mess that did not set since it did not boil to the proper temperature. The second lesson I learned is that you can rescue your caramel if it doesn’t set by re-boiling it! On my second boil, I used a different thermometer, and the temperature reached the accurate level. Ta da! Success! 🙂

Gingerbread Caramels

From MarthaStewart.com

4 cups (2 pints) heavy cream

2 cups light corn syrup

4 cups granulated sugar

12 tablespoons (1 1/2 sticks) unsalted butter, cut into small pieces

1/2 cup unsulfured molasses

1 teaspoon pure vanilla extract

3/4 teaspoon salt

1 teaspoon ground cinnamon

3/4 teaspoon ground ginger

3/4 teaspoon freshly grated nutmeg

1/4 teaspoon ground cloves

Vegetable-oil cooking spray

Lightly coat a 12-by-17-inch rimmed baking
sheet with cooking spray. Line with parchment
paper, leaving a 2-inch overhang on short
sides; spray paper.

In a large pot over high heat, bring cream,
corn syrup, sugar, butter, and molasses to a boil,
stirring until sugar has dissolved. Continue to
cook over medium-high heat, stirring frequently,
until mixture reaches 248 degrees (firm-ball stage)
on a candy thermometer, about 20 minutes.

Remove from heat, and stir in vanilla, salt, and spices. Immediately pour onto prepared sheet, without scraping pot. Let stand, uncovered, 24 hours at room temperature (do not move pan).

Generously coat a large cutting board with cooking spray. Lifting it by the parchment overhang, invert caramel onto the cutting board; use a sharp knife to loosen parchment, and remove. Cut into 1-by-1 1/4-inch pieces. Wrap each in cellophane or waxed paper. Caramels can be stored up to 1 month in airtight containers.

Gingerbread Caramels

Pumpkin Season! ~ Pumpkin Custard

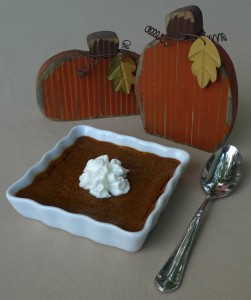
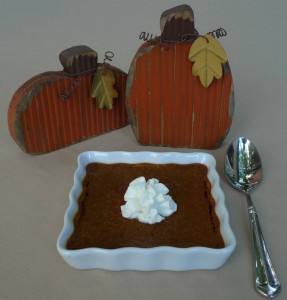
Pumpkin PieAt this time of the year, I love to cook with pumpkins. Sweet or savory, I love everything pumpkin. 🙂 (Almost as much as this little guy! Ha!) And right up there with pumpkin, as one of my favorite all time ingredients, is coconut. So this month I tried a new twist on pumpkin pie custard – I replaced the classic evaporated milk with coconut milk, and it worked beautifully! The texture and flavor are almost identical to the classic, but it has a very mild coconut taste, which I love! I have never been able to find an all-natural version of evaporated milk, so I feel a lot better about this recipe that is natural through and through. 🙂 You can use a natural frozen crust, but if you are like me, you just eat the custard part of the pie and leave the crust behind. Is it just me? OK, maybe I’m a little off the beaten path with this. 😉 But I would much rather have more filling than any crust! Because of that, I made these individual sized pumpkin custards. Basically they are small crustless pumpkin pies. 🙂

Pumpkin Custard

Based on a recipe from Cooking Light magazine

3/4 cup lightly packed brown sugar

1 3/4 teaspoons pumpkin pie spice

Pinch of salt

8-ounces whole coconut milk

2 large egg whites

1 large egg

15-ounces unsweetened pumpkin purée

Natural frozen pie crust (if you wish)

Whipped cream for serving

Preheat oven to 425°.

To prepare the custard, combine the first 6 ingredients in a large bowl, and whisk until well blended. Add the pumpkin, and whisk until smooth.

Pour pumpkin mixture into either a crust or 6 small ramekins. Place on a baking sheet. Bake at 425° for 10 minutes, and then reduce the oven temperature to 350°. (Keep the custard in the oven.) Bake an additional 50 minutes for a large pie, or about 15 minutes for individual ramekins, until set. Cool completely before serving.

Serve with whipped cream.Pumpkin Pie

Halloween Treats ~ Devil’s Food Cupcakes, Updated

Devil's Food CupcakesHalloween is right around the corner!

For the past few years, I have made devil’s food cupcakes to celebrate the season. This year I tried them with whole-wheat pastry flour, and it worked out beautifully! The hearty chocolate flavor stands up to the whole grain, and they are still moist and delicious. I think this will be my new and improved recipe from now on!

Devil’s Food Cupcakes

Based on a recipe from Bon Appétit magazine

1 1/4 cups sugar

1 cup buttermilk

2/3 cup light olive oil

2 eggs

1 teaspoon vanilla

1 1/2 cups whole wheat pastry flour

1/2 cup unsweetened cocoa powder

1 1/4 teaspoons baking soda

Preheat oven to 350°F. Line baking pan with 14 cupcake papers. Whisk first 5 ingredients in large bowl to blend. Sift in cocoa and baking soda. Stir to combine. Add flour, and mix until just combined. (Be careful not to mix too much at this point.) Fill each cupcake about ¾ full with batter. Bake until toothpick inserted into centers comes out clean, about 20 minutes. Turn cakes out onto racks and cool completely.

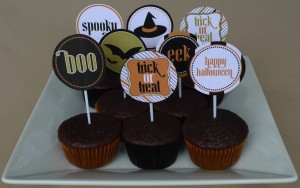
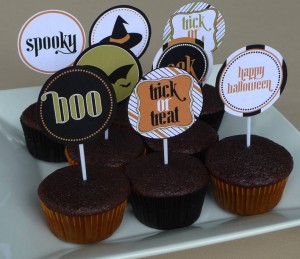
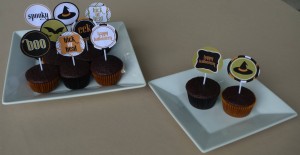
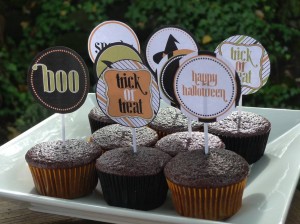
Devil's Food CupcakesI found the little Halloween printables at CatchMyParty.com. They are super cute, and free!

Devil's Food CupcakesCatchMyParty.com also has many other choices for Halloween if you’d rather have a different design. I had a hard time choosing my favorite. 🙂

Devil's Food Cupcakes

Welcome Fall ~ Delancey ~ Apple Crisp

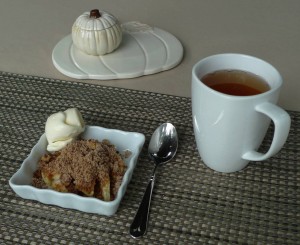
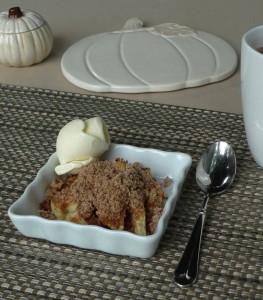
Apple CrispI really enjoyed a memoir that I read last month entitled Delancey: A Man, a Woman, a Restaurant, a Marriage. A local restaurant owner and food blogger named Molly Wizenberg wrote the book. She and her husband own the pizza place, Delancey, the bar next door, Essex, and she also writes the blog, Orangette. The book is about their adventures in the restaurant business, and it includes a few recipes. I saved this particular recipe to make once it started to feel like autumn in Seattle. 🙂

I replaced the butter with half the amount of Earth Balance, but other than that, I followed the recipe pretty closely. It was a sweet way to kick off the fall season. 🙂

Apple CrispApple Crisp

Based on a recipe from the book Delancey

Makes 8 servings

For the apples:

8 medium Granny Smith apples

3 to 4 tablespoons freshly squeezed lemon juice

4 to 6 tablespoons granulated sugar

For the topping:

1 ½ cups unbleached all-purpose flour

1 cup brown sugar

2 teaspoons ground cinnamon

¾ stick Earth Balance (85 g)

½ cup walnuts, coarsely chopped

For serving:

Vanilla ice cream or frozen custard

Preheat oven to 350 degrees.

Peel, core, and slice each apple into 8 to 10 wedges. In a bowl, toss the apples with 3 tablespoons lemon juice and 4 tablespoons sugar. Taste. They should be bright with lemon but lightly sweet. Adjust lemon and sugar if desired. Scrape the apples and any juices into a 2-quart soufflé dish, an 8 by 8-inch baking dish, or individual ramekins.

In a medium bowl, whisk the flour, brown sugar, and cinnamon. Add the Earth Balance, and use your fingers to rub and pinch it into the dry ingredients until there are no large lumps and the mixture is evenly crumbly. Add the walnuts and stir to combine.

Sprinkle the topping evenly over the apples. Bake for about 45 minutes, or until the top is lightly browned and the apples are bubbling. (The time does not differ if you decide to make individual servings in ramekins.) Serve warm with ice cream or frozen custard.

I hope you have a sweet and happy fall!

Delancey

Wedding Anniversary, Part 3 ~ Japanese-Style Coconut Cheesecake and 14 Hands Winery Reserve Red Blend

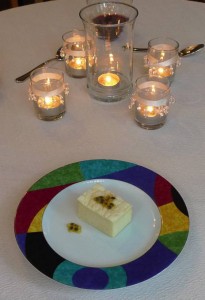
Japanese-Style Coconut CheesecakeThe grand finale of our wedding anniversary dinner celebration was a Japanese-style coconut cheesecake. It was light and fluffy, almost soufflé-like, compared to a typical American cheesecake. The coconut flavor was very subtle, but I served it with passion fruit (called lilikoi in Hawaii) for an added tropical taste.

Japanese-Style Coconut Cheesecake

This recipe was from a website called Cooking Hawaiian Style. I omitted the butter completely, and I used reduced fat cream cheese, but otherwise followed the recipe pretty closely.

Japanese-Style Coconut Cheesecake

Based on a recipe from Cooking Hawaiian Style

Yield: One 8″ cheesecake

Note: Do not substitute homemade cake flour (regular flour mixed with cornstarch) for this recipe. Use a store-bought cake flour.

9 oz. reduced fat cream cheese (one 8 oz. brick plus 1 oz. of another brick)

1/3 cup coconut milk

6 eggs, room temperature – whites and yolks separated

1/4 tsp. cream of tartar

1/2 cup plus

1/8 cup extra fine granulated sugar

1/3 cup plus 1 tsp. cake flour

3 tbsp. corn starch

1. Melt cream cheese and coconut milk in a heat-proof bowl over a pot of simmering water. Stir occasionally to break up cream cheese and combine the ingredients. Remove bowl from heat and allow to cool. Mixture will be thick. If lumpy, use a whisk to vigorously beat the mixture until smooth. Set aside.

2. When mixture has cooled, fold in the egg yolks, flour and corn starch. Fold until thoroughly incorporated.

3. Preheat oven to 325 degrees.

4. In a large bowl, whisk egg whites with an electric mixer until foamy. Add the cream of tartar and mix again, gradually adding the extra-fine sugar a little at a time until soft peaks form. Note: Soft peaks: mixture should be white and opaque, and meringue will fall onto itself when the beaters are lifted from the bowl.

5. Add the cheese mixture to the egg white mixture and fold together until well incorporated.

6. Pour into an 8-inch round spring-form pan that has been lightly greased and lined (sides and bottom) with parchment paper. Place a piece of aluminum foil over the top of the cake so it does not brown.

7. Bake in a water bath for 1 hour 10 minutes. When timer sounds, bake for an additional 10-15 minutes with the oven door cracked.

8. Carefully remove pan from water bath and let stand until cake pulls away from the sides of the pan. Remove spring-form ring and serve.

Notes:

•Substitutions are not recommended for this recipe. Be sure to use whole milk, cake flour and extra-fine sugar. If you can’t find extra-fine sugar, grind regular sugar finer in a food processor.

•Sprinkle matcha green tea on finished cake, or top with fresh fruit for serving.

14 Hands Reserve WineWe also paired our meal with a bottle of 14 Hands Winery Reserve Red Blend. We discovered 14 Hands around the 14th anniversary of our first date, so it seemed fitting to close the loop by having a bottle to celebrate our 14th wedding anniversary!

14 Hands Reserve Wine

August 1st Anniversary ~ Peaches with Ricotta Honey Cream and Aged Balsamic Vinegar

I like to celebrate the little anniversaries that mark special events in our lives. On this date 16 years ago, Rob and I moved into our current house. It also marks my 19th anniversary of becoming a Seattleite!

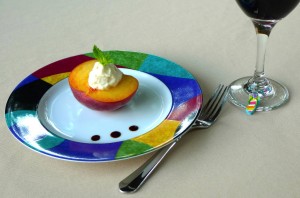
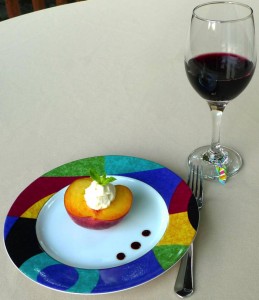
To celebrate, we had a steamed Dungeness crab dinner, which is our favorite Northwest dish. Whenever we have crab, it feels like a special occasion! To cap off dinner, I made this summery dessert. Peaches are ripe in the markets now, so I wanted to highlight their sweet deliciousness with a ricotta honey cream and a little aged balsamic vinegar. You could grill the peaches, but we preferred them natural, just as they come. I did use heavy cream, but I cut it in half with a low fat ricotta. Only a little dollop is needed, so I figured a little cream would be fine. It was a celebration, after all! 😉

Peaches with Ricotta Honey Cream and Aged Balsamic Vinegar

Based on a recipe from Sur La Table cooking classes

2 ripe peaches

½ cup heavy cream

½ cup low fat ricotta

1 teaspoon lemon zest

1 teaspoon vanilla bean paste

2 teaspoons honey

Aged balsamic vinegar, for drizzling

Mint, optional

In the bowl of a food processor, add the cream and ricotta. Process until thick, about a minute. Add the zest, vanilla, and honey, and pulse until combined.

To serve, cut the peaches in half, and place a dollop of the ricotta cream mixture in the middle of each half. Serve with balsamic vinegar drizzled on the top or on the side, and a sprig of mint if you desire.

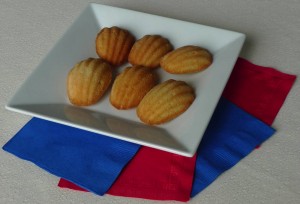
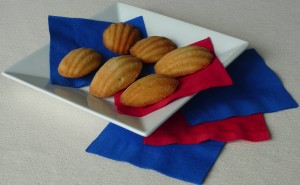
Bastille Day Celebration ~ Madeleines

July not only has a big celebration for Canada on the 1st and the USA on the 4th, but France’s Bastille Day falls on the 14th. For a belated celebration, I made French madeleines. They are so elegant, but also very easy to make!

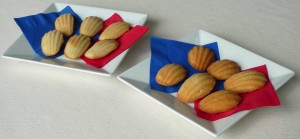
I tried a little experiment with this dish, since it is traditionally made with butter (as most French dishes are…Ha!) I made half the recipe the traditional way, with butter. I figured they are tiny little cakes; so a little butter in moderation is fine. I made the other half of the recipe with Earth Balance. I baked them in the same oven for the same amount of time, and observed the difference. I have to say, they were *both* quite delicious. There was not a bad madeleine in the bunch. 😉 The taste is slightly different, but both lovely. The butter version looked more beautifully golden brown, and spread out in the pan a little more. The Earth Balance cakes were a tad lighter in color, less golden. They also were slightly smaller cakes, since they didn’t spread out in the pan quite as much. The photo at the bottom displays the difference…The ones on the left are made with Earth Balance, and the ones on the right are made with butter. Your choice!

I used a tried-and-true recipe from Bon Appétit magazine.

Madeleines

Based on a recipe from Bon Appétit magazine

2 large eggs

2/3 cup sugar

1 teaspoon vanilla extract

1/2 teaspoon grated lemon peel

Pinch of salt

1 cup all purpose flour

10 tablespoons (1 1/4 sticks) unsalted butter, melted, cooled slightly (or Earth Balance buttery sticks)

Powdered sugar, optional, for serving

Preheat oven to 375°F. Generously butter and flour pan for large madeleines (about 3 x 1 1/4 inches).* Using electric mixer, beat eggs and 2/3 cup sugar in large bowl just to blend. Beat in vanilla, lemon peel and salt. Add flour; beat just until blended. Gradually add cooled melted butter in steady stream, beating just until blended.

Spoon 1 tablespoon batter into each indentation in pan. Bake until puffed and brown, about 16 minutes. Cool 5 minutes. Gently remove from pan. Repeat process, buttering and flouring pan before each batch. (Can be made 1 day ahead.)

Dust cookies with powdered sugar if desired.

*A metal mold with scallop-shaped indentations, sold at cookware stores.

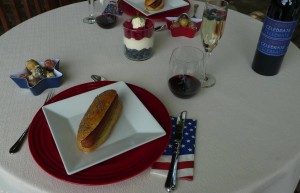
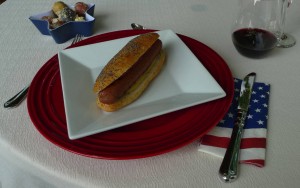
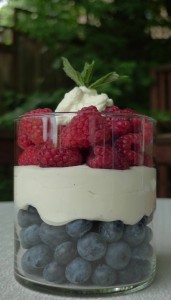
Happy Fourth of July! ~ Bison Hot Dogs on Homemade Buns; Red, White, and Blue Potato Salad; Blueberry and Raspberry Parfait with Vanilla Yogurt and Whipped Cream

Click photos to expand. 🙂

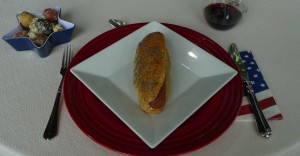
Bison hot dogs on homemade hot dog buns

Red, white and blue potato salad

Sparkling wine with blueberries and raspberries floating in the bubbles…

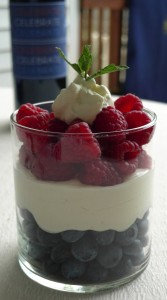
A red and blue berry parfait (with an equal combination of non-fat Greek vanilla yogurt and whipped cream for a layer of white)…

Fun patriotic decorations

It’s our Fourth of July celebration!

I hope you all have a fun, safe, and happy Independence Day! I’m off to Seattle’s festival on Lake Union! 🙂

Enjoy it all!


Red, White, and Blue Potato Salad

From Cooking Light magazine

2 cups fingerling potatoes, halved lengthwise (about 10 ounces)

2 cups small red potatoes, quartered (about 10 ounces)

2 cups small blue potatoes, halved lengthwise (about 10 ounces)

1/4 cup finely chopped red onion

2 tablespoons chopped fresh parsley

1 tablespoon chopped fresh dill

1 tablespoon chopped fresh chives

3 hard-cooked large eggs, finely chopped

1/4 cup red wine vinegar

2 tablespoons olive oil

1 1/4 teaspoons salt

2 teaspoons Dijon mustard

1/2 teaspoon freshly ground black pepper

1 garlic clove, minced

Place fingerling and red potatoes in a saucepan; cover with water. Bring to a boil. Reduce heat; simmer 15 minutes or until tender. Drain; cool slightly. Place potatoes in a large bowl.

Place blue potatoes in a saucepan; cover with water. Bring to a boil. Reduce heat; simmer 10 minutes or until tender. Drain; cool slightly. Add blue potatoes, onion, parsley, dill, chives, and eggs to bowl; toss gently.

Combine vinegar and remaining ingredients. Pour over potato mixture; toss gently to combine. Serve warm, at room temperature, or chilled.

Note: Blue potatoes are starchier than the others and tend to bleed, so cook them separately. If you need to, prepare this dish a day ahead, but add the blue potatoes just before serving. If your potatoes are larger than the ones we call for, cut them to a uniform size.

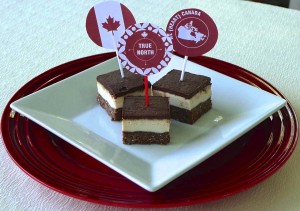
Happy Canada Day! ~ Nanaimo Bars

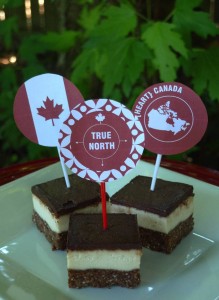
Happy Canada Day! We love our neighbors to the north, and I am always up for an excuse to celebrate another holiday, so I made a batch of Nanaimo bars in honor of this day. 🙂

Nanaimo bars are typically a rich, buttery, and sugary dessert. If you aren’t familiar with the confection, here is a little about their history. They are so good, but something to enjoy only every once in awhile. Then I found this recipe that is vegan and almost 100% raw, (except for the maple syrup, which makes them even more Canadian!) They are rich, but also full of healthy, good things. With all of the nutritious ingredients, they are like Canadian energy bars that will help you celebrate all day long! 😉 I’m glad I gave them a try. I hope you will, too. 🙂

The only thing I changed from the original recipe was the amount of maple syrup. I tried using less, and tasted as I went. I ended up using 2 tablespoons less in the custard filling and 3 tablespoons less in the chocolate topping. Just add a little at a time and taste as you go to make them as sweet as you like.

Nanaimo Bars

Based on a recipe from Living Nutrition

Ingredients

For the crust:

1 1/2 cup unsweetened shredded coconut

1 1/2 cup blanched almond flour

1/2 cup coconut oil, melted

3/4 cup coconut sugar

1/4 cup cocoa powder (or raw cacao powder)

10 dates, pitted

A few pinches of sea salt

For the cashew custard filling:

2 cups cashews, (soaked in water for 2 hours or more)

1/2 cup water

1/4 cup + 2 tbsp maple syrup

2 tsp vanilla extract or seeds of ¼ vanilla bean

1/2 cup melted coconut butter or oil

1/4 tsp sea salt

For the chocolate ganache:

1/4 cup + 1 tbsp maple syrup

1/2 cup coconut oil

1/2 cup cocoa powder

1 tsp vanilla extract and a pinch of sea salt

Instructions

For the crust:

Add everything to your food processor, and process for at least 20 seconds, or until it is thoroughly combined into a dough. It should stick together slightly when pinched. If it doesn’t, you can add a tablespoon of water or a few more dates to the mix. Press into a 9×9 inch-baking pan. Place the crust in the fridge or freezer to set while you make the cashew custard filling.

For the cashew custard filling:

Add cashews, water, maple syrup, vanilla, coconut oil, and sea salt to a high-speed bender. Blend until smooth and creamy. Pour over the crust and smooth evenly with a spatula. Place in the freezer to set for 2 hours.

To make the chocolate ganache:

Place the maple syrup, coconut oil, cocoa powder, vanilla extract and sea salt in the blender until creamy and emulsified. Spread evenly over the cashew custard filling and chill for another 4 hours.

Cut and serve.

The little Canada Day printouts are from Catch My Party. I couldn’t resist. 🙂 They are so cute, and also free!

Teashop Mystery ~ Chamomile Muffins

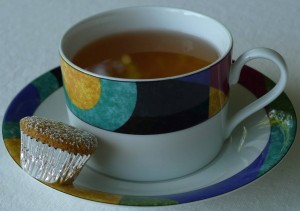
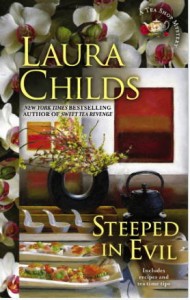
This month, I am thoroughly enjoying a cozy mystery that is set in a Charleston, South Carolina tearoom entitled Steeped in Evil. It is such a descriptive book and the characters are so vividly written, that I feel like I am taking a virtual vacation to Charleston! When I find an absorbing book like this, I often get inspired to make a recipe to compliment the story. It’s my way to get a little more into the storyline, and to make it come to life. 🙂 With this book, I wanted to make something small and sweet that might be served in a tearoom, and I also wanted to incorporate tea within the treat. Chamomile muffins fit the bill! They are perfect to nibble on a lazy and decadent afternoon of reading. I enjoyed some quiet time alone outside on this lovely summer day with a cup of tea, a muffin, and my book. 🙂 I even got out my teapot and poured a glass of bubbly as the fancy teashops do. I felt a little like I was a part of an afternoon tea at the main character’s store, the Indigo Tea Shop.

I based these muffins on a recipe from Joy the Baker. I substituted whole-wheat pastry flour for the all-purpose flour, light olive oil for the butter, and I reduced the sugar from the original recipe. The end result was moist, delicate, and delicious! The chamomile flavor really shines through. I didn’t top them with a glaze, but just a light dusting of powdered sugar.

Chamomile Muffins

Based on a recipe from Joy the Baker

1/4 cup light olive oil

1 cup whole-wheat pastry flour

1/2 cup granulated sugar

1 teaspoon baking powder

1/2 teaspoon baking soda

Pinch of salt

3 tablespoons dried chamomile (from tea bags)

1/2 cup skim milk

1 large egg

1 teaspoon pure vanilla extract

Place a rack in the upper third of the oven and preheat oven to 325 degrees F.  Line a muffin pan with paper or foil liners and set aside. (It makes about 12 standard size muffins.)

To make the cakes:  in the bowl of an electric stand mixer fitted with a paddle attachment, mix together oil, flour, sugar, baking powder, baking soda, pinch of salt, and chamomile leaves.  Mix on medium speed until the mixture is slightly coarse and sandy.

While the mixture beats, in a small bowl, whisk together milk, egg, and vanilla extract.

Pour half of the milk mixture into the flour mixture.  Beat until just incorporated.  Pour in the remaining milk mixture, turn the mixer up to medium-high speed and beat for 1 minute, until well blended.

Divide the batter between the prepared cups, filling only half way.

Bake the muffins for 17 to 20 minutes for the standard size, 10 to 14 minutes for the mini size, or until a skewer inserted in the center comes out clean. Remove from the oven and allow to cool in the pan for 10 minutes. Remove the muffins from the pan to cool completely before frosting.

Cakes will last, well wrapped, at room temperature for up to three days.

Steeped in Evil is the latest release in the series, but I am looking forward to reading more of the teashop mysteries by Laura Childs. If you are looking for a fun and light summer book, you might enjoy one of these mysteries, too!

First Day of Summer! ~ Banana Coconut Muffins

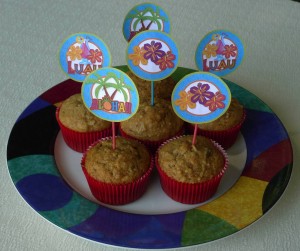
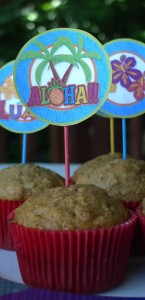
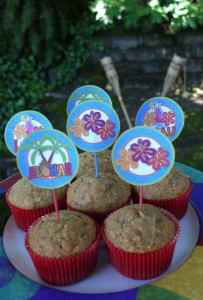
Happy summer! It is officially here! The weather in Seattle feels a little tropical in the summertime, so I decided to make my tropical banana coconut bread recipe into muffins to celebrate the season. 🙂

Dividing the batter into individual muffin portions allowed me to use whole-wheat pastry flour instead of all-purpose flour. (I tried using whole-wheat pastry flour in the original loaf recipe, however it didn’t turn out very well.) I like to use whole grains when I can, so I was happy that these turned out wonderfully moist and delicious. 🙂

Banana Coconut Muffins

2 cups whole-wheat pastry flour

3/4 teaspoon baking soda

Pinch of salt

1 cup granulated sugar (a little less if the bananas are very very ripe)

1/4 cup canola oil

2 large eggs

1 3/4 cups mashed ripe banana (about 4 bananas)

1 tablespoon vanilla extract

1/2 cup flaked sweetened coconut

Cooking spray

Preheat your oven to 350. Whisk the flour, baking soda and salt in a medium bowl. In a large bowl, whisk the sugar and oil until they are well blended. Add the eggs, 1 at a time, beating well after each. Add the mashed banana and vanilla, and whisk until they are incorporated. Add the flour mixture, and mix until everything is moist. Stir in 1/2 cup of coconut. Spoon the batter into 14 muffin tin cups, (about 3/4 full), either lined with paper or sprayed with cooking spray. Bake for about 25 minutes, or until a toothpick inserted in the center comes out clean.

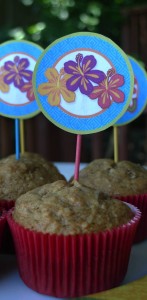
I found cute little tropical Hawaiian cupcake flags on a website called Party Planning Center. They are so adorable, and also free! I love to add a little pizzazz to my cupcakes and muffins with printables. Then I don’t need to use frosting or food coloring to make them look festive, and I think they are so pretty!

Sweet Ending to Easter Dinner ~ Rhubarb Rice Pudding

We enjoyed a simple and elegant Easter dinner at home this year. I tried three recipes that were inspired by Sophie Dahl’s cookbook entitled Very Fond of Food: A Year in Recipes. She’s a British cook I recently discovered, and I like her style. 🙂 She has two cookbooks, and she also had a little cooking show on the BBC.

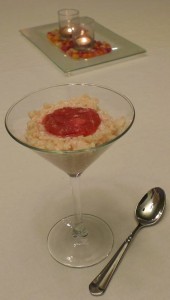
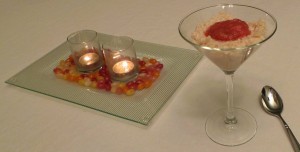
For our Easter dinner, we enjoyed bruschetta with an artichoke spread, lobster and crab salad, and this rhubarb rice pudding. I have a sweet tooth, so this was my favorite dish of the evening. 🙂 I love the subtle edition of orange flower water and rose water. It made it a little special and spring-like without being overwhelming.

Rhubarb Rice Pudding

Based on a recipe by Sophie Dahl

For the rice:

4 cups skim milk

¾ cup basmati rice

1 cinnamon stick

¼ cup honey

½ teaspoon orange flower water

For the rhubarb:

12 oz rhubarb, cut into 1-inch lengths

½ cup water

1 star anise

½ teaspoon rose water

2 tablespoons honey

First, make the rice pudding. Pour the milk and rice into a medium sized saucepan, add the cinnamon stick, bring to a boil, and then simmer over very low heat, stirring frequently, for about 15 minutes. At this point, stir in the honey and orange flower water and cook for another 5 to 10 minutes until the pudding is to the consistency that you like. Remove the cinnamon.

In a separate heavy bottomed saucepan, combine the rhubarb, water, star anise, rose water, and honey. Bring to a boil and simmer on low for about 10 minutes, turning once or twice, until you have a lovely tender pink softness. Remove the anise. Plate the rice pudding and swirl the rhubarb through. Or, conversely, serve the rice with a small dollop of the rhubarb on the top as I did.

Happy Easter ~ Simple Yellow Cupcakes

Happy Easter!

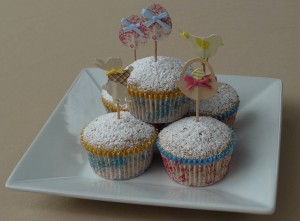
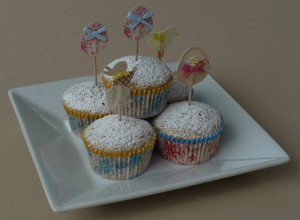
I made a batch of simple yellow cupcakes to celebrate the season. These cakes would be great with any kind of frosting or decoration on top. For example, here’s an idea to try for next year! Ha! They are a good base cupcake, and then you can get creative from there. 🙂 I used a super cute cupcake kit from Meri Meri. I love their products. 🙂 They dress up any ordinary cupcakes and make them ready for a special occasion!

I started with Martha Stewart’s recipe for yellow cupcakes. I replaced the all-purpose flour with whole-wheat pastry flour. I added a little bit more milk (skim rather than whole) since whole-wheat flour can require more liquid for a moist cake. I also replaced all of the butter with light olive oil.

Yellow Cupcakes

Based on a recipe from Martha Stewart

1 1/2 cups whole-wheat pastry flour

1 1/2 teaspoons baking powder

Pinch of salt

1/2 cup light olive oil

3/4 cup granulated sugar

2 large eggs

1/2 cup + 2 tablespoons skim milk

1 teaspoon vanilla extract

Preheat your oven to 350 F.

Line a standard-sized muffin tin with 12 baking liners.

In a small bowl, whisk together the flour, baking powder, and salt.

In a large bowl, whisk together the oil and sugar. Add the eggs, one at a time, and whisk until well incorporated. Add half of the dry ingredients, and whisk until combined. Then add the milk and vanilla, and whisk until combined. Finally, add the remaining dry ingredients, and whisk until just combined. Be careful not to overmix.

Divide the batter evenly in the prepared muffin tin.

Bake for about 20 to 25 minutes, or until a toothpick inserted into the center of one of the cakes comes out clean.

Happy Spring! ~ Parsley Cupcakes

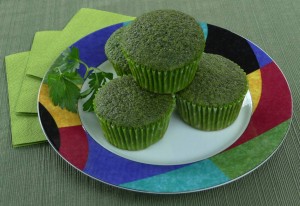
Spring is finally here! To celebrate the new season, I made a recipe for parsley cupcakes. It is one of the most interesting recipes I’ve come across in a long time, and I’m glad I tried it. 🙂  They have a unique herb flavor, and they are intensely green without the use of any food coloring. The original recipe was posted on Food52.com for St. Patrick’s Day. If you haven’t visited that website, I’d recommend it! They have a collection of very unique and delicious recipes to spice up (or in this case, herb up!) your kitchen. 🙂

I substituted the all-purpose flour with whole-wheat pastry flour, and I reduced the amount of salt and sugar a bit. I also made this recipe into individual cupcakes rather than a large cake.

Parsley Cupcakes

Based on a recipe from Food52.com

4 cups tightly packed parsley leaves, from about 5 bunches

1 cup tightly packed mint leaves, from 2 bunches

3/4 cup good olive oil

2 cups whole-wheat pastry flour

1 tablespoon plus 2 teaspoons cornstarch

1 teaspoon kosher salt

1 1/2 teaspoons baking powder

4 large eggs, at room temperature

2/3 plus 3/4 cups sugar

Preheat the oven to 340°F. Line 2 cupcake pans with paper liners. (The recipe makes about 17 cupcakes.)

To make the herb-oil mixture, put a fourth of the parsley and mint in a strong blender or food processor, and blend it on low speed. Use a blender stick to help crush the herbs while the blade is spinning (or stop the machine from time to time to push the herbs back down toward the blade). Slowly increase the speed to medium (or a steady puree, in a food processor) and continue adding the rest of the herbs until you have added all of them.

In a steady stream, add half of the olive oil. Mix on medium-low speed (or pulsing, if using a food processor) until all is combined. Add the remaining olive oil and blend for no longer than 10 seconds. The mixture will look loose and stringy. Scrape out the blender to get all of the parsley mixture, transfer it to a bowl, and refrigerate until ready to use.

In a bowl, combine the flour, cornstarch, salt, and baking powder and set aside.

In a stand mixer fitted with the paddle attachment, whip the eggs for about 30 seconds. Add the sugar and mix on high speed until the mixture is very thick and turns a pale yellow color, about 3 minutes. Turn the mixer speed down to low and add the herb-oil mixture.

With the machine still running, add the flour mixture and mix until just combined. Do not over mix.

Fill each cupcake liner about ¾ full with the batter.

Bake for about 18 to 20 minutes, rotating halfway through. When a cake tester inserted in the center of one cupcake comes out clean, they are done. Let the cupcakes cool in the pan.

Happy Shamrock Day ~ Irish Soda Bread Biscuits

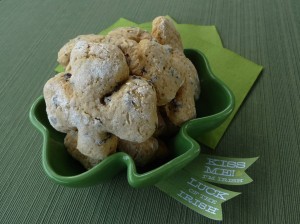
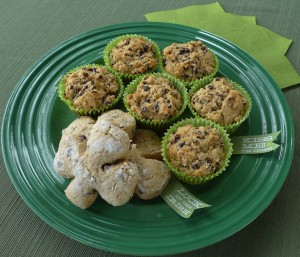
Happy St. Patrick’s Day! I’m not even a wee bit Irish, but I always have fun celebrating this holiday. We really enjoyed the Irish soda bread muffins I made last year, so this year I decided to try another spin on the same idea. I baked Irish soda bread biscuits. 🙂 I went an extra step and cut them out with a shamrock cookie cutter. What could be more festive that? 🙂

Irish Soda Bread Biscuits

2 cups whole-wheat pastry flour

1/2 cup sugar

1/2 teaspoon baking soda

¼ cup Earth Balance

1/2 cup dried currants

1/2 cup low fat buttermilk

1 egg

1 teaspoon caraway seeds

Preheat the oven to 350 degrees F.

Combine the dry ingredients in a medium sized mixing bowl. With a fork or pastry blender, cut in the Earth Balance. Stir in the currants and caraway.

Mix the egg and buttermilk in a separate bowl, and then combine the wet ingredients with the dry ingredients.

On a floured surface, shape the dough into a ball. It is a sticky and wet dough, so use as much all-purpose flour as you need on your hands and the bench to pull it together into a cohesive dough ball. Roll the dough so it is about ½ inch thick. Cut with a cookie cutter or a knife. Transfer biscuits to a baking sheet lined with parchment paper and sprayed with non-stick spray. Bake for about 12 minutes, or until golden brown on top.

I also baked a batch of the soda bread muffins that I wrote about last year. They freeze well, so our freezer is now stocked! Just microwave for 30 seconds for a warm, fresh muffin in the morning.

The cute little printable flags are from Elli.com. They are free to download and print for your St. Patrick’s Day celebration. 🙂

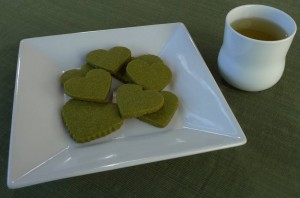
Happy White Day ~ Green Tea Shortbread

Happy White Day!

Last month, as I was looking through recipes for our Japanese Valentine’s Day dinner, I also looked at how people in Japan celebrate Valentine’s Day. Through that research, I stumbled upon a Japanese holiday called White Day. I learned that in Japan, women typically give men chocolates on Valentine’s Day rather than the other way around, as we usually do in the States. White Day is exactly one month after Valentine’s Day, and it is a chance for the men to give back. I thought it was such an interesting and cool tradition, so I wanted to mark it in some way. Here’s a Japanese-inspired cookie recipe for the guys out there! 😉

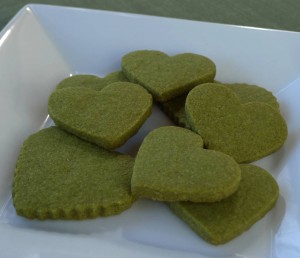
I used Martha Stewart’s recipe for Green Tea Shortbread. I substituted all of the butter with Earth Balance, which worked beautifully. We really didn’t miss the butter. I also omitted the salt, since Earth Balance already has a little salt incorporated into the product.

Green Tea Shortbread

Based on a recipe from Martha Stewart

2 cups all-purpose flour, plus more for rolling

2 tablespoons green-tea powder (matcha)

1/2 pound Earth Balance, room temperature

1/2 cup granulated sugar

Sift flour and tea powder into a small bowl; set aside. Place Earth Balance in the bowl of an electric mixer fitted with the paddle attachment. Cream on medium speed, 3 to 5 minutes. Add sugar; continue to beat until very light in color, about 2 minutes more. Add flour mixture; combine on low, scraping sides of bowl with a spatula if necessary, until flour is just incorporated and dough sticks together when squeezed with fingers.

Place a piece of parchment on a clean surface; dust with flour. Roll dough to 1/4-inch thickness; chill in refrigerator or freezer until firm, about 30 minutes.

Preheat oven to 325 degrees. Line two baking sheets with parchment. Cut chilled dough with 2-inch leaf cutters. Using a wide spatula, transfer to baking sheets. Chill until firm. Gather scraps together, re-roll, chill, and cut shapes. Bake until firm and barely starting to color, 15 to 20 minutes, rotating halfway through. Cool completely on wire rack; store in an airtight container for up to 3 to 4 weeks.

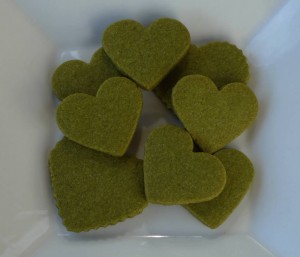
PS. Since these cookies are a vibrant green color, they could also be good for St. Patrick’s Day! Just cut them into shamrock shapes. 🙂