Wedding Anniversary, Part 3 ~ Japanese-Style Coconut Cheesecake and 14 Hands Winery Reserve Red Blend
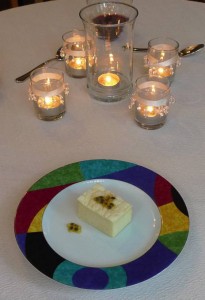
Japanese-Style Coconut CheesecakeThe grand finale of our wedding anniversary dinner celebration was a Japanese-style coconut cheesecake. It was light and fluffy, almost soufflé-like, compared to a typical American cheesecake. The coconut flavor was very subtle, but I served it with passion fruit (called lilikoi in Hawaii) for an added tropical taste.

Japanese-Style Coconut Cheesecake

This recipe was from a website called Cooking Hawaiian Style. I omitted the butter completely, and I used reduced fat cream cheese, but otherwise followed the recipe pretty closely.

Japanese-Style Coconut Cheesecake

Based on a recipe from Cooking Hawaiian Style

Yield: One 8″ cheesecake

Note: Do not substitute homemade cake flour (regular flour mixed with cornstarch) for this recipe. Use a store-bought cake flour.

9 oz. reduced fat cream cheese (one 8 oz. brick plus 1 oz. of another brick)

1/3 cup coconut milk

6 eggs, room temperature – whites and yolks separated

1/4 tsp. cream of tartar

1/2 cup plus

1/8 cup extra fine granulated sugar

1/3 cup plus 1 tsp. cake flour

3 tbsp. corn starch

1. Melt cream cheese and coconut milk in a heat-proof bowl over a pot of simmering water. Stir occasionally to break up cream cheese and combine the ingredients. Remove bowl from heat and allow to cool. Mixture will be thick. If lumpy, use a whisk to vigorously beat the mixture until smooth. Set aside.

2. When mixture has cooled, fold in the egg yolks, flour and corn starch. Fold until thoroughly incorporated.

3. Preheat oven to 325 degrees.

4. In a large bowl, whisk egg whites with an electric mixer until foamy. Add the cream of tartar and mix again, gradually adding the extra-fine sugar a little at a time until soft peaks form. Note: Soft peaks: mixture should be white and opaque, and meringue will fall onto itself when the beaters are lifted from the bowl.

5. Add the cheese mixture to the egg white mixture and fold together until well incorporated.

6. Pour into an 8-inch round spring-form pan that has been lightly greased and lined (sides and bottom) with parchment paper. Place a piece of aluminum foil over the top of the cake so it does not brown.

7. Bake in a water bath for 1 hour 10 minutes. When timer sounds, bake for an additional 10-15 minutes with the oven door cracked.

8. Carefully remove pan from water bath and let stand until cake pulls away from the sides of the pan. Remove spring-form ring and serve.

Notes:

•Substitutions are not recommended for this recipe. Be sure to use whole milk, cake flour and extra-fine sugar. If you can’t find extra-fine sugar, grind regular sugar finer in a food processor.

•Sprinkle matcha green tea on finished cake, or top with fresh fruit for serving.

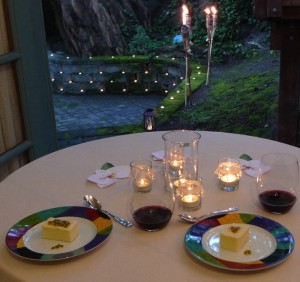
14 Hands Reserve WineWe also paired our meal with a bottle of 14 Hands Winery Reserve Red Blend. We discovered 14 Hands around the 14th anniversary of our first date, so it seemed fitting to close the loop by having a bottle to celebrate our 14th wedding anniversary!

14 Hands Reserve Wine

Wedding Anniversary, Part 2 ~ Macadamia Nut and Panko Crusted Ono with Happy Rice

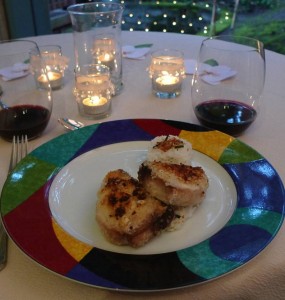
Macadamia and Panko Crusted OnoThe main course of our anniversary dinner was another recipe inspired by Roy’s Fish and Seafood: Recipes from the Pacific Rim. We had a macadamia nut and panko crusted ono fish, otherwise known as wahoo. (Wahoo! Sorry, couldn’t resist. 😉 ) It’s a Hawaiian fish with a dense but flaky texture, and a mild flavor. We also had a side dish of rice to accompany the fish. The cookbook calls this recipe Happy Rice. 🙂 So all in all, I’d say this is one of the happiest dishes I have ever made. 😉 Wahoo and Happy Rice!

We are lucky enough to have a Hawaiian fishmonger around Seattle called Tim’s Seafood in Kirkland. In addition to a wide selection of Northwest fish, he also gets fresh Hawaiian seafood. I had my choice of some beautiful fish for our dinner! He even makes his own poke.

I used coconut oil on the fish, and it gave it a subtle coconut flavor that was a nice compliment to the macadamia nuts. The original recipe used quite a bit of butter, but the coconut oil was a really nice alternative. This crust would work well with any firm white fish I think. The original recipe was for opakapaka, which I couldn’t find at the fish store that day, so I think any mild fish with a fairly firm texture would be lovely.

Macadamia Nut and Panko Crusted Ono with Happy Rice

Based on a recipe from Roy’s Fish and Seafood

Serves 2, with leftover rice for later

Happy Rice:

1 cup Japanese short-grain rice

1 cup water

1 tablespoon grated fresh ginger

1 tablespoon furikake, plus more for top

Macadamia and Panko Crusted Ono:

4 tablespoons macadamia nut halves

4 tablespoons coconut oil

½ cup panko breadcrumbs

Salt and pepper to taste

2 6 oz fillets of ono

Preheat oven to 350 F.

To prepare rice:

Put the rice in a fine mesh strainer and rinse under cold running water, until the water runs clear. Drain the rice and transfer to a bowl. Cover with fresh cold water, and let soak for 1 hour.

To cook the rice on the stovetop, place the drained rice in a saucepan and add 1 cup fresh water. Bring to boil, decrease heat, cover, and cook until the rice is soft and sticky and the water has just evaporated, about 15 minutes.

Combine the rice with ginger and furikake. Use small cookie cutters to form rice into compact shapes. Alternatively, dip your fingers in a bowl of slightly salted water to prevent the rice from sticking and mold 1 to 2 tablespoons of rice into triangles, cubes, or balls. Set aside and keep warm. Sprinkle the tops with more furikake.

To prepare fish:

In a food processor, pulse the nuts until they are cut into course pieces. Add the panko and oil, and pulse it all together until it is a thick paste, but still has some texture.

Coat one side of the ono with the paste. Preheat an oven-safe sauté pan over medium high heat, and when hot, place the ono in the pan, paste side down. Cook until golden, and then flip. Finish the fish in the oven. Cook until flaky, about 7 to 10 minutes.

Taste and say “Wahoo!!” OK, I have that out of my system now. 😉

Stay tuned for our Hawaiian dessert in the next entry!
Anniversary Dinner

Wedding Anniversary, Part 1 ~ Martini of Spicy Tuna Poke and Dragon Fruit Lychee Sparkling Wine Cocktails

Ahi Poke Martini

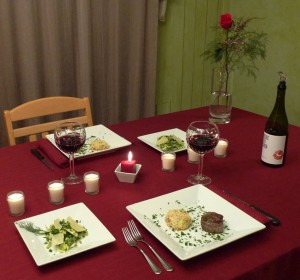
We celebrated our wedding anniversary this year with a special Hawaiian-style dinner. We love to explore foods from all around the world. For Valentine’s Day (also our engagement anniversary), we made a sushi dinner, so we decided to go with a twist on that theme for our wedding anniversary by making a few Japanese-influenced dishes from Hawaii. It was a summery meal from the land of endless summers!

The weather was not very Hawaiian-like for our celebration, though. Ha! (But it was very Seattle-like!) It was a little drizzly, and cooler than it usually is around our anniversary. We decided to use that opportunity to set the dinner table in a new place…We kicked open the French doors in the guest room, and ate inside overlooking a sea of candles and tiki torches. 🙂 Luckily it wasn’t too rainy, so the candles stayed lit. It was really beautiful!

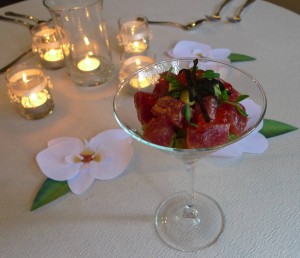
I also found some sweet little printable paper orchids on Elli.com. They were free, very easy to assemble, and I think they added a fun tropical touch to our table.

Ahi Poke Martini

I based two of our dishes on recipes from a cookbook called Roy’s Fish and Seafood: Recipes from the Pacific Rim. Chef Roy Yamaguchi has several restaurants in Hawaii and the mainland, and this book is a nice collection of a few of his Hawaiian seafood recipes. It was hard to choose what I wanted to make! I may continue to explore the recipes throughout our anniversary month. 🙂

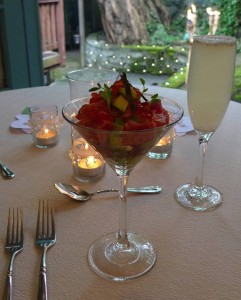
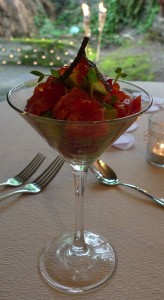
We started our meal with a classic ahi poke, one of our favorite Hawaiian dishes. 🙂 I loved the cookbook’s idea to serve it in layers in a martini glass, and then garnish with micro-greens, fish eggs, and thin strips of nori seaweed. I dressed the ahi much more lightly than the recipe called for. I used salmon roe instead of tobiko, because it’s local and also natural. I also doubled the avocado, since we love avocado. 🙂

Martini of Spicy Tuna Poke

Based on a recipe from Roy’s Fish and Seafood cookbook

Serves 2 as an appetizer

6 oz center-cut ahi tuna, cut into ½ inch dice

¼ cup mayonnaise

2 teaspoons sriracha

½ teaspoon fish sauce

A few micro-greens

¼ sheet nori, cut with scissors into thin strips

1 tablespoon salmon roe

1 avocado, cut into ½ inch dice

Juice of ½ lemon

Salt and pepper to taste

Combine mayonnaise, sriracha, and fish sauce. Salt and pepper to taste. Add as much or as little of the mixture to the ahi as you like. Stir to combine, and set aside.

Combine the avocado with the lemon juice and salt and pepper to taste.

Chill 2 martini glasses. Layer a few pieces of avocado in the bottom of the glass, then add a layer of ahi, another of avocado, and finish with a layer of ahi. Top with micro-greens, roe, and nori strips.

We also made fun dragon fruit and lychee sparkling wine cocktails to go with our first course. The dragon fruit added pretty little seeds and a very mild flavor, and the lychee gave the cocktail a nice sweetness. In a blender, I added a couple of slices of dragon fruit with about a ½ cup of lychee juice. Then I strained the mix, added a little to each champagne glass, and topped the juice with sparkling wine.

Stay tuned for the main course in my next entry!
Ahi Poke Martini

Valentine Sushi Dinner ~ Miso Soup

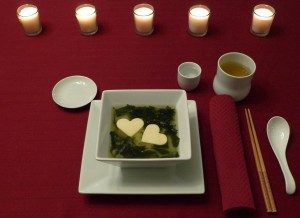
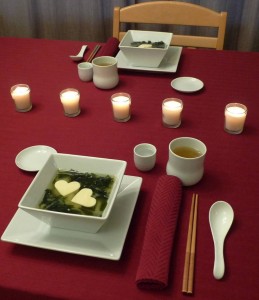
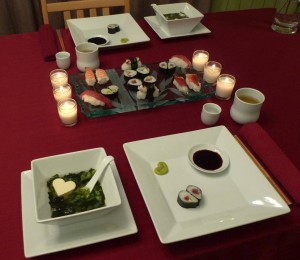
Rob and I celebrated Valentine’s Day and our engagement anniversary all weekend, culminating with a fancy sushi dinner! I decided to try making miso soup from scratch to go with the dinner, since it is almost always served at Japanese sushi restaurants. I really had no idea how it was made or what went into it before I tried it at home. I just knew it was delicious! 😉 Now I have a whole new appreciation for it, so I thought I would share the recipe I used. It’s a traditional soup in Japan, but in my American kitchen, it was a new and exciting culinary adventure.

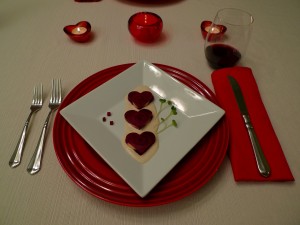
Since we were celebrating Valentine’s Day and to make the soup a little more special, I cut the tofu into heart shapes with a little cookie cutter. So cute! 🙂

Miso Soup

From Gourmet magazine

1/2 cup dried wakame (a type of seaweed)

1/4 cup shiro miso (white fermented-soybean paste)

6 cups Dashi (recipe follows)

1/2 pound soft tofu, drained and cut into 1/2-inch cubes

1/4 cup thinly sliced scallion greens

Prepare wakame:
Combine wakame with warm water to cover by 1 inch and let stand 15 minutes, or until reconstituted. Drain in a sieve.

Make soup:
Stir together miso and 1/2 cup dashi in a bowl until smooth. Heat remaining dashi in a saucepan over moderately high heat until hot, then gently stir in tofu and reconstituted wakame. Simmer 1 minute and remove from heat. Immediately stir in miso mixture and scallion greens and serve.

Dashi (Japanese Sea Stock)

From Gourmet magazine

6 cups cold water

1 oz (30 grams) kombu (dried kelp), about 20 square inches

2 (5-gram) packages katsuo bushi (dried bonito flakes), about 1 cup

Bring cold water and kombu just to a boil in a large saucepan over high heat. Remove from heat and remove kombu. Sprinkle katsuo bushi over liquid; let stand 3 minutes and, if necessary, stir to make katsuo bushi sink. Pour through a cheesecloth-lined sieve or a coffee filter into a bowl.

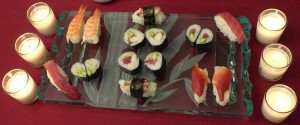
For the sushi we enjoyed with the soup, I used this sushi rice recipe. If you are using a pot on the stovetop rather than a rice cooker, we thought it was a very good one. Along with the traditional rolls, we also made a couple of pieces in heart shapes. 🙂 To see how to do that, here is a little video. So fun!

We paired our dinner with a little sake, since that only seemed fitting! There is a Northwest sake maker in Oregon called Momokawa, and we had their Organic Junmai Ginjo with our sushi feast. I would highly recommend it. 🙂

幸せなバレンタインデー (Happy Valentine’s Day)!

Valentine Saturday ~ Crab Cake Breakfast

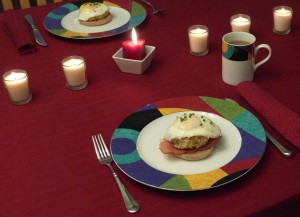
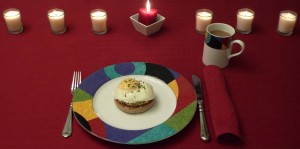
The leftover crab cakes make a really lovely breakfast in the morning. Just toast a whole-wheat English muffin for the base, place a reheated crab cake on top of that, and finish it off with a poached egg on top. Rob likes to put a little crispy prosciutto on his, as well. We are celebrating the whole Valentine weekend, so this was the perfect way to start the day after V-Day. 🙂

Happy Valentine’s Day! ~ Crab Cakes

Happy Valentine’s Day!

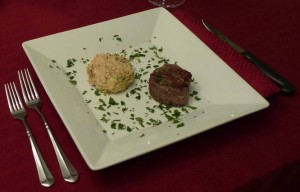
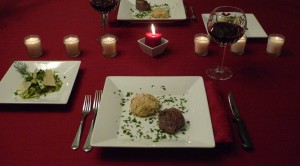
We enjoyed a low key, but special dinner tonight. Since I worked later in the evening, we just made a couple of our favorite dishes that are easy to put together. My Valentine requested his favorite crab cakes, which I wrote about a few years ago. They always feel like a special occasion dish. That with a little filet mignon and a fennel salad, and we had a gourmet meal in about 30 minutes! It really didn’t take any longer than that.

Since the crab cakes are one of our favorite dishes, I will reprint the recipe here. They are worth repeating! 🙂

Dungeness Crab Cakes

Based on a recipe from Sunset magazine

1 pound cooked and shelled Dungeness crab meat

1/4 cup finely diced celery

2 tablespoons minced fresh chives

2 tablespoons mayonnaise

1 large egg

2 teaspoons Dijon mustard

1/4 teaspoon hot sauce

1 1/4 cups panko, divided

Preheat your oven to 475 F. Make sure your crab doesn’t have any hidden bits of shell mixed in before you begin. In a large bowl, mix the celery, chives, mayonnaise, egg, mustard, and hot sauce with a fork. Then add the crab and 1/4 cup panko. Stir gently until everything is well blended.

Place the remaining 1 cup of panko in a shallow bowl. Shape the crab mixture into cakes. (I usually get about 6 or 7 large cakes, but make them the size you prefer. Whatever size you choose, they should be about 1/2 inch thick.) Place each cake in the panko and coat on all sides. Press gently to make sure the crumbs stick. Lay the panko-covered cakes slightly apart on a parchment-lined baking sheet. (You can make them up to this point earlier in the day. Just cover the pan lightly with plastic wrap and refrigerate until you are ready to bake.)

Bake until golden brown, 15 to 18 minutes. Serve immediately.

I gave Rob a bottle of wine from a new Washington winery called Result of a Crush. He was nice enough to share it with me. 😉 It was a perfect wine for Valentine’s Day!  Delicious, too. 🙂

Wedding Anniversary ~ Portobello Mushroom Ravioli

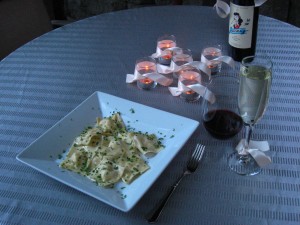
Our 13th wedding anniversary happened to fall on Labor Day this year, so we celebrated the whole weekend long! The grand finale was a homemade gourmet Italian dinner on Monday that we enjoyed under our grape arbor. 🙂 Dining under the vines made it feel a little like being in Tuscan wine country. Rob even added some little lights above the table, and we lit tea lights all around the yard for the occasion. So pretty!

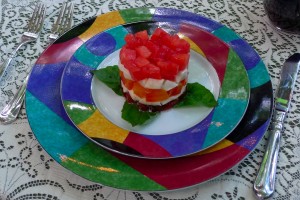
We made one special main dish, and a couple simple dishes surrounding it. We started with a simple Caprese salad that I made a little fancier by showcasing the different colored heirloom tomatoes in a tower with a food ring. We ended with a simple Earl Grey tea affogato, rather than the traditional coffee version. It tied this celebration back to the afternoon tea we had earlier in the weekend, and the bergamot orange that flavors Earl Grey tea is actually from Italy, which was very fitting! 🙂

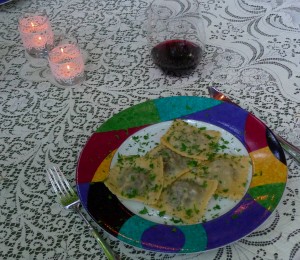
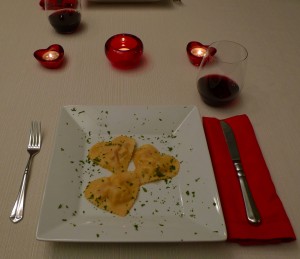
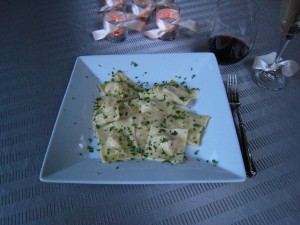
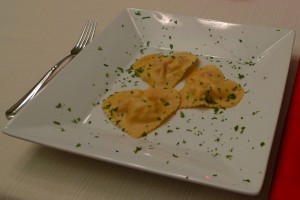
For the main course, we made homemade portobello mushroom ravioli. I think that fresh pasta is much easier to make with a partner, so it is a perfect project to do together on an anniversary. 🙂 We also celebrated our engagement anniversary with a ravioli dish (on Valentine’s Day), so making ravioli again tied the two special anniversaries together.  Plus we had a portobello mushroom dish for dinner at our wedding reception at Columbia Winery, so that flavor brought us back to the reason for this celebration! (Have you noticed I like to find several layers of meaning in everything I cook for special occasions? 🙂 I think it makes it more fun and special!)

Portobello Mushroom Ravioli

Dough based on a recipe from Sur La Table cooking classes

Filling based on a recipe from ChasingSomeBlueSky.com

For the Fresh Pasta Dough:

Yield: 4 servings

2 1/2 cups (12 ounces) all-purpose flour or “00″ flour, plus more for dusting

1 tablespoon kosher salt

4 large eggs

1 tablespoon extra-virgin olive oil (optional)

Place flour and salt in a large mixing bowl and whisk to combine. Make a “well” in the center of the flour mixture and add eggs and oil, if using. Using your fingers, blend the eggs into the flour mixture, stirring the flour in from the sides of the well and working outwards. When the pasta dough is thoroughly mixed, turn it out on a lightly floured work surface. Knead dough until it is smooth and flexible but not sticky, about 5 to 10 minutes, adding small amounts of flour as needed. Gather the dough into a ball and flatten into a disk. Cover in plastic wrap and allow dough to rest for at least 10 minutes and up to 1 hour at room temperature.

To roll dough, secure a pasta machine to the edge of a long countertop. Using a bench scraper, cut dough into thirds. Keep extra dough covered in plastic while working with one piece. Flatten the piece of dough into a rough square that will fit inside the width of the pasta machine. Place the rollers on the widest setting and roll the dough through the machine, catching it with one hand as you roll with the other. Take the dough and fold into thirds towards the center of the dough. Turn the dough so one open end faces the machine and roll it through on the widest setting again. Fold, turn, and roll once more on the widest setting. Continue rolling the pasta through machine without folding, adjusting the rollers to the next smallest setting each time, until the desired thickness is reached. If the pasta sheet becomes too large to handle, use a bench scraper to cut it into more manageable lengths and continue rolling until pasta is less than 1/16-inch thick.

(This whole process can also be done with a rolling pin. It takes some muscle, but it works really well).

For the Ravioli Filling:

1 tablespoon olive oil

18 oz portobello mushrooms, finely chopped

1 garlic clove, minced

1/4 cup dry red wine

1/2 cup part skim ricotta

1/4 cup grated Parmesan

Salt and pepper to taste

For the Sauce:

2 tablespoons Earth Balance

Splash of white wine

Flat leaf parsley, for serving

Freshly grated Parmesan, for serving

Preheat a large non-stick pan over medium heat. Add the olive oil, and when it is shimmering, add the garlic. Cook until fragrant, about 30 seconds. Then add the chopped mushrooms, and salt and pepper lightly. Cook until the liquid from the mushrooms is mostly evaporated. Add the wine, and continue to cook until most of the wine has evaporated. Place the mixture into a large bowl. Mix in the ricotta and Parmesan, and season to taste.

Bring a large pot of water to a boil. When it is boiling, add a good amount of salt to season the cooking liquid.

To make the ravioli, take two pieces of uncut pasta dough. Place 1 teaspoon dollops of the mushroom mixture along one piece of the dough, with at least an inch and a half between them. With a pastry brush or your finger, brush water on the pasta around the mushrooms. Carefully place the second sheet of pasta dough over the top, taking care to press it around each teaspoon of mushroom filling to try to avoid any air bubbles. Cut around the raviolis with a ravioli cutter, cookie cutter, or a pizza cutter. Take care to keep enough flour on the outside of the ravioli so they don’t stick together before cooking.

Cook the ravioli in the boiling water until they float to the top, about 2-3 minutes.

I used a simple sauce for this dish by tossing the cooked raviolis in about 2 tablespoons of melted Earth Balance mixed with a splash of white wine in a sauté pan, and then serving the ravioli with freshly grated Parmesan and flat leaf parsley on top.

(For a little video of how to fill ravioli, here is one that is a short and sweet. 🙂 Much easier to understand than my explanation, I think. ;-))

We paired our meal with a special bottle of 2000 Peninsula red wine from Columbia Winery. We bought a case of the 2000 awhile back when it was still available, and we’ve been opening only one bottle a year for our wedding anniversary. It is aging really nicely! Hopefully that’s a good sign for our marriage, as well! 😉 We definitely savored this bottle.

Afternoon Anniversary Tea ~ Earl Grey Tea Smoked Salmon

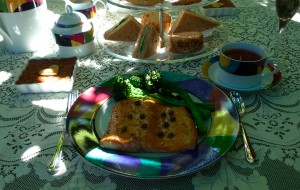
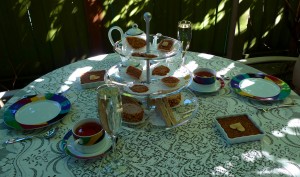
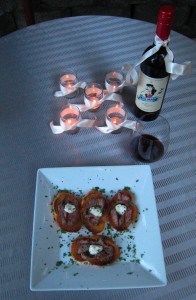
Our 13th wedding anniversary falls on Labor Day this year, so we are celebrating the whole holiday weekend! The traditional gift for the 13th year is lace, which led me to think about lacy afternoon teas. So, first stop, England! Virtually at least. 😉 I made a couple of little tea sandwiches and a couple of little desserts for the start and finish of our meal. I decided to add a more substantial main course in the middle for my sweetie, though. 🙂 I found a really interesting recipe from a British Pub called The Wellington Arms for a tea smoked salmon. I have to say, I was really intrigued, but also a little nervous that it might involve a few fire trucks. 😉 But I’m happy to report, no fire alarms or fire trucks, and it is one of the most exciting recipes I’ve tried in a while! Now I would like to smoke more things! Vegetables, eggs, cheese, chicken…The possibilities are endless. The types of tea to try are also plentiful. I used Earl Grey to stay with the British theme, but I’m excited to try different kinds for different flavors. I hope you’ll give this technique a go sometime. I think you’ll like it. 🙂

Tea Smoked Salmon

Based on a recipe from The Wellington Arms

Serves 2

For the fish:

2 fillets fresh wild salmon, about 6 oz each

Decaffeinated Earl Grey tea from 8 tea bags (approximately)

½ cup white rice (approximately)

1 tablespoon sugar (approximately)

Canola oil, or other high heat oil

Salt and pepper to taste

For the sauce:

2 tablespoons Earth Balance

1 teaspoon capers, rinsed

Squeeze of lemon juice

Salt and pepper to taste

Preheat oven to 350

Line an old pan that you are not very fond of with 2 layers of heavy duty tin foil, making sure there is plenty of extra overhanging to wrap around your lid. Form it to the bottom of the pan. Sprinkle the tea, rice and sugar in the bottom of the pan and combine.

Place a cake rack in the pan, and oil it with a high heat oil, such as canola. Place the fish skin-side down on top of the rack. Cover the pan with a lid. (It doesn’t need to fit tightly. I found that glass was nice because I could see my progress without removing the lid.) Wrap the excess tin foil up and around the lid to make sure there is a tight seal. This will keep almost all of the smoke inside of the pan. Put the pan on the stove and heat on high until smoking. Cook for about 8 minutes until the salmon is well infused with the smoke flavor. The top of the salmon will become a little dark. Remove the lid outside to avoid smoking your kitchen.

If you have thin fillets, they may be cooked through at this point. If they are still undercooked, place them in the preheated oven until they are done to your liking.

In the meantime, place the Earth Balance and capers in a saucepan and melt over medium heat. When they are melted and warm, add a squeeze of lemon juice and combine.

Serve the salmon with a spoonful of sauce over the top.

I found a few videos that helped me visualize how to do this technique before I tried it. One that is similar to the way I did it (only with wood chips instead of tea and without the lid) can be found here.

The small dishes we had with our afternoon tea were also lovely, and worth a try. I will keep these recipes in my collection. 🙂 We had chicken salad tea sandwiches with smoked almonds and smoked turkey tea sandwiches with arugula mayonnaise. I just replaced the regular mayonnaise in both of them with the reduced fat variety and I used a tender whole wheat bread instead of white, but I followed the recipes otherwise.

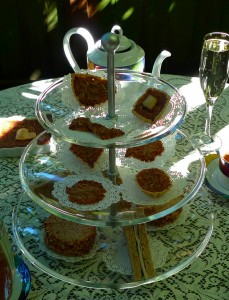
For dessert I made mini apple treacle tarts. Now I want to watch an episode of Downton Abbey! 😉 I wonder if they were as good as Mrs. Patmore’s? I actually substituted the butter completely with Earth Balance, and it worked beautifully. I just baked them for much less time than the big tart called for. I also made coconut oatmeal lace cookies. Again, I completely substituted the butter with Earth Balance, and they were delicious!

Next stop, Italy! We are planning to make ravioli and an Italian meal for our anniversary day. 🙂 Stay tuned….


August Anniversary ~ Summery Corn Chowder

I love to celebrate the little anniversaries in our life. They give us an excuse for a special meal, a bottle of wine, and time together. 🙂

Every August, we celebrate the date that we moved into our current house together, and I also celebrate the date I moved to Seattle from the Midwest a few years before. For this little anniversary, we usually have a Dungeness crab dinner, since it is one of our favorite Northwest treats. It always feels like a special occasion when we steam a couple crabs. 🙂 (For two crabs {about 3 lbs each}, steam for about 20 minutes until they are cooked through.)

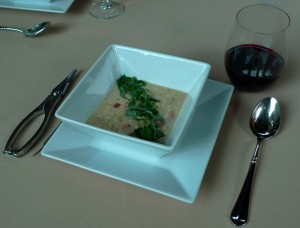
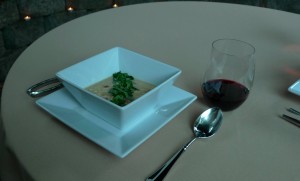
For the first course, I made summery corn chowder this year. The original recipe is from America’s Test Kitchen. They find the most unique and creative ways to improve classic recipes, and I really enjoy their show, their magazines, and their cookbooks. For this recipe, they amped up the corn flavor by using some of the corn juice, which I thought was a clever idea. I changed 3 things to make this a lighter recipe than the original. I omitted the butter altogether, and instead used a very good nonstick pan. I also trimmed most of the fat off of the bacon, and I replaced the half and half with skim milk. The final product turned out to be creamy, sweet, and delicious. It felt like summer in a bowl!

Corn Chowder

Based on a recipe from America’s Test Kitchen

Serves 6

8
 ears corn, husks and silk removed

1
 onion, chopped fine

4
 slices bacon trimmed of excess fat, halved lengthwise then cut into 1/4 inch pieces

2
 teaspoons minced fresh thyme

Salt and pepper to taste

1/4 
cup all-purpose flour

5
 cups water

3/4 
pound red potatoes, cut into 1/2 inch pieces

1
 cup skim milk

3
 tablespoons chopped fresh basil

1. Using chef’s knife or corn stripper, cut kernels from corn; transfer to bowl and set aside (you should have 5 to 6 cups kernels). Holding cobs over second bowl, use vegetable peeler or back of butter knife to firmly scrape any remaining pulp on cobs into bowl (you should have 2 to 2 1/2 cups pulp). Transfer pulp to center of clean kitchen towel set in medium bowl. Wrap towel tightly around pulp and squeeze tightly until dry. Discard pulp in towel and set corn juice aside (you should have about 2/3 cup juice).

2. In Dutch oven over medium heat, add onion, bacon, thyme, salt, and pepper; cook, stirring frequently, until onion is softened and edges are beginning to brown, 8 to 10 minutes. Stir in flour and cook, stirring constantly, for 2 minutes. Whisking constantly, gradually add water and bring to boil. Add corn kernels and potatoes. Return to simmer; reduce heat to medium-low and cook until potatoes have softened, 15 to 18 minutes.

3. Process 2 cups chowder in blender until smooth, 1 to 2 minutes. Return puree to chowder; add milk and return to simmer. Remove pot from heat and stir in reserved corn juice. Season to taste with salt and pepper. Serve, sprinkling with basil.

Elegant Spring Anniversary Brunch, Part 3 ~ Strawberries Dusted With Cardamom Sugar

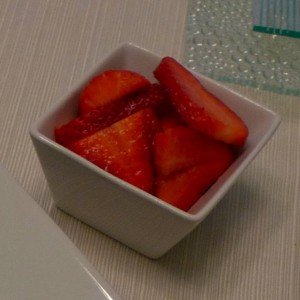
We enjoyed a sweet finale to our spring anniversary brunch – Strawberries Dusted With Cardamom Sugar. It was such a refreshing and unique flavor combination. It felt like a special dish, even though it only took a couple of minutes to assemble. This would be a very nice addition to any special brunch. (Easter and Mother’s Day are coming! :)) I used the original recipe as a guide, but I really made everything to taste. I sliced my berries before serving, and I only used a light dusting of sugar. (Now I have some leftover cardamom sugar for another recipe.)

Strawberries Dusted With Cardamom Sugar

Adapted from Bon Appétit magazine

1/4 cup sugar, or to taste

1/4 teaspoon ground cardamom, or to taste

2 tablespoons Grand Marnier or other orange liqueur or orange juice

1 16-ounce basket strawberries, hulled, left whole or sliced

Whisk sugar and cardamom in small bowl to blend.

Pour Grand Marnier into large bowl. Add strawberries to bowl and toss to coat. Sprinkle to taste with cardamom sugar. Serve.

Elegant Spring Anniversary Brunch, Part 2 ~ Broiled Portobello Topped With Creamy Scrambled Eggs

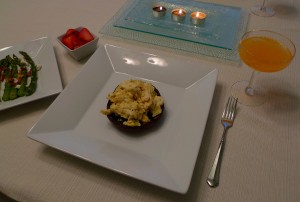
We made a Broiled Portobello Topped With Creamy Scrambled Eggs as the main course of our spring anniversary brunch. We often make a scramble on a regular Sunday morning, and this was only minimally more effort. We usually lighten our scrambles by using about half of the egg yolks to egg whites, and we did the same here. I also omitted the butter from the original recipe completely and just used a non-stick pan with no oil for the eggs. I would recommend measuring both the Parmesan and the rosemary to taste. We used a little more cheese than the recipe called for, but we used less rosemary. (I will make exceptions when I think the fat is worth it…Cheese is worth it to me!) Make it your own, the way you like it :).

Broiled Portobello Topped with Creamy Scrambled Eggs

Adapted from Bon Appétit magazine

Makes 3 servings

3 4- to 5-inch-diameter portobello mushrooms

Olive oil

1 large garlic clove, minced

12 large egg whites and 6 of the yolks

Grated Parmesan cheese, to taste

Chopped fresh rosemary, to taste

Salt and pepper

Preheat broiler. Line large baking sheet with foil. Remove and discard mushroom stems. Scoop out and discard tough inside centers where mushroom stems were attached. Brush both sides of mushrooms generously with olive oil. Place mushrooms, dark gill side up, on prepared baking sheet. Sprinkle mushrooms with minced garlic, then sprinkle generously with salt and pepper. Broil mushrooms about 5 inches from heat source until beginning to soften, about 5 minutes. Turn mushrooms over; broil until tender when pierced with knife, about 7 minutes longer. (Can be made 2 hours ahead. Let stand at room temperature. Before continuing, rewarm in 350°F oven until heated through, about 10 minutes.)

Whisk eggs, Parmesan cheese, chopped rosemary, salt, and pepper in large bowl to blend. Heat large non-stick skillet over medium-low heat. Add eggs to skillet and stir gently in circular motion with wooden spoon or heat-resistant rubber spatula, releasing cooked eggs from bottom of skillet and allowing uncooked portion of eggs to flow underneath. Cook until eggs are set but still soft, about 4 minutes total.

Arrange hot portobello mushrooms, gill side up, on plates. Top with eggs, dividing equally. Sprinkle with more grated Parmesan cheese, dividing equally, and serve.

Elegant Spring Anniversary Brunch, Part 1 ~ Roasted Asparagus with Goat Cheese and Crispy Prosciutto

Every year on March 24th, my hubby and I celebrate the anniversary from the day that we met. We love to mark our little milestone anniversaries, which gives us a reason for a nice meal. I’m always up for another excuse for a celebration! 😉

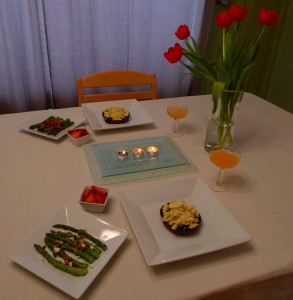
This year we made a nice brunch at home. The first meal of the day to celebrate the beginning of us :).

I found a menu from Bon Appétit magazine that was both simple and elegant. We made three of the dishes, and we thought they all turned out really well. They would be perfect for Easter, or Mother’s Day, or any other spring celebration. I will definitely keep these recipes at the front of my list when I need a special, but quick, brunch recipe.  I am rarely up for a big cooking project first thing in the morning ;-).

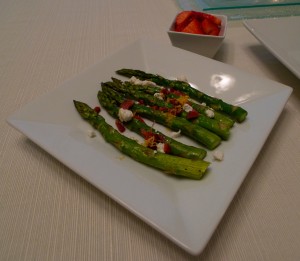
First we made Roasted Asparagus with Goat Cheese and Crispy Prosciutto. It was a fresh and light dish. Prosciutto can be fried in a dry, non-stick sauté pan until it gets crispy just like bacon, which is a little healthier option than traditional bacon. I also didn’t drizzle olive oil over the asparagus at the end, as the original recipe called for, to keep the dish a little bit lighter. Other than that, I followed this recipe pretty closely. Just be sure to keep a close eye on the asparagus in the oven so it doesn’t over cook.

Roasted Asparagus with Goat Cheese and Crispy Prosciutto

Based on a recipe from Bon Appétit magazine

6 prosciutto slices

2 pounds medium asparagus, tough ends trimmed

2 tablespoons olive oil

1 3 1/2- to 4-ounce log soft fresh goat cheese, crumbled

2 teaspoons fresh lemon juice

1 teaspoon grated lemon peel

Cook prosciutto in large non-stick skillet over medium heat until brown and crisp. Transfer to paper towels and drain. Crumble prosciutto; set aside.

Position rack in center of oven and preheat to 500°F.

Arrange asparagus on large rimmed baking sheet. Drizzle with 2 tablespoons oil and turn asparagus to coat well. Sprinkle generously with salt and pepper. Roast asparagus until crisp-tender when pierced with knife, about 7 minutes.

Arrange asparagus in single layer on platter. Sprinkle with goat cheese, then prosciutto. Drizzle with lemon juice. Sprinkle grated lemon peel over. (Can be prepared 1 hour ahead. Cover with plastic wrap. Let stand at room temperature.)

Valentine’s Day Dinner, Part 2 ~ Lobster Ravioli with Warm Lobster Vinaigrette


The second ravioli course that we made for our romantic Valentine’s Day dinner was lobster ravioli with warm lobster vinaigrette. The recipe is from the chef at Corton restaurant in New York City, so it was our second stop on our virtual trip to NYC. I could almost see Tom Hanks and Meg Ryan on top of the Empire State Building in the movie Sleepless in Seattle. 😉

The spices in the vinaigrette are a truly unique combination, and I would have never thought to put them together myself. It has a lot of Asian elements along with French and Indian. I found what I needed at Market Spice in Pike Place Market, which is always an adventure! If they don’t have a spice, I likely won’t find it in Seattle.

I followed the recipe closely, and I would highly recommend it for a special occasion. It is time consuming, but we thought it was well worth it. It made us appreciate what high end restaurants go through for one dish :).

Lobster Ravioli with Warm Lobster Vinaigrette

From Corton chef Paul Liebrandt

1 (1 1/2 pound) lobster

1 cup white-wine vinegar

1 cup dry white wine

1 carrot, finely chopped

1 medium onion, finely chopped

2 bay leaves

10 black peppercorns

1/2 lemon, sliced

Coarse salt and freshly ground pepper

Pinch of madras curry powder

1/2 large egg white

3 tablespoons olive oil

1 piece lemongrass, finely chopped

1 shallot, finely chopped

8 kaffir lime leaves

6 green cardamom pods, lightly crushed

1 tablespoon minced fresh ginger

3 star anise

2 tablespoons extra-virgin olive oil

1 tablespoon freshly squeezed lime juice

Pinch of espelette pepper

Pasta Dough (recipe follows)

All-purpose flour, for work surface (or ’00’)

1 large egg yolk, beaten

Prepare an ice-water bath; set aside. Fill a large pot with 32 cups water. Add vinegar, white wine, carrots, onion, bay leaves, peppercorns, and lemon; bring to a gentle simmer over medium-high heat. Add lobster headfirst. Cook for three minutes. Remove lobster from pot and remove claws. Return claws to pot and continue to cook 8 minutes more. Immediately transfer lobster to ice-water bath to cool; drain.

Remove meat from lobster, reserving shells. Cut lobster meat into 1/4-inch pieces and transfer to a large bowl; season with salt and pepper. Add curry powder and egg white; stir to combine. Using a teaspoon, form twelve 1-inch balls of lobster mixture and place on a parchment paper-lined baking sheet; transfer to refrigerator uncovered, until well chilled, about 1 1/2 hours.

Chop reserved shells into equal size pieces. Place olive oil and chopped shells in a large high-sided skillet over medium heat. Cook, stirring, until liquid has evaporated from shells. Reduce heat to low and continue cooking until shells are bright red, but not sizzling, about 10 minutes. Add lemongrass, shallot, kaffir lime leaves, cardamom, ginger, and star anise. Increase heat to medium and cook for 5 minutes. Add enough water to just cover; cook until liquid is reduced by two-thirds, stirring occasionally.

Strain mixture into a bowl through a fine mesh strainer, pressing down on solids to release liquids. Discard solids and return liquid to skillet. Cook over low heat until liquid is reduced and slightly syrupy, 3 to 5 minutes.

Remove from heat and stir in extra-virgin olive oil, lime juice, and esplette; vinaigrette will look broken. Keep warm.

Set the rollers of a hand-crank or electric pasta machine at their widest opening. Unwrap dough; flatten with the palms of your hands and run it once through the machine. Fold the dough in thirds like a letter and run through the machine again.

Now change the rollers of the pasta machine to the next decreasing setting; roll dough through machine twice. Keep rolling the sheet through the machine two times on each decreasing setting until you have rolled it through the last (thinnest) setting.

Cut sheet in half crosswise and place on a lightly floured surface. Using a 2 3/4-inch round cutter, cut out 24 rounds of pasta, covering cut pasta with plastic wrap as you work.

Working with 2 pasta rounds at a time (and keeping remaining pieces covered while working), brush 1 round with egg yolk and place 1 ball of lobster filling in the center. Lay second round directly on top and press edges together to seal. Repeat process with remaining pasta rounds and filling.

Bring a large pot of water to a gentle simmer over medium-high heat. Add raviolis, taking care not to overcrowd and working in batches if necessary, cook for 2 minutes. Meanwhile, rewarm vinaigrette, if necessary.

Using a slotted spoon, transfer ravioli to warm serving plates or bowls; top each with 2 tablespoons vinaigrette and serve immediately.


Pasta Dough

From Corton chef Paul Liebrandt

(Makes enough for 12 (2-inch-round) raviolis)

3 large egg yolks

2 large eggs

1 tablespoon olive oil

2 cups plus 3 tablespoons ’00’, flour plus more for work surface

In a large bowl, whisk together egg yolks and eggs; add olive oil and whisk until slightly emulsified. Transfer to the bowl of a food processor and pulse for 5 seconds. Add flour and pulse until a cohesive ball of dough forms, about 30 seconds.

Remove dough from food processor. Add a pinch of flour to work surface and knead until smooth, about 2 minutes. Wrap with plastic wrap and let rest in a cool place 2 hours before using.

Valentine’s Day Dinner, Part 1 ~ Beet Ravioli with Pine Nut “Goat Cheese,” Rosemary-Cream Sauce, and Aged Balsamic Vinegar

We jetted off to New York City to explore their world-class restaurants this Valentine’s Day. Well, not literally, but in our own way. I found two recipes that I was excited to try, and they both happened to be from chefs in NYC. They couldn’t be more different, but they are both types of ravioli.

The first course was a raw beet ravioli filled with “goat cheese” that was made of pine nuts over a “cream” sauce flavored with rosemary and garlic. All of it was vegan, and uncooked. I love to play with food in new and different ways like this. It keeps the kitchen interesting and exciting for me. And tonight I had the chance to play with my best playmate…My hubby! 🙂

I followed the recipe closely, which can be found at Epicurious.com.

Beet Ravioli with Pine Nut “Goat Cheese,” Rosemary-Cream Sauce, and Aged Balsamic Vinegar

Pine Nut “Goat Cheese:”

4 cups pine nuts, soaked 1 hour or more

1/2 cup extra-virgin olive oil

2 medium shallots, peeled and diced

Zest of 1 lemon

1/2 cup freshly squeezed lemon juice

4 teaspoons nutritional yeast

2 1/2 teaspoons sea salt

Freshly ground black pepper

Rosemary-Cream Sauce:

1 teaspoon minced rosemary

1 tablespoon freshly squeezed lemon juice

3/4 cup filtered water

Pinch of sea salt

1 clove garlic, peeled

Freshly ground black pepper

Beet “Pasta:”

2 medium beets (2 inches in diameter or more), peeled

2 tablespoons macadamia oil, or other nut oil, or extra-virgin olive oil

1 tablespoon freshly squeezed lemon juice

1/2 teaspoon sea salt

2 tablespoons high-quality aged balsamic vinegar

Microgreens or other herbs, for garnish


Pine Nut “Goat Cheese”

Process all ingredients in a food processor until as smooth as possible.

You should have about 4 cups. Reserve 2 cups for the sauce, and set aside the remainder.

Rosemary-Cream Sauce

Puree all the ingredients in a high-speed blender until smooth.

To Finish

Using a mandoline, slice the beets very thin (so they are pliable and not stiff, approximately 1/16 of an inch or less).

Make small stacks of the larger pieces and use a sharp knife to cut into squares—the size doesn’t matter much, as long as they are all roughly the same. Alternatively, use a round-, heart-or other- shaped cookie cutter to cut the slices. Cut at least 40 slices—10 per serving, with a few extra to spare.

In a medium bowl, place the beet slices, oil, lemon juice, and salt and toss gently to coat evenly. Allowing the beets to sit for a half hour or more will soften them; this is optional but a good idea if your slices are on the thicker side and still a bit stiff.

Lay half the beet slices on a clean work surface and top each with a rounded teaspoonful of the cheese. Top with the remaining beet slices and press down gently.

Spoon the sauce onto serving plates, and arrange the ravioli on top. Garnish with a few drops of aged balsamic vinegar and a few sprigs of either microgreens or fresh herbs.

Happy Valentine’s Day! ~ Chocolate Cupcakes with Raspberry Cream Cheese Frosting and Chocolate Hearts

Happy Valentine’s Day!

I found some adorable Valentine cupcake recipes on MarthaStewart.com. I combined a few of my favorites, since there were so many cute ideas that I couldn’t decide on just one. 🙂 These are inspired by a combination of Martha’s recipes for Raspberry Cupcakes with Pink Buttercream and Lacy Chocolate Hearts as well as her Frosted Chocolate-Buttermilk Cupcakes.

For the cake recipe, I replaced the all-purpose flour with whole wheat pastry flour, I reduced the sugar slightly and I replaced the butter with coconut oil. Now they are a little more heart-healthy for heart day!

Chocolate Cupcakes

Based on a recipe from MarthaStewart.com

3/4 cup whole wheat pastry flour, (spooned and leveled)

2/3 cup sugar

1 teaspoon baking powder

1/2 teaspoon baking soda

1/4 teaspoon salt

6 tablespoons unsweetened cocoa powder, preferably Dutch-process

3 tablespoons coconut oil

6 tablespoons buttermilk

1 large egg

1 large egg white

Light Cream-Cheese Icing (recipe follows)

Chocolate Hearts decorations (recipe follows)

Directions

Preheat oven to 350 degrees. Line standard 12-cup muffin tin (or two 6-cup muffin tins) with paper liners. In a large mixing bowl, combine flour, sugar, baking powder, baking soda, and salt; set aside.

With an electric mixer, combine cocoa and 3 tablespoons hot water until a thick paste forms. Add coconut oil, buttermilk, egg, and egg white; beat until combined. Whisk in flour mixture until smooth.

Scoop (or spoon) batter into prepared tin(s). Bake until a toothpick inserted in the center of a cupcake comes out clean, about 20 minutes. Transfer cupcakes to a wire rack to cool completely.

Use an offset spatula or butter knife to spread icing over tops. Decorate as desired.

The original icing recipe was already a lightened version of a cream cheese frosting. I decided to make it a little more special and festive for the holiday by adding some raspberry puree, which made it pink! 🙂 It’s more natural than red food coloring, and I love the raspberry flavor paired with the chocolate. I used a little less sugar than the recipe called for. Just taste as you go, and add as much or as little sugar and raspberry puree as you desire.

Light Cream Cheese Icing

Based on a recipe from MarthaStewart.com

Ingredients

3 ounces reduced-fat cream cheese

1 cup confectioners’ sugar

1/2 bag of frozen raspberries

Directions

Thaw raspberries, and blend until pureed in a food processor. Strain through a fine mesh strainer to remove the seeds. With an electric mixer, beat cream cheese and as much of the confectioners’ sugar and raspberry puree as you desire. (To make without a mixer, sift sugar before stirring into cream cheese.)

I made free form chocolate hearts to go on top of the cakes. However, if you’d like more perfect and uniform shapes, below is Martha’s technique :).

Chocolate Hearts

Inspired by Martha Stewart’s Chocolate Filigree Hearts

Ingredients

Dark or milk chocolate

Directions

Trace the inside of a 2-inch heart-shaped cookie cutter (surlatable.com) onto parchment 30 times using a pencil.

Flip parchment, and transfer to a baking sheet.

Melt 4 ounces chopped bittersweet chocolate in a double boiler or heatproof bowl set over a pan of simmering water. Let cool slightly. Transfer to a parchment cone (or resealable plastic bag). Snip a tip to make a small hole.

Pipe chocolate into hearts, following outlines and filling in with squiggles (be sure squiggles are at least 1/4 inch thick so hearts won’t break when removed).

Freeze hearts until set, about 15 minutes. Remove hearts using an offset spatula. Makes 30.


Happy wedding anniversary ~ Part 3 ~ Lime Granita with Candied Mint Leaves and Sweet Sour Cream

We finished our Italian anniversary feast with a light little dessert. It was so small and refreshing that it could actually be served in between the courses of a rich dinner, as well.

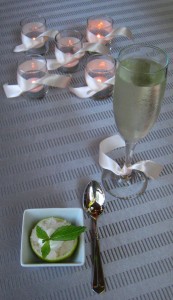
I found the original recipe from Epicurious.com, but I reduced the sugar quite a bit. We like our citrus desserts to be a little tart, so if you like things a little sweeter, you may want to add more sugar. Taste before you put it in the freezer. I used light sour cream instead of the full fat version, also.

Lime Granita with Candied Mint Leaves and Sweet Sour Cream

Based on a recipe from Epicurious.com

Granita:

1 1/2 cups water

1/2 cup sugar

1/2 cup fresh lime juice

Candied Mint Leaves:

2 tablespoons sugar

6 fresh mint leaves, washed, patted dry

1 large egg white, beaten until foamy

Sweet Sour Cream:

1/2 cup light sour cream

1 1/2 tablespoons powdered sugar

For granita:
 Bring water and sugar to boil in medium saucepan, stirring until sugar dissolves. Reduce heat to medium and simmer 5 minutes. Cool syrup. Stir in lime juice. Transfer lime syrup to 9 by 9-inch glass baking dish. Cover and place in freezer. Stir every 45 minutes until frozen, about 3 hours. DO AHEAD Granita can be made 2 days ahead. Cover and keep frozen.

For candied mint leaves:
 Place sugar on small shallow plate. Brush both sides of 1 mint leaf lightly with egg white; dredge in sugar. Transfer mint leaf to rack. Repeat with remaining mint leaves. Let mint stand at room temperature until dry, about 3 hours. DO AHEAD Can be made 1 day ahead. Store in airtight container at room temperature.

For light sour cream:
 Mix light sour cream and sugar. DO AHEAD Can be made 1 day ahead. Cover and chill.

For a fun presentation from Epicurious, serve the granita in hollowed-out lime halves. To prepare the limes, snip the membranes with scissors, and then scrape clean with a grapefruit spoon.

Using fork, scrape granita to loosen. Spoon granita into bowls or lime halves; drizzle with light sour cream, garnish with candied mint leaves, and serve immediately.

Happy wedding anniversary ~ Part 2 ~ Pepper-Crusted Steak with Horseradish Cream on Grilled Garlic Crostini

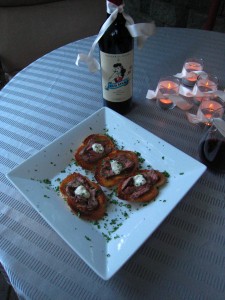
We enjoyed an Italian steak dish to compliment our crab ravioli on our anniversary. Surf and turf :). We just wanted a little something to snack on as we lingered at the table, enjoyed the candles surrounding us, and sipped our wine. These were perfect.

The original recipe was from Epicurious.com. I replaced the heavy cream with light sour cream, which is a different flavor, but delicious all the same. I also trimmed the steak very well before I cooked it.

Pepper-Crusted Steak with Horseradish Cream on Grilled Garlic Crostini

Based on a recipe from Epicurious.com

For the crostini:

1/2 cup extra virgin olive oil

2 garlic cloves, crushed

Salt and pepper to taste

15 1/3-inch slices cut from a French baguette

Italian parsley, minced

Mix the olive oil, garlic, salt, and pepper together in a small bowl and brush lightly on both sides of the bread slices. To broil, position the rack so the slices are 2 inches from the top and turn when the crostini starts to brown at the edges. It will only take a couple of minutes, so watch them very closely.

For the cream:

1/3 cup freshly grated horseradish

1 teaspoon white wine vinegar

1 teaspoon Dijon mustard

Salt and pepper to taste

1/2 cup light sour cream

Use a microplane grater to grate the horseradish root, and then mix the horseradish with the vinegar. Add the mustard, salt, and pepper, and mix again. Then fold into the sour cream.

For the marinated beef:

3 cloves garlic, crushed

1/2 teaspoon hot red pepper flakes

1 tablespoon whole black peppercorns, cracked

1 tablespoon minced fresh rosemary leaves

1/3 cup olive oil

2 pounds London broil (top sirloin), cut 1 1/2 inches thick

Kosher salt

Combine the garlic, hot red pepper flakes, peppercorns, rosemary, and olive oil in a Zip-loc bag. Add the beef, coating it with the marinade. Squeeze all the air out of the bag so the marinade envelops the beef, and refrigerate for at least 6 hours, or overnight.

Preheat the grill or broiler for 15 to 20 minutes. Sprinkle the steak with the salt and grill or broil to rare or medium rare, depending on your preference. (Our steak took about 6 minutes in the broiler to cook to our liking).

Let the steak rest for at least 20 minutes, to get the juices back into the meat, and then cut into short, very thin slices.

Arrange a few shaved slices of beef on each piece of bread, top with a dot of horseradish cream, scatter with minced Italian parsley, and finish with a little kosher salt.

The wine we paired with dinner was called Red Silk 2010 Shiraz by Oliverhill Winery in Australia. Since the traditional anniversary gift for the 12th anniversary is silk, this was our twist on it. Funny thing, out of all of the wines to choose from in the world, I chose this one for Rob, and my mom happened to choose the very same wine as a gift to us! What are the chances? 😉  So we still have one bottle to enjoy after our anniversary. Let the celebration continue!

Happy wedding anniversary ~ Part 1 ~ Dungeness Crab Ravioli


We celebrated our wedding anniversary this year with pasta! Last week Rob and I took a cooking class at Sur La Table about making homemade pasta, and afterwards we bought a pasta machine as a gift to each other. The traditional anniversary gift for 12 years of marriage is silk, so we thought making silky pasta would be fitting! 😉

We both love crab, so we made a Dungeness crab filling to go in our homemade ravioli. I found a good recipe on MarthaStewart.com to base our dish. I used lightened ricotta instead of the whole milk variety, and I used Earth Balance instead of butter for the sauce. We also used a little more crab than the recipe called for, since we love crab :). We replaced the wonton wrappers in her recipe with fresh pasta dough that we rolled and cut out. The recipe for the dough is on a previous entry that I wrote last spring, and it can be found here.

Crab Ravioli with Lemony Sauce

Based on a recipe from MarthaStewart.com

For the filling:

1 cup ricotta cheese

1 1/2 cups lump crabmeat, such as Dungeness

Coarse salt and freshly ground pepper

1/8 teaspoon red-pepper flakes

For the pasta:

Fresh Pasta Dough

Rice flour preferably, or the type of flour you used to make the dough (either all-purpose or 00)

For the sauce:

1 stick Earth Balance

2 teaspoons lemon peel, very finely chopped, plus 2 teaspoons fresh lemon juice

Make the filling: Mix together ricotta, crabmeat, 1/2 teaspoon salt, 1/8 teaspoon pepper, and the red-pepper flakes.

Make the ravioli: Cut your pasta sheets into squares with a pizza cutter, about 2 inches wide. Mound 1 teaspoon crab filling in the center of each hand cut piece of pasta. Brush edges of the pasta square with water, and top each with another square. Press edges to seal. Transfer to a baking sheet covered with rice flour (preferably) or the type of flour used to make the dough, and lightly dust the ravioli with the flour to keep them from sticking.

Bring a large pot of salted water to a boil. Working in 2 batches, cook ravioli until they rise to the top, 2 to 3 minutes.

Meanwhile, make the sauce: Melt 4 tablespoons Earth Balance in a large skillet over medium heat. Transfer first batch of cooked ravioli to the skillet using a slotted spoon, along with about 2 tablespoons cooking liquid. Add 1 teaspoon chopped lemon peel and 1 teaspoon juice, and swirl to combine. Transfer to plates.

Repeat with second batch of ravioli.

They sound like a lot of work, but when you have two people working together in the kitchen, they go surprisingly quickly. It’s a fun project! I hope you’ll give them a try :).

August 1st Celebration ~ Lemony Strawberry Shortcakes

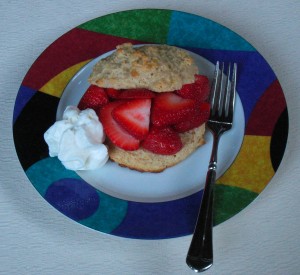
We enjoyed a few delicious Dungeness crabs for dinner, as we do every year to celebrate this little anniversary. It marked 14 years since we moved into our current house together, and 17 years since I have lived in Seattle! After dinner, we needed something sweet to top off the night :).  I decided to make lemony strawberry shortcakes since Washington strawberries are wrapping up for the season. I found a recipe for the biscuits from Bon Appétit magazine, and then tweaked it to make it a bit healthier. I replaced half of the all-purpose flour with whole-wheat pastry flour and I also replaced the butter with melted Earth Balance buttery spread. Very summery and fresh with a little twist of lemon.

Lemony Strawberry Shortcakes

Adapted from Bon Appétit magazine

1 cup all-purpose flour

1 cup whole-wheat pastry flour

1/3 cup sugar

1 tablespoon baking powder

1 tablespoon grated lemon peel

1/2 teaspoon salt

1 cup low-fat buttermilk

1/4 cup (1/2 stick) Earth Balance buttery spread, melted, cooled

2 quarts fresh strawberries

Preheat oven to 400°F. Mix flour, sugar, baking powder, lemon peel and salt in large bowl. Whisk buttermilk and melted butter in medium bowl to blend. Add to flour mixture and stir just until moist dough forms. Drop 8 dough mounds (about 1/3 cup each) onto nonstick baking sheet. Using lightly floured hands, gently pat biscuits into neat 2 1/4-inch-diameter round about 1 1/4 inches high. Bake until biscuits are golden brown, about 15 minutes.

Cut warm biscuits in half horizontally. Place bottom halves of biscuits on 8 plates. Spoon strawberries over. Place top halves of biscuits over everything and serve.

We paired our dinner with 14 Hands Merlot to compliment our 14th anniversary. We first tried the wine around the anniversary of our first date back in April (also 14 years ago), and it has since become our house wine for the year. Local, delicious, and inexpensive :). Perfect combination!

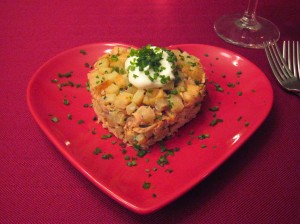
Happy Heart Day ~ Smoked Salmon and Crispy Potato Tian with Sour Cream

Happy Valentine’s Day!

We had a special little heart shaped appetizer to celebrate Heart Day :). The original recipe was from one of Sur La Table’s cooking classes entitled Great Restaurant Recipes of Seattle, and this one was courtesy of Rover’s. I streamlined it to make it a little more weeknight friendly, and I also made it a little healthier with a couple of substitutions. I replaced the crème fraiche with reduced fat sour cream, and I used Earth Balance in place of the butter. The original recipe mixes salmon with several other ingredients, but smoked salmon is so flavorful on its own that it really doesn’t need more flavor to be delicious. By streamlining the recipe this way, I’m more likely to make it again for a special weeknight appetizer. The recipe below only took about 15 minutes to put together, and it has a great “wow” factor ;).

Smoked Salmon and Crispy Potato Tian with Sour Cream

2 servings

3 oz smoked salmon

6 oz Yukon Gold potatoes

2 tbsp Earth Balance buttery spread

1/8 tsp minced garlic

Pinch of thyme

1 tbsp minced fresh chives, plus more for garnish

1 tbsp reduced fat sour cream, plus more for garnish

Salt and pepper to taste

Crumble the salmon into fine bits, and set aside.

Cut the potatoes into a ¼ inch dice. (You may peel them if you wish, but the skin is just fine). Heat a large sauté pan over medium high heat, and then add the Earth Balance. Add the potatoes and sauté until they are golden and cooked through. Add the garlic and thyme and toss for 30 seconds. Transfer the potatoes to a plate lined with a paper towel to drain and cool slightly. Combine the potatoes, chives and sour cream in a small bowl and season with salt and pepper to taste.

To serve, set a 3-inch ring mold (or I used a heart shaped cookie cutter) in the center of a plate. Spoon the smoked salmon into the mold, pressing to form an even layer. Top with the potato mixture, again pressing lightly for an even layer. Repeat with the remaining salmon and potatoes. Top with a little sour cream and garnish with more chives.