National Wine Day ~ Chocolate Cabernet Cupcakes

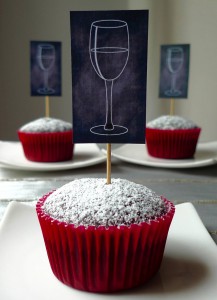
Chocolate Cabernet CupcakesToday is National Wine Day! I think that is definitely a reason to celebrate. 😉 I love to make interesting, unexpected, and fresh dishes to celebrate special days, and I couldn’t think of anything more festive for this occasion than these chocolate cabernet cupcakes. 🙂

These little cupcakes have a good amount of wine in the batter, and the wine pairs well with the cocoa powder and chocolate chips. The cabernet flavor is prominent when they are warm, but subtler when they cool. They are perfect for an evening snack, paired with a glass of cabernet of course. 😉

Chocolate Cabernet Cupcakes

Makes 6

¼ cup + 2 tablespoons cabernet sauvignon (I used 14 Hands)

2 tablespoons light olive oil

2 tablespoons skim milk

2 tablespoons packed brown sugar

3 tablespoons granulated sugar

½ teaspoon vanilla

1 egg

½ cup ivory whole-wheat flour

¼ cup cocoa powder

¼ teaspoon baking powder

¼ teaspoon baking soda

Pinch of salt

¼ cup mini chocolate chips

Preheat oven to 350 F.

Line a muffin tin with 6 paper liners.

In a medium bowl, whisk together the first seven ingredients (through the egg) until well combined. In a second medium bowl, whisk together the remaining dry ingredients (minus the chocolate chips) until well combined. Then add the chocolate chips to the dry ingredients, and toss until coated in the floury mixture. Merge the ingredients from both bowls, and whisk until just combined, being careful not to over mix.

Fill the muffin liners evenly with the batter. Bake for about 18 minutes, or until a toothpick inserted in one of the cupcakes comes out clean.

Cheers!

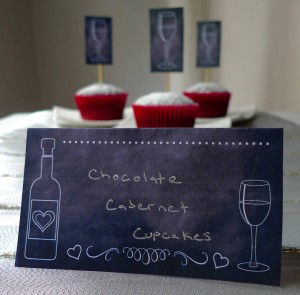
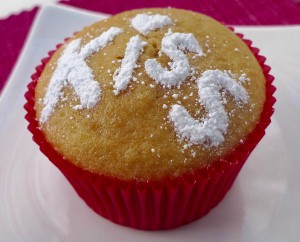
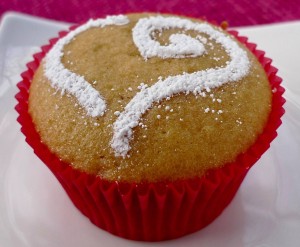
The sweet little chalkboard wine decorations are from Yesterday on Tuesday. The set was actually created for Valentine’s Day, but I thought they were perfect for my cupcakes. I think the designs are so adorable I might use them again in February!Chocolate Cabernet Cupcakes

Kentucky Derby Day Treats ~ Horseshoe Sugar Cookies with Mint Julep Glaze

Horseshoe CookiesThe traditional cocktail of the Kentucky Derby is the mint julep, which has been associated with the race ever since 1938. Along with the horses and the hats, the cocktail is one of the things that makes the Kentucky Derby what it is. I wanted to bake something inspired by this iconic drink for the occasion, and I couldn’t think of anything more fun and festive than horseshoe shaped cookies with a mint julep glaze. 🙂

I used my whole-wheat sugar cookie dough as the base, cut the dough into horseshoe shapes, and then topped them with a sugary glaze made with mint and bourbon. Yum!

Horseshoe Sugar Cookies with Mint Julep Glaze

For the cookies:

2 cups whole-wheat pastry flour

Pinch of salt

1/2 cup unsalted room temperature butter

1/2 cup granulated sugar

1 teaspoon vanilla extract

2 eggs

For the glaze:

1/4 cup powdered sugar

3 drops mint extract

1/2 teaspoon water, or more for a thinner consistency

1 teaspoon bourbon

For the cookies:

In a large bowl, whisk together the flour and salt. In a second large bowl, beat the butter and sugar with an electric mixer until light and fluffy. Add the vanilla. Beat in the eggs, one at a time. Add the flour mixture, and beat until just combined. You may need to hand mix the last bit if the dough becomes too thick for the mixer.

Wrap the dough in plastic wrap and refrigerate for at least an hour.

Preheat oven to 350 F.

Prepare a baking sheet with parchment paper.

On a floured work surface, roll the dough until it is slightly thicker than 1/8 inch. Cut into desired shapes with a cookie cutter.

Place the cookies on the prepared baking sheet.

Bake for about 7 minutes, or until slightly firm, rotating the pan halfway through. Cool the cookies completely on a wire rack.

For the glaze:

In a small bowl, whisk all of the ingredients very well until silky smooth. Add more water if you would like a thinner glaze. With an offset spatula, apply the glaze to the cookies.

Let dry before serving.

A Fresh New Color ~ White Pepper Crème Brûlée

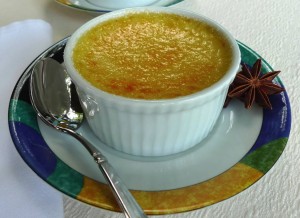
White Pepper Crème BrûléeI painted our living room a fresh new color this month as a part of my spring cleaning. The light gray I chose is called “white pepper.” (Don’t you love all of the creative names paint companies come up with for different shades?)

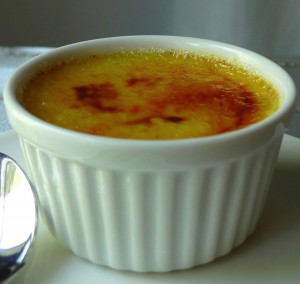
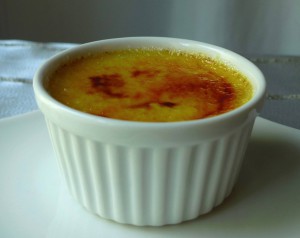
To celebrate the new look, I baked a dessert! I made a unique and delicious flavor of crème brûlée by adding a little white pepper to the custard. The pepper is very subtle. It shows up as an understated flavor at the end of a bite, and after a couple of bites, you start to sense a peppery heat on your tongue. It is unexpected but delightful!

A crème brûlée recipe from Bon Appétit magazine inspired me, but I used my lighter recipe as the base.

White Pepper Crème Brûlée

Serves 2

8 ounces 2% milk

3 tablespoons granulated sugar, plus about 2 tablespoons for the top

3 egg yolks

1/2 teaspoon ground white pepper

1/2 teaspoon vanilla extract

Preheat your oven to 325 F.

Whisk together the milk and 3 tablespoons of sugar in a saucepan with a heavy bottom. Heat until the sugar is dissolved, taking care not to bring the mixture to a boil. Remove the pan from the heat and pour the mixture into a large bowl over ice. Cool down until lukewarm. Then whisk in the egg yolks, pepper, and vanilla extract.

Strain the mixture into a container with a spout. Pour the custard into 2 4-ounce ramekins or 4 2-ounce ramekins. Place the ramekins in a baking dish. Heat some water until almost boiling, and pour the water carefully around the ramekins until it reaches about halfway up the sides. (Make sure none of the water gets into the custard.)

Bake for about 38 minutes for the smaller ramekins, or 45 minutes for the larger ramekins, or until set. They should still have a slight jiggle in the middle when tapped.

Cool in the refrigerator at least 2 hours before serving, or overnight.

Right before serving, dust a little sugar evenly over the top of the custards so they are covered. Caramelize the sugar with a kitchen torch.White Pepper Crème Brûlée

Happy Easter! ~ Bird’s Nest Sugar Cookies

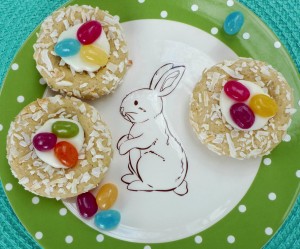
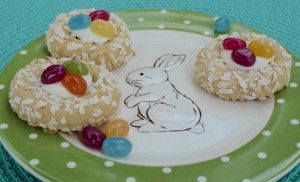
Bird's Nest Sugar CookiesTo celebrate Easter this year, I made these sweet little bird’s nest sugar cookies. This is a popular Easter cookie idea, and for good reason…They are adorable and easy to make. I used my whole-wheat sugar cookie recipe to make my version of these little nests. It’s a fun challenge to dress up the same dough for different holidays. 🙂 Using this same recipe, I made hot cocoa cookie cups for Christmas, double heart cookies for Valentine’s Day, and now these little nests for Easter. Hmm…What can I make for Mother’s Day, or for a summer celebration cookie?

Bird’s Nest Sugar Cookies

2 cups whole-wheat pastry flour

Pinch of salt

1/2 cup unsalted room temperature butter

1/2 cup granulated sugar

1 teaspoon vanilla extract

2 eggs

Unsweetened shredded coconut (approximately 1 1/2 cups)

White chocolate (approximately 1/4 cup to attach the jelly beans)

Jelly beans (approximately 1 cup) (I used the naturally flavored and colored beans from Trader Joe’s)

In a large bowl, whisk together the flour and salt. In a second large bowl, beat the butter and sugar with an electric mixer until light and fluffy. Add the vanilla. Beat in the eggs, one at a time. Add the flour mixture, and beat until just combined. You may need to hand mix the last bit if the dough becomes too thick for the mixer.

Wrap the dough in plastic wrap and refrigerate for at least an hour.

Preheat oven to 350 F.

Prepare a baking sheet with parchment paper.

Roll the dough into approximately 1-inch balls between your hands. Flatten the balls slightly and form a small well in the center of each so they are the shape of nests. Roll each cookie into the coconut, gently pressing the coconut into the dough to make sure it sticks. Place the cookies on the prepared baking sheet.

Bake for about 12 minutes, or until slightly firm, rotating the pan halfway through. Cool the cookies completely on a wire rack.

In a double boiler, melt the white chocolate. Spoon a small amount of the melted chocolate into the middle of each cooled cookie, and attach three jelly beans to the chocolate. Allow to set completely before serving.

I hope you all have a lovely Easter Sunday!Bird's Nest Sugar Cookies

To Top Off Valentine’s Day ~ Chocolate Frosting

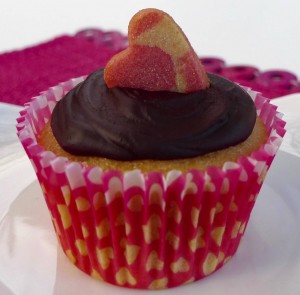
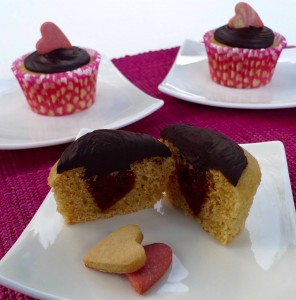
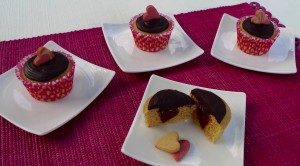
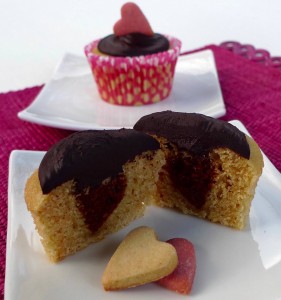
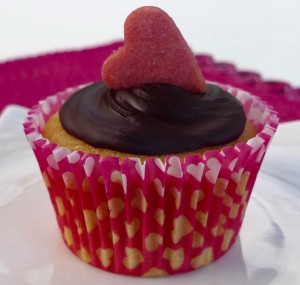
Hidden heart cupcake with chocolate frostingI was on a Valentine baking streak! 😉 I made one more batch of hidden heart cupcakes, and I decorated them a little differently for some variety. I don’t typically frost my cupcakes, but I figured everyone needs a little chocolate on Valentine’s Day, no? 😉Hidden heart cupcake with chocolate frostingIf I’m completely honest, I didn’t fill my second batch of cupcakes full enough of yellow cake batter, so the hearts weren’t completely hidden after I baked them. That led me to figure out a frosting solution. Sometimes unexpected and good ideas come out of mistakes! I thought that was a good Valentine cupcake lesson for the day. 😉Hidden heart cupcake with chocolate frostingChocolate Frosting

1/2 cup cocoa powder

1/2 teaspoon vanilla extract

1/4 cup confectioner’s sugar (or more if you would like it sweeter)

4 tablespoons skim milk

Whisk all of the ingredients together until smooth. (That’s it!)Hidden heart cupcake with chocolate frostingI used a few of my tiny heart-shaped sugar cookies to top these cupcakes. I made sure to place them along the middle so I knew where to cut the cupcakes to reveal the heart inside.Hidden heart cupcake with chocolate frosting

One More Valentine Sweet! ~ Hidden Heart Cupcakes

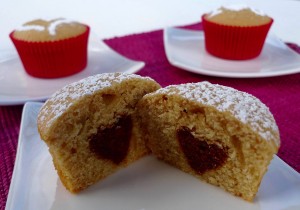
Hidden Heart CupcakesI made one more Valentine sweet for my sweet. 🙂 These hidden heart cupcakes are another idea inspired by Cupcake Jemma that I just couldn’t resist trying! I think they are so adorable. 🙂

I made mine with a beet whole-wheat red velvet cake in the middle and a simple whole-wheat yellow cake for the outside. The yellow cake was from a recipe I made before, but the red velvet cake was new for me. I think the red velvet would also be delicious on its own, so you might see more red velvet cakes in the future!Hidden Heart CupcakesHidden Heart Cupcakes

Red Velvet Cake:

3/4 cup packed beet pulp

1/4 cup light olive oil

3/4 cup granulated sugar

1 large egg

1/2 cup skim milk

1 teaspoon vanilla extract

1 cup whole-wheat pastry flour

Pinch of salt

1 1/2 tablespoons cocoa powder

1 1/2 teaspoons baking powder

Yellow Cake:

1 1/2 cups whole-wheat pastry flour

1 1/2 teaspoons baking powder

Pinch of salt

1/2 cup light olive oil

3/4 cup granulated sugar

2 large eggs

1/2 cup + 2 tablespoons skim milk

1 teaspoon vanilla extract

For the red velvet cake:

Preheat oven to 350 F.

Spray a 9-inch cake pan with oil. Line the bottom with parchment paper. Set aside.

Steam the beet pulp until it is tender. Purée in a food processor. When the beets are puréed, add the oil and sugar, and process until smooth. Add the egg, and process until incorporated. Then add the milk and vanilla, and process until smooth.

In a large bowl, add the flour, salt, cocoa powder, and baking powder. Whisk until well combined. Then add the beet mixture to the dry ingredients, and mix until just combined.

Fill the prepared cake tin, and bake for about 27 minutes, or until a toothpick inserted in the center comes out clean.

Let cool.

Once the cake is cool, invert it onto a cutting board. With a small heart-shaped cookie cutter (approximately 1-inch high), punch hearts out of the cake. Squeeze the cake in the cookie cutter with your fingers so it is compact. Gently work the cake hearts out of the cookie cutters and set aside. The hearts can be made a day ahead and kept in the refrigerator.

For the yellow cake:

Preheat your oven to 350 F.

Line a standard-sized muffin tin with 12 baking liners.

In a small bowl, whisk together the flour, baking powder, and salt.

In a large bowl, whisk together the oil and sugar. Add the eggs, one at a time, and whisk until well incorporated. Add half of the dry ingredients, and whisk until combined. Then add the milk and vanilla, and whisk until combined. Finally, add the remaining dry ingredients, and whisk until just combined. Be careful not to overmix.

To assemble:

Scoop about 2 tablespoons of the yellow cake batter into the bottom of each lined muffin cup. Bake for about 5 minutes, until slightly set, but not completely baked. Place a heart, tip side down, into each muffin cup. The semi-baked batter should hold it upright. Fill the cups with the remaining batter until they are about 4/5 full. The top of the heart will still be visible.

Bake for about 17 minutes, or until a toothpick inserted in the middle of the yellow cake comes out clean.Hidden Heart CupcakesDecorate with powdered sugar or chocolate frosting. (Recipe for the frosting to follow!) For this batch I used my set of Valentine cupcake stencils for the top. A simple dusting of powdered sugar was all they needed. I made sure to keep all of my cakes in alignment and dusted the designs in the same direction so I knew which way to cut into the cakes to reveal the heart.Hidden Heart Cupcakes

Valentine Sweets ~ Double Heart Cookies

Double Heart CookiesI just love all of the cute Valentine desserts at this time of the year, so I decided to get an early start to give myself plenty of time to make a few! I started with these sweet little sugar cookies. This idea was inspired by a British baker named Cupcake Jemma. I love watching her weekly recipe videos, which are filled with some very cute and festive ideas throughout the year.Double Heart CookiesI used my whole-wheat sugar cookie recipe from my Christmas cookies last year, and I dyed half of them pink with beet juice. The beet flavor doesn’t come through, but the color is very pretty. For a little variety, I also made some of them into stained glass window cookies with cinnamon hard candy melted in the middle.Double Heart CookiesDouble Heart Cookies

2 raw beets

Approximately 1/4 cup cinnamon hard candies (if you would like to make some of the stained glass window cookies…otherwise, omit)

2 cups whole-wheat pastry flour

Pinch of salt

1/2 cup unsalted room temperature butter

1/2 cup granulated sugar

1 teaspoon vanilla extract

2 eggs

To make the beet juice to dye the pink cookies, start by putting on latex gloves if you have them. Peel the beets with a vegetable peeler. Grate the beets on a grater or with a grater attachment of a food processor. With cheesecloth or a thin kitchen towel you don’t care about, squeeze out as much juice as you can. (Reserve the pulp for the red velvet cake recipe to follow!)

To prepare the candy for the stained glass cookies, place the hard candy in a plastic zip lock bag. With a meat mallet, smash the candy into fine pieces.

In a large bowl, whisk together the flour and salt. In a second large bowl, beat the butter and sugar with an electric mixer until light and fluffy. Add the vanilla. Beat in the eggs, one at a time. Add the flour mixture, and beat until just combined. You may need to hand mix the last bit if the dough becomes too thick for the mixer.

Divide the dough in half. Into one half of the dough, add as much of the beet juice as you like for the color you desire. (Keep in mind, the color fades slightly when baked.) Thoroughly knead the juice into the dough for an even color.

Wrap the two pieces of dough separately in plastic wrap and refrigerate for at least an hour or overnight.

Preheat oven to 350 F.

On a lightly floured surface, roll out the two pieces of dough until they are between about 1/8 to 1/4 inch thick.

Cut out the dough with a large heart-shaped cookie cutter. In the middle of each large heart use a smaller heart-shaped cookie cutter to cut out a smaller heart in the center. Reserve the smaller hearts.

Transfer the larger hearts to a cookie sheet.

For the stained glass window cookies, fill the center of each large heart with an even layer of the crushed candy. The candy will bubble up slightly when baked, so don’t fill the cookies to the top.

For the remaining cookies, fill the hole with the smaller hearts in the opposite colored dough.

Bake for approximately 7 minutes, turning the pan once, until the cookies are cooked through and the candy is melted.Double Heart Cookies

Happy Christmas! ~ Star-Topped Mince Pies

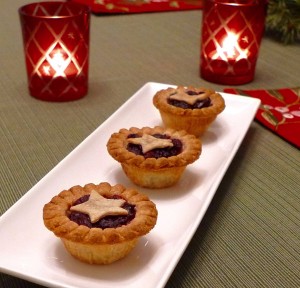
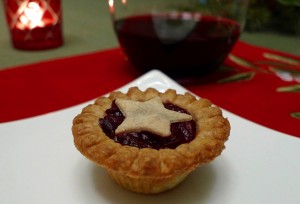
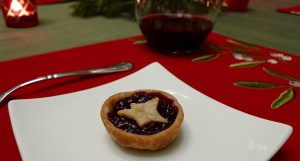
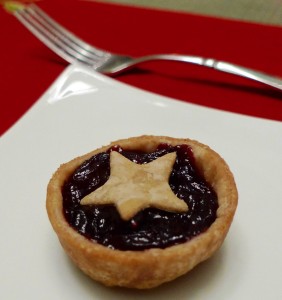
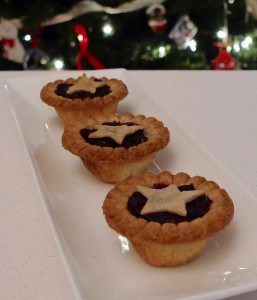
Star-Topped Mince PiesHappy Christmas! I hope you had a lovely Christmas Day. 🙂

These sweet little star-topped mince pies were the grand finale of my Christmas dinner this year. They were the perfect finish, and just the right size after a beef Wellington feast.

I used Nigella Lawson’s cranberry mincemeat recipe with a few small changes. I replaced the brown sugar with a diced apple and a little extra honey, I used two oranges rather than one, and I added a dash more of brandy, since it was Christmas after all! 😉

For the crust, I used store-bought pastry cups, but I also made my own pastry. I could have just used the ready made cups, but I really wanted to make stars for the top. 🙂 Then I had a lot of extra dough after making the stars, so I made some homemade shells, as well. They weren’t as fancy as the ones I bought, but I actually preferred the texture and taste. Using a food processor, the pastry is very easy to make…It literally only takes 5 minutes, so I figured I could fit that into my holiday schedule. 😉 This is the same short crust pastry dough I used for my meat pies this September, and it worked as beautifully for sweet as it did for savory.Star-Topped Mince PiesStar-Topped Mince Pies

Cranberry Mincemeat

Recipe based on Nigella Lawson’s cranberry studded mincemeat

¼ cup port

½ apple, peeled and diced

3 cups fresh or frozen cranberries

1 teaspoon ground cinnamon

1 teaspoon ground ginger

½ teaspoon ground cloves

½ cup currants

½ cup raisins

¼ cup dried cranberries

2 clementine oranges, zested and juiced

3 tablespoons brandy

3 drops almond extract

½ teaspoon vanilla extract

4 tablespoons honey

In a medium saucepan over medium heat, add the port, apple, fresh (or frozen) cranberries, and spices. Cook until the cranberries begin to bubble and pop. Then add the currants, raisins, dried cranberries, and the orange zest and juice. Bring the mixture to a simmer. Cook for about 20 minutes, until the fruit has absorbed most of the liquid. If you still have many whole cranberries, you can squish them with your spoon to help them incorporate into the mixture. Remove the pan from the heat. Then add the brandy, extracts, and honey. Stir until everything is well incorporated.

Let the mincemeat cool before using in your pies.Star-Topped Mince PiesWhole-Wheat Short Crust Pastry

Based on a recipe from BBC

125 grams ivory whole-wheat flour

Pinch of salt

55 grams cold unsalted butter, cubed

Approximately 5 tablespoons ice water

With a food processor, pulse the flour, salt, and butter until the butter is the size of small peas. Gradually add the water until the mixture comes together. Add only enough water to combine everything. You may not need a full 5 tablespoons. Form the dough into a disc, and wrap in plastic wrap. Refrigerate at least 15 minutes before rolling it out. It also freezes well. Just take it out of the freezer and refrigerate the night before you will need it.Star-Topped Mince PiesTo assemble, grease a mini muffin pan very well, and set aside.

Preheat your oven to 425 F.

On a floured surface, roll out the pastry into a very thin sheet. Cut out circles for the crust and stars for the top. Carefully fill the muffin pan with the crusts, fill each crust with the cooled mincemeat, and top with a pastry star. Bake for about 10 minutes, or until the pastry is golden, and the bottom crusts are baked through. Let cool before serving.Star-Topped Mince Pies

Merry Christmas! ~ Peppermint Hot Cocoa Cookie Cups

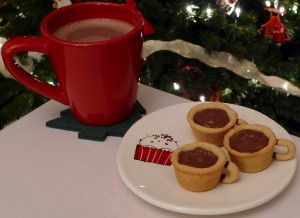
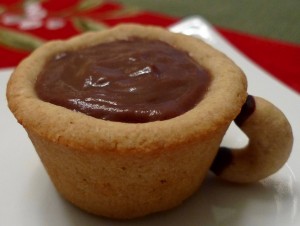
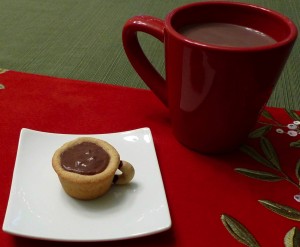
Peppermint Hot Cocoa Cup CookiesThese festive little cookie cups will make a perfect dessert for your Christmas meal. I think Santa might like them too! 😉Peppermint Hot Cocoa Cup CookiesI made a simple whole-wheat sugar cookie dough for the cups and handles. They have a lot less sugar and butter than many recipes to keep them a little lighter. Then I filled the cute little cups with my favorite chocolate mint pudding that is a regular at our house.
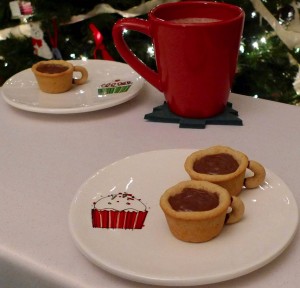
If you are looking for a fun way to spend a few hours in the kitchen, I think you’ll enjoy these. (Or if your holiday schedule is already full, make them next month. 🙂 I think hot cocoa is just as fitting in January as it is in December! Why should December get all the fun cookies? 😉 ) Either way, I hope you’ll enjoy giving these a try.Peppermint Hot Cocoa Cup CookiesPeppermint Hot Cocoa Cookie Cups
Cookies:

2 cups whole-wheat pastry flour

Pinch of salt

1/2 cup unsalted room temperature butter

1/2 cup granulated sugar

1 teaspoon vanilla extract

2 eggs

Approximately 1/8 cup milk, dark, or white chocolate (to attach the cup handles)

Pudding:

2/3 cup granulated sugar

1/4 cup cornstarch

Pinch of salt

1/3 cup unsweetened cocoa powder

2 1/2 cups skim milk

2 egg yolks

1 teaspoon vanilla extract

1/2 teaspoon peppermint (or mint) extract

To make the cookies:

In a large bowl, whisk together the flour and salt. In a second large bowl, beat the butter and sugar with an electric mixer until light and fluffy. Add the vanilla. Beat in the eggs, one at a time. Add the flour mixture, and beat until just combined. You may need to hand mix the last bit if the dough becomes too thick for the mixer.

Wrap the dough in plastic wrap and refrigerate for at least an hour.

Preheat oven to 350 F.

Prepare a mini muffin pan by greasing it very well. Prepare a baking sheet with parchment paper.

Reserve about 1/4 cup of the dough for the cup handles.

With the remaining dough, roll approximately 1-inch balls between your hands, and place them in the prepared muffin tin. Push the center of each ball until it squishes up the side of each hole. Make sure to press the sides and bottom firmly so there are no gaps in between the dough and the pan, and make sure the top is neat. The sides and top will be visible in the final product.

With the reserved dough, roll small pieces into thin lines, and fashion them into tiny cup handles. Place the handles on the prepared baking sheet.

Bake the cups for about 15 minutes, or until firm, rotating the pan halfway though. Let cool for a couple of minutes before removing the cookies from the pan. Bake the handles for about 7 minutes, or until firm, rotating the pan halfway through. Cool the cups and handles completely on a wire rack.

To attach the cup handles:

Over a double boiler, melt the chocolate. Place all of your cups on their sides in the cleaned mini muffin pan to prop them up. The side of each cup should be facing up. Dip the edges of the cup handles in the chocolate, and gently place on the side of the cups. Let stand to dry for at least an hour.

To make the pudding:

Begin by placing a fine mesh strainer over a medium bowl. Set aside.

Off the heat, in a medium saucepan, whisk the sugar, cornstarch, salt, and cocoa powder. Turn the heat onto medium high. Gradually add the milk, whisking well to dissolve the cornstarch. Add the egg yolks, and whisk until incorporated.

Continue to whisk occasionally, until big bubbles begin to form. At that point, reduce the heat to low. Cook one more minute, whisking constantly. The consistency should be creamy and thick.

Remove the pudding from the heat and pour it through the strainer into the bowl. Add the vanilla and mint to the hot pudding, and whisk until well incorporated.

Cover the pudding directly on the surface with plastic wrap. Refrigerate for at least three hours. Before serving, whisk it one more time to make sure the consistency is smooth.

To assemble:

Place the pudding into a piping bag to neatly fill the hot cocoa cups. Use the back of a small spoon to smooth the top.Peppermint Hot Cocoa Cup Cookies
One More November Holiday ~ Indian Pudding

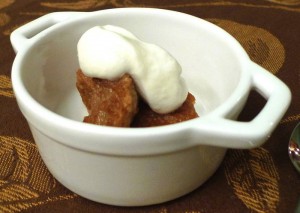
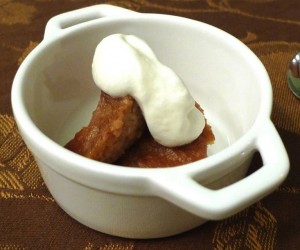
Indian PuddingToday is National Indian Pudding Day! (Yes, surprisingly, it is actually a real holiday. 😉 ) I have never lived in New England, and I have to admit, I wasn’t familiar with Indian Pudding until recently. But then I read about its fascinating history as one of the first American recipes, and I had to give it a try! It’s a fusion of classic hasty pudding from the Old World, corn from the New World, and molasses from early American trading with the Caribbean. The dish is simple, but delicious and comforting. If you missed the big holiday today ( 😉 ), this dish would also be lovely on your Thanksgiving table.

I based this recipe on one from Bon Appétit magazine. I cut the recipe in half to make only 4 servings. I used skim milk rather than whole, I reduced the sugar a little, and I added more spices and seasoning.

Indian Pudding

Based on a recipe from Bon Appétit magazine

2 3/4 cups skim milk

1/2 cup lightly packed light brown sugar

1/3 cup cornmeal

1 tablespoon molasses

1 teaspoon ground ginger

1 teaspoon ground cinnamon

2 tablespoons unsalted butter, plus more for greasing the pan

1/2 teaspoon vanilla extract

Whipped cream for serving

Preheat your oven to 325 F. Grease a 9-inch casserole dish. Set aside. In a medium saucepan over medium high heat, combine the milk through the cinnamon. Whisk occasionally to prevent lumps. Once the mixture is hot, cook for about 15 minutes, or until thickened. Remove the saucepan from the heat, and add the butter and vanilla. Whisk until well combined. Pour the mixture into the prepared casserole dish. Bake until the pudding is golden and set in the middle, about 1 hour and 15 minutes. Cool slightly before serving with whipped cream.Indian Pudding

National Candy Corn Day ~ Candy Corn Fruit Parfait

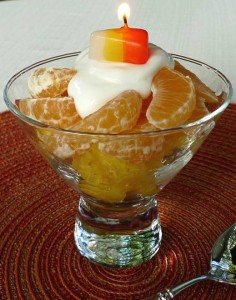
Candy Corn Fruit ParfaitThe Halloween countdown is on, and it also happens to be National Candy Corn Day today! 🙂 Here’s a sweet little idea to celebrate – Layer pineapple and oranges with vanilla nonfat Greek yogurt on top.

I hope you have a fun and safe kickoff to the Halloween weekend!

National Pumpkin Day ~ Ghostly Pumpkin Custard

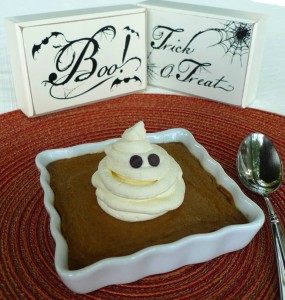
Ghostly Pumpkin CustardHalloween is fast approaching, and today is also National Pumpkin Day. 🙂 To celebrate, I made my favorite pumpkin custards! And because things are starting to get a little spooky around here, I added a little whipped cream ghost with mini chocolate chip eyes.

Have a happy Pumpkin Day!

Savoring the End of Summer ~ Summer Vacation Crumble

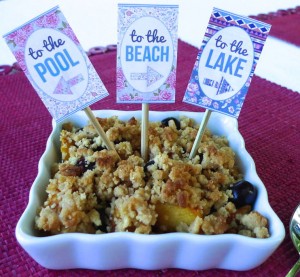
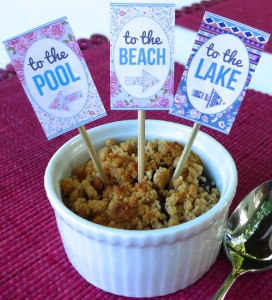
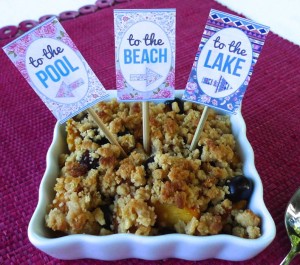
Vacation CrumbleI’m enjoying every last morsel of summer. 🙂 I hope you are too! This dessert is my last one of the year using summer’s fruits. It’s a perfect dessert to throw together using what you have on hand, because when you want to hang out at the beach or the lake, you don’t want to stop for groceries! 😉 I am calling it a Summer Vacation Crumble since it is also a good dessert to make if you are on vacation where you don’t have your usual kitchen staples for baking, like flour or sugar.

This recipe is more of an inspiration rather than a hard and fast recipe. I think it would even be great with different fruits like blackberries or plums. Use whatever store-bought cookies sound good to you. I have used almond cookies and snickerdoodles, but I think ginger snaps and sugar cookies would also be delicious.Vacation CrumbleSummer Vacation Crumble

Serves 6

4 ripe peaches, peeled and sliced

½ pint blueberries

Enough maple syrup to sweeten the fruit to your liking

2 handfuls of all-natural store-bought cookies, crumbled (almond, snickerdoodle, or whatever sounds good to you!)

2 tablespoons cold butter, cut into pieces

Preheat oven to 425.

Mix the peaches and blueberries together with the maple syrup. Transfer the mixture into one large baking dish or 6 small ones.

Work the cookie crumbs and the butter with your fingers until incorporated.

Evenly top the fruit with the cookie mixture.

Bake until the top is golden, and the fruit is bubbly and softened. Check the crumble after 10 minutes, and bake longer if needed. The individual ones will take less time to bake than one large one, and the time also depends on the ripeness of the fruit.

The cute little flags came from SmartSchoolHouse.com. I thought they added the perfect touch to the summery crumbles!Vacation Crumble

British Wedding Anniversary Dinner ~ Dessert ~ Lemon Syllabub Trifle

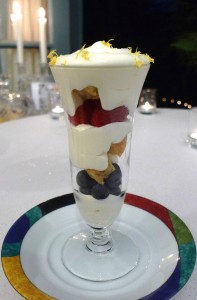
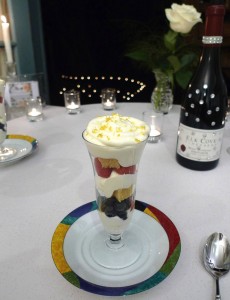
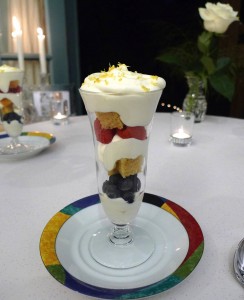
Lemon Syllabub TrifleThe grand finale to our British anniversary dinner was a lemon syllabub trifle. I couldn’t make up my mind as to which dessert I wanted to make, so I combined three classic British sweets into one – Lemon drizzle cupcakes, lemon syllabub, and a trifle. 🙂

The lemon drizzle cupcakes were based on a recipe from BBC Good Food. I replaced half of the butter with coconut oil and the other half with nonfat Greek yogurt. I cut the sugar in half, and I replaced the self-rising flour with a combination of whole-wheat pastry flour, baking powder, and a pinch of salt. (I put the leftovers in the freezer, and after thawing in the microwave for 30 seconds, they make a nice little treat with afternoon tea. 🙂 )

Lemon Drizzle Cupcakes

Based on a recipe from BBC Good Food

For the cakes:

1/2 cup coconut oil

1/2 cup nonfat Greek yogurt

1/2 cup caster or fine sugar

Zest of 1 lemon, finely grated

4 eggs

1 cup whole-wheat pastry flour

1 1/2 teaspoons baking powder

Pinch of salt

For the drizzle:

Juice of 2 lemons

Powdered sugar, to taste (Maybe start with 2 tablespoons and add from there if you like it sweeter)

Preheat oven to 350. Line a muffin tin with 12 cupcake papers. Whisk together the coconut oil, yogurt, sugar, and lemon zest until well blended. Then add the eggs, one at a time, and whisk until incorporated. In a separate bowl, whisk together the flour, baking powder, and salt. Add the dry ingredients into the wet ingredients, and mix until well combined, being careful not to over mix. Spoon the mixture into the lined muffin tin.

Bake for about 20 minutes, or until a toothpick inserted in the middle of a cupcake comes out clean.

While the cakes are cooling, make the glaze drizzle. Whisk together the lemon juice and enough powdered sugar to your liking. Prick the warm cakes in several places with a skewer, and then pour the drizzle over the top. Let cool completely.Lemon Syllabub TrifleFor the syllabub, I started with one more recipe from BBC Good Food. I replaced half of the heavy cream with nonfat Greek yogurt, and I cut back on the sugar. It was a delicious, creamy dessert on its own with a lovely little tang from the yogurt, wine, and lemon.

Lemon Syllabub

Based on a recipe from BBC Good Food

2/3 cup heavy whipping cream

3 tablespoons caster or fine sugar

2/3 cup nonfat Greek yogurt

3 tablespoons dry white wine

Zest of 1/2 lemon, finely grated

Juice of 1/2 lemon

Whip the cream and sugar together until stiff peaks form. Stir in the yogurt, and blend well. Add the wine, the lemon zest, and the lemon juice. Mix until everything is evenly incorporated.

Trifle

Lemon syllabub

Small berries, such as raspberries or blueberries

Lemon drizzle cupcakes, cut into small cubes

Zest of 1/2 lemon, finely grated

For ease, place the syllabub into a piping bag. In the base of a tall glass, pipe a shallow layer of syllabub in the bottom. Top with a few berries and then a few cubes of cake. Repeat until you finish at the top with the syllabub. Sprinkle with lemon zest on top.

That is the last stop on our virtual culinary getaway to the UK. 🙂 Cheerio for now!Lemon Syllabub Trifle

A Week at the Lake ~ Maple and Star Anise Crème Brûlée

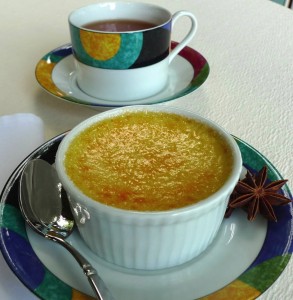
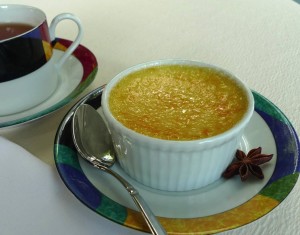
Maple and Star Anise Crème BrûléeI just finished a lovely summery novel called A Week at the Lake by Wendy Wax. The story transported me to Lake George in New York, which is now on my list of places I would love to visit! But in the meantime, I feel like I just got back from a virtual trip at the lake without leaving home. The fictional characters visited real places around Lake George including the Sagamore Resort and the Inn at Erlowest, and I tagged along with them in my imagination.Maple and Star Anise Crème BrûléeWhen I’m reading a good book that captivates me, I almost always start thinking about recipes that pair well with the storyline. 🙂 One of the characters in A Week at the Lake has an important dinner at the Erlowest, so I decided to look at the menu from their restaurant and make something based on one of the dishes. I chose to make a maple and star anise crème brûlée from the dessert menu.

I based my recipe on a lightened crème brûlée I made several years ago. I just played around with the recipe to make it a maple and star anise flavor rather than the original orange flavor.

Maple and Star Anise Crème BrûléeMaple and Star Anise Crème Brûlée

Serves 2

8 ounces 2% milk

4 pods of star anise

2 ½ tablespoons maple syrup

3 egg yolks

1/2 teaspoon vanilla extract

2 tablespoons granulated sugar for the top

Combine the milk, anise, and maple syrup in a saucepan with a heavy bottom. Heat until it almost comes to a boil. Refrigerate the mixture overnight in an airtight container.

The next day, preheat your oven to 325 degrees.

Strain the milk mixture to remove the anise pods. Add the egg yolks and vanilla extract, and whisk until well combined.

Pour the custard mixture into 2 4-ounce ramekins. (A little trick for getting rid of any little bubbles on top is to take your kitchen torch and lightly torch them. They will easily pop. The final result looks better without bubbles.) Place the ramekins in a baking dish. Heat some water until almost boiling, and pour the water carefully around the ramekins until it reaches about half way up the sides. (Make sure none of the water gets inside of the custard.)

Bake the custards for 45 minutes, or until set, but with a slight jiggle in the middle when they are tapped.

Cool in the refrigerator at least 2 hours before serving, or overnight.

Right before serving, dust a tablespoon of sugar evenly over the top of each custard. Take a kitchen torch to the sugar until it is caramelized evenly.A Week at the Lake

Makeover for Noon Café ~ Cappuccino Cupcakes

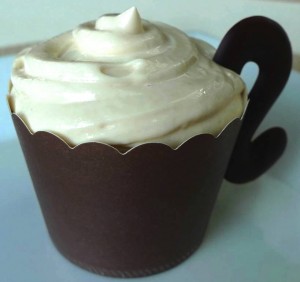
Cappuccino CupcakeWelcome to the brand new look for Noon Café! It got a complete makeover this weekend to keep up with the times. I hope you enjoy the new website as much as I enjoyed putting it together. 🙂

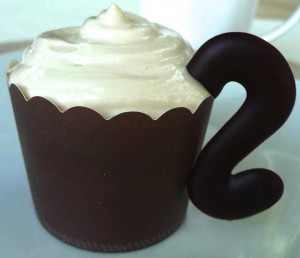
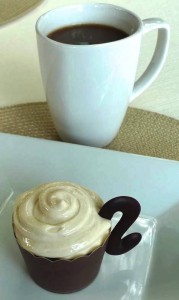
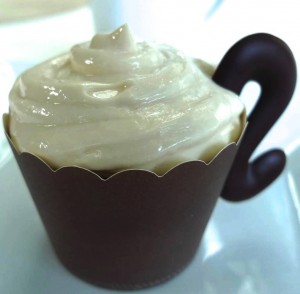
To celebrate the new look and the new cappuccino logo, I thought I would bake a batch of cappuccino cupcakes! I based my cupcakes on a recipe from Cooking Light magazine. I made three notable changes to the original recipe…I reduced the sugar, replaced the butter with light olive oil, and replaced the all-purpose flour with whole-wheat pastry flour. Then I dressed them up a bit. (After all, this recipe is about makeovers!) Instead of making the espresso syrup in the original recipe, I made a Greek yogurt frosting with a little espresso mixed in. This transformed these coffee cupcakes into cappuccino cupcakes. I also made little coffee cup handles out of chocolate for the side of the cakes. They are cute little cupcakes that are perfect for an afternoon pick-me-up or even for breakfast. (And I promise I won’t tell anyone if you decide to have a cupcake for breakfast! 😉 )

Cappuccino Cupcakes

Based on a recipe from Cooking Light magazine

2 tablespoons boiling water

4 teaspoons instant espresso granules

1/3 cup low-fat buttermilk

1 1/4 cups whole-wheat pastry flour

1/2 teaspoon baking soda

Pinch of salt

1/2 cup granulated sugar

5 tablespoons light olive oil

2 teaspoons vanilla extract

2 large eggs

12 baking liners

Preheat oven to 350°.

To prepare cupcakes, combine boiling water and espresso granules, stirring until espresso dissolves. Stir in buttermilk.

Lightly spoon flour into dry measuring cups; level with a knife. Combine flour, baking soda, and salt, stirring well with a whisk.

Place granulated sugar, oil, and vanilla extract in a large bowl; whisk until well blended. Add eggs, 1 at a time, whisking well after each addition. Add flour mixture and buttermilk mixture alternately to sugar mixture, beginning and ending with flour mixture.

Spoon batter into 12 muffin cups lined with paper liners. Bake at 350° for 20 minutes or until a wooden pick inserted in center comes out clean. Cool cupcakes in pan 10 minutes on a wire rack; remove from pan.Cappuccino CupcakeEspresso Frosting

1 cup plain nonfat Greek yogurt

¼ cup Neufchatel cream cheese, room temperature

2 tablespoons powdered sugar, (or more if you prefer a sweeter frosting)

¼ teaspoon instant espresso granules, (or more if you would like the frosting to have a more pronounced coffee flavor)

In a food processor, mix all of the ingredients until the espresso is incorporated and no longer grainy. Chill until ready to use.Cappuccino CupcakeCoffee Cup Handles

8 ounces dark chocolate (approximately)

Piping bag or zip lock bag

Small piping tip (optional)

Waxed paper

Place the chocolate in a microwave safe bowl. Heat at 30 second increments, stirring in between, until just melted and smooth. Place piping tip (if using) in a corner of the piping bag or zip top bag. Fill the bag with the melted chocolate. Snip a small hole in the corner of the bag. Pipe the “handles” onto the waxed paper and freeze until hardened. (About 10 minutes.) Place one chocolate handle on the side of each cupcake.Cappuccino Cupcake

Happy Fourth of July ~ Part 3 ~ Strawberry Cheesecake Tart (Updated!)

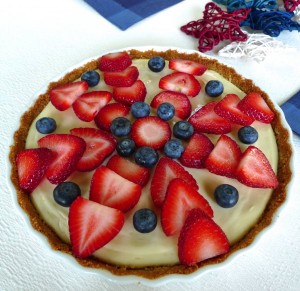
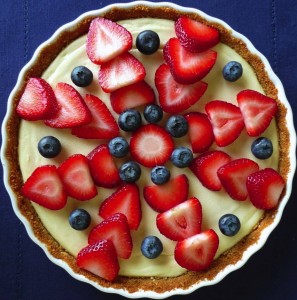
Cheesecake TartThe grand finale of our Fourth of July dinner was my hubby’s favorite cheesecake tart! It was a special request. 😉

Since I am always trying to improve and learn, I made a couple of small tweaks to the original recipe. Opting for an all natural ingredient, I exchanged the nonfat sour cream with nonfat Greek yogurt. I also omitted the sugar in the crust since I try to cut back on sugar where I can, and the graham crackers are sweet enough on their own.

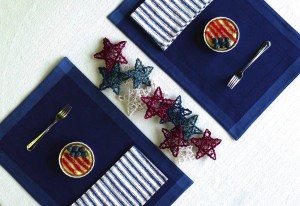
You can make a few small cheesecakes, or one big one! For the tiny ones, I piped seedless strawberry jam to make the stripes, and placed a few little blueberries in the corner for the stars. So cute! I got the idea from MyRecipes.com. 🙂 For the big one, I topped it with fresh summer strawberries arranged in a pretty pattern. I also added a few blueberries this time around to make it a little more patriotic.

Cheesecake TartStrawberry Cheesecake Tart

Based on a recipe from Martha Stewart

6 full graham cracker sheets

1/3 cup almonds

4 tablespoons unsalted melted butter, or just enough until the crust is moistened

2 8-oz bars of Neufchatel cream cheese

1/2 cup nonfat Greek yogurt

1/2 cup sugar

1 egg

1/2 teaspoon vanilla extract

Pinch of salt

Pint of fresh strawberries, or blueberries, or whatever you’d like to use for your topping

Preheat your oven to 350 degrees.

In a food processor, grind the graham crackers and almonds until they are finely ground. Add the butter slowly, and process until moistened. (You may not need the full 4 tablespoons.) Transfer to a 9-inch tart pan or three 3-inch tart pans. Press the mixture firmly into the pan(s) and up the sides. Freeze for 15 minutes.

If you have a second food processor bowl, I’d recommend using it now. Otherwise, just clean your bowl and blade very well. Then process the cream cheese, yogurt, sugar, egg, vanilla, and salt until the mixture is smooth.

Place your tart pan on a rimmed baking sheet and fill with the cheesecake mixture.

Bake until filling is set, about 30 to 35 minutes for the large tart. For the smaller tarts, check the progress at about 20 minutes to ensure you don’t overbake.

Cool completely and decorate as you wish!

Cheesecake Tarts

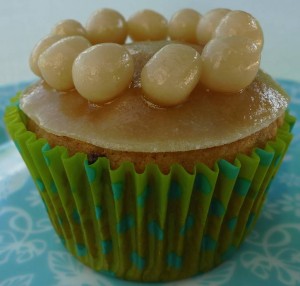
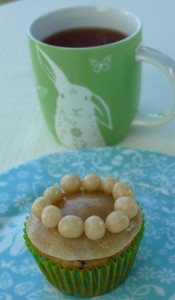
Easter Treats ~ Simnel Cupcakes

Simnel CupcakesHappy Easter!

To celebrate the holiday this year, I made a batch of simnel cupcakes. 🙂

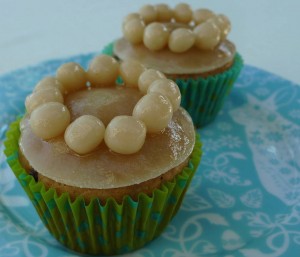
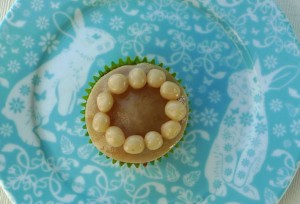
Simnel cake is a British confection eaten around Easter time. It is a type of fruit cake with some warm holiday spices mixed in, but I think the most interesting part about this dish is the decoration. These cakes are decorated with a ring of 11 small balls of marzipan symbolizing 11 Apostles, with the exception of Judas. I love dishes such as this one that combine culture, history, and deliciousness! 😉

Simnel CupcakesI only decorated a few of the cupcakes, and I froze the rest of them without any decoration to keep them fresh for later. (By the way, microwave one frozen cupcake for 30 seconds, and it tastes like it came right out of the oven. I like to eat them plain as a snack.) I ended up using one small 150 gram package of marzipan because I only decorated a few of the cakes. This amount will be enough to decorate about 8 cupcakes, depending on how thin you roll it. If you would like to decorate the whole batch, you will probably need three packages to be on the safe side. Marzipan keeps well in the refrigerator for later if you don’t use all of it. I also only used about ¼ cup of apricot jam. Again, if you plan to decorate all of your cupcakes, you will probably need more.

Simnel CupcakesSimnel Cupcakes

Makes 20

¾ cup light olive oil

½ cup plain nonfat yogurt

6 tablespoons skim milk

½ cup fine or caster sugar

3 eggs

2 ¼ cups whole wheat pastry flour

3 teaspoons baking powder

Pinch of salt

1 ¼ teaspoons mixed spice or pumpkin pie spice

½ teaspoon freshly grated nutmeg

1 ½ cups mixed dry fruit (finely chopped apricots, currants, etc.)

Marzipan (one 150 g package will cover and decorate about 8 cupcakes)

Powdered sugar, for dusting work surface

Apricot jam (¼ cup will be enough for about 8 cupcakes)

Preheat oven to 350. Line 2 cupcake tins with 20 paper liners.

Combine oil, yogurt, milk, sugar, and eggs in a medium bowl. Whisk to combine. In a separate large bowl, whisk together the flour, baking powder, salt, and spices. Add the wet ingredients to the dry, and stir until just combined. Add the fruit, and mix until evenly distributed.

Fill each baking cup about ½ full. Bake for about 25 minutes, or until a toothpick inserted comes out clean.

In the meantime heat jam until it is more viscous, and sieve it through a fine mesh strainer. Reserve the smooth portion of the jam, and discard the solids.

On a clean and smooth surface, sprinkle some powdered sugar to keep the marzipan from sticking. Roll out the marzipan with a rolling pin until it is very thin. Cut out rounds with a round cookie cutter that is approximately the size of the top of a cupcake. With remaining bits of marzipan, make small, evenly sized balls.

When the cupcakes are cooked and cooled, brush a small amount of the jam over the top of each one that you would like to decorate. Place a round of marzipan over the jam, and press gently to adhere to the cake. Lightly brush the top of the marzipan with jam, and also lightly coat 11 little balls with jam. Stick the balls in a circle on top of each cupcake.

Simnel Cupcakes

April Fool’s Day ~ Rhubarb Fool

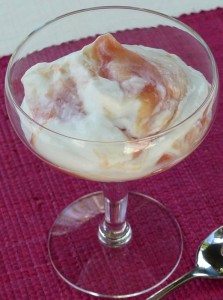
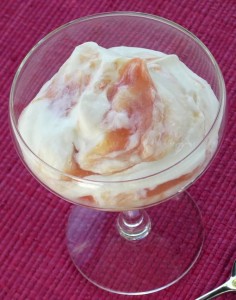
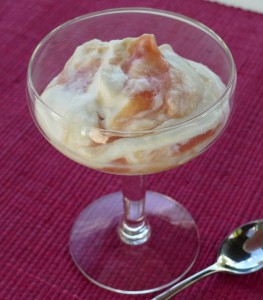
Rhubarb FoolWhat’s the perfect way to celebrate April Fool’s Day? With an English fool, of course! 😉 I couldn’t think of anything more fitting for the occasion. (Except perhaps this. 😉 Love it!)

A fool is a blend of cooked and puréed fruit combined with a creamy base. It is typically made with whipped cream or custard, but I cut down on the fat and calories by combining the cream with nonfat plain Greek yogurt. I also boiled the rhubarb with orange juice to sweeten it without a lot of refined sugar.

Rhubarb FoolRhubarb Fool

½ pound rhubarb, cut into ½ inch pieces

¼ cup fresh orange juice

Zest of ½ an orange

¼ cup sugar

½ cup heavy whipping cream

½ cup nonfat plain Greek yogurt

Place the rhubarb, orange juice, orange zest, and sugar in a small saucepan. Bring to a boil, and simmer until the rhubarb is soft. Strain the excess liquid. Purée the rhubarb in a food processor until smooth. Chill.

Beat the cream until soft peaks form. Whisk in the Greek yogurt. Then stir the cooled rhubarb mixture into the cream mixture, leaving some streaks. Serve immediately.

I hope you have an April Fool’s Day filled with fun and surprising twists and turns!

Rhubarb Fool

Sweets for my sweet ~ Date and Almond Fudge

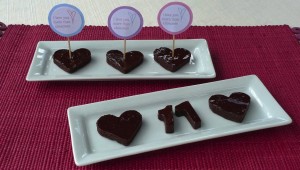
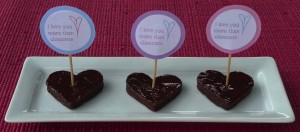
Date and Almond Fudge17 years ago, I met my hubby on this date. We like to celebrate the anniversary every year in some way. 🙂
This year I chose to make some healthy, vegan fudge to mark the occasion. The fudge is sweetened completely with dates. It is something to feel good about eating, and they are sweet and chocolaty. Those two benefits rarely go together! 😉

Date and Almond FudgeDate and Almond Fudge

14 ounces Medjool dates (about 2 cups), pitted

½ cup almond butter

¼ cup extra virgin coconut oil

6 tablespoons cocoa powder

½ teaspoon vanilla extract

Line a square 8-inch baking dish with parchment paper, leaving a few inches to overhang on the sides. (These will be your handles to pull the fudge out when it is set.) Combine all of the ingredients in a food processor and blend until smooth. Spread the fudge evenly into the baking dish. Refrigerate until firm, about an hour. Pull the fudge out of the baking dish, and cut into desired shapes.

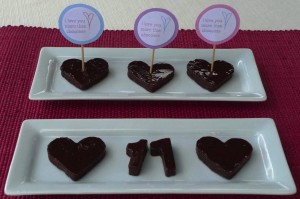
The little flags came from a website called Honey Bear Lane. They were created for Valentine’s Day, but I thought they were perfect to dress up this fudge. You could also sprinkle it with shredded coconut, sliced almonds, or anything else that strikes your fancy.

Happy anniversary, my sweet!

Date and Almond Fudge