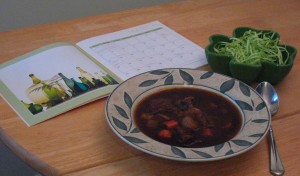
Thankful For Thanksgiving Leftovers ~ Turkey Pho

I discovered a new recipe website this year called Food52.com. It is an online community where you can share recipes, compare them and just chat about food. My favorite part about it is that they run recipe contests, so everyone’s favorite dishes rise to the top. When I found myself with a bunch of turkey leftovers earlier this year, I stumbled upon the “Best Recipe for Turkey Leftovers Contest Winner,” which was turkey pho. I’d never made pho at home before, but I definitely enjoy a good bowl on a cold and rainy night. I was actually quite impressed with how well this dish turned out! I love it when something comes out of my own kitchen that surprises me ;-). I thought I would pass along this recipe before you have your own turkey leftovers next week. It is a very delicious and comforting dish that is a little off the beaten track if you’d like to try something new.

Turkey Pho

From Food 52

This recipe makes 2 big bowls of soup

TOAST THE SPICES

2 tablespoons coriander seeds

4 whole cloves

4 whole star anise

1 cinnamon stick

Heat a cast-iron skillet or frying pan over medium heat. Add the coriander seeds, cloves, star anise, and cinnamon stick and toast until fragrant, about 3-4 minutes. Immediately spoon out the spices into a bowl to avoid burning them and set aside.

MAKE THE TURKEY PHO

1 quart homemade turkey stock (or homemade or store-bought chicken stock)

1 bunch green onions (green top parts only) chopped

1 3-inch chunk of ginger, sliced and smashed with side of knife

1 teaspoon brown sugar, or more to taste

1 tablespoon fish sauce, or more to taste

1-2 cup kale, chopped into bite-sized pieces

1/2 pound leftover turkey breast, shredded

1 bunch (approx. 2 oz.) cellophane/bean thread noodles (or enough flat dried rice noodles to serve 2)

1-2 tablespoon cilantro, chopped- for garnish (optional)

1-2 tablespoon chopped green onions (white parts only), minced- for garnish (optional)

1/2 lime, cut into wedges

Sriracha chili sauce to taste

In a large pot, add the toasted spices and all ingredients from stock through fish sauce and bring to a boil.

Reduce the heat to medium-low and let simmer for 20 minutes, skimming the surface frequently.

Taste the broth and add more sugar or fish sauce, if needed. Strain the broth and discard the solids. Add the kale and cook for 1-2 more minutes. Remove from heat.

Add the shredded turkey and the cellophane noodles. Allow to sit for a few minutes while the noodles soften.

Ladle the broth into bowls. Divide the kale, shredded turkey and the noodles evenly into each bowl.

Sprinkle on the garnishes and add sriracha to taste. Squeeze lime juice to taste over the top of your bowl before eating.

Happy wedding anniversary ~ Part 1 ~ Dungeness Crab Ravioli


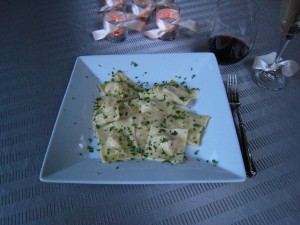
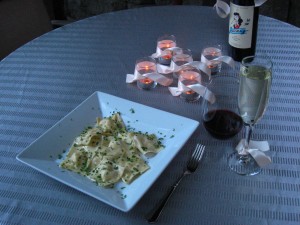
We celebrated our wedding anniversary this year with pasta! Last week Rob and I took a cooking class at Sur La Table about making homemade pasta, and afterwards we bought a pasta machine as a gift to each other. The traditional anniversary gift for 12 years of marriage is silk, so we thought making silky pasta would be fitting! 😉

We both love crab, so we made a Dungeness crab filling to go in our homemade ravioli. I found a good recipe on MarthaStewart.com to base our dish. I used lightened ricotta instead of the whole milk variety, and I used Earth Balance instead of butter for the sauce. We also used a little more crab than the recipe called for, since we love crab :). We replaced the wonton wrappers in her recipe with fresh pasta dough that we rolled and cut out. The recipe for the dough is on a previous entry that I wrote last spring, and it can be found here.

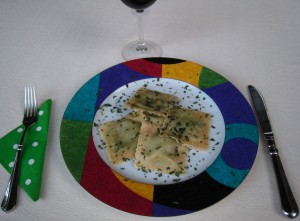
Crab Ravioli with Lemony Sauce

Based on a recipe from MarthaStewart.com

For the filling:

1 cup ricotta cheese

1 1/2 cups lump crabmeat, such as Dungeness

Coarse salt and freshly ground pepper

1/8 teaspoon red-pepper flakes

For the pasta:

Fresh Pasta Dough

Rice flour preferably, or the type of flour you used to make the dough (either all-purpose or 00)

For the sauce:

1 stick Earth Balance

2 teaspoons lemon peel, very finely chopped, plus 2 teaspoons fresh lemon juice

Make the filling: Mix together ricotta, crabmeat, 1/2 teaspoon salt, 1/8 teaspoon pepper, and the red-pepper flakes.

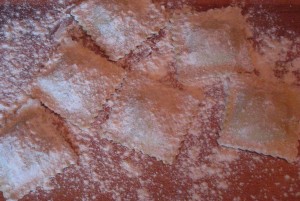
Make the ravioli: Cut your pasta sheets into squares with a pizza cutter, about 2 inches wide. Mound 1 teaspoon crab filling in the center of each hand cut piece of pasta. Brush edges of the pasta square with water, and top each with another square. Press edges to seal. Transfer to a baking sheet covered with rice flour (preferably) or the type of flour used to make the dough, and lightly dust the ravioli with the flour to keep them from sticking.

Bring a large pot of salted water to a boil. Working in 2 batches, cook ravioli until they rise to the top, 2 to 3 minutes.

Meanwhile, make the sauce: Melt 4 tablespoons Earth Balance in a large skillet over medium heat. Transfer first batch of cooked ravioli to the skillet using a slotted spoon, along with about 2 tablespoons cooking liquid. Add 1 teaspoon chopped lemon peel and 1 teaspoon juice, and swirl to combine. Transfer to plates.

Repeat with second batch of ravioli.

They sound like a lot of work, but when you have two people working together in the kitchen, they go surprisingly quickly. It’s a fun project! I hope you’ll give them a try :).

Seafood for Seafair Weekend ~ Halibut with Summer Vegetable Ragout

It’s Seafair weekend in Seattle! Our neighborhood transforms into a big party filled with boats on Lake Washington, the Blue Angels flying overhead, hydroplane races and a wakeboard competition. After taking in some of the festivities during the day, we decided to celebrate Seafair Saturday night in our own back yard, our way :).

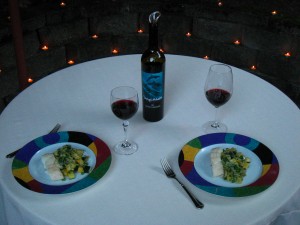
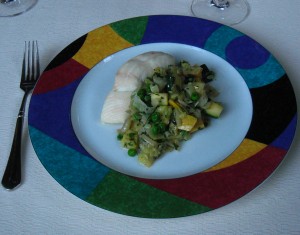
I made halibut with a summer vegetable ragout to compliment the sea theme of the weekend. The recipe was based on one I had at a private event at Sur La Table. I replaced the butter with Earth Balance and I added more vegetables to the mix than the original recipe called for. It’s really more of an idea than a recipe, so just add the vegetables and herbs that you like and that are in season.

Halibut with Summer Vegetable Ragout

Serves 2

1 cup leeks, thinly sliced

1 fennel bulb, thinly sliced

2 cups summer squash, diced

1/2 cup peas

2 tablespoons Earth Balance buttery spread

Zest of 1 lemon

1 tablespoon Italian parsley, chopped

1 teaspoon each of fresh thyme and oregano, chopped

Salt and pepper to taste

2 4-oz halibut filets

Preheat your oven to 400 degrees.

Place a large sauté pan on low heat, and add the Earth Balance. Once melted, add the leeks and fennel, and sweat until almost tender. Then add the peas and the summer squash. Cook until the squash is done to your liking. Off the heat, add the lemon zest and fresh herbs. Blend well. Season to taste with salt and pepper.

In the meantime, place the halibut filets on a tin foil lined baking sheet. Add salt and pepper to taste. Bake for about 10 minutes, or until the halibut flakes with a fork.

We paired our dinner with Wyland Cabernet Sauvignon from Laguna Canyon Winery. It has a beautiful picture of dolphins on the label, which is why I thought it was the perfect choice for this sea inspired meal.

Cheers!

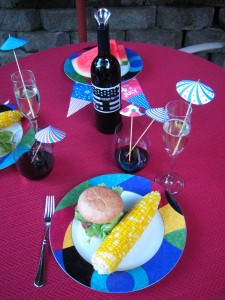
Happy Fourth of July ~ Bison Burgers with Washington Cabernet Onions and Wisconsin Cheddar

Happy 4th!

Tonight I decided to shake up the traditional Fourth of July hamburger with ground bison. It’s a very lean meat and a healthier option compared to most ground beef, and it is also feels like a patriotic choice for this holiday since bison have lived around this country longer than we have! I followed a recipe from Bon Appétit magazine that was absolutely delicious.

Bison Burgers with Washington Cabernet Onions and Wisconsin Cheddar

From Bon Appétit magazine

Ingredients

2 tablespoons olive oil, divided

3 cups sliced onions (about 2)

3/4 cup Cabernet Sauvignon or other dry red wine (I chose one from my home state of Washington)

1 pound ground bison (buffalo)

2 tablespoons chopped shallots

1/4 teaspoon coarse kosher salt

1/4 teaspoon dried thyme

4 organic hamburger buns (I used whole-wheat)

6 ounces sliced Wisconsin white cheddar cheese (My other home state, where I grew up :))

Dijon mustard

1 small head of escarole, leaves separated

Preparation

Heat 1 tablespoon oil in heavy medium skillet over medium-high heat. Add onions, sprinkle with salt, and sauté until tender and golden brown, stirring often, about 10 minutes. Reduce heat to medium and continue to sauté until very tender and well browned, about 15 minutes longer. Add wine and cook, stirring occasionally, until liquid is absorbed, about 5 minutes.

DO AHEAD Can be made 3 days ahead. Cool, cover, and chill.

Preheat broiler. Gently mix meat and next 3 ingredients in large bowl. Shape into four 1/2-inch-thick patties. Heat remaining 1 tablespoon oil in heavy large skillet over high heat. Sprinkle burgers with salt and pepper; add to skillet. Cook until well browned, about 2 minutes per side for medium-rare.

Open buns and arrange, cut side up, on rimmed baking sheet. Place cheese slices on bun tops. Broil until cheese melts and bottom halves are lightly toasted, about 1 minute. Spread bottom halves with mustard. Top each with a few escarole leaves, then burger. Spoon onions atop burgers, dividing equally. Cover with bun tops; press lightly.

Makes 4 burgers.

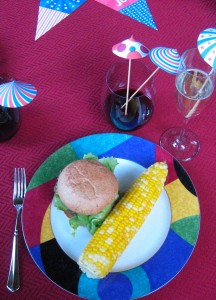
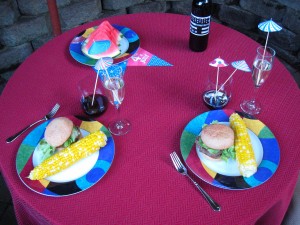
I served the burgers with simple sides of corn on the cob and watermelon slices. What could be more summery? 🙂

We also paired dinner with a Washington wine with a patriotic label called 2010 Charles & Charles Red Wine. It is a blend of Syrah and Cabernet Sauvignon, which is a perfect compliment to red meat.

The cute little clip art drink skewers and table decorations were from HP.com and MarthaStewart.com. Both were free to print :).

An Easy Weeknight Dish ~ Curried Salmon Cakes

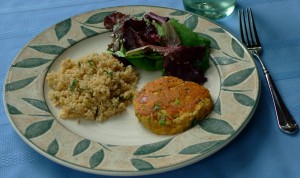
One of the recipes that I go back to again and again for a quick, easy and inexpensive meal is this one for curried salmon cakes. It is a refreshing blend of curry and apples, which is a little unexpected and a little exotic for a weeknight meal :). The recipe originally came from Sunset magazine. It is full of healthy ingredients, so I follow it pretty closely. I am just passing it along, since it’s one of my favorites :).

Curried Salmon Cakes

From Sunset magazine

2 large eggs

2 pouches (about 7 oz. each) boned, skinned pink salmon, or 1 can (about 15 oz.) red or pink salmon, drained, skin removed (make sure it is wild salmon vs. farmed)

1/2 cup finely chopped apple

1/4 cup dried bread crumbs (I use panko)

1/4 cup thinly sliced green onions

2 tablespoons mayonnaise

1 teaspoon curry powder

1/2 teaspoon paprika

1/4 teaspoon pepper

1 tablespoon vegetable oil

1. Beat eggs with a fork. Add salmon and break up. Stir in apple, bread crumbs, onions, mayonnaise, curry powder, paprika, and pepper. Shape into four cakes (3/4 in. thick); place on a piece of plastic wrap.

2. Set a 12-inch nonstick frying pan over medium heat. When hot, add oil, then salmon cakes. Cook until well browned on the bottom, 5 to 7 minutes. Turn cakes over and cook until browned on the other side, 3 to 5 minutes longer.

I served these with a simple salad and quinoa pilaf. Yum!

Happy Mother’s Day Weekend ~ Fresh Asparagus, Pine Nut and Tarragon Ravioli


To celebrate Mother’s Day weekend this year, my mom came up for a visit filled with the things we love to do together! Things like shopping at some of our favorite stores, taking a cooking class, and enjoying this fresh ravioli for dinner.

I have recently learned that fresh pasta is actually amazingly easy, and it feels so much more special than dried. It is a little time consuming, but it freezes beautifully, so you can make it on a night when you have time and enjoy it whenever you’d like.

This dish was based on a recipe from one of Sur La Table’s cooking classes. They offer many fresh pasta classes that have really demystified the process for me. The original dish was tossed in a mushroom cream sauce, but I simply tossed the finished ravioli in a little bit of melted Earth Balance buttery spread and sprinkled them with fresh tarragon. I also used less vinegar than called for. Just add the filling ingredients to your taste, and sample as you go before you fill the ravioli.

Fresh Pasta Dough

Yield: 4 servings

2 1/2 cups (12 ounces) all-purpose flour or “00” flour, plus more for dusting

1 tablespoon kosher salt

4 large eggs

1 tablespoon extra-virgin olive oil (optional)

Place flour and salt in a large mixing bowl and whisk to combine. Make a “well” in the center of the flour mixture and add eggs and oil, if using. Using your fingers, blend the eggs into the flour mixture, stirring the flour in from the sides of the well and working outwards. When the pasta dough is thoroughly mixed, turn it out on a lightly floured work surface. Knead dough until it is smooth and flexible but not sticky, about 5 to 10 minutes, adding small amounts of flour as needed. Gather the dough into a ball and flatten into a disk. Cover in plastic wrap and allow dough to rest for at least 10 minutes and up to 1 hour at room temperature.

To roll dough, secure a pasta machine to the edge of a long countertop. Using a bench scraper, cut dough into thirds. Keep extra dough covered in plastic while working with one piece. Flatten the piece of dough into a rough square that will fit inside the width of the pasta machine. Place the rollers on the widest setting and roll the dough through the machine, catching it with one hand as you roll with the other. Take the dough and fold into thirds towards the center of the dough. Turn the dough so one open end faces the machine and roll it through on the widest setting again. Fold, turn, and roll once more on the widest setting. Continue rolling the pasta through machine without folding, adjusting the rollers to the next smallest setting each time, until the desired thickness is reached. If the pasta sheet becomes too large to handle, use a bench scraper to cut it into more manageable lengths and continue rolling until pasta is less than 1/16-inch thick.

(This whole process can also be done with a rolling pin. It takes some muscle, but it works really well).

Asparagus, Pine Nut and Tarragon Ravioli

Yield: 4 servings

2 cloves garlic, peeled

1/2 cup pine nuts, toasted

1 large bunch tarragon, washed and dried, stems removed

1/2 pound asparagus spears, trimmed, cut into 2-inch lengths, blanched and cooled

1/3 cup extra-virgin olive oil

1/3 cup grated Parmesan cheese

3 tablespoons white wine vinegar, plus more as needed

Kosher salt and freshly ground black pepper

1 recipe Fresh Pasta Dough

To prepare filling, place garlic, pine nuts, tarragon, and asparagus pieces in the bowl of a food processor fitted with a metal blade. Pulse to a rough chop. Add 1/3 cup olive oil in a steady steam and process to a smooth paste. Stop motor and add cheese and vinegar, stirring by hand to combine. Taste and season with salt, pepper and more vinegar as needed. Set aside.

Place pasta sheets on a lightly floured work surface. Place tablespoons of filling in rows down the length of the pasta sheet, leaving at least 2 inches of space around each tablespoon of filling. Using a pastry brush, moisten the surface of the pasta around the filling with water or egg wash. Place a similarly sized pasta sheet on top of the filling, gently pressing to seal the pasta around the filling without creating air pockets inside the ravioli. Cut the ravioli using a cookie cutter, a ravioli stamp, a pizza wheel, or a ravioli maker. Place ravioli on a rimmed baking sheet lightly coated with flour. Dust the tops of the ravioli with flour and cover loosely with a clean kitchen towel. The filled ravioli can be cooked immediately or covered with plastic wrap and refrigerated for up to 1 hour before cooking.

To cook ravioli, heat a large pot over high heat until boiling. Add enough kosher salt to season the water like seawater. While salted water boils vigorously, add ravioli and stir immediately to prevent them from sticking. Boil until ravioli are al dente, about 4 to 5 minutes. Reserve about 1/4 cup pasta water and drain ravioli through a colander. Alternately, remove the cooked ravioli with a slotted spoon or spider and reheat water to boiling before cooking another batch.

Toss hot ravioli with your sauce of choice, using the reserved pasta water to thin the mixture as needed. Garnish as desired and serve immediately.

(If you decide to freeze your ravioli, don’t thaw them before placing in boiling water. They will just take about a minute or two longer than room temperature dough to thaw and cook).

I hope you’ll give these a try for a spring dinner! 🙂

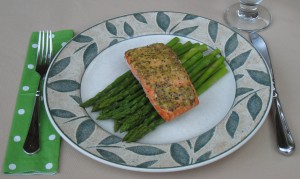
Giada De Laurentiis ~ Broiled Salmon with Herb Mustard Glaze

When I first began to get into cooking, I spent a lot of time watching shows like Everyday Italian and Barefoot Contessa on the Food Network. They taught me the basics and inspired me to try many of the recipes on my own. I still make a few of the dishes on a semi-regular basis, since a handful found their way to becoming old favorites at our house.

I have the opportunity to meet Giada De Laurentiis this week at a book signing event for her new cookbook entitled Weeknights with Giada. I also had the chance to take a class at Sur La Table last week that explored a few of those new recipes.

So, to stick with that theme, I decided to pull out one of my old favorites from Everyday Italian for dinner this evening. It is really quick and really healthy. Not to mention, really delicious with the whole grain mustard on the flaky salmon :). On a beautiful day like today, I wanted to get dinner on the table in under a half an hour so we could spend more time outside. It’s time to eat al fresco again!

As a side note, if you do not have a mini-food processor, you can just chop the garlic and herbs very finely with a chef’s knife and then mix them with the remaining ingredients.

Broiled Salmon with Herb Mustard Glaze

From Everyday Italian

2 garlic cloves

3/4 teaspoon finely chopped fresh rosemary leaves

3/4 teaspoon finely chopped fresh thyme leaves

1 tablespoon dry white wine

1 tablespoon extra-virgin olive oil

2 tablespoons Dijon mustard

2 tablespoons whole-grain mustard

Nonstick olive oil cooking spray

6 (6 to 8-ounce) salmon fillets

Salt and freshly ground black pepper

6 lemon wedges

In a mini food processor, combine garlic, rosemary, thyme, wine, oil, Dijon mustard, and 1 tablespoon of whole-grain mustard. Grind the mustard sauce until combined, about 30 seconds. Transfer to a small bowl. Add remaining 1 tablespoon of whole-grain mustard to the sauce and stir to combine. Set aside mustard sauce.

Preheat the broiler. Line a heavy rimmed baking sheet with foil. Spray the foil with nonstick spray. Arrange the salmon fillets on the baking sheet and sprinkle them with salt and pepper. Broil for 2 minutes. Spoon the mustard sauce over the fillets. Continue broiling until the fillets are just cooked through and golden brown, about 5 minutes longer.

Transfer the fillets to plates and serve with lemon wedges.

Irish Week ~ Guinness and Beef Stew

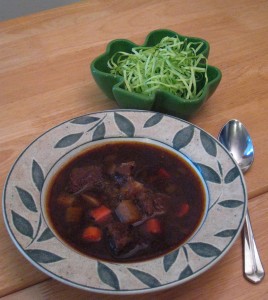
Since Saint Patrick’s Day is fast approaching, I was in the mood for something a little Irish. To celebrate, I made Guinness and Beef Stew tonight. It’s one of those dishes that simmers on the stove all afternoon and makes the whole house smell inviting until the beef falls apart with a spoon. My Irish hubby said it’s one of the best stews he has ever had. I hope you’ll give it a try!

I followed the recipe from Cooking Light pretty closely, since it was already a fairly healthy dish. The biggest adjustment I made was replacing the chuck roast with a round roast of beef, since it is a little leaner cut of meat that also braises beautifully. I also omitted the raisins, simply because I don’t like raisins in most dishes. I found that I didn’t need the full amount of salt, either. Just taste as you go.

Guinness and Beef Stew

Adapted from Cooking Light magazine

3 tablespoons canola oil, divided

1/4 cup all-purpose flour

2 pounds boneless round roast, trimmed and cut into 1-inch cubes

5 cups chopped onion (about 3 onions)

1 tablespoon tomato paste

4 cups fat-free, lower-sodium beef broth (my favorite store bought beef broth is from Kitchen Basics)

1 (11.2-ounce) bottle Guinness Stout

1 teaspoon caraway seeds

Black pepper to taste

Salt to taste

1 1/2 cups (1/2-inch-thick) diagonal slices carrot (about 8 ounces)

1 1/2 cups (1/2-inch-thick) diagonal slices parsnip (about 8 ounces)

1 cup (1/2-inch) cubed peeled turnip (about 8 ounces)

2 tablespoons finely chopped fresh flat-leaf parsley

Heat 1 1/2 tablespoons oil in a Dutch oven over medium-high heat. Place flour in a shallow dish. Sprinkle beef with salt; dredge beef in flour. Add half of beef to pan; cook 5 minutes, turning to brown on all sides. Remove beef from pan with a slotted spoon. Repeat procedure with remaining 1 1/2 tablespoons oil and beef.

Add onion to pan; cook 5 minutes or until tender, stirring occasionally. Stir in tomato paste; cook 1 minute, stirring frequently. Stir in broth and beer, scraping pan to loosen browned bits. Return meat to pan. Stir in salt, caraway seeds, and pepper; bring to a boil. Cover, reduce heat, and simmer 1 hour, stirring occasionally. Uncover and bring to a boil. Cook 50 minutes, stirring occasionally. Add carrot, parsnip, and turnip. Cover, reduce heat to low, and simmer 30 minutes, stirring occasionally. Uncover and bring to a boil; cook 10 minutes or until vegetables are tender. Sprinkle with parsley.

Just because it’s Monday ~ Roasted Pork Tenderloin with Honey Mustard Sauce

Tonight, we had a special dinner for no particular reason other than it is Monday. That’s a reason to celebrate, right? Why not? 🙂 There is a little snow on the ground, it’s a cozy day to stay inside, and I saw an eagle flying over Lake Washington from my window. There are always reasons to celebrate, I think :).

I found a nice bottle of Greystone Cellars Chardonnay for half price at one of my favorite grocery stores called Grocery Outlet. They have many high quality and organic foods and wines for a fraction of the price. It’s always an adventure to see what they have in stock. My latest find was this wine from Napa Valley’s Culinary Institute of America, which I was very excited to discover. I stocked up since their inventory turns over quickly.

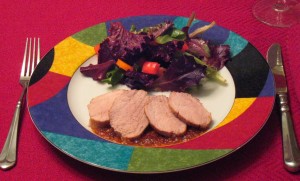
That wine inspired me to find a recipe from the Culinary Institute of America to pair with it. I decided it would go well with a pork tenderloin dish from Gourmet Meals in Minutes. I used less salt than the recipe called for, and I added a tad more honey for a slightly sweeter sauce. Just taste as you go to make it to your liking. I also cut the recipe in half since it was just my hubby and me tonight, but the recipe below serves 8. It was easy to put together, but it felt special. Perfect for a Monday!

Roasted Pork Tenderloin with Honey Mustard Sauce

Adapted from Gourmet Meals in Minutes

3 pounds pork tenderloin

2 tablespoons vegetable oil

2 garlic cloves, minced

2 tablespoons shallots, minced

1 tablespoon tomato paste

2 tablespoons whole-grain mustard

2 tablespoons honey

2 1/2 tablespoons red wine vinegar

1 1/2 teaspoons thyme, chopped

Salt and pepper to taste

1 1/3 cups vegetable or chicken broth

Preheat the oven to 425 F. Place a rack in a roasting pan, spray with nonstick spray, and place in oven. Remove any excess fat or silver skin from the tenderloin. Season with salt and pepper on all sides.

Heat the vegetable oil in a large sauté pan over medium-high heat. Sear the tenderloin until it is golden brown on all sides, approximately 5 minutes. Remove the tenderloin and place it on the rack in the roasting pan. Roast until it reaches an internal temperature of 160 F. This will take approximately 15-20 minutes. (I use an oven safe kitchen thermometer with an alarm that tells me when the pork is up to temperature. It ensures I have perfectly cooked pork every time. Before I invested in this kind of thermometer, I must admit we had many dried out pork tenderloins! ;)).

While the tenderloin is roasting, return the sauté pan to medium heat. Add the garlic and shallots. Cook until fragrant, about 1 minute. Add the tomato paste and cook until warmed through. Add the mustard, honey, vinegar, thyme, chicken/vegetable broth and salt and pepper to taste. Bring to a boil, and then simmer until the mixture reduces to a sauce consistency. Keep warm.

Remove the tenderloins from the oven and let stand 5 minutes before slicing. Slice the roast and serve with the warm honey-mustard sauce.

PS. The lovely organic greens and carrots were also from Grocery Outlet 🙂


Lots to be thankful for ~ Roasted Pheasant with Chestnuts, Wild Rice and Fennel, Frisée Salad with Blue Cheese, Walnut and Cranberry Crostini and a Pumpkin Cake Roll with Cream Cheese Frosting

Happy Thanksgiving!

We celebrated a little early with family this year, so Rob and I had a quiet and cozy Thanksgiving for two on the actual holiday. I decided to shake things up a bit since we had the traditional turkey and sweet potatoes and all of that last week. For our own little celebration, we had Roasted Pheasant with Chestnuts, Wild Rice and Fennel, Frisée Salad with Blue Cheese, Walnut and Cranberry Crostini and a Pumpkin Cake Roll with Cream Cheese Frosting. If you would like to try something off the beaten path for your holidays, we both thought all three were exceptional! The recipes were twists on the traditional fare, so it still felt like Thanksgiving, but it was fun to try a few new things.

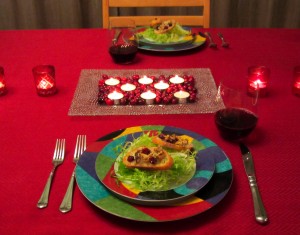
The frisée salad was a festive little starter for our meal. I have to admit, I am not a big cranberry sauce fan, and so the addition of dried cranberries on the crostini was my version of “cranberry sauce.” 😉 I used quite a bit less blue cheese than the original recipe called for, and I was actually able to find a reduced fat cheese by Stella that had a very full flavor. I also used a baguette instead of ciabatta since I liked the size better, and it has fewer holes to let the goodies fall through ;). I made the whole recipe for the crostini, so as to have leftovers as snacks in the coming days.


Frisée Salad with Blue Cheese, Walnut, and Cranberry Crostini

Adapted from Bon Appétit magazine

24 ½ or ¼ inch-thick slices of a French baguette, depending on your preference

3 tablespoons walnut oil, divided

1/2 cup chopped toasted walnuts

1/4 cup reduced fat blue cheese, crumbled

5 tablespoons minced shallots, divided

1/3 cup dried cranberries

1 bunch of frisée lettuce

1 teaspoon red wine vinegar

Preheat oven to 400°F. Arrange bread slices on baking sheet. Brush bread slices on top side with 2 tablespoons walnut oil. Bake until crisp, about 5 minutes.

Mix walnuts, cheese, 4 tablespoons shallots, and dried cranberries in medium bowl. Sprinkle mixture on toasts. Bake until cheese melts, about 4 minutes.

Meanwhile, combine frisée, 1 tablespoon shallots, 1 tablespoon walnut oil, and vinegar in bowl. Serve with crostini on top of the frisée.
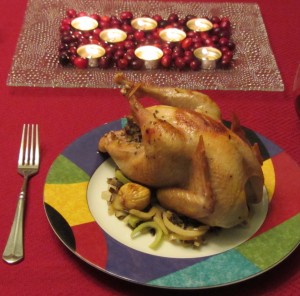
For the pheasant dish, I followed the recipe pretty closely. I did omit the butter when called for and used olive oil instead. I also needed to cook the pheasant longer than 40 minutes to get the breast meat to 160 degrees. If you haven’t ever had pheasant before (like we hadn’t) it has a very mild taste, but it is definitely not chicken or turkey. It was less gamey than I expected. A nice refreshing change from our usual poultry choices :). The sizes of the pheasants were also perfect for two with leftovers. I used two little 2 lb birds. (If you are in the Seattle area, Don and Joe’s Meats in Pike Place Market carries pheasant along with many other specialty meats. It’s a fun place to visit if you are looking for a little culinary adventure!)


Roasted Pheasant with Chestnuts, Wild Rice and Fennel

Adapted from MarthaStewart.com

2 cups fresh chestnuts

3/4 cup wild rice

1 teaspoon salt, plus more to taste

2 pheasants (about 2 pounds each)

1/4 cup fresh rosemary, finely chopped

1 clove garlic, minced

6 shallots, 2 minced and 4 slivered lengthwise

Freshly ground pepper

2 tablespoons plus 2 teaspoons olive oil

2 fennel bulbs (about 8 ounces each), sliced thinly crosswise

1 cup homemade chicken stock, or canned low-sodium chicken broth, skimmed of fat

Preheat oven to 425 degrees. With a sharp knife, make two crosscut gashes on flat side of chestnuts. Place on a baking sheet, and roast for 15 to 20 minutes. When cool enough to handle, peel off skins and set aside.

Rinse rice well. In a medium saucepan, combine with 3 cups water. Bring to a boil, reduce heat, cover loosely, and allow to simmer for 25 minutes. Remove from heat, add 1/2 teaspoon salt, and let sit for 10 minutes. Drain, and set aside.

Rinse pheasant, and pat dry. Combine rosemary, garlic, minced shallots, and salt and pepper to taste. Rub cavity with mixture. Season outside with salt and pepper. Tie pheasant’s legs together with kitchen twine. Tuck wings under breast.

Reduce heat to 350 degrees. Pour 1 tablespoon oil in a roasting pan over medium heat. Brown bird evenly on all sides, about 15 minutes. Place breast side up; transfer to oven. Cook for about 40 more minutes, basting often, until legs are a little loose when you shake them.

Meanwhile, pour 1 teaspoon oil in a skillet. Add slivered shallots, and cook over medium heat for 5 to 6 minutes. Transfer shallots to a bowl.

Pour another 1 teaspoon oil in skillet. Add fennel slices, and cook for 5 minutes. Transfer to bowl.

Pour remaining tablespoon oil in skillet. Add chestnuts; cook for 2 minutes. Add 1/2 cup stock and 1/2 teaspoon salt. Bring to a boil and simmer until reduced to a glaze, about 10 minutes. Add remaining stock; simmer until again reduced to a glaze, about 5 minutes. Transfer to a plate.

Add rice, shallots, fennel, and 1 cup water to skillet and cook for 5 minutes. Add chestnuts. Season to taste with salt and pepper. Serve with pheasant.

For dessert, we had a pumpkin cake roll with cream cheese frosting. I reduced the sugar from the original recipe and I made a simple Neufchatel frosting for the middle instead of the traditional full fat cream cheese filling. The presentation was quite beautiful, but I must say, it looks harder to make than it actually was. My favorite kind of recipe! 😉


Pumpkin Cake Roll with Cream Cheese Frosting

Adapted from Cook’s Country magazine

1
cup cake flour, sifted

2
teaspoons pumpkin pie spice

1/2
teaspoon baking soda

Pinch of salt

5
large eggs

1
cup sugar

1
cup canned pumpkin puree

16 ounces Neufchatel, room temperature

3/4 cup confectioners’ sugar, plus more for garnish

For the Cake: Adjust oven rack to middle position and heat oven to 350 degrees. Grease 18- by 13-inch rimmed baking sheet and line with greased parchment paper. Whisk flour, spice, baking soda, and salt in medium bowl; set aside. With electric mixer on medium-high speed, beat eggs and sugar until pale yellow and thick, 6 to 10 minutes. Add pumpkin and mix on low until incorporated. Fold in flour mixture until combined. Spread batter evenly in prepared pan. Bake until cake is firm and springs back when touched, about 15 minutes. Before cooling, run knife around edge of cake to loosen, and turn out onto clean sheet of parchment paper that has been dusted with confectioners’ sugar. Gently peel off parchment attached to cake and discard. Roll cake and fresh parchment into log and cool completely, about 1 hour.

For the Filling: Place the room temperature Neufchatel cheese in a food processor, and blend with ¾ cup confectioner’s sugar until smooth.

To Assemble: Gently unroll cake and spread with frosting, leaving 1-inch border at edges. Re-roll cake snugly, leaving parchment behind. Wrap cake firmly in plastic wrap and chill completely, at least 1 hour or up to 2 days. Remove plastic, dust with confectioners’ sugar.


All Hallow’s Eve ~ Black and Orange Halloween Pasta

Happy Halloween!

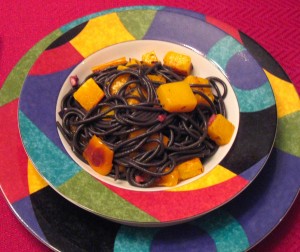
We had a fun little Halloween dinner tonight based on the colors of the holiday – Black squid ink pasta and Kalamata olives with orange butternut squash and bell peppers. It not only looked festive and elegant, but the flavors also worked very well together. I would highly recommend it for your next Halloween dinner party if you’d like to try something new and fun :).

The trickiest part of the recipe was finding the black pasta. If you live in the Seattle area, Pasta & Co. has it in stock.  The flavor is about the same as typical pasta, but the look really stands out. I think it’s well worth the hunt for this recipe.

Black and Orange Halloween Pasta

From Epicurious.com

2 pounds butternut squash, peeled, seeded, and cut into 3/4-inch chunks

2 orange bell peppers, cut into 1-inch pieces

4 garlic cloves, thinly sliced

1 tablespoon thyme leaves

1/2 teaspoon hot red pepper flakes

1/4 cup extra-virgin olive oil

1 pound black linguine or spaghetti (squid or cuttlefish ink pasta)

1/2 cup pitted Kalamata olives, chopped

Preheat oven to 425°F with rack in middle.

Toss squash and bell peppers with garlic, thyme, red pepper flakes, oil, and 1/2 teaspoon each of salt and pepper in a 17- by 11-inch 4-sided sheet pan. Roast, stirring once, until vegetables are just tender and browned in spots, 25 to 35 minutes.

While vegetables finish roasting, cook linguine in a pasta pot of well-salted boiling water until al dente. Reserve 1/2 cup cooking water, then drain pasta and return to pot.

Remove sheet pan from oven and pour reserved water over vegetables, stirring to loosen from pan. Stir in olives, then add vegetable mixture to pasta in pot and toss to combine.

We paired dinner with a red wine by Owen Roe Winery called Sinister Hand. Ooooh, spooky! 😉 Also yummy! 🙂

Wedding Anniversary, Part 3 ~ Duck Breasts with Celeriac Root Potato Purée and Caramelized Carrots

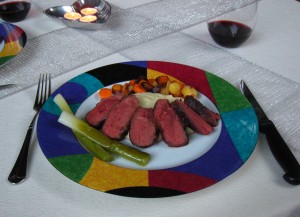
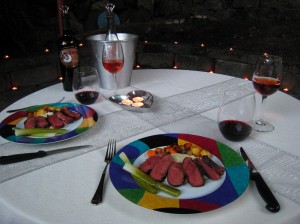
The main course for our wedding anniversary dinner was something new to our kitchen…Duck! We have had duck out in restaurants, but I’ve never tried making it at home before. I changed the original recipe from Domaine Chandon quite a bit to replace the turnip puree with a celeriac and potato puree. We love that flavor combination. Plus, I omitted the heavy cream and butter by using these vegetables with a naturally creamy texture. I also omitted the canola oil, since the duck breasts have enough fat in the skin to sauté them in a dry pan. Lastly, I used Earth Balance instead of butter when called for.

Duck Breasts with Celeriac Root Potato Purée and Caramelized Carrots

2 medium Yukon gold potatoes

3 medium celeriac roots (about the same total size as the potatoes)

Earth Balance to taste (I used about 2 tablespoons in the potato mixture and about 1 tablespoon for the carrots)

Skim Milk to taste

Salt and freshly ground pepper

2 large carrots, peeled and cut into thin rounds

2 boneless duck breasts

Peel and chop the potatoes and celeriac roots into approximately 2 inch pieces to speed up the cooking time. In a large pot, boil enough water to cover the potatoes and celeriac. Boil until everything is very tender. Drain the water, and place the potatoes and celeriac into a food processor. Pulse the mixture while adding a little skim milk until it is smooth. (Be careful not to over mix, however, since potatoes can get goopy if over mixed.) Add a little Earth Balance, salt and pepper to taste, and pulse the mixture until everything is well incorporated.

In a small frying pan, melt about 1 tablespoon of Earth Balance over medium low heat. Add the carrots and sauté until tender and golden brown. Season with salt to taste.

Trim away any excess fat on the duck breasts. Score the skin in a crosshatch pattern using a chef’s knife to allow the fat to render. Salt and pepper on both sides.

Preheat a large frying pan over medium heat. Place the breasts skin-side down and cook until the skin is crispy, about 6 to 8 minutes. Pour off and discard the rendered fat from the pan as you go. Turn the breasts, and cook until medium-rare. (Adjust the heat to a lower temperature if they begin to get a little too brown before they are cooked.) Transfer the breasts to a carving board and let rest for 5 minutes before carving. Cut into thin slices crosswise. We also carved away most of the skin for a leaner cut.

To serve, place a bed of the potato mixture in the middle of each plate. Fan several thin slices of the duck meat over the bed, and sprinkle the carrots on the other side. Serve immediately.

Serves 2 with leftovers.

We paired our dinner with a California wine called Steele 2008 Cabernet Sauvignon. The traditional anniversary gift for the 11th wedding anniversary is made of steel, so I thought it was a fitting choice! 🙂 We thought it was very delicious…Fruit forward but full bodied, which is our favorite style.

Rob also picked up a French Marsannay Rosé by Domaine Charles Audoin as a part of his gift to me. It was recommended to him by our local wine store when he asked for something to pair well with duck. Duck is fairly rich tasting meat, and the rose was light and crisp. Perfect combination :).

It’s Canada Day! ~ Cedar Plank Roasted Salmon with a Maple Glaze


Happy Canada Day!

We love our neighbors to the north :). We spent our honeymoon on Vancouver Island, and British Columbia is one of our favorite places to visit. It’s just a hop, skip and a jump from Seattle, and it’s an absolutely beautiful province.

Even though we aren’t Canadian, who can’t use an extra reason to celebrate? Celebrating non-traditional holidays shakes things up a bit and it’s fun!

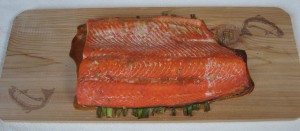
I think of maple syrup when I think of Canadian cuisine, and British Columbia has some great seafood similar to Seattle, so I decided to make cedar plank roasted salmon with a maple glaze. The wooden plank infuses a subtle smokey flavor into the fish. (Luckily it didn’t smoke the house, as well ;). It did make the kitchen smell nice and toasty, though.) I found the recipe at Epicurious.com. I followed it pretty closely, so I just want to pass the recipe onto you since it was so delicious and special!


Cedar Plank Roasted Salmon with a Maple Glaze

1 cup maple syrup

2 tablespoons grated fresh ginger

4 tablespoons lemon juice

3 tablespoons soy sauce

1 1/2 teaspoons minced garlic

An untreated cedar plank (you can find them at specialty cooking stores)

2 1/2-pound center-cut salmon fillet with skin

1 bunch of scallion greens

In a small saucepan, simmer the maple syrup, ginger, 3 tablespoons of lemon juice, soy sauce, garlic, and salt and pepper to taste until it is reduced to about 1 cup. (About 30 minutes). Let cool.

Place the oven rack in the middle position, and preheat your oven to 350. Heat the cedar plank by itself in the middle of the oven after it is up to temperature for about 15 minutes to get it a little toasty.

Pour half of the glaze into a small dish, and keep the other half in the pan. Stir the remaining 1 tablespoon of lemon juice into the sauce on the stove, warm and cover.

Arrange the scallion greens in one layer on the plank.

Put the salmon, skin side down, on the scallion greens and brush with the remaining glaze in the small dish. Season the salmon with salt and pepper and roast until just cooked through, about 35 minutes.

Cut the salmon crosswise into 6 pieces and drizzle with the warm sauce.

Happy Canada Day to all…Whether you live in Canada or just enjoy their beautiful country :).

It’s the first day of summer! ~ Oven Baked Fish with Chips

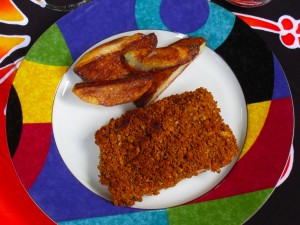
It’s the first day of summer! The sun actually cooperated in Seattle today, and it feels like summer is here. No coats necessary :). We celebrated by having fish and chips for dinner alfresco. In the summertime, we occasionally visit a little fish and chip place on Lake Union called Ivar’s. The view on their little deck overlooks the lake and the city skyline, and the food is very tasty, but it isn’t what I would call bikini friendly :). So I decided to try a baked version of this favorite summertime treat. A recipe in The Best Light Recipe cookbook inspired me again. It is basically the same as the “fried”chicken recipe I wrote about earlier this month, but with fish. We tried halibut and salmon, which were both delicious.

Oven Baked Fish Fillets

1 5 oz box of whole grain Melba toast broken into 1-inch pieces.

2 tablespoons canola oil

3 large egg whites

1 tablespoon Dijon mustard

1 teaspoon dried thyme

¼ teaspoon garlic powder

1/8 teaspoon cayenne pepper

4 fish fillets, about 1 inch thick and 6 oz each (A firm fleshed fish will work nicely like cod, halibut, or even salmon)

Salt and pepper

Canola oil cooking spray

Adjust your oven rack to the upper middle position, and preheat to 450. Cover a baking sheet with aluminum foil, and place a wire rack on top.

Pulse the Melba toast in a food processor until it is coarse crumbs. Place in a shallow bowl and mix in the oil.

In another shallow dish, whisk the egg whites through the cayenne together.

Pat the fish dry with paper towels, and season well with salt and pepper. Dip each fillet into the egg mix and then the Melba mix, pressing to make sure it adheres. Then place each piece of fish on the wire rack and spray the top with cooking spray.

Bake for about 12 to 15 minutes, or until the fish just flakes apart and the coating is golden brown.

Serve with baked chips and tartar sauce if you’d like.

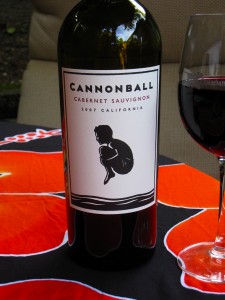
We also had a summery wine to go with dinner called 2007 Cannonball Cabernet Sauvignon. It starts with a berry aroma, but finishes as a full-bodied Cabernet. Yum! It might become our new house wine. I must admit I am inclined to fall for cute wine labels, and this one has a little boy who is poised to splash into a lake. Perfect for the season :).

The Help ~ Southern “Fried” Baked Chicken

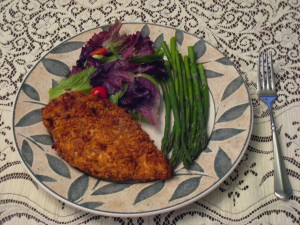
I just finished reading a really inspirational book called The Help by Kathryn Stockett. It’s about a group of women who take a big risk to make a big change in the Deep South of the 1960s. I would definitely recommend it if you’d like a book about a little American history mixed in with a story about friendships. Reading about that part of the country inspired me to try some Southern dishes…my way :).  To me, nothing says Southern cooking quite as much as fried chicken. I found a really good recipe for a baked version of “fried” chicken from a cookbook called The Best Light Recipe from the editors of Cook’s Illustrated magazine. That cookbook is filled with so many remarkable recipes, so while you are at the library or bookstore, I would highly recommend picking it up, as well! We were amazed by how much it really tasted like deep-fried chicken…only it’s much much lighter. I made it even a tad healthier by using whole grain Melba toast instead of the original kind.

Baked “Fried” Chicken Breasts

1 5 oz box of whole grain Melba toast broken into 1-inch pieces.

2 tablespoons canola oil

3 large egg whites

1 tablespoon Dijon mustard

1 teaspoon dried thyme

¼ teaspoon garlic powder

1/8 teaspoon cayenne pepper

4 bone-in skinless split chicken breasts (bone in is important…boneless chicken breasts make the dish too dry)

Salt and pepper

Canola oil cooking spray

Adjust your oven rack to the upper middle position, and preheat to 450. Cover a baking sheet with aluminum foil, and place a wire rack on top.

Using kitchen shears, trim the rib section off of the breasts by following the line of fat from the narrow end of the breast up to the socket where the wing was attached.

Pulse the Melba toast in a food processor until it is coarse crumbs. Place in a shallow bowl and mix in the oil.

In another shallow dish, whisk the egg whites through the cayenne together.

Pat the chicken dry with paper towels, and season well with salt and pepper. Dip each breast into the egg mix and then the Melba mix, pressing to make sure it adheres. Then place each piece of chicken on the wire rack and spray the top with cooking spray.

Bake until the center of the thickest part of the chicken breast registers to 160 degrees. (About 40 minutes.)

I hope you will give it a try the next time you are craving good old Southern fried chicken!

Summer is (almost) here ~ Dungeness Crab Cakes

We tend to do a little more entertaining as the weather (slowly but surely!) gets warmer and sunnier. It’s a treat to have dinner alfresco after staying inside over the winter.

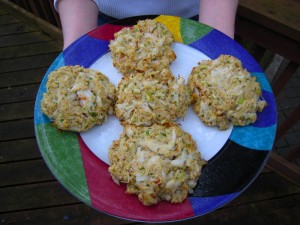
One dish that I make time and time again for entertaining in the warmer months is my Dungeness crab cakes. They are one of our very favorite things…Ever! One thing I love about them is that they can be made ahead of time, stored in the refrigerator, and then baked off once our guests arrive. I am not mussing and fussing in the kitchen, so I can enjoy a glass of wine with our friends out on the deck while the cakes bake in the oven. They are also full of crab…Very little filler. That’s how we like our crab cakes! I would highly recommend them for easy gourmet entertaining. 🙂

Dungeness Crab Cakes

Based on a recipe from Sunset magazine

1 pound cooked and shelled Dungeness crab meat

1/4 cup finely diced celery

2 tablespoons minced fresh chives

2 tablespoons mayonnaise

1 large egg

2 teaspoons Dijon mustard

1/4 teaspoon hot sauce

1 1/4 cups panko, divided

Preheat your oven to 475 F. Make sure your crab doesn’t have any hidden bits of shell mixed in before you begin. In a large bowl, mix the celery, chives, mayonnaise, egg, mustard, and hot sauce with a fork. Then add the crab and 1/4 cup panko. Stir gently until everything is well blended.

Place the remaining 1 cup of panko in a shallow bowl. Shape the crab mixture into cakes. (I usually get about 6 or 7 large cakes, but make them the size you prefer. Whatever size you choose, they should be about 1/2 inch thick.) Place each cake in the panko and coat on all sides. Press gently to make sure the crumbs stick. Lay the panko-covered cakes slightly apart on a parchment-lined baking sheet. (You can make them up to this point earlier in the day. Just cover the pan lightly with plastic wrap and refrigerate until you are ready to bake.)

Bake until golden brown, 15 to 18 minutes. Serve immediately.

I usually serve them with a good store-bought tartar sauce.

I hope you enjoy these as much as we do!

Memorial Day Weekend ~ Chicago Style Italian Beef Sandwiches

It’s Memorial Day weekend! The unofficial beginning of summer. 🙂

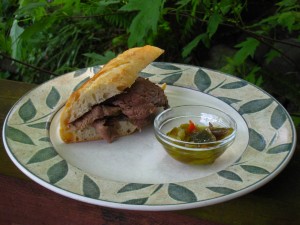
To celebrate this weekend, I tried making my own version of Chicago style Italian beef sandwiches. My husband is from Chicago, and this is one dish that is very hard to come by outside of the city limits. He misses his occasional beef sandwich in Seattle.

I found a recipe from Cook’s Country magazine that sounded promising. They do such a nice job testing recipes at that magazine, so I thought that would be a good place to go for an authentic dish. I would highly recommend subscribing to their magazine, or to their sister magazine, Cook’s Illustrated. They are definitely a trusted source in my kitchen.

We ended up sharing the beef with another of Rob’s friends from Chicago, and both he and Rob thought this recipe was very close to what they remembered from their childhoods!

I did change a couple of things from the original recipe to make them a little healthier and to make them a little more authentic. My butcher trimmed the beef very well, so very little fat remained. I also used kosher salt instead of table salt to reduce the sodium. The original recipe asked for the giardiniera to be blended with mayonnaise, but that’s not what I have experienced in Chicago, so I didn’t follow those instructions. I also didn’t put the giardiniera liquid into the jus for the same reason. The jus had a ton of flavor all by itself. One final thing I added was a bell pepper to include a vegetable and to stay authentic.

The whole dish only took a couple of hours, and most of that time was just roasting the beef (so I could go off and do other things.) It is definitely an easy recipe to repeat over and over again.

Chicago Style Italian Beef Sandwiches

4 teaspoons garlic powder

4 teaspoon dried basil

4 teaspoons dried oregano

1 tablespoon ground pepper

1 4-lb top sirloin roast, trimmed of most of the fat

2 tablespoons oil (canola, grape seed, or vegetable)

1 finely chopped onion

3 minced garlic cloves

1 tablespoon all purpose flour

2 cups low sodium beef broth

2 cups low sodium chicken broth

1 ½ cups water

1 teaspoon red pepper flakes

2 teaspoons kosher salt

1 green bell pepper, sliced into 1 inch strips

French bread for serving

Giardiniera packed in oil for serving

(If you are in the Seattle area, De Laurenti Specialty Food and Wine has a nice selection of authentic giardiniera. That’s the only ingredient that’s a little tricky to find.)

Preheat your oven to 300 degrees.

Combine the garlic powder, basil, oregano, and pepper in a small bowl.

Heat 1 tablespoon of oil in a skillet over medium high heat until it is almost smoking. Pat the meat dry with paper towels, and brown on all sides. Transfer to a roasting pan with a V-rack to keep the meat from resting on the bottom of the pan.

Add the onion to the remaining fat in the skillet and cook until softened, about 5 minutes. Add the garlic, flour and 1 teaspoon of the spice mix. Cook about 1 minute, or until fragrant. Add the broths and water, scraping up the brown bits on the bottom of the pan. Bring to a boil. Then add the liquid mixture to the roasting pan.

Stir 1 tablespoon of oil, red pepper flakes and salt into the remaining spice mix. Massage the mix all over the meat.

Roast for about 90 minutes, covered, and then transfer the meat to a cutting board. (It should still be a little pink in the middle). Tent with foil, and let it rest for 20 minutes before slicing.

Pour the jus through a fine mesh strainer into a pan, and keep at a low simmer.

Microwave the sliced bell pepper for two minutes to give it a head start. Then add it to the jus, and let it soften.

Slice the meat as finely as possible, and place it in the jus on the stove. Cook until it is no longer pink, about 5 minutes.

Serve the beef on French bread slices, with spicy giardiniera. We also like to serve it with a little bowl of jus to dip.

Take a bite and imagine you are at the shores of Lake Michigan on a picnic blanket on the beach!

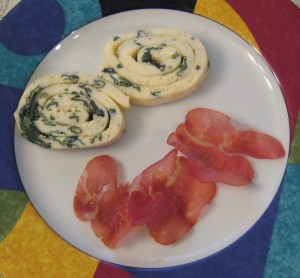
Happy Mother’s Day! ~ Egg Roulade

My mom said she was up for something new this year, so for Mother’s Day brunch I tried an egg dish unlike anything I have ever tried before …An egg roulade. The original idea was from America’s Test Kitchen Light & Healthy 2011 magazine. They do such a nice job testing recipes at that magazine, and this was already a lightened recipe, so I followed it pretty closely. Don’t want to mess with a good thing! 😉 It turned out to be an exceptional dish, we thought…It was both delicious and the presentation was impressive. Plus it was really quick and easy to make. That’s a combination I thought I would pass along on this blog! 🙂

Egg Roulade

5 oz fresh baby spinach

¼ cup water

¼ skim milk

2 tbsp unbleached all purpose flour

10 large egg whites (You can find egg whites already separated in a little carton near the egg section at the grocery store…It saves discarding 10 yolks)

5 large eggs

1 garlic clove, pressed to a paste

¼ teaspoon kosher salt

1/8 teaspoon pepper

2 oz grated Gruyère cheese

Place your oven rack in the middle position and preheat to 375. Coat an 18 by 13 inch rimmed baking sheet with cooking spray. Then cover it with parchment paper, taking care to make sure it goes up the sides as well. Then spray the parchment liberally. Set aside.

Place the spinach and water in a microwave safe bowl, cover, and microwave on high for about 3 minutes, or until the spinach is wilted. Transfer the greens to a colander, and press out the excess liquid.

Whisk the milk and flour together in another bowl. In a third bowl, whisk the egg whites, eggs, garlic, salt and pepper until well combined. Then whisk in the milk and flour mixture.

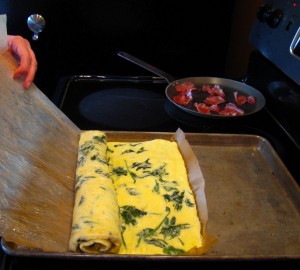
Pour the combined egg mix onto the prepared baking sheet. Sprinkle evenly with the spinach and cheese. Bake until the eggs are just set, about 11 minutes, rotating the pan once half way through the baking process.

Remove the baking sheet from the oven. Beginning at the short end, use the parchment paper to roll the eggs over in a tight cylinder (like a sushi roll.) Then use the parchment to transfer the eggs to a cutting board, and slice it crosswise before serving.

PS. Instead of bacon, we like to cook thin slices of prosciutto in a sauté pan on the stovetop. It gets crispy just like bacon. If you haven’t tried it before, it’s a nice alternative! Much leaner, too :).

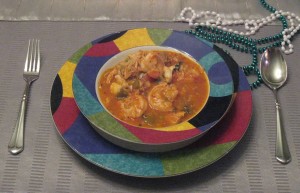
Happy Mardi Gras! ~ Red Jambalaya with Chicken, Shrimp and Lobster and Chandon Sidecars

This year, we had red jambalaya with chicken, shrimp and lobster for our Mardi Gras celebration. I’ve been working my way through the recipes on the Domaine Chandon website, and this one caught my eye awhile back. It seemed perfect for tonight, so I saved it until now. I must say, it was worth the wait!  I would recommend it highly. I did make a handful of changes to make it a little healthier. I used brown rice instead of white, I only used 2 andouille sausage links (chicken or turkey preferred to pork) instead of a pound, I omitted the bacon grease or butter and replaced it with grapeseed oil and I used skinless chicken with the bone in. Other than those differences, I followed the recipe closely. We thought it was a delicious gourmet spin on traditional jambalaya.

Red Jambalaya with Chicken, Shrimp and Lobster

3 lbs chicken breasts and thighs with the bone in but skin removed

3-4 tbsp grape seed oil, or any other oil with a high smoke point

2 medium-sized onions, chopped

1 green pepper, diced

1 clove garlic, finely chopped

2 tbsp flour

2 links of sliced chicken or turkey andouille (about ½ lb) (if you would like less heat, you might want to use only one link)

3 cups tomato plus one extra medium tomato, chopped

½ tsp thyme

½ tsp pepper

½ tsp Tabasco sauce
(if you don’t like things very spicy, use a little less)

1 cup water

1 cup tomato juice

¾ cup uncooked long grain brown rice

½ lb jumbo shrimp, shelled and deveined

2 small lobster tails, shelled and cut into small pieces (may substitute 12 oz small shrimp, shelled and deveined)

½ cup scallions, diced (discard green stalks)

¼ cup fresh parsley, chopped


Season the chicken with salt and pepper. Heat 2 tbsp oil and sauté until just browned and remove from pan. (It will not be cooked through.) Do not discard oil.

In the same pan, sauté onions, green pepper and garlic until onions are translucent. Remove from skillet.

Add remaining oil and gradually add flour, stirring often. Simmer until the color turns light brown.

In the same pan, stir in sausage, chicken, onion, pepper and garlic mixture and tomatoes (except for the extra medium tomato). Cook 10 minutes on medium high, stirring continuously.

Add thyme, ½ tsp pepper, Tabasco sauce, water, tomato juice and rice. Mix well and bring to a boil. Reduce heat and cover. Simmer for 30 minutes, or until the rice is tender.

Stir in shrimp, lobster, scallions, remaining tomato and parsley. Cook an additional 5 minutes until the seafood is just cooked through.

Makes 8–10 servings.

We also had my take on a Chandon Sidecar cocktail to go with our dinner. We were first introduced to sidecars at one of our favorite nightspots in Seattle called the New Orleans Creole Restaurant, so I always associate them with Creole cooking. For our drinks, I used ¾ oz of Grand Marnier, ½ oz Meyer lemon juice (its a little sweeter than regular lemon juice, so we didn’t need any simple syrup to balance it) and ¾ oz of Cognac. Then top it with dry sparkling wine to your liking.

I hope you have a festive Mardi Gras! 🙂

Sweetest Day ~ Butternut Squash Soup with Pear, Cider and Vanilla Bean and Cider Glazed Salmon

Happy Sweetest Day! This is one of those little holidays that gives us an excuse for a little celebration. I am all for that :). I decided to make a special dinner menu to mark the occasion. The recipes were from a really good book I read this year called A Homemade Life: Stories and Recipes from My Kitchen Table. It was written by an author who lives here in Seattle, Molly Wizenberg, who has a well-respected recipe blog called Orangette. I read the book in the spring and have been saving these two autumn recipes until now. They are a little gourmet, a little decadent, and very delicious. Perfect for a fall evening that feels a little special.

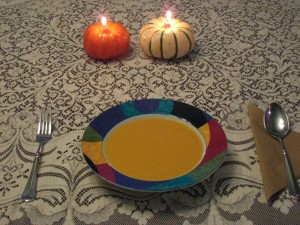
The first recipe I made was a butternut squash soup with pear, cider, and vanilla bean. It’s a very funky combination, I know, which is why I had to try it! It just sounded so unique and special with the vanilla. Both Rob and I agreed it was a very nice and refreshing flavor combination. I would highly recommend it! I lightened the recipe a touch by using less half and half, and replacing the other portion with skim milk. It was still very creamy and silky because of the squash, so we didn’t miss the extra richness at all. I also only needed 1 tablespoon of olive oil instead of 3. Other than those two little details I followed the recipe, so I am just passing it along in all of its goodness :).

Butternut Squash Soup with Pear, Cider and Vanilla Bean

1 tablespoon olive oil

2 lbs of peeled and seeded butternut squash cut into 1-inch cubes (about 4 cups)

2 peeled and cored pears cut into 1 inch cubes (about 2 cups)

1 chopped
white onion

1 cup apple cider

4 cups low sodium chicken broth

Salt

¼ cup half-and-half

¼ cup skim milk

1 vanilla bean

Add the oil, squash, pears and onion to a large pot over medium low heat, and cook uncovered for about 10-15 minutes, stirring occasionally, until the onion is translucent and the pears are soft. Add the cider and bring it to a boil over medium high heat. Add the broth, lower the heat to medium low, and simmer partially covered for about 30 minutes until everything is tender.

Carefully puree the mixture in small batches in a blender. Return the soup to the pot and continue to cook over medium low heat, uncovered, until it has reduced to a thick and creamy consistency that you like. While the soup is bubbling, put the half-and-half and milk in a small saucepan. Cut the vanilla bean in half lengthwise and scrape the seeds with the back of a knife. Put the pod and seeds in the dairy and put the pan over low heat until it is just steaming, but not boiling. Strain the vanilla pod from the mix and set aside. When your soup has reduced to the thickness you desire, stir in the vanilla mixture. Season with salt to taste and enjoy!

Makes 4-5 servings

The main course was a cider glazed salmon dish. It was so simple, but so delicious. Isn’t that the way with the best recipes? 🙂 I used half and half instead of all cream, but other than that detail I followed the recipe. I usually don’t use cream or butter, but because you only need a little bit of this glaze to make an impact, I didn’t skimp. I think a little bit is just fine :).

Cider Glazed Salmon

1 tablespoon butter

1 medium shallot, cut in half and peeled

2 cups apple cider

2, 3 or 4 salmon fillets (depending on the number of portions)

Salt

½ cup half and half

In a large skillet bring the shallot, butter and cider to a simmer over medium high heat.

Place the salmon in the cider blend, cover and simmer gently. Flip half way through. For every inch of thickness the salmon needs about 10 minutes to cook until it is just cooked through.

Remove the fish from the pan and cover with tin foil.

For the glaze, raise the heat under the pan to medium high, add a pinch of salt and simmer until the liquid is reduced by about 2/3. It will be a slightly thickened. Reduce the heat to medium and add the half and half. Bring to a boil, stirring frequently, until the mixture darkens to a light caramel color.

Plate the salmon and top with a spoonful of the glaze.

Rob also treated me to special little chocolate pumpkin truffles for dessert. One of my favorite local chocolatiers called Moonstruck Chocolate makes creative little pieces to go with the seasons. Almost too cute to eat….Almost :).


Wine Pairing

We had a new wine tonight from Columbia Winery called Romance Red. Since Rob and I had our wedding reception at that winery, it seemed like a good choice for a romantic evening celebration :).