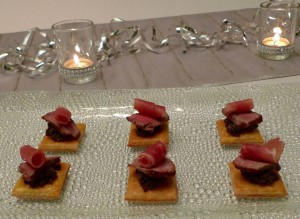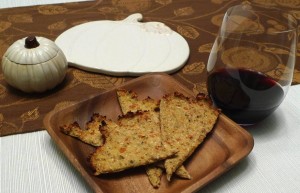
Happy Holidays! ~ Sweet and Spicy Gochujang Nuts

Happy holidays! I hope the close of 2018 is filled with many celebrations, but also quiet time to thoroughly enjoy and reflect upon the season.

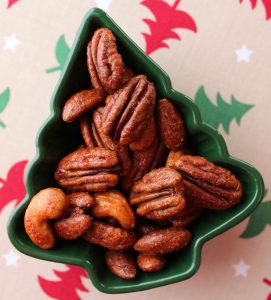
My final recipe of 2018 follows my interest in Korean food that was sparked earlier this year. Since then, I’ve made many traditional Korean recipes at home, and I’ve also played with popular Korean ingredients to make my own dishes. This is a twist on the classic holiday party snack of sweet and spicy mixed nuts, but I used gochujang to add a delicious depth of flavor.

Sweet and Spicy Gochujang Nuts

Inspired by a recipe from Better Homes and Gardens

1 tablespoon granulated sugar

2 teaspoons gochujang

1 1/2 teaspoons water

1/2 teaspoon fine sea salt

1 1/2 cups raw shelled mixed nuts

Preheat oven to 325 F. Line a half sheet pan with parchment paper.

In a small saucepan, heat the sugar, gochujang, water, and sea salt until the sugar has dissolved. Remove from heat.

In a medium bowl, toss the nuts with the sugar mixture until evenly coated.

Spread the mixture evenly onto the prepared sheet pan.

Bake for about 15 minutes, or until fragrant. Let cool completely. Serve immediately or store in an airtight container for later snacking.

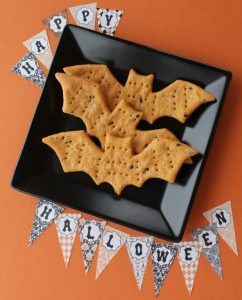
Happy Halloween ~ Orange and Black Halloween Crackers

I hope you have a happy Halloween!

I’m all about the treats on Halloween, but I often like to go for savory treats over sweet. These crackers are perfect for Halloween night snacking. 🙂 The cheddar and paprika not only add orange color, but they add a touch of flavor. And the poppy seeds and sesame seeds give added crunch and texture while adding pretty black speckles for the holiday.

The cute little decorations are from a website called Yesterday on Tuesday. They are free to print for personal use, and absolutely adorable! The design is meant to be used as a banner, but I just made them into little flags to add a festive touch. I found many printable treasures over there for decorating. I hope you’ll check out her website. 🙂

Orange and Black Halloween Crackers

1/2 cup white whole-wheat flour

1/2 cup all-purpose flour, plus more for rolling

1/2 teaspoon kosher salt, plus more for (optionally) sprinkling the tops of the crackers

1/2 teaspoon baking powder

1 teaspoon paprika

1 1/2 tablespoons light olive oil

1/4 cup + 2 tablespoons water

1/4 cup shredded extra sharp cheddar cheese, lightly packed

1/2 teaspoon poppy seeds

1 teaspoon black sesame seeds

Preheat oven to 375 F. Line three baking sheets with parchment paper.

In the bowl of a food processor, process the flours, salt, baking powder, and paprika until combined. Add the olive oil, water, and cheddar, and pulse until combined. Take the dough out of the processor, and knead in the poppy seeds and the sesame seeds with your hands until everything is evenly incorporated and it becomes a cohesive ball. Cover the dough with plastic wrap and let rest for at least 15 minutes.

Divide the dough into 3 portions. Lightly dust a clean work surface and a rolling pin with all-purpose flour. Roll out one portion of the dough until it is about 1/8-inch thick. Dust with a little extra flour if it sticks to the work surface or the rolling pin.

Cut out the crackers into desired shapes. (I used a cookie cutter in the shape of a bat for my crackers.) After I used my cookie cutter, I cut the remaining odd pieces into random shapes as a snack for the cook! Repeat with the remaining two portions of dough.

Place the crackers on the prepared baking sheets. If using, sprinkle with a little kosher salt on top. Dock the top of the crackers with a fork to ensure they don’t rise and bubble very much as they bake. Bake each tray individually for about 12 minutes, turning once, until the crackers begin to crisp. They will still have a little chew at this point, so if you would like your crackers to be more crispy, bake a little longer.

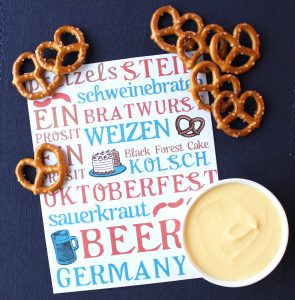
Oktoberfest Celebration ~ Oktoberfest Beer Cheese Dip

After a little hiatus, I’m back to my blog! I am starting to get excited about all of the foods of autumn. It’s my favorite time of year to cook. Once the weather gets a little cool and rainy, I love to stay cozy in my kitchen.

Here’s a simple little recipe to get you into the spirit of Oktoberfest! I used a local seasonal lager from Silver City Brewery, but any Oktoberfest beer should do.

Oktoberfest Beer Cheese Dip

4 ounces sharp cheddar, cut into cubes

3 ounces reduced-fat cream cheese

2 teaspoons prepared mustard

1/2 teaspoon Worcestershire sauce

1/4 cup Oktoberfest beer

Mix all of the ingredients together in a food processor until smooth. You may need to scrape down the sides a few times to get everything well incorporated.

That’s it! It couldn’t be simpler.

The festive printable is from a website entitled Sunny Slide Up. It is adorable and free to download for personal use! I hope you’ll check out their website.

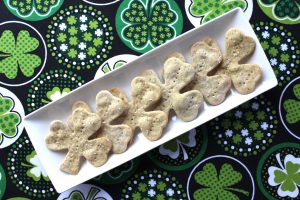
St. Patrick’s Day Snack ~ Shamrock Whole-Wheat Crackers with Parsley

I’m not Irish, but St. Patrick’s Day is still one of my favorite holidays! I always try to make something fun in the kitchen to celebrate. This year I made a couple of batches of these shamrock-shaped crackers with flecks of parsley for a little added color. (Gotta have a little green on this holiday!) I served mine with an Irish cheddar and Guinness spread to make this snack even more Irish.

Shamrock Whole-Wheat Crackers with Parsley

1/2 cup white whole-wheat flour

1/2 cup all-purpose flour, plus more for rolling

1 tablespoon dried parsley

1/2 teaspoon kosher salt, plus more for sprinkling the tops of the crackers

1/2 teaspoon baking powder

1 1/2 tablespoons light olive oil

1/4 cup + 2 tablespoons water

Preheat oven to 375 F. Line three baking sheets with parchment paper.

In the bowl of a food processor, process the flours, parsley, salt, and baking powder to ensure the parsley is very fine. Add the olive oil and water, and pulse until combined. Take the dough out of the processor, and knead a couple of times with your hands until it becomes a cohesive ball. Cover the dough with plastic wrap and let rest for at least 15 minutes.

Divide the dough into 3 portions. Lightly dust a clean work surface and a rolling pin with all-purpose flour. Roll out one portion of the dough until it is about 1/8-inch thick. Dust with a little extra flour if it sticks as you roll it. Cut out the crackers into desired shapes. (I used a cookie cutter in the shape of a shamrock for my crackers.) Repeat with the remaining two portions of dough.

Place the crackers on the prepared baking sheets. Sprinkle with a little kosher salt on top. Dock the top of the crackers with a fork to ensure they don’t rise and bubble very much as they bake. Bake each tray individually for about 9 minutes, turning once, until the crackers are crisp and lightly golden.

PS. After I took my photos for this blog entry, hubby said the cheese spread was also something delicious I should blog about! So here’s a bonus recipe. 🙂

Irish Cheddar and Guinness Spread

4 ounces sharp Irish cheddar cheese, coarsely shredded

4 ounces reduced-fat cream cheese

2 teaspoons Dijon mustard

3 tablespoons Guinness stout

Add all of the ingredients into the bowl of a food processor. Process a few minutes, until very smooth, scraping down the sides of the bowl a couple of times to make sure everything is well incorporated.

Korean Culinary Adventure! ~ Spicy Shrimp and Winter Squash Canapés on Sesame Crackers

My hubby and I visited a Korean restaurant earlier this winter, which sparked my interest in this delicious cuisine! Coincidentally, the Winter Olympics are now in South Korea, so this culinary adventure was well timed! I have made many visits to the Korean grocery store and cooked many traditional recipes this winter to explore the wide range of dishes. We’ve tried everything from japchae to tteokbokki to kalguksu to bibimbap to name a few. And I still have many many other dishes on my wish list that I want to try! A lot of the dishes are hearty and comforting (and spicy!!), so they are the perfect way to liven up our wet and gray winter days here in Seattle.

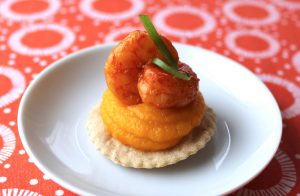
These little bite-sized appetizers were inspired by this Korean culinary adventure. I made sesame crackers as a base, since sesame seeds and/or oil are used in many traditional recipes I’ve tried. I made a winter squash purée as a seasonal sweet center to contrast with the salty cracker and the spicy shrimp. Then I topped it with shrimp coated in gochujang (Korean spicy pepper paste), sesame oil, and soy sauce. I also added a little gochugaru (Korean spicy pepper flakes) to kick up the heat a little more.

Spicy Shrimp and Winter Squash Canapés on Sesame Crackers

Makes about 25 canapés

For the crackers:

1/2 cup white whole-wheat flour

1/2 cup all-purpose flour, plus more for rolling

1/4 cup sesame seeds

1/2 teaspoon kosher salt, plus more for the tops of the crackers

1/2 teaspoon baking powder

1 1/2 tablespoons light olive oil

1/4 cup + 2 tablespoons water

For the squash:

1 butternut squash, seeded, peeled, and cut into approximately 3-inch chunks.

Approximately 1 tablespoon high-heat cooking oil, such as rice bran oil

Salt to taste

Water for thinning the purée

For the shrimp:

2 tablespoons gochujang

2 tablespoons warm water

1 teaspoon sesame oil

1 teaspoon soy sauce

Gochugaru to taste, optional, (if you like it extra spicy!)

Approximately 2 tablespoons high-heat cooking oil, such as rice bran oil

Approximately 1/2 pound small raw shrimp (I used 70-90), peeled and deveined

For garnish:

The green portion of approximately 4 green onions, cut into 1 to 2-inch pieces, sliced into very thin strips

For the crackers:

Preheat oven to 450 F. Line three baking sheets with parchment paper.

In a medium bowl, whisk together the flours, seeds, salt, and baking powder. Add the olive oil and water, and stir until combined. Knead the dough until it becomes a cohesive ball. Cover the dough with plastic wrap, and let the dough rest for at least 15 minutes.

Divide the dough into 3 portions. One portion at a time, on a lightly floured surface, roll the dough to about 1/8-inch. Cut out crackers in desired shapes, or make squares with a pizza wheel. I used a biscuit cutter that was about 2-inches wide.

Place the crackers on the prepared baking sheets. Sprinkle with a little salt on top. Prick the top of the crackers with a fork to ensure they don’t rise and bubble very much as they bake. Bake each tray individually for about 6 or 7 minutes, turning once, until the crackers are crisp and lightly golden.

Set the crackers aside as you work on the squash and shrimp.

For the squash:

Keep your oven heated to 450 F. Line a baking sheet with parchment paper.

Toss the pieces of squash with oil and salt until coated. Bake for about 30 minutes, turning once, until soft and slightly caramelized.

In the bowl of a food processor, purée the roasted squash. Add a little water if it is too thick. (It should be a consistency that allows you to pipe the purée.) Season with more salt to taste if needed.

Cool the squash purée to room temperature.

Scoop the squash into a piping bag with a large round tip.

Set aside.

For the shrimp:

In a medium bowl, whisk together the gochujang, water, sesame oil, and soy sauce until smooth. Add a pinch of gochugaru if you would like the sauce to be spicier.

Preheat the high-heat cooking oil in a medium sauté pan until shimmering. Add the shrimp, and sauté on both sides until just cooked through. Toss the shrimp in the bowl with the gochujang mixture until well coated.

To assemble:

Pipe a small dollop of squash onto the crackers. Top with 2 shrimp. Top the shrimp with the green onion. Serve immediately.

PS. This appetizer is good warm, room temperature, or cold, so you can make all of the components ahead of time. If you are not assembling the appetizers right away, store the crackers in an airtight container, and refrigerate the squash and the shrimp.

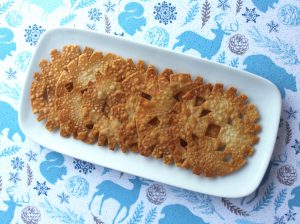
Winter Wonderland ~ Snowflake Wonton Crackers

Remember the paper snowflakes you used to make as a kid? Fold up a piece of paper and cut slits into it. When you open it up again, you end up with a beautiful snowflake! That is the general idea behind these crackers. Let your inner child come out to play this winter with this fun little baking project. 🙂 Bonus: It will warm up your kitchen!

Snowflake Wonton Crackers

Round wonton wrappers

High heat cooking spray

Salt to taste

Grated Parmesan, optional

Preheat oven to 350 F. Line 2 baking sheets with parchment paper.

Fold each wonton wrapper in half, and then in half again. With a sharp pair of kitchen scissors, cut little slits into the sides of the wrapper. Open the wrapper so it lays flat again. Spray the wrapper with a light coating of cooking spray and gently rub the oil evenly over the surface with your finger. Season with a sprinkling of salt and Parmesan if you would like. Repeat with as many crackers as you desire.

Bake for about 7 to 10 minutes, or until the wonton wrappers are golden brown and crunchy.


Happy New Year! ~ Pimento Cheese Balls

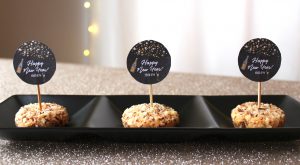
We closed 2017 and rang in 2018 with one of our favorite recipes from the past year. 🙂 I made my pimento cheese into individual portions, so everyone could easily grab one onto their plate. I also dressed them up for the party with a few adorable New Year flags from IsiDesigns!

Pimento Cheese Balls

Makes about 12 cheese balls

Approximately 2 cups sliced almonds

2 ounces extra sharp cheddar, coarsely grated

1/2 cup reduced-fat cream cheese

1 teaspoon mayonnaise

2 tablespoons jarred pimentos, drained and squeezed to remove excess liquid

1/4 teaspoon paprika

1/8 teaspoon garlic powder

1/8 teaspoon onion powder

Pinch of cayenne

Chop the almonds coarsely. Set them aside in a shallow bowl.

In the bowl of a food processor, add the remaining ingredients. Process until smooth.

Transfer the cheese to an airtight storage container, and refrigerate overnight.

After the cheese is chilled, scoop it into 1 tablespoon portions. Roll the chilled cheese in your hands to make a ball. Roll the ball in the almonds until evenly coated. Repeat with the remaining portions of cheese.


Pumpkin Season! ~ Pimento Cheese Pumpkins

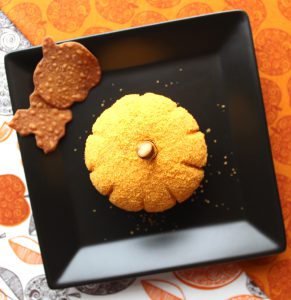
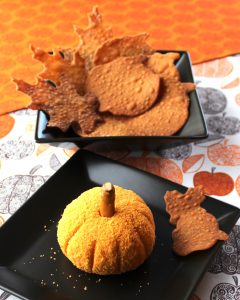
Every October I love to try a bunch of different pumpkin recipes, both savory and sweet. Since pumpkins are not only delicious but also so festive, I even love to make dishes that look like pumpkins, whether or not they have any actual pumpkin in the recipe. This pimento cheese ball is one of those recipes. It is dressed up in a pumpkin costume for the season! 😉

Pimento cheese is a Southern classic, which you can serve with crackers, crudités, or bread. For my version, I made wonton crackers in different autumn shapes. The super simple recipe for the crackers can be found here.

Pimento Cheese Pumpkins

Makes 2 small cheese balls

Approximately 2 cups cheddar cheese crackers (I used Annie’s Cheddar Squares)

2 ounces extra sharp cheddar, coarsely grated

1/2 cup reduced-fat cream cheese

1 teaspoon mayonnaise

2 tablespoons jarred pimentos, drained and squeezed of excess liquid

1/4 teaspoon paprika

1/8 teaspoon garlic powder

1/8 teaspoon onion powder

Pinch of cayenne

2 2-inch long pretzel sticks.

Place the crackers in a gallon-sized zip-top bag. Smash the crackers with a rolling pin until the crumbs are fine. For an even finer crumb, process the crackers in a food processor for a couple of minutes. Set the crumbs aside in a shallow bowl.

In the bowl of a food processor, add the remaining ingredients, except for the pretzels. Process until smooth.

Cover the cheese in cling wrap and refrigerate overnight.

After the cheese is chilled, divide into 2 equal pieces. Roll the chilled cheese in your hands to make a ball. Roll the ball in the cracker crumbs until evenly coated. With the back of a butter knife, indent the sides of the ball to look like the grooves on the side of a pumpkin. Top with a pretzel to make the “stem.” Repeat with the remaining piece of pimento cheese.

Wedding Anniversary Hors d’Oeuvres ~ Crab Imperial Bites

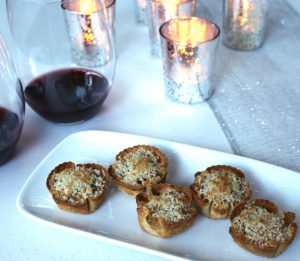
For our second special anniversary dish, I made crab imperial bites. Crab imperial is a type of crab casserole or dip from Maryland, and it is usually served in a ramekin or baking dish. I made my version into bite-sized hors d’oeuvres with our favorite local Dungeness crab for a West Coast twist. 🙂

Crab Imperial Bites

Makes about 18 hors d’oeuvres

18 wonton wrappers

High heat cooking spray

1 tablespoon mayonnaise

2 tablespoons minced fresh Italian parsley

2 tablespoons panko breadcrumbs, plus more for the top

1 1/2 teaspoons lemon juice

1 teaspoon Worcestershire sauce

1 teaspoon Dijon mustard

1/2 teaspoon Old Bay seasoning

Pinch of cayenne

Salt to taste (if needed)

Freshly ground black pepper to taste

1/2 pound lump crabmeat, picked through to make sure there are no hidden bits of shell.

Preheat your oven to 350 F.

Cut the wonton wrappers into circles that will fit into the holes of a mini muffin pan. I used a circular cookie cutter for this, but kitchen scissors also work. Spray the wrappers with a light coating of cooking spray on both sides, and rub the oil with your fingers to ensure an even coating. Form the wrappers into cup shapes in the mini muffin pan.

Bake for about 10 to 15 minutes, or until the wonton wrappers are golden and crunchy.

Set aside.

Turn up your oven to 400 F.

In a medium bowl, mix the remaining ingredients except for the crab. Add the crab, and mix well, but try to keep the bigger pieces of crab intact.

Place the filling into the prepared wonton shells.

Top the bites with more panko. Spray the top of the breadcrumbs with a light coating of cooking spray.

Bake until heated through, about 4 minutes. Then turn on the broiler, and broil until the breadcrumbs are lightly golden. Keep a close eye on them so they don’t get too brown.

One more tropical celebration of summer! ~ Luau Meatballs

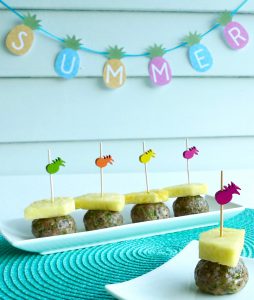
I made one more tropical recipe to celebrate this beautiful summer! I am soaking up the sunshine and warm weather while we still have it. It has been an especially lovely summer here in Seattle.

The pineapple cocktail sticks are from Two’s Company. They were too cute to pass up when I saw them at the store. 🙂 I wanted to use them before the summer’s end. These cocktail sticks were actually the inspiration behind this pineapple recipe!

The adorable summer pineapple printable banner is from My Sister’s Suitcase. It is free to print for your personal use. 🙂 I hope you’ll go over to their website to check out all of the fun things they have posted.

Luau Meatballs

2 tablespoons panko breadcrumbs

2 tablespoons minced shallot

2 green onions, minced

3 tablespoons minced cilantro

1/2 teaspoon soy sauce

1/2 teaspoon kosher salt

3/4 pound ground pork tenderloin

1 cup fresh pineapple juice

2 tablespoons rice wine vinegar

2 teaspoons cornstarch

12 fresh pineapple pieces, for garnishing

Preheat your oven to 350 F. Line a baking sheet with parchment paper.

In a large bowl, mix the panko, shallot, green onions, cilantro, soy sauce, and salt. Add the pork and mix well. Form the mixture into about 12 meatballs. Place the meatballs on the prepared baking sheet.

Bake the meatballs for about 12 minutes, or until they are just cooked through. Be careful not to over bake or your meatballs will be dry.

In a medium saucepan, bring the pineapple juice to a simmer. In a small bowl, whisk together the vinegar and cornstarch to make a slurry. Whisk the slurry into the simmering pineapple juice. Cook until thickened.

Dip each meatball in the pineapple sauce. Top with a piece of pineapple. Serve on a cocktail stick with extra sauce for dipping.

Warm Weather Appetizers ~ Chicken Lau Lau on Purple Sweet Potatoes with Taro Chips

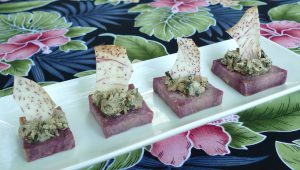
The weather is warming up, and that gets me into the mood for something tropical! I decided to cook a traditional Hawaiian dish called lau lau, which means “leaf leaf” in Hawaiian since it uses two different kinds of leaves. I recently learned how to make the classic dish from a native Hawaiian lady, and this is my spin on the tradition. 🙂

I served some of the shredded lau lau as an appetizer on rectangles of purple sweet potato with taro chips to garnish. I love how the colors of the potato and taro compliment one another, and I also think using both the leaf and the root of the taro plant balances the dish nicely.

We enjoyed the remaining lau lau as a main course for a few days (with the extra bits of baked sweet potato!) It is a bit of a project to make this dish, so I recommend making a lot for leftovers. Or, this is a great dish to serve a big crowd. Perfect for a summer backyard luau!

Chicken Lau Lau on Purple Sweet Potatoes with Taro Chips

9 chicken thighs, skin removed, trimmed of excess fat

About 18 fresh taro leaves

About 18 ti leaves or 2 large banana leaves

Hawaiian sea salt

2 large purple sweet potatoes (I used Okinawan sweet potatoes)

Olive oil

Taro chips

Preheat oven to 350 F.

Set aside either a large pot with a lid, or a large casserole dish with two layers of aluminum foil to cover.

Salt the chicken liberally, and rub the salt into the meat with your fingers.

Remove the tough stems from the taro leaves. If using ti leaves, remove the tough stems. If using banana leaves, cut into manageable pieces, approximately 8 or 9 inches in length.

Nestle 2 taro leaves together. Place 1 chicken thigh in the middle of the leaves. Wrap it into a bundle so the chicken is completely covered by the leaves.

Then wrap the taro bundle in the ti or banana leaves so it is completely covered. Either tie the bundles with kitchen twine (or traditionally, the stem of the ti leaf) or make sure the last fold is on the bottom so they stay closed while cooking.

Place the bundles in the prepared pot or dish. Bake for approximately 3 1/2 hours, or until the chicken falls off the bone and shreds easily.

The ti and banana leaves are not edible, so remove before serving.

Shred two or three bundles of chicken for the appetizers. Reserve the remaining lau lau for an easy weeknight main course.

Turn up your oven to 400 F.

Prepare two baking sheets with parchment paper.

Cut 2 large purple sweet potatoes into approximately 1/3-inch slices. Then cut the slices into rectangles.

Toss the rectangles (and the extra bits) in olive oil so every side is well coated. Sprinkle with sea salt, and toss to evenly coat. Arrange the potatoes on the baking sheets in a single layer.

Bake for about 10 minutes, turn the potatoes over, and continue to bake until fork tender.

To serve, top the potato squares with some shredded lau lau chicken. Top each with a piece of taro chip for garnish.

Beachside Snack ~ Crunchy Roasted Chickpeas with Hawaiian Sea Salt

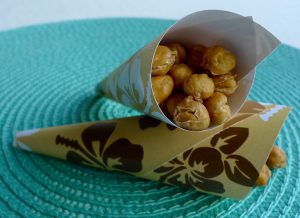
I recently picked up a few bags of crunchy roasted chickpeas at the grocery store, and I discovered a delightful snack! I wondered if I could make them in my own kitchen with canned chickpeas, since the canned variety is much easier for me to find at my local store. Happily the answer is yes! Now they are one of my new favorite summertime snacks, perfect for the beach. They are so simple, but so amazingly crunchy and delicious. They are easy to pack in your beach bag, or you can dress them up for a summer party with cute paper cones made of scrapbook paper.

I have tried several variations of this snack. They are wonderful simply seasoned with salt, but for extra flavor, add a dash of pimentón and cumin with just a hint of cayenne. The sky is the limit on the flavors you can create.

Crunchy Roasted Chickpeas with Hawaiian Sea Salt

1 15-ounce can of chickpeas with no salt added (I used Eden Organic Garbanzo Beans)

Approximately 1 1/2 tablespoons olive oil

Sea salt, ground, to taste

Spices such as pimentón, cumin, or cayenne, to taste (optional)

Make sure your oven rack is in the middle. Preheat your oven to 350 F.

Drain the chickpeas and rinse well. Then spin them in a salad spinner to get off the excess moisture. Gently roll the chickpeas between two layers of paper towels to make sure they are very dry.

In a medium bowl, toss the chickpeas with the oil, salt, and spices (if using), until evenly coated.

Spread the chickpeas onto a rimmed baking sheet, making sure they are in a single layer.

Bake for 35 minutes, tossing once midway through. Then turn off the oven, but leave the chickpeas in for another hour until they are dry and crunchy.

Cool completely. Store in an airtight container.

Easter Eggs ~ Pickled Rainbow Deviled Eggs

Happy Easter!

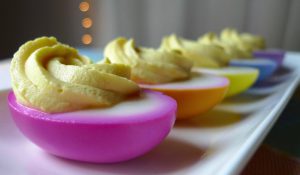
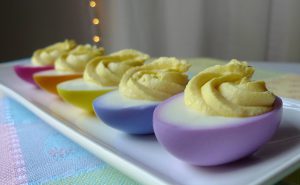
My mom makes pickled eggs with beets for Easter, just the way my grandma used to make. I think it’s an old Pennsylvania Dutch tradition that made its way into our family. I decided to expand on our tradition this year by dying my eggs pink…and yellow, orange, blue, and purple, and I was delighted with all of the bright colors, which were, amazingly, totally natural! 🙂

After I dyed the eggs, I made them into deviled eggs. Use your favorite deviled egg recipe. I like to use Greek yogurt in mine, so between the pickling and the filling, they have a bit of a tang. These deviled eggs are perfect for an Easter afternoon snack—if they make it that long. 😉

Pickled Rainbow Deviled Eggs

(Inspired by Food52)

For the pickled eggs:

3/4 cup white-wine vinegar

3/4 cup water

1/2 teaspoon kosher salt

3 hard-boiled eggs, peeled (for all 5 colors, use 15 whole eggs)

(Each coloring recipe below is for 1 batch of the basic pickling blend above. To make all 5 colors, make the basic pickling blend in 5 separate batches.)

For pink:

1 small red beet, roasted, peeled, and cut into large pieces

For yellow:

1/2 tablespoon ground dried turmeric

For orange:

1/2 tablespoon ground dried turmeric

1 small piece (the equivalent of approximately 1 1/2 tablespoons) roasted and peeled red beet

For blue:

1/4 small red cabbage, thinly sliced

1 1/2 teaspoons baking soda

For purple:

1/4 small red cabbage, thinly sliced

1 1/8 teaspoons baking soda

Divide the eggs into five glass containers that are big enough for three eggs and one batch of the pickling liquid.

In a small saucepan, bring one batch of vinegar, water, and salt to a simmer. Whisk the mixture to ensure the salt fully dissolves. Then, turn off the heat and add the coloring of your choice.

Pour the colored pickling blend over the top of three eggs, making sure they are fully submerged. Repeat with the remaining four colors.

Refrigerate the submerged eggs until they are the color you desire. I left mine in the pickling blend for a few hours, stirring every hour or so, to ensure they colored evenly. (I found that the pink, orange, and yellow took less time to reach the color I wanted than the blue and purple, so I left the latter colored eggs in the pickling blend longer.) The eggs will also become more pickled with time.

If you make all 5 colors, you’ll end up with 15 whole eggs or 30 deviled egg halves.

Deviled eggs:

Prepared pickled eggs

5 ounces nonfat plain Greek yogurt

2 teaspoons Dijon mustard

2 tablespoons mayonnaise

Salt to taste

Cut each egg in half and remove the yolks.

In a medium bowl, mash the yolks with a fork. Add the yogurt, mustard, mayonnaise, and salt, and mix until the filling is well incorporated and smooth.

Scoop the filling into a piping bag fitted with a star tip, and then, pipe the filling into each egg white half.

Iced Under ~ Lobster Fra Diavolo in Angel Hair Pasta Cups

I just finished a wonderful cozy mystery set in the midst of a frigid New England winter called Iced Under. It is part of a delightful Maine Clambake series from Barbara Ross. I think this latest installment was my favorite of them all! I love how it combines a family mystery with some real New England history. I would highly recommend it if you are looking for a cozy winter book. 🙂

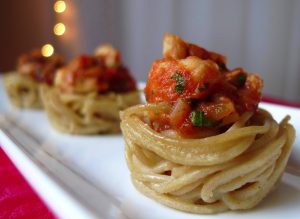
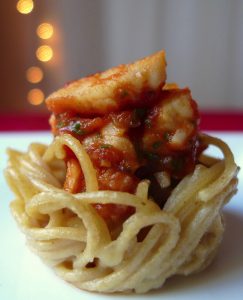
In the back of each Maine Clambake mystery, there is a recipe for a lobster dish. This one happened to have a lobster fra diavolo recipe, which combines lobster and other shellfish with a spicy tomato sauce and pasta. I decided to transform the dish from a main course into hors d’oeuvres that can be eaten in one bite. It’s a perfect snack to enjoy while you read!Lobster Fra Diavolo in Angel Hair Pasta Cups

Makes about 24 hors d’oeuvres

For the cups:

Approximately 4 ounces whole-wheat angel hair pasta, broken in half

1 cup Parmesan cheese, finely grated

1 egg, beaten

For the filling:

1 tablespoon high heat cooking oil

1 small shallot, minced

Red pepper flakes, to taste

1 garlic clove, minced

1/4 teaspoon dried oregano

1/2 cup dry white wine

3/4 cup crushed canned tomatoes (I used San Marzano)

Salt, to taste

Freshly ground black pepper, to taste

Approximately 8 ounces precooked lobster meat, cut into a small dice

About 1 tablespoon Italian flat leaf parsley, minced

About 1 tablespoon fresh basil, cut into thin ribbons

For the cups:

Preheat oven to 375 F. Spray a mini muffin pan with cooking spray.

Cook the pasta according to the package instructions. Aim for a softer texture rather than a firmer texture, since they will dry out slightly in the oven.

Drain the pasta. Toss with cheese and egg until all of the strands of pasta are well coated. Divide the pasta between 24 mini muffin cups. Arrange the pasta strands in the muffin cups so they cover the bottom of each and form cuplike shapes.

Bake for about 7 minutes, or until the egg is set.

Cool slightly, and then remove the pasta cups carefully from the pan.

These can be made the day ahead and refrigerated in an airtight container. Gently warm the cups for a few seconds in the microwave before filling and serving.

For the filling:

Preheat a medium sauté pan over medium high heat. Add the oil, and allow it get hot and shimmering. Then add the shallot, and cook until translucent. Next, add the red pepper flakes, garlic, and oregano. Cook until just fragrant, about 30 seconds. Add the wine, and bring to a boil. Scrape any fond from the bottom of the pan. Then add the tomatoes. Cook until the mixture reduces and thickens to your liking. Season with salt and black pepper.

Add the lobster meat to the tomato mixture, and cook until it is just heated through.

Turn off the heat, and stir in the parsley and basil.

Spoon a little of the lobster/tomato mixture into each pasta cup. Serve immediately.

Cozy Autumn Treat ~ Pumpkin Spice Latte Muffins

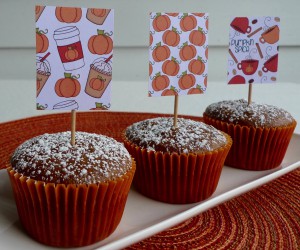
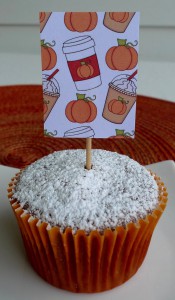
Pumpkin Spiced Latte MuffinsNothing says autumn in Seattle more to me than a warm pumpkin spice latte. I got my first cup of the season and sipped it by the lake under the colorful autumn leaves. Ahh…

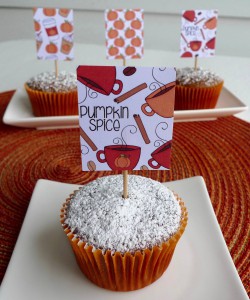
To recreate the flavors at home, I made a batch of pumpkin spice latte muffins. 🙂 They are filled with a good bit of pumpkin puree, warm spices, and a generous amount of espresso. A perfect breakfast treat to start any autumn day.

The cute (and free!) printables are from a website called Weigh to Maintain. They were actually meant for another purpose, but I thought they were a perfect way to dress up these little muffins.Pumpkin Spiced Latte MuffinsPumpkin Spice Latte Muffins

Makes about 16 muffins

1 3/4 cups whole-wheat pastry flour

2 teaspoons baking powder

5 teaspoons instant espresso powder

1 1/2 teaspoons pumpkin pie spice

Pinch of kosher salt

2 large eggs

1 cup pumpkin puree

1/4 cup light olive oil

1/2 cup granulated sugar

1/2 cup lightly packed light brown sugar

2/3 cup skim milk

1/2 teaspoon vanilla

Preheat your oven to 350 F.

Line a muffin tin with paper liners.

In a large bowl, whisk all of the dry ingredients, from the flour through the salt.

In a medium bowl, whisk all of the wet ingredients, from the eggs to the vanilla.

Then add the wet mixture to the dry mixture, and whisk until just combined. Take care not to mix the batter too much at this point.

Fill your paper liners about 3/4 full. Bake the muffins for about 22 minutes, or until a toothpick inserted into one of the muffins comes out clean.Pumpkin Spiced Latte Muffins

Savoring the end of summer ~ Corn Dog Muffins

Corn Dog MuffinsI hope you have enjoyed your summer so far! For me, it has been a summer filled with time at the beach, several good books, and visits to local festivals. But summer isn’t over yet. 🙂 I am trying to savor the last of the warm weather before it’s time to enjoy autumn’s pleasures!

Before August comes to a close, I wanted to share one more summery recipe. These little corn dog mini muffins were inspired by the fun food I see at festivals and carnivals. Dip these little muffins into ketchup for the full corn dog experience.

The sweet little summer printables on top of my muffins are from a blog called Glued To My Crafts. So adorable! They are free to print for personal use, so maybe you can incorporate them into your end-of-summer celebrations. 🙂

Corn Dog Muffins

1 cup all-purpose flour

1 cup finely ground cornmeal

1/4 cup granulated sugar

3/4 teaspoon baking soda

Pinch of salt

1 1/4 cup low-fat buttermilk

3 tablespoons light olive oil

1 large egg

3 vegetarian frankfurters cut into approximately 1/4-inch pieces (I used frankfurters from Field Roast)

Preheat your oven to 350 F. Line a mini muffin tin with paper liners. Spray the inside of the liners with cooking spray.

In a large bowl, whisk together the dry ingredients (from the flour to the salt.)

In a medium bowl, whisk together the wet ingredients (from the buttermilk to the egg.)

Add the wet ingredients to the dry, and whisk until just combined. Add the chopped frankfurters, and stir until they are coated in batter.

Fill the muffin liners about 3/4 of the way full.

Bake for about 13 minutes, or until the muffins spring back to the touch.Corn Dog Muffins

A Lowcountry Wedding ~ Pickled Shrimp

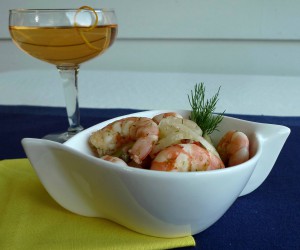
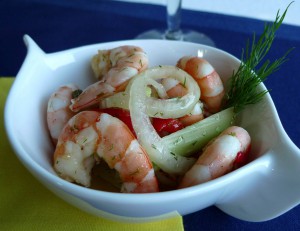
Pickled ShrimpI just finished a delightful summer book called A Lowcountry Wedding by Mary Alice Monroe. It was the fourth book in a series I have enjoyed over the past couple of summers, and the finale was just as entertaining and satisfying as the first three novels! As in the first three, the story is set on picturesque Sullivan’s Island in South Carolina. There the characters I have come to know and love continue their journey, (and as the title implies, it’s time for a wedding or two!) If you are looking for your next book to read by the beach, I would highly recommend this one. 🙂

Inspired by the story, I made a Southern celebration dinner! I made three of the recipes included in the back of the novel. We had pickled shrimp as an appetizer, and a chicken and shrimp gumbo for the main course. I paired dinner with a cocktail called A Lowcountry Wedding, which combined sparkling wine with peach moonshine made by Firefly Distillery in South Carolina. All three recipes were quite delicious, but I think my favorite was the pickled shrimp. It is a light and easy appetizer that is perfect for summer entertaining. I’ll definitely keep this recipe on hand for future cocktail parties and celebrations.
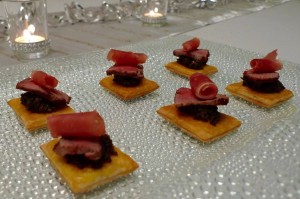
Pickled ShrimpPickled Shrimp

Based on a recipe from A Lowcountry Wedding

1 1/2 quarts water

2 tablespoons Old Bay Seasoning

1 1/2 pounds large, wild-caught shrimp, peeled, deveined

4 tender inner stalks of celery, cut into thin 2-inch strips

1/2 medium sweet onion, such as Vidalia or Walla Walla, thinly sliced

2 ounces jarred sliced pimento, drained

1 1/2 tablespoons capers, drained and rinsed

2 tablespoons fresh dill, minced, plus a couple of sprigs for garnish

3/4 cup light olive oil

1/4 cup plus 2 tablespoons apple cider vinegar

1/4 teaspoon Dijon mustard

1/2 teaspoon kosher salt

1/8 teaspoon freshly ground black pepper

In a large pot, bring the water and the Old Bay to a boil. Stir in the shrimp, cover, and remove from the heat. Let the covered pot sit for about 5 minutes, or until the shrimp are cooked through. Drain the shrimp, but do not rinse.

In a large bowl, mix the shrimp, celery, onion, pimento, capers, and minced dill. In a separate bowl, whisk together the oil, vinegar, mustard, salt, and pepper. Pour the oil mixture over the shrimp mixture and toss to coat.

Cover and refrigerate overnight.

Before serving, drain the excess liquid and garnish with sprigs of dill.Lowcountry Wedding

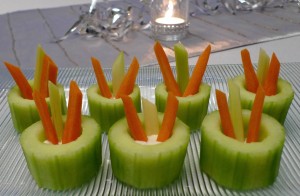
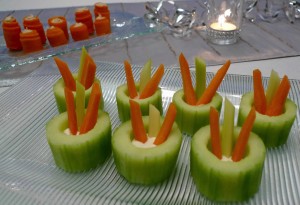
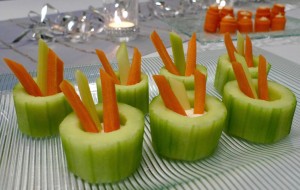
Happy New Year ~ Cucumber Cups with Crudités and Dip

Cucumber Cups with Crudités and DipHappy New Year! I hope you had a fun and festive celebration to ring in the New Year, whether it was big or small. 🙂

In addition to the beef Wellington canapés, I also made these cute little cucumber cups yesterday. This is a way to dress up plain vegetables so they are ready for a party! 🙂Cucumber Cups with Crudités and DipCucumber Cups with Crudités and Dip

2 large English cucumbers, peeled and cut into 1-inch rounds

Bottled ranch dressing (or any dip of your choice)

2 medium carrots, peeled and cut into thin sticks

2 medium celery stalks, cut into thin sticks

With a small melon baller, scoop out most of the seeds from the cucumbers. Make sure not to scoop all the way to the bottom so the dressing can be contained in the cup.

Add about a ½ teaspoon of dressing to the bottom of each cup. It won’t look like a lot, but when the carrots and celery are added, the dressing will rise up the sides a little.

Add as many of the carrots and celery sticks as you like to each cup.

PS. The appetizer in the background was another fun way to dress up carrots for the party. 🙂 I simply peeled a large carrot lengthwise so I ended up with long strips. Then I piped a small bit of store-bought hummus along each strip and rolled them up. The hummus acted as the glue. The finishing touch was a little more hummus piped inside the middle, and a thin round slice of carrot on the bottom as the base.Cucumber Cups with Crudités and Dip

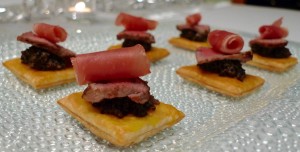
New Year’s Eve Party! ~ Beef Wellington Canapés

Beef Wellington CanapésAs 2015 is coming to a close, I made these mini beef Wellington canapés as my last hurrah of the year. 🙂 These little Wellingtons had all of the flavors of their full-sized counterpart – puff pastry, mushrooms, beef tenderloin, and prosciutto. They were fun and festive, and oh so cute!Beef Wellington CanapésBeef Wellington Canapés

6 ounces crimini mushrooms

1 sprig thyme

1 splash dry white wine

1 sheet puff pastry, refrigerated

1 egg, beaten

4 ounces beef tenderloin

Approximately 5 pieces thinly sliced prosciutto

Salt and pepper, to taste

In a food processor, pulse the mushrooms until they are approximately the size of coarse breadcrumbs. In a medium sauté pan over medium heat, cook the mushrooms (without oil) with the sprig of thyme until the mushrooms are dry. Add a splash of white wine, and cook until the pan is dry once again. Remove the thyme. Season to taste with salt and pepper. Set aside.

Preheat oven to 400 F. Line a sheet pan with parchment paper. Roll out the puff pastry on a floured work surface until it is about double in height and width. With a pizza wheel or pasta roller, cut the pastry into small squares. Place the squares on the prepared sheet pan. Cover the pastry with another piece of parchment, and cover the sheet pan with another sheet pan so they are nesting. This will ensure that your puff pastry won’t puff too much. Bake for 8 minutes. Remove the top pan and top parchment paper. Let the pastry cool enough so you can handle it, and then lightly brush the beaten egg on each piece. Bake for 3 minutes more, or until shiny and golden.

Season the steak with salt and pepper. Sear until the meat is done to your liking. After it has rested for 5 minutes, slice as thinly as possible.

To assemble, scoop a small spoonful of the mushroom mixture on the top of each piece of puff pastry. Top with a thin slice of steak. Roll a small piece of prosciutto into a tiny tube, and place it on top of the steak. Serve immediately.Beef Wellington Canapés

Healthy Holiday Hors d’Oeuvre ~ Cauliflower Flatbread

Cauliflower FlatbreadCauliflower is usually a part of my holiday table, whether the occasion is Thanksgiving or Easter. It is so versatile that it can be made into anything from a mash that rivals mashed potatoes (like I made last St. Patrick’s Day) to an appetizer that is very much like a flatbread! It really is a pretty amazing vegetable for which I am thankful today. 🙂

This unique spin on flatbread can be used in any way traditional flatbread is served — with an olive tapenade, with melted cheese, or even with your favorite pizza toppings. I’d recommend it as an appetizer that is out of the ordinary to start off your Thanksgiving meal!

Cauliflower Flatbread

1 ounce Parmesan cheese, cut into approximately 1/2 inch pieces

1 large head of cauliflower, cut into approximately 1 inch pieces

3 eggs, lightly beaten

2 teaspoons dried oregano

Salt and pepper to taste

Preheat oven to 400 F. Line a rimmed baking sheet with parchment paper.

In a food processor, grate the cheese until it is the size of tiny pebbles. Transfer the cheese to a large bowl. In the same processor, (no need to clean the bowl), process the cauliflower in two batches until you have fine pieces that look a little like rice. Transfer the cauliflower to a clean dishtowel. Squeeze as much excess moisture as you can out of the cauliflower. Discard the liquid. Add the cauliflower to the bowl with the cheese. Then add the eggs, oregano, salt, and pepper to the bowl. Combine until all of the ingredients are well incorporated.

On the prepared baking sheet, spread the mixture into a thin layer, about 1/8 inch thick. Bake for about 45 minutes, turning the pan half way through, until the cauliflower is golden and crisp on the edges.

Cut with a pizza wheel and serve immediately.