National Candy Corn Day ~ Candy Corn Fruit Parfait

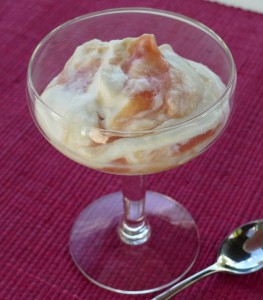
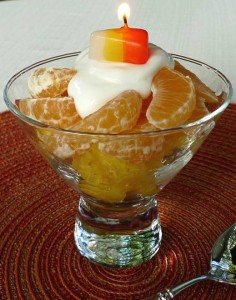
Candy Corn Fruit ParfaitThe Halloween countdown is on, and it also happens to be National Candy Corn Day today! 🙂 Here’s a sweet little idea to celebrate – Layer pineapple and oranges with vanilla nonfat Greek yogurt on top.

I hope you have a fun and safe kickoff to the Halloween weekend!

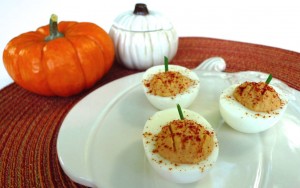
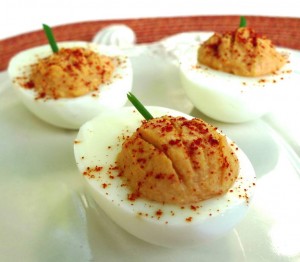
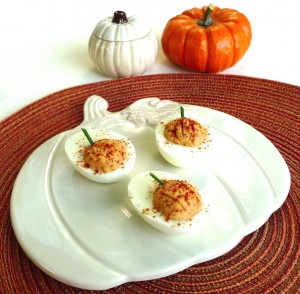
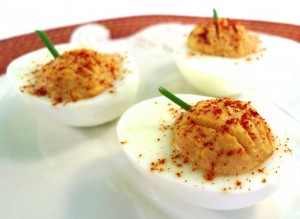
Everything Pumpkin! ~ Pumpkin Deviled Eggs

Pumpkin Deviled EggsI absolutely love anything and everything pumpkin at this time of the year! (Almost as much as these little squirrels. 😉 ) I love pumpkin muffins, pumpkin custard, pumpkin curry, and now, pumpkin deviled eggs! Mind you, they aren’t pumpkin flavored eggs. That might be a little too much, even for me. 😉 They would be perfect for Halloween or even Thanksgiving.Pumpkin Deviled EggsYou can use your favorite classic deviled egg recipe, or use my lightened version below. The extra paprika mixed in is what gives them their pumpkin color.Pumpkin Deviled EggsPumpkin Deviled Eggs

8 hard boiled eggs, cooled, sliced in half, yolks removed, 1/2 of the yolks reserved

3 tablespoons nonfat plain Greek yogurt

1 teaspoon Dijon mustard

1 tablespoon mayonnaise

1/2 teaspoon paprika, plus more for garnish

Salt to taste

1 or 2 fresh chives, cut into one-inch lengths

In a small bowl, stir together the yolks, yogurt, mustard, mayonnaise, paprika, and salt until smooth. With a small spoon, fill the holes in the egg whites with the yolk mixture. (FYI, you will have more whites than yolk mixture if you mound the filling as I did. But no worries, whites are a great snack!) Smooth the mixture with your finger. With the back of a butter knife, make 4 small little lines in each yolk filling to imitate the lines of a pumpkin. Place the cut chives into the yolks to make a “stem.” Sprinkle extra paprika over the top as a garnish.Pumpkin Deviled Eggs

It’s Oktoberfest! ~ Beer, Sauerkraut, and Cheese Muffins

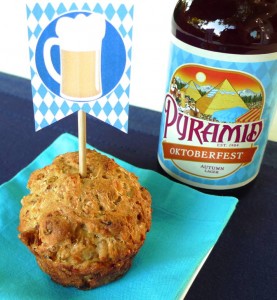
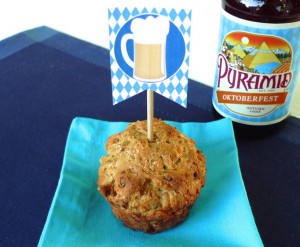
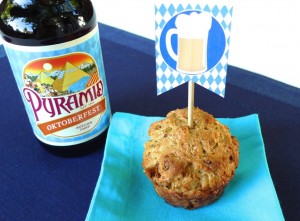
Oktoberfest MuffinsHappy Oktoberfest!

Even though I am typically a wine kind of girl, when Oktoberfest rolls around, I love to try the autumn beer at the market. Many of our local breweries make special beer just for the season. I picked up one from Pyramid Brewery, and instead of just drinking it, I decided to use it in some muffins. 🙂 Then I took these muffins one step further…I wanted to add one more Oktoberfest flavor, so I added a little sauerkraut! I know it sounds a little odd, but it actually added a lot of moisture and flavor to the muffins without making them taste like pickles. These go well with chili, or they are great just as a snack (with a little beer of course! 😉 )

Oktoberfest MuffinsBeer, Sauerkraut, and Cheese Muffins

Makes 12

1 tablespoon olive oil

1/2 yellow onion, minced

3 cups ivory whole-wheat flour

1 tablespoon granulated sugar

2 teaspoons baking powder

1 teaspoon kosher salt

1/4 teaspoon freshly ground black pepper

4 ounces sharp cheddar cheese, shredded

1/2 cup sauerkraut, squeezed to remove excess brine and finely chopped

12 ounces Oktoberfest beer

1/4 cup skim milk

Cooking spray

Preheat your oven to 375.

Heat a small sauté pan over medium heat. Add the oil and onion, and cook until the onion is slightly caramelized. Set aside.

In a medium bowl, whisk together the flour, sugar, baking powder, salt, and pepper. Then stir in the caramelized onions, cheese, sauerkraut, beer, and milk. You may need to work it with your hands to make sure everything is well combined because the batter is very thick.

Spray a muffin tin with cooking spray. Divide the batter evenly into 12 muffins.

Bake for about 35 minutes, until cooked through but still moist.

The cute little flags came from PreppingParties.com. I actually used the artwork for the party banner, but printed it very small to make muffin flags instead. There are a lot of other sweet Oktoberfest printables in the same place that you might want to check out this season. 🙂

Prost!Oktoberfest Muffins


Happy Fourth of July ~ Part 3 ~ Strawberry Cheesecake Tart (Updated!)

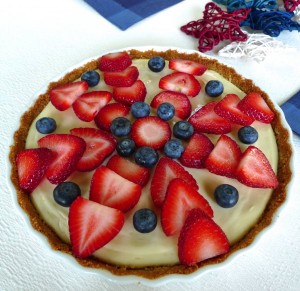
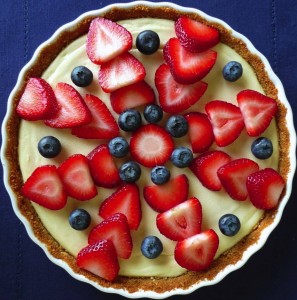
Cheesecake TartThe grand finale of our Fourth of July dinner was my hubby’s favorite cheesecake tart! It was a special request. 😉

Since I am always trying to improve and learn, I made a couple of small tweaks to the original recipe. Opting for an all natural ingredient, I exchanged the nonfat sour cream with nonfat Greek yogurt. I also omitted the sugar in the crust since I try to cut back on sugar where I can, and the graham crackers are sweet enough on their own.

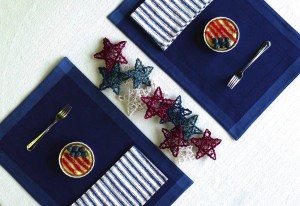
You can make a few small cheesecakes, or one big one! For the tiny ones, I piped seedless strawberry jam to make the stripes, and placed a few little blueberries in the corner for the stars. So cute! I got the idea from MyRecipes.com. 🙂 For the big one, I topped it with fresh summer strawberries arranged in a pretty pattern. I also added a few blueberries this time around to make it a little more patriotic.

Cheesecake TartStrawberry Cheesecake Tart

Based on a recipe from Martha Stewart

6 full graham cracker sheets

1/3 cup almonds

4 tablespoons unsalted melted butter, or just enough until the crust is moistened

2 8-oz bars of Neufchatel cream cheese

1/2 cup nonfat Greek yogurt

1/2 cup sugar

1 egg

1/2 teaspoon vanilla extract

Pinch of salt

Pint of fresh strawberries, or blueberries, or whatever you’d like to use for your topping

Preheat your oven to 350 degrees.

In a food processor, grind the graham crackers and almonds until they are finely ground. Add the butter slowly, and process until moistened. (You may not need the full 4 tablespoons.) Transfer to a 9-inch tart pan or three 3-inch tart pans. Press the mixture firmly into the pan(s) and up the sides. Freeze for 15 minutes.

If you have a second food processor bowl, I’d recommend using it now. Otherwise, just clean your bowl and blade very well. Then process the cream cheese, yogurt, sugar, egg, vanilla, and salt until the mixture is smooth.

Place your tart pan on a rimmed baking sheet and fill with the cheesecake mixture.

Bake until filling is set, about 30 to 35 minutes for the large tart. For the smaller tarts, check the progress at about 20 minutes to ensure you don’t overbake.

Cool completely and decorate as you wish!

Cheesecake Tarts

Happy Fourth of July ~ Part 1 ~ Homemade Dill Pickles

Dill PicklesI hope you had a lovely Fourth of July weekend!

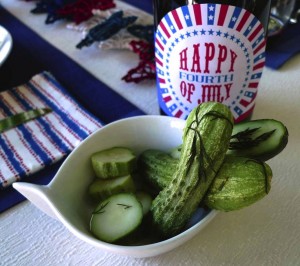
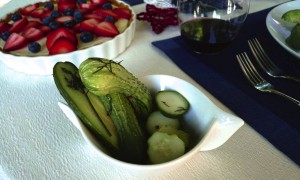
To celebrate the occasion this year, I made fresh dill pickles from the farmers’ market, trout burgers with a tarragon mayonnaise, and my hubby’s favorite summer strawberry cheesecake tart. I’ll share all three recipes since we really enjoyed them all, starting with the pickles. 🙂

I stumbled upon a farmers’ market last week where I saw some beautiful Kirby cucumbers that I couldn’t resist, along with a big bunch of fresh dill. (I must admit, I’m one of those people who gets much more excited about beautiful cucumbers and herbs than I do about beautiful shoes and purses. 😉 ) For a couple of dollars, I knew I could make something fresh and delicious with my discoveries.

I used a dill pickle recipe from Food and Wine magazine with only a few small changes. I reduced the amount of sugar by half and added some whole peppercorns for added seasoning. I also omitted the dill seeds and used more fresh dill than the recipe called for (since I had a huge bunch). These pickles were so flavorful and delicious! I have a feeling I’ll be making this recipe again and again. Maybe I’ll try radishes or green beans next time? I can see what my local farmers’ market has to play with next week!

Dill Pickles

Based on a recipe from Food and Wine magazine

1 1/2 cups distilled white vinegar

2 tablespoons granulated sugar

4 teaspoons kosher salt

1 teaspoon mustard seeds

1 teaspoon coriander seeds

1 teaspoon whole peppercorns

2 cups hot water

2 pounds Kirby cucumbers, cut in half lengthwise or sliced 1/2 inch thick

1 1/2 cups fresh dill, coarsely chopped

3 garlic cloves, coarsely chopped

In a large, heatproof measuring cup, combine the vinegar, sugar, salt, mustard seeds, coriander seeds, and peppercorns with the hot water and stir until the sugar and salt are dissolved. Let the brine cool.

In a large bowl, toss the cucumbers with the dill and garlic. Pour the brine over the cucumbers and turn to coat. Place a small plate over the cucumbers to keep them submerged, then cover the bowl with plastic wrap. Refrigerate the pickles overnight, stirring once or twice. Serve cold.

The dill pickles can be refrigerated in an airtight container for up to 1 week.

Stay tuned for the trout burger recipe next! 🙂

Dill Pickles

One more culinary stop in Asia ~ Vietnamese Baby Clams with Sesame Rice Crackers

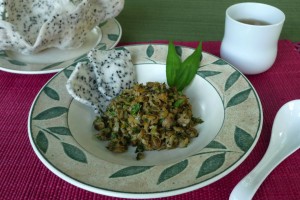
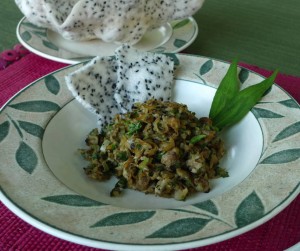
Baby Clams with Rice CrackersAfter my virtual stop in South Korea to try their famous bibimbap, I decided to try a Vietnamese dish on my next stop. After all, it’s only a 4 ½ hour plane ride from Seoul to Da Nang, so I’ll make a quick culinary visit, just long enough for an appetizer in Vietnam. 😉

This is a dish I order over and over again at one of my favorite Vietnamese restaurants, so I decided to figure out how to make it at home! Turns out, it is really easy! It just requires two special ingredients from the Asian grocery store. The first is a Vietnamese herb that is sort of like mint or cilantro called rau ram. The pretty little leaves are a little peppery and delicious. I also used black sesame rice crackers on the side to scoop up the clams. They puff up when they are cooked, which is so much fun to watch!

Baby Clams with Rice Crackers

Inspired by a recipe from Danang Cuisine

1 tablespoon safflower oil (or other high heat cooking oil)

2 small shallots, finely sliced

1 teaspoon lemongrass, minced

1 teaspoon fresh chili pepper, seeds and ribs removed, minced (I like jalapeño or serrano)

1 garlic clove, minced

5 oz canned baby clams or chopped clams, drained and rinsed (Just try to find an all-natural brand, without any added preservatives)

4 tablespoons (approximately) of rau ram, roughly chopped (Fresh basil also works if you can’t find rau ram)

1/2 teaspoon fish sauce

1/2 teaspoon soy sauce

Freshly ground black pepper to taste

1-2 sesame rice crackers

Preheat a wok or nonstick pan. Add oil. When the oil is shimmering and hot, add the shallots, and cook until caramelized. Add the lemongrass and chili pepper, and cook until fragrant. Add the garlic and cook until just fragrant, about 15 seconds. Add the clams. Toss until warmed through. Turn off the heat and add rau ram, fish sauce, soy sauce, and black pepper. Toss and serve.

Take one rice cracker and microwave for one minute until puffy. Break into pieces. Serve as a “spoon” with the clams.

Baby Clams with Rice Crackers

Easter Treats ~ Simnel Cupcakes

Simnel CupcakesHappy Easter!

To celebrate the holiday this year, I made a batch of simnel cupcakes. 🙂

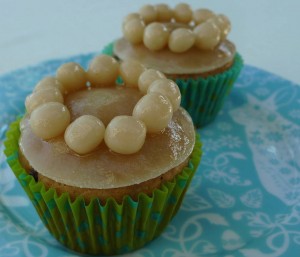
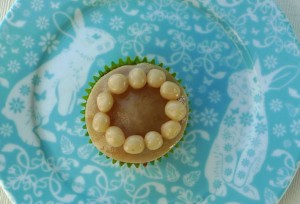
Simnel cake is a British confection eaten around Easter time. It is a type of fruit cake with some warm holiday spices mixed in, but I think the most interesting part about this dish is the decoration. These cakes are decorated with a ring of 11 small balls of marzipan symbolizing 11 Apostles, with the exception of Judas. I love dishes such as this one that combine culture, history, and deliciousness! 😉
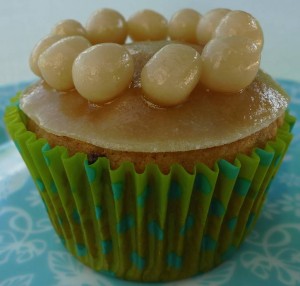
Simnel CupcakesI only decorated a few of the cupcakes, and I froze the rest of them without any decoration to keep them fresh for later. (By the way, microwave one frozen cupcake for 30 seconds, and it tastes like it came right out of the oven. I like to eat them plain as a snack.) I ended up using one small 150 gram package of marzipan because I only decorated a few of the cakes. This amount will be enough to decorate about 8 cupcakes, depending on how thin you roll it. If you would like to decorate the whole batch, you will probably need three packages to be on the safe side. Marzipan keeps well in the refrigerator for later if you don’t use all of it. I also only used about ¼ cup of apricot jam. Again, if you plan to decorate all of your cupcakes, you will probably need more.
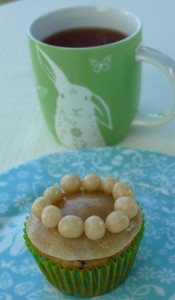
Simnel CupcakesSimnel Cupcakes

Makes 20

¾ cup light olive oil

½ cup plain nonfat yogurt

6 tablespoons skim milk

½ cup fine or caster sugar

3 eggs

2 ¼ cups whole wheat pastry flour

3 teaspoons baking powder

Pinch of salt

1 ¼ teaspoons mixed spice or pumpkin pie spice

½ teaspoon freshly grated nutmeg

1 ½ cups mixed dry fruit (finely chopped apricots, currants, etc.)

Marzipan (one 150 g package will cover and decorate about 8 cupcakes)

Powdered sugar, for dusting work surface

Apricot jam (¼ cup will be enough for about 8 cupcakes)

Preheat oven to 350. Line 2 cupcake tins with 20 paper liners.

Combine oil, yogurt, milk, sugar, and eggs in a medium bowl. Whisk to combine. In a separate large bowl, whisk together the flour, baking powder, salt, and spices. Add the wet ingredients to the dry, and stir until just combined. Add the fruit, and mix until evenly distributed.

Fill each baking cup about ½ full. Bake for about 25 minutes, or until a toothpick inserted comes out clean.

In the meantime heat jam until it is more viscous, and sieve it through a fine mesh strainer. Reserve the smooth portion of the jam, and discard the solids.

On a clean and smooth surface, sprinkle some powdered sugar to keep the marzipan from sticking. Roll out the marzipan with a rolling pin until it is very thin. Cut out rounds with a round cookie cutter that is approximately the size of the top of a cupcake. With remaining bits of marzipan, make small, evenly sized balls.

When the cupcakes are cooked and cooled, brush a small amount of the jam over the top of each one that you would like to decorate. Place a round of marzipan over the jam, and press gently to adhere to the cake. Lightly brush the top of the marzipan with jam, and also lightly coat 11 little balls with jam. Stick the balls in a circle on top of each cupcake.
Simnel Cupcakes

First Date Anniversary ~ Hot Date Muffins

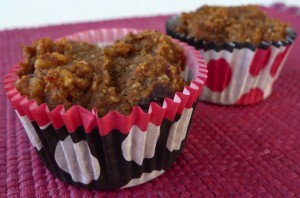
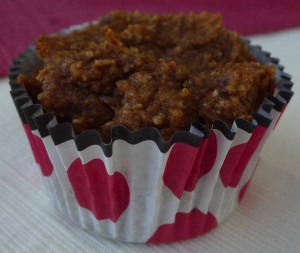
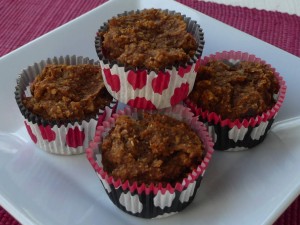
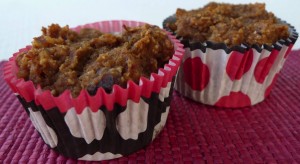
Date and Banana Muffins17 years ago today, my hubby and I went on our first date together. To celebrate this little anniversary, I thought I would bake him some Hot Date Muffins! 😉

Date and Banana MuffinsI wanted to try making a muffin that was 100% fruit sweetened, with no refined sugar. These are sweetened three ways, with dates, applesauce, and a ripe banana. They are also vegan, gluten free, and almost fat free. And I should add, they are quite delicious, which is probably the most important point of all! 😉 If a recipe is super healthy but not very tasty, it doesn’t make the cut for me. My hubby and I both thought these were pleasantly surprising. (Kind of like our first date! 😉 ) They are concentrated moist sweet morsels, perfect for a quick and hearty breakfast or snack.

Date and Banana MuffinsHot Date Muffins

1 ¾ cups oat flour

2 ½ teaspoons baking powder

1 ½ teaspoons cinnamon

½ teaspoon ground ginger

Pinch of salt

1 ¼ cups Medjool dates, pitted

1 cup applesauce

1 very ripe banana

1 ½ teaspoons vanilla extract

¾ cup chopped walnuts (optional)

Preheat oven to 325. Line a muffin tin with 12 paper liners.

In a large bowl, whisk together the oat flour, baking powder, cinnamon, ginger, and salt.

In a food processor, add the dates, applesauce, banana, and vanilla. Process until smooth.

Add the wet ingredients to the dry ingredients, and stir until well combined. Add chopped walnuts if you are using them, and stir to distribute evenly.

Fill 12 muffin cups evenly with batter. Bake for about 30 minutes, or until a wooden skewer inserted in the middle of one comes out clean.

Let cool completely, or they will stick to the paper liners.

Date and Banana Muffins

April Fool’s Day ~ Rhubarb Fool

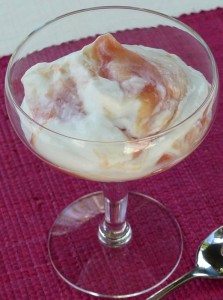
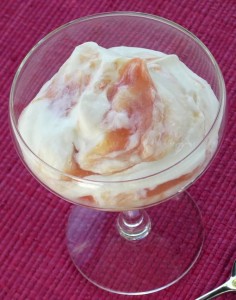
Rhubarb FoolWhat’s the perfect way to celebrate April Fool’s Day? With an English fool, of course! 😉 I couldn’t think of anything more fitting for the occasion. (Except perhaps this. 😉 Love it!)

A fool is a blend of cooked and puréed fruit combined with a creamy base. It is typically made with whipped cream or custard, but I cut down on the fat and calories by combining the cream with nonfat plain Greek yogurt. I also boiled the rhubarb with orange juice to sweeten it without a lot of refined sugar.

Rhubarb FoolRhubarb Fool

½ pound rhubarb, cut into ½ inch pieces

¼ cup fresh orange juice

Zest of ½ an orange

¼ cup sugar

½ cup heavy whipping cream

½ cup nonfat plain Greek yogurt

Place the rhubarb, orange juice, orange zest, and sugar in a small saucepan. Bring to a boil, and simmer until the rhubarb is soft. Strain the excess liquid. Purée the rhubarb in a food processor until smooth. Chill.

Beat the cream until soft peaks form. Whisk in the Greek yogurt. Then stir the cooled rhubarb mixture into the cream mixture, leaving some streaks. Serve immediately.

I hope you have an April Fool’s Day filled with fun and surprising twists and turns!

Rhubarb Fool

Sweets for my sweet ~ Date and Almond Fudge

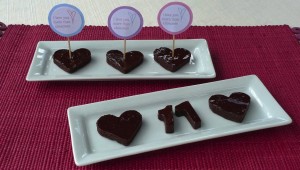
Date and Almond Fudge17 years ago, I met my hubby on this date. We like to celebrate the anniversary every year in some way. 🙂

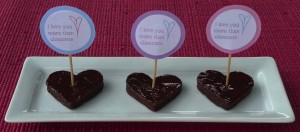
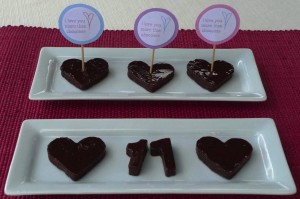
This year I chose to make some healthy, vegan fudge to mark the occasion. The fudge is sweetened completely with dates. It is something to feel good about eating, and they are sweet and chocolaty. Those two benefits rarely go together! 😉

Date and Almond FudgeDate and Almond Fudge

14 ounces Medjool dates (about 2 cups), pitted

½ cup almond butter

¼ cup extra virgin coconut oil

6 tablespoons cocoa powder

½ teaspoon vanilla extract

Line a square 8-inch baking dish with parchment paper, leaving a few inches to overhang on the sides. (These will be your handles to pull the fudge out when it is set.) Combine all of the ingredients in a food processor and blend until smooth. Spread the fudge evenly into the baking dish. Refrigerate until firm, about an hour. Pull the fudge out of the baking dish, and cut into desired shapes.

The little flags came from a website called Honey Bear Lane. They were created for Valentine’s Day, but I thought they were perfect to dress up this fudge. You could also sprinkle it with shredded coconut, sliced almonds, or anything else that strikes your fancy.

Happy anniversary, my sweet!

Date and Almond Fudge

Shrove Tuesday (Pancake Day!) ~ Mini English Pancakes

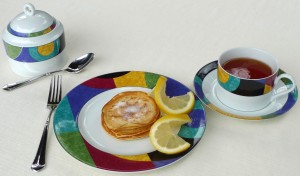
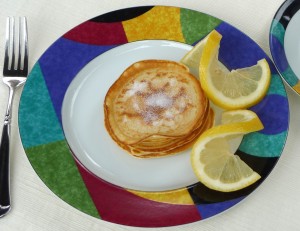
PancakesMardi Gras came on the heels of Valentine’s Day this year, and since I was still in a British mood after our Downton Abbey themed Valentine dinner, I decided to celebrate this day as the British do…with pancakes! In England, what we call Mardi Gras or Fat Tuesday is known as Shrove Tuesday or Pancake Day. They celebrate by eating pancakes, and they even have pancake races! This video of the yearly Parliamentary pancake race from a couple of years ago made me giggle. It gets quite competitive, as the video shows! Ha! This year’s race video featured a pancake-cam, which is also quite hilarious. 😉

In honor of this fun tradition, I made mini pancakes to celebrate Pancake Day. English-style pancakes are much thinner than American pancakes. They are almost like French crêpes. The cakes are traditionally served with a little caster/fine sugar and lemon rather than maple syrup.

I chose to make a basic recipe from BBC Good Food. I replaced the plain flour with whole-wheat pastry flour, and I used fully skim milk rather than partly-skimmed milk as the recipe called for. I also made my cakes mini for an afternoon tea snack, but otherwise followed the recipe fairly closely.

PancakesEnglish Pancakes

Based on a recipe from BBC Good Food

100g whole-wheat pastry flour

2 eggs

300ml skim milk, plus more if needed

1 tbsp light oil such as sunflower or safflower, plus extra for frying

Pinch of salt

Lemon slices, for serving

Caster/fine sugar, for serving

Blending in the flour: Put the flour and a pinch of salt into a large mixing bowl and make a well in the center. Crack the eggs into the middle, and then pour in about 50ml milk and 1 tbsp oil. Start whisking from the center, gradually drawing the flour into the eggs, milk and oil. Once all the flour is incorporated, beat until you have a smooth, thick paste. Add a little more milk if it is too stiff to beat.

Finishing the batter: Add a good splash of milk and whisk to loosen the thick batter. While still whisking, pour in a steady stream of the remaining milk. Continue pouring and whisking until you have a batter that is the consistency of slightly thick single cream.

Getting the right thickness: Heat the pan over a moderate heat, and then wipe it with oiled paper towel. Ladle some batter into the pan, tilting the pan to move the mixture around for a thin and even layer. Leave to cook, undisturbed, for about 30 seconds, or until you see the edges getting a bit dry and golden. If the pan is the right temperature, the pancake should turn golden underneath after about 30 seconds and will be ready to turn.

Flipping pancakes: Hold the pan handle, ease a fish spatula under the pancake, then quickly lift and flip it over. Make sure the pancake is lying flat against the base of the pan with no folds, and then cook for another 30 seconds before turning out onto a warm plate. Continue with the rest of the batter, serving them as you cook or stack onto a plate.

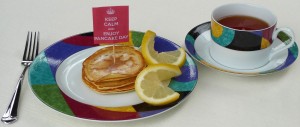
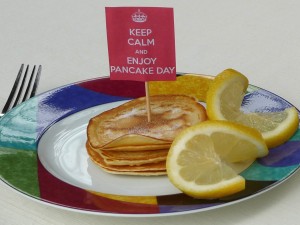
PancakesThe little flag was generated from the Keep Calm-O-Matic website. You can make your own personalized signs based on the classic British “Keep Calm and Carry On” poster. So fun!

Pancakes

Valentine’s Day Treats ~ Chocolate Coconut Truffles

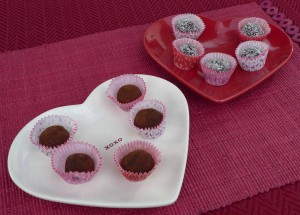
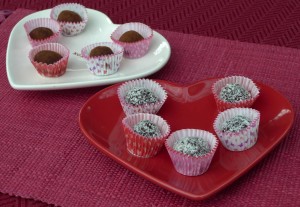
Chocolate Coconut TrufflesHappy Valentine’s Day!

I can’t think of anything that says Valentine’s Day more than chocolate truffles! Traditional truffle recipes are decidedly heavy, made from a combination of chocolate and cream, so I wanted to make something that I would feel better about eating and sharing. These little chocolate coconut truffles fit the order. 🙂 They are a rich treat, but they use ingredients that are good for my Valentine and me. 🙂 I hope you’ll give them a try!

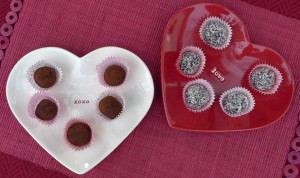
Chocolate Coconut TrufflesI coated my truffles in cocoa powder as the recipe calls for, but I also made some with a coating of unsweetened coconut. The color contrast was really pretty. 🙂 I also used a food processor rather than a high speed blender, which worked very well.

Chocolate Coconut Truffles

Chocolate Coconut Truffles

From Epicurious.com

Makes about 40 truffles

1/2 cup coconut butter/oil, warmed to soften

3/4 cup agave nectar

2 teaspoons vanilla extract

1/4 teaspoon sea salt

1 cup dried shredded coconut

2 1/4 cups cocoa powder, sifted

In a high-speed blender, blend the warmed coconut butter/oil, agave nectar, vanilla, and salt. Add the shredded coconut, 1/2 cup at a time, and blend until smooth.

Transfer the mixture to a bowl and stir in 2 cups of the cocoa powder until thoroughly combined. Place the bowl in the refrigerator for about 10 minutes or more to set slightly.

Place the remaining 1/4 cup cocoa powder onto a small plate. Spoon heaping tablespoons of the chocolate mixture and roll them into balls. Roll these in the cocoa powder. Store the finished truffles in the refrigerator.

Chocolate Coconut Truffles

Go Seahawks! ~ Nacho Kale Chips

Nacho Cheese Kale ChipsHappy Super Bowl Sunday!

To celebrate the Super Bowl, I made a batch of nacho kale chips to have during the game. (Although, they are disappearing quickly, and I may need to make another batch before tomorrow!) Nachos are a popular Super Bowl snack, so I figured a healthier version might be appreciated amid the rich choices of party food. (Plus they are green, which is the right color for my home team! 😉 Go Seahawks!)

Nacho Cheese Kale ChipsI based my chips on a few different recipes, combining the ingredients I liked. The result is something I think I’ll make again and again! They are really nice to have around the house when you want a cheesy, crunchy snack. I hope you’ll give them a try!

Depending on how cheesy you like your chips, you can use either one or two bunches of kale. The chips in the pictures were made using only one bunch, so the nacho coating is relatively thick. Also, any kind of kale will work. I have used curly kale (in the photos) as well as lacinato, and both are delicious!

Nacho Kale Chips

1 or 2 large bunches of kale, rinsed, dried, stalks removed, and torn into chip size pieces

1 ½ cups raw cashews, soaked overnight

1 red bell pepper, seeds and ribs removed, roughly chopped

2 tablespoons fresh lemon juice

¾ cup nutritional yeast

¾ teaspoon kosher salt

Pinch of cayenne (or more if you like spicy chips)

Preheat oven to 200 degrees.

Line several baking sheets with parchment paper. I needed three sheets for one bunch of kale, and six sheets for two bunches.

In a food processor, blend all of the ingredients except the kale until smooth.

In a large bowl, combine the kale and the blended cashew mixture. Rub the mixture into each piece of kale so they are evenly coated.

Spread the kale out on the baking sheets, making sure not to overlap. This will ensure the chips get crispy.

Bake for about 2 to 3 hours, checking every 45 minutes or so. Flip the chips halfway through, and make sure they are not sticking to the pan. They are done when dry and crispy.

Store in an airtight container.

Nacho Cheese Kale ChipsThe football cones are the same ones I used last year from Snap! They are so cute that I printed them again. I dressed them up with some Seahawk printables from a website called Elegance and Enchantment. (They have Patriot decorations, also, if that’s your preference. 🙂 )

Nacho Cheese Kale Chips

Happy Australia Day! ~ Cheddar and Chive Dampers

Cheddar and Chive DampersHappy Australia Day! Every January 26th, Australia celebrates this national holiday. It falls in the middle of summer in the southern hemisphere, so much like the way we celebrate the Fourth of July, they celebrate with barbeques, fireworks and outdoor concerts.

Twenty years ago this month, I had the good fortune to travel to Australia through my university. (How did twenty years go by already? Wow!) It was an extraordinary experience I will never forget.

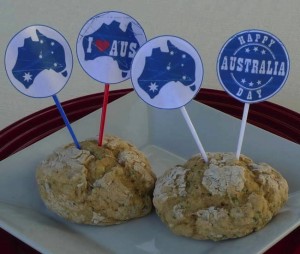
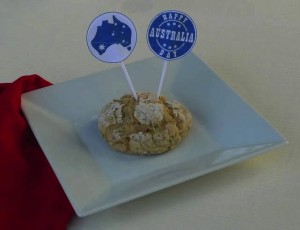
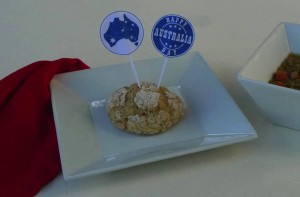
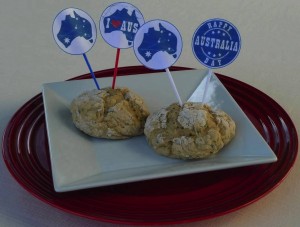
Cheddar and Chive DampersTo celebrate the holiday and the good times I had in Australia, I decided to make a special Australian dinner. We had split pea and ham soup with Cheddar and chive dampers. I chose the menu based on an article from CNN Travel about forty dishes Australians call their own. It is a fun article filled with many foods I have never tried before. There is much more to explore!

For the dampers, I was inspired by an Australian recipe website called Taste, but I ended up changing the recipe to a large extent for my own version. Mainly, I used 100% whole-wheat pastry flour combined with baking powder rather than self-rising flour, and I made individual dampers rather than one large one. I also made only half of the recipe, and reduced the portion size. They were the perfect accompaniment to the split pea and ham soup!

The cute little flags were printed from Jellyfish Prints. I couldn’t resist adding them for a festive touch. 🙂 They are completely adorable, and also free!

Cheddar and Chive DampersCheddar and Chive Dampers

1 ¼ cups whole-wheat pastry flour

2 teaspoons baking powder

¼ teaspoon kosher salt

½ cup Cheddar, coarsely grated

½ bunch chives, finely chopped

½ cup buttermilk

1 egg, scrambled

Preheat oven to 350 degrees.

Combine the flour, baking powder, salt, cheese and chives in a large bowl, whisking to combine. Add the buttermilk and egg, and stir until well combined. On a lightly floured surface, knead the dough until it comes together. Divide into 4 equal pieces, and shape each piece into a ball. Place each ball onto a parchment lined baking sheet, flattening the top slightly. Bake about 15 minutes, or until the underside of each damper sounds hollow when tapped.

Cool for 5 or 10 minutes, and serve warm.

Cheddar and Chive Dampers

Christmas Baking ~ Gingerbread Cupcakes

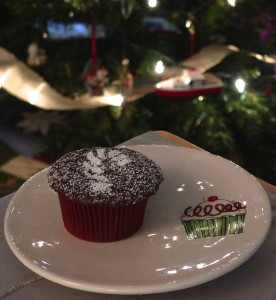
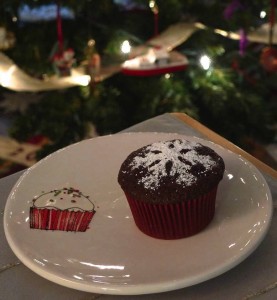
Gingerbread CupcakesI baked a batch of gingerbread cupcakes to go with my gingerbread caramels. (Sensing a gingerbread theme this month?? I figured Santa might like choices! 😉 )

I based the recipe on Martha Stewart’s Gingerbread Snacking Cake. It is such a flavorful recipe with the addition of fresh ginger, but I wanted individual cupcakes instead of one big sheet cake. I replaced the butter with light olive oil, and I replaced the all-purpose flour with whole-wheat pastry flour. The bold flavors of the cake stand up the whole grains beautifully. I hope you’ll give this recipe a try! I will definitely keep these cupcakes in my holiday recipe collection. 🙂 Yum!

Gingerbread Cupcakes

Based on a recipe from MarthaStewart.com

½ cup light olive oil

2 1/2 cups whole-wheat pastry flour

1 cup boiling water

2 teaspoons baking soda

2 teaspoons ground ginger

1 1/2 teaspoons ground cinnamon

1/2 teaspoon ground cloves

1/2 teaspoon ground nutmeg

Pinch of salt

2 teaspoons baking powder

2/3 cup packed dark-brown sugar

1 cup unsulfured molasses

1 tablespoon freshly grated ginger

2 large eggs, room temperature, lightly beaten

Confectioners’ sugar, for dusting

Heat oven to 350 degrees. In a bowl, combine boiling water and baking soda; set aside. In a large bowl, sift together flour, ground spices, salt, and baking powder; set aside.

In an electric mixer with the paddle attachment, mix oil and brown sugar. Beat in molasses and grated ginger, baking-soda mixture, and flour mixture. Beat in eggs.

Pour batter into a muffin pan lined with paper liners, filling each about ½ full. Bake until a toothpick inserted in center comes out clean, about 20 minutes. Let cool on a wire rack. Dust with confectioners’ sugar.

Merry Christmas!!

Gingerbread Cupcakes

A Decadent Holiday Treat ~ Gingerbread Caramels

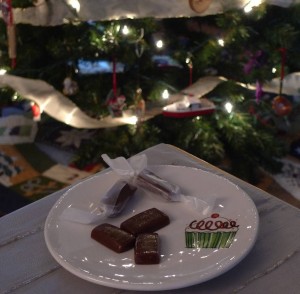
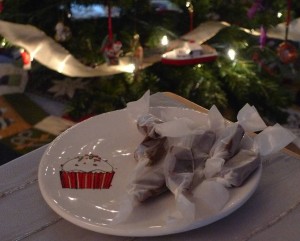
Gingerbread CaramelsI typically don’t make treats quite as rich as these, but a small bite is all you need to feel like you’ve had a decadent treat. Share them with friends and family since they travel well, or leave them by the tree for Santa. He might like them even better than cookies. 😉

I have never made caramels from scratch on my own before, so I followed the recipe from Martha Stewart to the letter. Candy making is really a science, and a few degrees can be the difference between a success and a dud. I learned two important lessons through this experience. The first is to make sure your thermometer is calibrated. I learned this the hard way, as my first attempt was a mess that did not set since it did not boil to the proper temperature. The second lesson I learned is that you can rescue your caramel if it doesn’t set by re-boiling it! On my second boil, I used a different thermometer, and the temperature reached the accurate level. Ta da! Success! 🙂

Gingerbread Caramels

From MarthaStewart.com

4 cups (2 pints) heavy cream

2 cups light corn syrup

4 cups granulated sugar

12 tablespoons (1 1/2 sticks) unsalted butter, cut into small pieces

1/2 cup unsulfured molasses

1 teaspoon pure vanilla extract

3/4 teaspoon salt

1 teaspoon ground cinnamon

3/4 teaspoon ground ginger

3/4 teaspoon freshly grated nutmeg

1/4 teaspoon ground cloves

Vegetable-oil cooking spray

Lightly coat a 12-by-17-inch rimmed baking
sheet with cooking spray. Line with parchment
paper, leaving a 2-inch overhang on short
sides; spray paper.

In a large pot over high heat, bring cream,
corn syrup, sugar, butter, and molasses to a boil,
stirring until sugar has dissolved. Continue to
cook over medium-high heat, stirring frequently,
until mixture reaches 248 degrees (firm-ball stage)
on a candy thermometer, about 20 minutes.

Remove from heat, and stir in vanilla, salt, and spices. Immediately pour onto prepared sheet, without scraping pot. Let stand, uncovered, 24 hours at room temperature (do not move pan).

Generously coat a large cutting board with cooking spray. Lifting it by the parchment overhang, invert caramel onto the cutting board; use a sharp knife to loosen parchment, and remove. Cut into 1-by-1 1/4-inch pieces. Wrap each in cellophane or waxed paper. Caramels can be stored up to 1 month in airtight containers.

Gingerbread Caramels

Pumpkin Season! ~ Pumpkin Custard

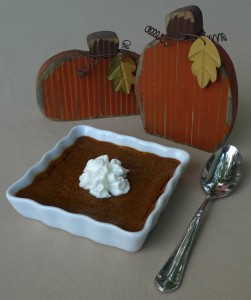
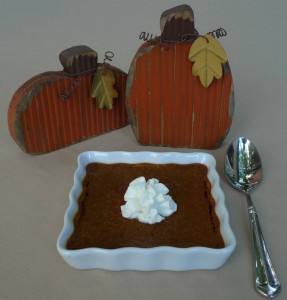
Pumpkin PieAt this time of the year, I love to cook with pumpkins. Sweet or savory, I love everything pumpkin. 🙂 (Almost as much as this little guy! Ha!) And right up there with pumpkin, as one of my favorite all time ingredients, is coconut. So this month I tried a new twist on pumpkin pie custard – I replaced the classic evaporated milk with coconut milk, and it worked beautifully! The texture and flavor are almost identical to the classic, but it has a very mild coconut taste, which I love! I have never been able to find an all-natural version of evaporated milk, so I feel a lot better about this recipe that is natural through and through. 🙂 You can use a natural frozen crust, but if you are like me, you just eat the custard part of the pie and leave the crust behind. Is it just me? OK, maybe I’m a little off the beaten path with this. 😉 But I would much rather have more filling than any crust! Because of that, I made these individual sized pumpkin custards. Basically they are small crustless pumpkin pies. 🙂

Pumpkin Custard

Based on a recipe from Cooking Light magazine

3/4 cup lightly packed brown sugar

1 3/4 teaspoons pumpkin pie spice

Pinch of salt

8-ounces whole coconut milk

2 large egg whites

1 large egg

15-ounces unsweetened pumpkin purée

Natural frozen pie crust (if you wish)

Whipped cream for serving

Preheat oven to 425°.

To prepare the custard, combine the first 6 ingredients in a large bowl, and whisk until well blended. Add the pumpkin, and whisk until smooth.

Pour pumpkin mixture into either a crust or 6 small ramekins. Place on a baking sheet. Bake at 425° for 10 minutes, and then reduce the oven temperature to 350°. (Keep the custard in the oven.) Bake an additional 50 minutes for a large pie, or about 15 minutes for individual ramekins, until set. Cool completely before serving.

Serve with whipped cream.Pumpkin Pie

Halloween Treats ~ Devil’s Food Cupcakes, Updated

Devil's Food CupcakesHalloween is right around the corner!

For the past few years, I have made devil’s food cupcakes to celebrate the season. This year I tried them with whole-wheat pastry flour, and it worked out beautifully! The hearty chocolate flavor stands up to the whole grain, and they are still moist and delicious. I think this will be my new and improved recipe from now on!

Devil’s Food Cupcakes

Based on a recipe from Bon Appétit magazine

1 1/4 cups sugar

1 cup buttermilk

2/3 cup light olive oil

2 eggs

1 teaspoon vanilla

1 1/2 cups whole wheat pastry flour

1/2 cup unsweetened cocoa powder

1 1/4 teaspoons baking soda

Preheat oven to 350°F. Line baking pan with 14 cupcake papers. Whisk first 5 ingredients in large bowl to blend. Sift in cocoa and baking soda. Stir to combine. Add flour, and mix until just combined. (Be careful not to mix too much at this point.) Fill each cupcake about ¾ full with batter. Bake until toothpick inserted into centers comes out clean, about 20 minutes. Turn cakes out onto racks and cool completely.

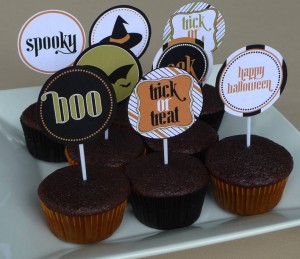
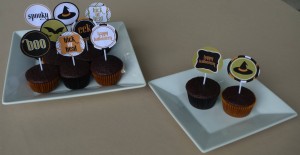
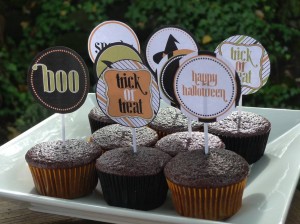
Devil's Food CupcakesI found the little Halloween printables at CatchMyParty.com. They are super cute, and free!

Devil's Food CupcakesCatchMyParty.com also has many other choices for Halloween if you’d rather have a different design. I had a hard time choosing my favorite. 🙂

Devil's Food Cupcakes

Wedding Anniversary, Part 3 ~ Japanese-Style Coconut Cheesecake and 14 Hands Winery Reserve Red Blend

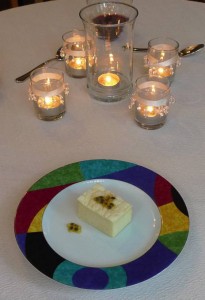
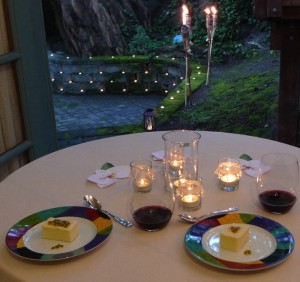
Japanese-Style Coconut CheesecakeThe grand finale of our wedding anniversary dinner celebration was a Japanese-style coconut cheesecake. It was light and fluffy, almost soufflé-like, compared to a typical American cheesecake. The coconut flavor was very subtle, but I served it with passion fruit (called lilikoi in Hawaii) for an added tropical taste.

Japanese-Style Coconut Cheesecake

This recipe was from a website called Cooking Hawaiian Style. I omitted the butter completely, and I used reduced fat cream cheese, but otherwise followed the recipe pretty closely.

Japanese-Style Coconut Cheesecake

Based on a recipe from Cooking Hawaiian Style

Yield: One 8″ cheesecake

Note: Do not substitute homemade cake flour (regular flour mixed with cornstarch) for this recipe. Use a store-bought cake flour.

9 oz. reduced fat cream cheese (one 8 oz. brick plus 1 oz. of another brick)

1/3 cup coconut milk

6 eggs, room temperature – whites and yolks separated

1/4 tsp. cream of tartar

1/2 cup plus

1/8 cup extra fine granulated sugar

1/3 cup plus 1 tsp. cake flour

3 tbsp. corn starch

1. Melt cream cheese and coconut milk in a heat-proof bowl over a pot of simmering water. Stir occasionally to break up cream cheese and combine the ingredients. Remove bowl from heat and allow to cool. Mixture will be thick. If lumpy, use a whisk to vigorously beat the mixture until smooth. Set aside.

2. When mixture has cooled, fold in the egg yolks, flour and corn starch. Fold until thoroughly incorporated.

3. Preheat oven to 325 degrees.

4. In a large bowl, whisk egg whites with an electric mixer until foamy. Add the cream of tartar and mix again, gradually adding the extra-fine sugar a little at a time until soft peaks form. Note: Soft peaks: mixture should be white and opaque, and meringue will fall onto itself when the beaters are lifted from the bowl.

5. Add the cheese mixture to the egg white mixture and fold together until well incorporated.

6. Pour into an 8-inch round spring-form pan that has been lightly greased and lined (sides and bottom) with parchment paper. Place a piece of aluminum foil over the top of the cake so it does not brown.

7. Bake in a water bath for 1 hour 10 minutes. When timer sounds, bake for an additional 10-15 minutes with the oven door cracked.

8. Carefully remove pan from water bath and let stand until cake pulls away from the sides of the pan. Remove spring-form ring and serve.

Notes:

•Substitutions are not recommended for this recipe. Be sure to use whole milk, cake flour and extra-fine sugar. If you can’t find extra-fine sugar, grind regular sugar finer in a food processor.

•Sprinkle matcha green tea on finished cake, or top with fresh fruit for serving.

14 Hands Reserve WineWe also paired our meal with a bottle of 14 Hands Winery Reserve Red Blend. We discovered 14 Hands around the 14th anniversary of our first date, so it seemed fitting to close the loop by having a bottle to celebrate our 14th wedding anniversary!

14 Hands Reserve Wine

Wedding Anniversary, Part 1 ~ Martini of Spicy Tuna Poke and Dragon Fruit Lychee Sparkling Wine Cocktails

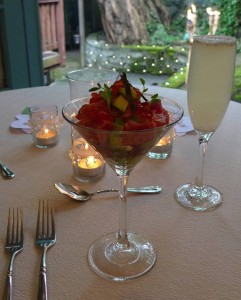
Ahi Poke Martini

We celebrated our wedding anniversary this year with a special Hawaiian-style dinner. We love to explore foods from all around the world. For Valentine’s Day (also our engagement anniversary), we made a sushi dinner, so we decided to go with a twist on that theme for our wedding anniversary by making a few Japanese-influenced dishes from Hawaii. It was a summery meal from the land of endless summers!

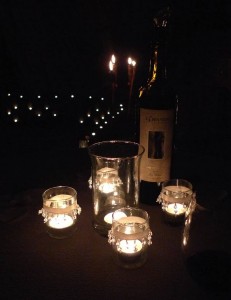
The weather was not very Hawaiian-like for our celebration, though. Ha! (But it was very Seattle-like!) It was a little drizzly, and cooler than it usually is around our anniversary. We decided to use that opportunity to set the dinner table in a new place…We kicked open the French doors in the guest room, and ate inside overlooking a sea of candles and tiki torches. 🙂 Luckily it wasn’t too rainy, so the candles stayed lit. It was really beautiful!

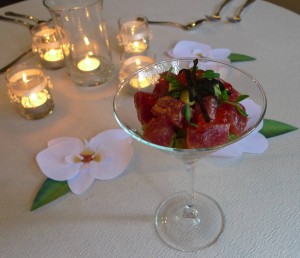
I also found some sweet little printable paper orchids on Elli.com. They were free, very easy to assemble, and I think they added a fun tropical touch to our table.

Ahi Poke Martini

I based two of our dishes on recipes from a cookbook called Roy’s Fish and Seafood: Recipes from the Pacific Rim. Chef Roy Yamaguchi has several restaurants in Hawaii and the mainland, and this book is a nice collection of a few of his Hawaiian seafood recipes. It was hard to choose what I wanted to make! I may continue to explore the recipes throughout our anniversary month. 🙂

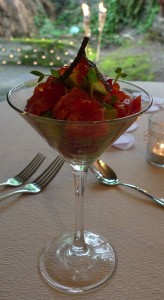
We started our meal with a classic ahi poke, one of our favorite Hawaiian dishes. 🙂 I loved the cookbook’s idea to serve it in layers in a martini glass, and then garnish with micro-greens, fish eggs, and thin strips of nori seaweed. I dressed the ahi much more lightly than the recipe called for. I used salmon roe instead of tobiko, because it’s local and also natural. I also doubled the avocado, since we love avocado. 🙂

Martini of Spicy Tuna Poke

Based on a recipe from Roy’s Fish and Seafood cookbook

Serves 2 as an appetizer

6 oz center-cut ahi tuna, cut into ½ inch dice

¼ cup mayonnaise

2 teaspoons sriracha

½ teaspoon fish sauce

A few micro-greens

¼ sheet nori, cut with scissors into thin strips

1 tablespoon salmon roe

1 avocado, cut into ½ inch dice

Juice of ½ lemon

Salt and pepper to taste

Combine mayonnaise, sriracha, and fish sauce. Salt and pepper to taste. Add as much or as little of the mixture to the ahi as you like. Stir to combine, and set aside.

Combine the avocado with the lemon juice and salt and pepper to taste.

Chill 2 martini glasses. Layer a few pieces of avocado in the bottom of the glass, then add a layer of ahi, another of avocado, and finish with a layer of ahi. Top with micro-greens, roe, and nori strips.

We also made fun dragon fruit and lychee sparkling wine cocktails to go with our first course. The dragon fruit added pretty little seeds and a very mild flavor, and the lychee gave the cocktail a nice sweetness. In a blender, I added a couple of slices of dragon fruit with about a ½ cup of lychee juice. Then I strained the mix, added a little to each champagne glass, and topped the juice with sparkling wine.

Stay tuned for the main course in my next entry!

Ahi Poke Martini