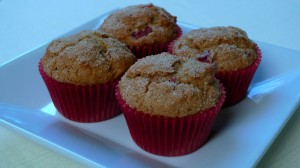
Bastille Day Celebration ~ Madeleines
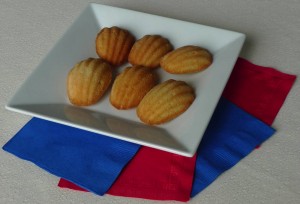
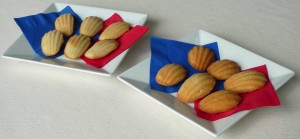
July not only has a big celebration for Canada on the 1st and the USA on the 4th, but France’s Bastille Day falls on the 14th. For a belated celebration, I made French madeleines. They are so elegant, but also very easy to make!

I tried a little experiment with this dish, since it is traditionally made with butter (as most French dishes are…Ha!) I made half the recipe the traditional way, with butter. I figured they are tiny little cakes; so a little butter in moderation is fine. I made the other half of the recipe with Earth Balance. I baked them in the same oven for the same amount of time, and observed the difference. I have to say, they were *both* quite delicious. There was not a bad madeleine in the bunch. 😉 The taste is slightly different, but both lovely. The butter version looked more beautifully golden brown, and spread out in the pan a little more. The Earth Balance cakes were a tad lighter in color, less golden. They also were slightly smaller cakes, since they didn’t spread out in the pan quite as much. The photo at the bottom displays the difference…The ones on the left are made with Earth Balance, and the ones on the right are made with butter. Your choice!
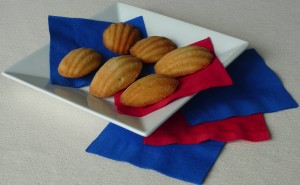
I used a tried-and-true recipe from Bon Appétit magazine.

Madeleines

Based on a recipe from Bon Appétit magazine

2 large eggs

2/3 cup sugar

1 teaspoon vanilla extract

1/2 teaspoon grated lemon peel

Pinch of salt

1 cup all purpose flour

10 tablespoons (1 1/4 sticks) unsalted butter, melted, cooled slightly (or Earth Balance buttery sticks)

Powdered sugar, optional, for serving

Preheat oven to 375°F. Generously butter and flour pan for large madeleines (about 3 x 1 1/4 inches).* Using electric mixer, beat eggs and 2/3 cup sugar in large bowl just to blend. Beat in vanilla, lemon peel and salt. Add flour; beat just until blended. Gradually add cooled melted butter in steady stream, beating just until blended.

Spoon 1 tablespoon batter into each indentation in pan. Bake until puffed and brown, about 16 minutes. Cool 5 minutes. Gently remove from pan. Repeat process, buttering and flouring pan before each batch. (Can be made 1 day ahead.)

Dust cookies with powdered sugar if desired.

*A metal mold with scallop-shaped indentations, sold at cookware stores.

Happy Canada Day! ~ Nanaimo Bars

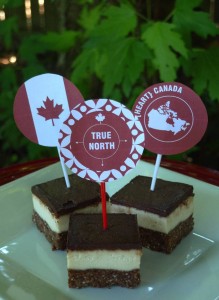
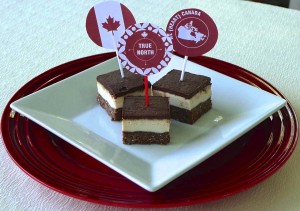
Happy Canada Day! We love our neighbors to the north, and I am always up for an excuse to celebrate another holiday, so I made a batch of Nanaimo bars in honor of this day. 🙂

Nanaimo bars are typically a rich, buttery, and sugary dessert. If you aren’t familiar with the confection, here is a little about their history. They are so good, but something to enjoy only every once in awhile. Then I found this recipe that is vegan and almost 100% raw, (except for the maple syrup, which makes them even more Canadian!) They are rich, but also full of healthy, good things. With all of the nutritious ingredients, they are like Canadian energy bars that will help you celebrate all day long! 😉 I’m glad I gave them a try. I hope you will, too. 🙂

The only thing I changed from the original recipe was the amount of maple syrup. I tried using less, and tasted as I went. I ended up using 2 tablespoons less in the custard filling and 3 tablespoons less in the chocolate topping. Just add a little at a time and taste as you go to make them as sweet as you like.

Nanaimo Bars

Based on a recipe from Living Nutrition

Ingredients

For the crust:

1 1/2 cup unsweetened shredded coconut

1 1/2 cup blanched almond flour

1/2 cup coconut oil, melted

3/4 cup coconut sugar

1/4 cup cocoa powder (or raw cacao powder)

10 dates, pitted

A few pinches of sea salt

For the cashew custard filling:

2 cups cashews, (soaked in water for 2 hours or more)

1/2 cup water

1/4 cup + 2 tbsp maple syrup

2 tsp vanilla extract or seeds of ¼ vanilla bean

1/2 cup melted coconut butter or oil

1/4 tsp sea salt

For the chocolate ganache:

1/4 cup + 1 tbsp maple syrup

1/2 cup coconut oil

1/2 cup cocoa powder

1 tsp vanilla extract and a pinch of sea salt

Instructions

For the crust:

Add everything to your food processor, and process for at least 20 seconds, or until it is thoroughly combined into a dough. It should stick together slightly when pinched. If it doesn’t, you can add a tablespoon of water or a few more dates to the mix. Press into a 9×9 inch-baking pan. Place the crust in the fridge or freezer to set while you make the cashew custard filling.

For the cashew custard filling:

Add cashews, water, maple syrup, vanilla, coconut oil, and sea salt to a high-speed bender. Blend until smooth and creamy. Pour over the crust and smooth evenly with a spatula. Place in the freezer to set for 2 hours.

To make the chocolate ganache:

Place the maple syrup, coconut oil, cocoa powder, vanilla extract and sea salt in the blender until creamy and emulsified. Spread evenly over the cashew custard filling and chill for another 4 hours.

Cut and serve.

The little Canada Day printouts are from Catch My Party. I couldn’t resist. 🙂 They are so cute, and also free!

Teashop Mystery ~ Chamomile Muffins

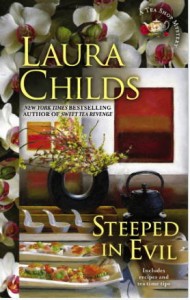
This month, I am thoroughly enjoying a cozy mystery that is set in a Charleston, South Carolina tearoom entitled Steeped in Evil. It is such a descriptive book and the characters are so vividly written, that I feel like I am taking a virtual vacation to Charleston! When I find an absorbing book like this, I often get inspired to make a recipe to compliment the story. It’s my way to get a little more into the storyline, and to make it come to life. 🙂 With this book, I wanted to make something small and sweet that might be served in a tearoom, and I also wanted to incorporate tea within the treat. Chamomile muffins fit the bill! They are perfect to nibble on a lazy and decadent afternoon of reading. I enjoyed some quiet time alone outside on this lovely summer day with a cup of tea, a muffin, and my book. 🙂 I even got out my teapot and poured a glass of bubbly as the fancy teashops do. I felt a little like I was a part of an afternoon tea at the main character’s store, the Indigo Tea Shop.

I based these muffins on a recipe from Joy the Baker. I substituted whole-wheat pastry flour for the all-purpose flour, light olive oil for the butter, and I reduced the sugar from the original recipe. The end result was moist, delicate, and delicious! The chamomile flavor really shines through. I didn’t top them with a glaze, but just a light dusting of powdered sugar.

Chamomile Muffins

Based on a recipe from Joy the Baker

1/4 cup light olive oil

1 cup whole-wheat pastry flour

1/2 cup granulated sugar

1 teaspoon baking powder

1/2 teaspoon baking soda

Pinch of salt

3 tablespoons dried chamomile (from tea bags)

1/2 cup skim milk

1 large egg

1 teaspoon pure vanilla extract

Place a rack in the upper third of the oven and preheat oven to 325 degrees F.  Line a muffin pan with paper or foil liners and set aside. (It makes about 12 standard size muffins.)

To make the cakes:  in the bowl of an electric stand mixer fitted with a paddle attachment, mix together oil, flour, sugar, baking powder, baking soda, pinch of salt, and chamomile leaves.  Mix on medium speed until the mixture is slightly coarse and sandy.

While the mixture beats, in a small bowl, whisk together milk, egg, and vanilla extract.

Pour half of the milk mixture into the flour mixture.  Beat until just incorporated.  Pour in the remaining milk mixture, turn the mixer up to medium-high speed and beat for 1 minute, until well blended.

Divide the batter between the prepared cups, filling only half way.

Bake the muffins for 17 to 20 minutes for the standard size, 10 to 14 minutes for the mini size, or until a skewer inserted in the center comes out clean. Remove from the oven and allow to cool in the pan for 10 minutes. Remove the muffins from the pan to cool completely before frosting.

Cakes will last, well wrapped, at room temperature for up to three days.

Steeped in Evil is the latest release in the series, but I am looking forward to reading more of the teashop mysteries by Laura Childs. If you are looking for a fun and light summer book, you might enjoy one of these mysteries, too!

First Day of Summer! ~ Banana Coconut Muffins

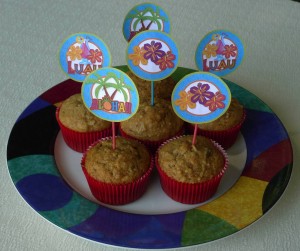
Happy summer! It is officially here! The weather in Seattle feels a little tropical in the summertime, so I decided to make my tropical banana coconut bread recipe into muffins to celebrate the season. 🙂

Dividing the batter into individual muffin portions allowed me to use whole-wheat pastry flour instead of all-purpose flour. (I tried using whole-wheat pastry flour in the original loaf recipe, however it didn’t turn out very well.) I like to use whole grains when I can, so I was happy that these turned out wonderfully moist and delicious. 🙂

Banana Coconut Muffins

2 cups whole-wheat pastry flour

3/4 teaspoon baking soda

Pinch of salt

1 cup granulated sugar (a little less if the bananas are very very ripe)

1/4 cup canola oil

2 large eggs

1 3/4 cups mashed ripe banana (about 4 bananas)

1 tablespoon vanilla extract

1/2 cup flaked sweetened coconut

Cooking spray

Preheat your oven to 350. Whisk the flour, baking soda and salt in a medium bowl. In a large bowl, whisk the sugar and oil until they are well blended. Add the eggs, 1 at a time, beating well after each. Add the mashed banana and vanilla, and whisk until they are incorporated. Add the flour mixture, and mix until everything is moist. Stir in 1/2 cup of coconut. Spoon the batter into 14 muffin tin cups, (about 3/4 full), either lined with paper or sprayed with cooking spray. Bake for about 25 minutes, or until a toothpick inserted in the center comes out clean.

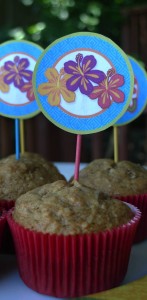
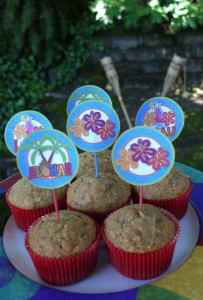
I found cute little tropical Hawaiian cupcake flags on a website called Party Planning Center. They are so adorable, and also free! I love to add a little pizzazz to my cupcakes and muffins with printables. Then I don’t need to use frosting or food coloring to make them look festive, and I think they are so pretty!

Dos de Junio ~ Elote from Elote Cafe

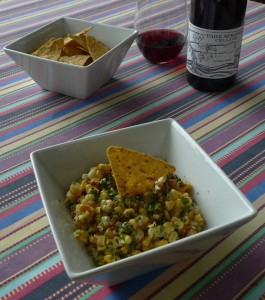
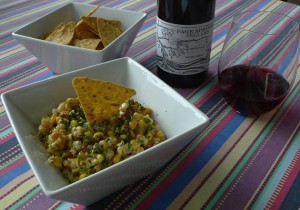
Happy Dos de Junio! OK, it isn’t really a Mexican holiday today. But it is a gorgeous Monday, the sun is shining, and I think there is a reason to celebrate every day. 🙂 I didn’t make a Mexican dish this year for Cinco de Mayo, so I made up for that today. This recipe for Elote has been on my list to try for quite some time, and now that corn is starting to come into the markets, today seemed like a perfect time to make it.

I had this dish in Arizona at a place called Elote Café. If you are ever in the Sedona area, I would highly recommend checking them out! It is such a popular place that people will wait in a long line outside just to experience the food. Get there early is all I have to say! 🙂

This recipe is based on the signature dish at Elote Café with a couple of small changes to make it a bit healthier. I used reduced fat mayonnaise instead of the full fat version. I also didn’t use the entire amount of the mayonnaise mixture on the corn. I just added a little at a time and tasted as I went until I was happy with the flavor. I had a couple tablespoons left of the sauce in the end. I also grilled the corn inside on a grill pan, since I don’t have an outdoor grill. It worked just fine!  Just make sure you have a fan on, since the husks get a little smoky.

Elote

Based on a recipe from Elote Café

2 ears corn, husks intact

1/4 cup light mayonnaise

1/4 tablespoon Cholula brand hot sauce

1/2 tablespoon fresh lime juice

Pinch of kosher salt

1/4 teaspoon fresh ground black pepper

1/4 teaspoon sugar

1 tablespoon chicken stock

1 tablespoon Cotija cheese, crumbled for garnish

1 tablespoon cilantro, chopped, for garnish

Tortilla chips, for serving

Over a medium-high grill or on a grill pan over high heat, roast the corn until the husks are well charred, about 5 minutes. Turn occasionally so as not to burn the side contacting the direct heat.

Set the roasted ears aside until cool enough to handle, then shuck them.

Cut the kernels off the cob.

When ready to eat, mix the mayonnaise and all the other ingredients through chicken stock in a sauté pan over medium heat.

Add the corn kernels and warm through.

Pour into a bowl and garnish with the cheese, and cilantro.

Serve immediately with tortilla chips.

When I was in Arizona, I also picked up a bottle of local wine by Page Springs Cellars called Mule’s Mistake. It doesn’t sound like a fancy wine, but it is actually quite lovely! It reminds me a little of Oregon Pinot Noirs that we love so much.

Mother’s Day Weekend ~ Healthy Morning Muffins

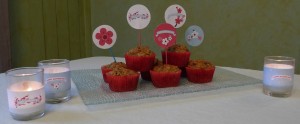
Almost every Mother’s Day weekend, my mom and I get together for a girls’ weekend to celebrate! We love to spend the time together doing our favorite things like shopping, exploring wineries, and staying up late chatting. 🙂 Given that I am less of a morning person than she is, I made sure she had a bunch of muffins for breakfast when she got up before me. 😉 I decided to make these healthy morning muffins this year.

I replaced the all-purpose flour with whole-wheat pastry flour, and I also added a tad more skim milk to make sure they stayed moist. I replaced the raisins with currants, since Mom is not a big raisin fan. 😉 I also reduced the salt to a pinch.

Healthy Morning Muffins

Based on a recipe from Martha Stewart

1 1/4 cups whole-wheat pastry flour (spooned and leveled)

1/2 cup packed dark-brown sugar

1/2 teaspoon baking soda

1/2 teaspoon baking powder

1/2 teaspoon ground nutmeg

Pinch of coarse salt

1 cup old-fashioned rolled oats

1/4 cup currants

3 tablespoons light olive oil

1 large egg

1/3 cup + 1 tablespoon skim milk

4 medium carrots, shredded

1 medium ripe banana, mashed

Preheat oven to 400 degrees. Line a 12-cup muffin pan with cupcake liners. In a large bowl, whisk together flour, brown sugar, baking soda, baking powder, nutmeg, and salt until there are no lumps. Stir in oats and currants. Add oil, egg, milk, carrots, and banana and stir until blended.

Fill each muffin cup with 1/4 cup batter. Bake until a toothpick inserted in center of a muffin comes out clean, 23 to 25 minutes. Serve muffins warm or at room temperature.

The super cute little decorations are from CatchMyParty.com. They have a large collection of free and printable decorations for all sorts of celebrations, and I would highly recommend checking them out! I made cupcake flags and matching votive wraps from the pretty Mother’s Day “Blossoms” design.

Sweet Ending to Easter Dinner ~ Rhubarb Rice Pudding

We enjoyed a simple and elegant Easter dinner at home this year. I tried three recipes that were inspired by Sophie Dahl’s cookbook entitled Very Fond of Food: A Year in Recipes. She’s a British cook I recently discovered, and I like her style. 🙂 She has two cookbooks, and she also had a little cooking show on the BBC.

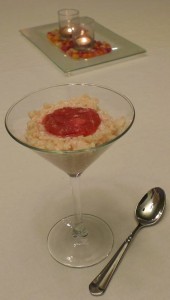
For our Easter dinner, we enjoyed bruschetta with an artichoke spread, lobster and crab salad, and this rhubarb rice pudding. I have a sweet tooth, so this was my favorite dish of the evening. 🙂 I love the subtle edition of orange flower water and rose water. It made it a little special and spring-like without being overwhelming.

Rhubarb Rice Pudding

Based on a recipe by Sophie Dahl

For the rice:

4 cups skim milk

¾ cup basmati rice

1 cinnamon stick

¼ cup honey

½ teaspoon orange flower water

For the rhubarb:

12 oz rhubarb, cut into 1-inch lengths

½ cup water

1 star anise

½ teaspoon rose water

2 tablespoons honey

First, make the rice pudding. Pour the milk and rice into a medium sized saucepan, add the cinnamon stick, bring to a boil, and then simmer over very low heat, stirring frequently, for about 15 minutes. At this point, stir in the honey and orange flower water and cook for another 5 to 10 minutes until the pudding is to the consistency that you like. Remove the cinnamon.

In a separate heavy bottomed saucepan, combine the rhubarb, water, star anise, rose water, and honey. Bring to a boil and simmer on low for about 10 minutes, turning once or twice, until you have a lovely tender pink softness. Remove the anise. Plate the rice pudding and swirl the rhubarb through. Or, conversely, serve the rice with a small dollop of the rhubarb on the top as I did.

Happy Spring! ~ Parsley Cupcakes

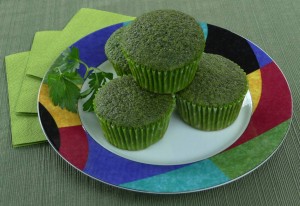
Spring is finally here! To celebrate the new season, I made a recipe for parsley cupcakes. It is one of the most interesting recipes I’ve come across in a long time, and I’m glad I tried it. 🙂  They have a unique herb flavor, and they are intensely green without the use of any food coloring. The original recipe was posted on Food52.com for St. Patrick’s Day. If you haven’t visited that website, I’d recommend it! They have a collection of very unique and delicious recipes to spice up (or in this case, herb up!) your kitchen. 🙂

I substituted the all-purpose flour with whole-wheat pastry flour, and I reduced the amount of salt and sugar a bit. I also made this recipe into individual cupcakes rather than a large cake.

Parsley Cupcakes

Based on a recipe from Food52.com

4 cups tightly packed parsley leaves, from about 5 bunches

1 cup tightly packed mint leaves, from 2 bunches

3/4 cup good olive oil

2 cups whole-wheat pastry flour

1 tablespoon plus 2 teaspoons cornstarch

1 teaspoon kosher salt

1 1/2 teaspoons baking powder

4 large eggs, at room temperature

2/3 plus 3/4 cups sugar

Preheat the oven to 340°F. Line 2 cupcake pans with paper liners. (The recipe makes about 17 cupcakes.)

To make the herb-oil mixture, put a fourth of the parsley and mint in a strong blender or food processor, and blend it on low speed. Use a blender stick to help crush the herbs while the blade is spinning (or stop the machine from time to time to push the herbs back down toward the blade). Slowly increase the speed to medium (or a steady puree, in a food processor) and continue adding the rest of the herbs until you have added all of them.

In a steady stream, add half of the olive oil. Mix on medium-low speed (or pulsing, if using a food processor) until all is combined. Add the remaining olive oil and blend for no longer than 10 seconds. The mixture will look loose and stringy. Scrape out the blender to get all of the parsley mixture, transfer it to a bowl, and refrigerate until ready to use.

In a bowl, combine the flour, cornstarch, salt, and baking powder and set aside.

In a stand mixer fitted with the paddle attachment, whip the eggs for about 30 seconds. Add the sugar and mix on high speed until the mixture is very thick and turns a pale yellow color, about 3 minutes. Turn the mixer speed down to low and add the herb-oil mixture.

With the machine still running, add the flour mixture and mix until just combined. Do not over mix.

Fill each cupcake liner about ¾ full with the batter.

Bake for about 18 to 20 minutes, rotating halfway through. When a cake tester inserted in the center of one cupcake comes out clean, they are done. Let the cupcakes cool in the pan.

Happy Shamrock Day ~ Irish Soda Bread Biscuits

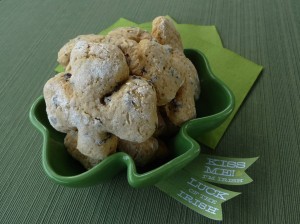
Happy St. Patrick’s Day! I’m not even a wee bit Irish, but I always have fun celebrating this holiday. We really enjoyed the Irish soda bread muffins I made last year, so this year I decided to try another spin on the same idea. I baked Irish soda bread biscuits. 🙂 I went an extra step and cut them out with a shamrock cookie cutter. What could be more festive that? 🙂

Irish Soda Bread Biscuits

2 cups whole-wheat pastry flour

1/2 cup sugar

1/2 teaspoon baking soda

¼ cup Earth Balance

1/2 cup dried currants

1/2 cup low fat buttermilk

1 egg

1 teaspoon caraway seeds

Preheat the oven to 350 degrees F.

Combine the dry ingredients in a medium sized mixing bowl. With a fork or pastry blender, cut in the Earth Balance. Stir in the currants and caraway.

Mix the egg and buttermilk in a separate bowl, and then combine the wet ingredients with the dry ingredients.

On a floured surface, shape the dough into a ball. It is a sticky and wet dough, so use as much all-purpose flour as you need on your hands and the bench to pull it together into a cohesive dough ball. Roll the dough so it is about ½ inch thick. Cut with a cookie cutter or a knife. Transfer biscuits to a baking sheet lined with parchment paper and sprayed with non-stick spray. Bake for about 12 minutes, or until golden brown on top.

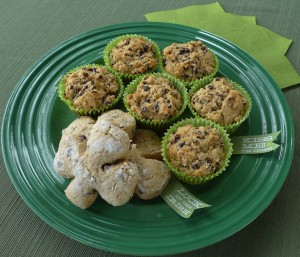
I also baked a batch of the soda bread muffins that I wrote about last year. They freeze well, so our freezer is now stocked! Just microwave for 30 seconds for a warm, fresh muffin in the morning.

The cute little printable flags are from Elli.com. They are free to download and print for your St. Patrick’s Day celebration. 🙂

Happy White Day ~ Green Tea Shortbread

Happy White Day!

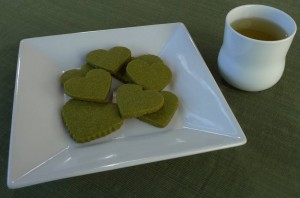
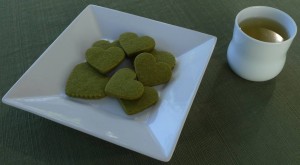
Last month, as I was looking through recipes for our Japanese Valentine’s Day dinner, I also looked at how people in Japan celebrate Valentine’s Day. Through that research, I stumbled upon a Japanese holiday called White Day. I learned that in Japan, women typically give men chocolates on Valentine’s Day rather than the other way around, as we usually do in the States. White Day is exactly one month after Valentine’s Day, and it is a chance for the men to give back. I thought it was such an interesting and cool tradition, so I wanted to mark it in some way. Here’s a Japanese-inspired cookie recipe for the guys out there! 😉

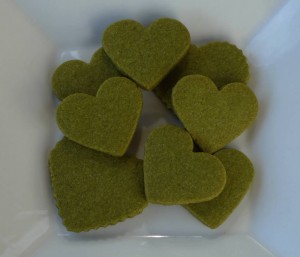
I used Martha Stewart’s recipe for Green Tea Shortbread. I substituted all of the butter with Earth Balance, which worked beautifully. We really didn’t miss the butter. I also omitted the salt, since Earth Balance already has a little salt incorporated into the product.

Green Tea Shortbread

Based on a recipe from Martha Stewart

2 cups all-purpose flour, plus more for rolling

2 tablespoons green-tea powder (matcha)

1/2 pound Earth Balance, room temperature

1/2 cup granulated sugar

Sift flour and tea powder into a small bowl; set aside. Place Earth Balance in the bowl of an electric mixer fitted with the paddle attachment. Cream on medium speed, 3 to 5 minutes. Add sugar; continue to beat until very light in color, about 2 minutes more. Add flour mixture; combine on low, scraping sides of bowl with a spatula if necessary, until flour is just incorporated and dough sticks together when squeezed with fingers.

Place a piece of parchment on a clean surface; dust with flour. Roll dough to 1/4-inch thickness; chill in refrigerator or freezer until firm, about 30 minutes.

Preheat oven to 325 degrees. Line two baking sheets with parchment. Cut chilled dough with 2-inch leaf cutters. Using a wide spatula, transfer to baking sheets. Chill until firm. Gather scraps together, re-roll, chill, and cut shapes. Bake until firm and barely starting to color, 15 to 20 minutes, rotating halfway through. Cool completely on wire rack; store in an airtight container for up to 3 to 4 weeks.

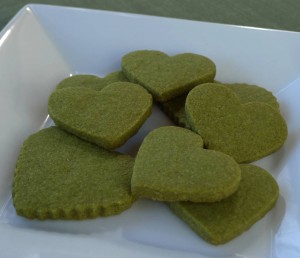
PS. Since these cookies are a vibrant green color, they could also be good for St. Patrick’s Day! Just cut them into shamrock shapes. 🙂

Mardi Gras ~ King Cake

Happy Mardi Gras!

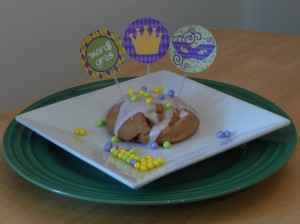
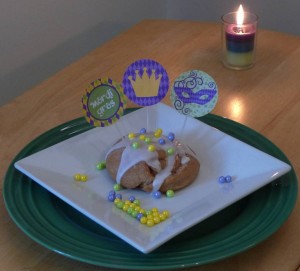
I couldn’t think of anything better to celebrate the holiday than king cake. I love the story and history surrounding the cake. In Louisiana, they decorate the top with the colors of Mardi Gras – purple, yellow, and green. They also hide a small plastic baby or a trinket inside. I made mini cakes this year based on a recipe from AllRecipes.com. I substituted all of the butter with Earth Balance, and replaced half of the all-purpose flour with whole-wheat flour. The result was nutty and delicious! With the glaze, they make a nice dessert, but without the glaze, they are perfect for breakfast. 🙂

Mardi Gras King Cake

Based on a recipe from AllRecipes.com

Pastry:

½ cup + 2 tablespoons non-fat milk

2 tablespoons Earth Balance

1 (.25 ounce) package active dry yeast

1/3 cup warm water (110 degrees F/45

degrees C)

1/4 cup white sugar

1 egg

1/4 teaspoon freshly grated nutmeg

1 ¼ cups + 2 tablespoons all-purpose flour

1 ¼ cups + 2 tablespoons whole-wheat flour

Filling:

1/2 cup packed brown sugar

1-1/2 teaspoons ground cinnamon

1/3 cup chopped pecans

1/4 cup all-purpose flour

1/4 cup melted Earth Balance

Glaze:

1/2 cup confectioners’ sugar

1-1/2 teaspoons water (approximately…add a little more or less to get the consistency you desire)

To make the pastry: Combine warmed milk and melted Earth Balance. Allow mixture to cool to room temperature. In a large bowl, dissolve yeast in the warm water with 1/2 tablespoon of the white sugar. Let stand until frothy, about 10 minutes.

When yeast mixture is bubbling, add the cooled milk mixture. Whisk in the egg. Stir in the remaining white sugar, and nutmeg. Stir both flours into the milk/egg mixture a little at a time. When the dough has pulled together, turn it out onto a lightly floured surface and knead until smooth and elastic, about 2 minutes.

Lightly oil a large bowl, place the dough in the bowl and turn to coat with oil. Cover with a damp cloth or plastic wrap and let rise in a warm place until doubled in volume, about 1 to 2 hours. When risen, punch down.

To make the filling: Combine the brown sugar, ground cinnamon, chopped pecans, and flour. Pour 1/4 cup melted Earth Balance over the cinnamon mixture and mix until crumbly.

Preheat oven to 375 degrees F (190 degrees C). Grease a cookie sheet or line with parchment paper.

Divide the dough into 8 equal pieces. Roll each piece into a rectangle (approximately 6 by 8 inches or so). Sprinkle 1/8th of the filling evenly over each piece of the dough. Roll up each piece tightly like a little jelly roll, beginning at the wide side. Bring the ends of each roll together to form 8 oval shaped rings. Place each ring on a prepared cookie sheet. If you wish, make cuts with scissors 1/3 of the way through the rings at 1 inch intervals. Let rise in a warm spot until doubled in size, about 45 minutes.

Bake in preheated oven for about 20 minutes, until golden. If you are partaking in the tradition of adding a baby or trinket, place it in the bottom of one of the cakes after it is baked. Whisk together the glaze ingredients. Frost the cakes with the glaze and purple, green, and yellow sprinkles if you wish.

I decorated with some cute Mardi Gras printables from MardiGrasOutlet.com. They are free, so help yourself! 🙂 I also found some pretty little edible beads in purple, yellow, and green. They looked like Mardi Gras beads to me, so they seemed perfect for the cake! We don’t plan to eat them, but they were too cute for me to pass up for decoration. 🙂

I hope you enjoy your Fat Tuesday!

Winter Olympics ~ Smoked Salmon Blini

As the winter Olympics in Sochi, Russia are coming to a close, I wanted to try a Russian recipe to celebrate the occasion! I made blini with smoked salmon. 🙂

I used Ina Garten’s recipe as the base, but I made it a little healthier. I substituted the butter with Earth Balance, and used much less of it than the original recipe called for. Rather, I used a good non-stick pan, so the butter was unnecessary to keep the pancakes from sticking. I also used nonfat milk and reduced fat sour cream rather than the full fat versions.

Blini with Smoked Salmon

Based on a recipe from Ina Garten

1/3 cup buckwheat flour

2/3 cup all-purpose flour

1/2 teaspoon baking powder

3/4 teaspoon kosher salt

3/4 cup plus 2 tablespoons nonfat milk

1 extra-large egg

2 tablespoons Earth Balance

1/2 pound smoked salmon, thinly sliced

1/4 cup reduced fat sour cream

Fresh dill sprig, for garnish

Combine both flours, baking powder, and salt in a bowl. In a separate bowl, whisk together the milk, egg, and 1 tablespoon of Earth Balance. Whisk the wet ingredients into the flour mixture. Heat 1 tablespoon of the Earth Balance in a medium non-stick sauté pan and drop the batter into the hot skillet, 1 tablespoon at a time. Cook over medium-low heat until bubbles form on the top side of the blini, about 2 minutes. Flip and cook for 1 more minute, or until brown. Repeat with the remaining batter. Set aside.

To serve, top the blini with a piece of smoked salmon. Add a dollop of sour cream and a sprig of dill.

Blini are often served with caviar on top rather than the smoked salmon. That could be something to try for the Oscars next week! 🙂

Happy Lunar New Year ~ Vietnamese Steamed Layer Cakes

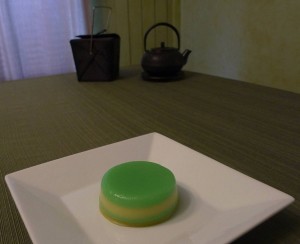
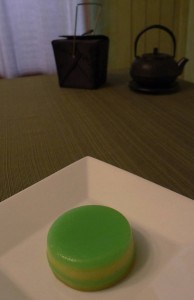
We had a little culinary adventure this year in honor of the Lunar New Year in Vietnam (Tết). Rob and I love Vietnamese food, and we often go out for it in the International District. I also attended a Tết festival in Seattle Center this year where they had dragon dancers, firecrackers, and a chef demonstration. The chef made steamed rice cakes, which inspired me to give this type of cake a try at home!

I found this recipe on a Vietnamese cooking website called DanangCuisine.com. They were very pretty little desserts, with several layers of color from pandan and mung beans. I followed the recipe rather closely since I had never tried anything quite like this before in my kitchen. I did use light coconut milk instead of the full fat version, and I reduced the sugar a little bit, but otherwise followed the expert. 🙂

BÁNH DA LỢN – STEAMED LAYER CAKES

Based on a recipe from DanangCuisine.com

200 g tapioca starch (7 oz)

50 g rice flour (1.76 oz)

1 tsp pandan extract (or 5 fresh pandan leaves)

100 g peeled mung bean (3.5 oz)

200 g sugar (8.8 oz)

pinch of salt

400 ml light coconut milk (14 fl. oz)

300 ml water (10 fl. oz)

Rinse the mung beans a few times until the water becomes clear and soak in water for at least 1 hour (or overnight). Add just enough water to barely cover the beans and cook in a rice cooker until done. Alternatively, you can steam the beans for 15-20 minutes or until soft.

In a saucepan over low heat, dissolve sugar and salt in coconut milk and water. Let cool. In a large bowl, combine tapioca starch, rice flour and the coconut mixture. Stir well until dissolved.

In a blender, combine 350ml (1 + 1/2 cups) of the above batter with the cooked mung beans and blend until smooth. You will get a yellow batter.

Add pandan extract to the remaining batter. You will get a green batter. (To make pandan extract, blend 5 finely chopped pandan leaves with 120ml (1/2 cup) water and extract the juice.)

Grease the mold (or several smaller molds, such as ramekins) with vegetable oil. Fill the mold(s) with the green batter to a depth of about ½ inch (1cm). Cover and steam for a few minutes until slightly set. Then add the same amount of the yellow batter. Continue pouring and steaming the alternate colors until the molds are filled to the top.

After the last layer, steam the whole cake for another 15 minutes. When you poke the center of the cake with a chopstick and see no batter spilling, it is done.

Let cool completely and cut into pieces with a greased knife. You can keep the cake(s) in the refrigerator for up to 2-3 days. Warm slightly in the microwave before serving.

Happy New Year!

PS. If you live in the Northwest, Uwajimaya has all of the ingredients in this recipe. I love to visit my local store and explore the ingredients that most American markets don’t carry.

Squirrelly Snacks ~ Sugar and Spice Nuts

We have a little community of squirrels in our backyard that are very amusing to watch! One in particular is a brave little guy, and he will come right up to our feet and look up at us. SO adorable! (Perhaps keeping a stash of nuts for him has a little something to do with it ;-)). Since we have been enjoying our little woodland creatures so much this winter, I was excited to see there is a holiday today (yes, it’s an actual holiday!) called Squirrel Appreciation Day! Here’s a little article about the celebration.

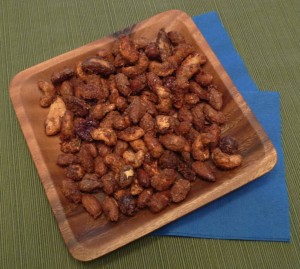
In honor of the day and our cute little neighbors in the backyard, I made a batch of sweet and spicy nuts! The original recipe was from Food and Wine magazine. I used only half of the cayenne pepper as a matter of preference, and I used a bag of mixed fancy raw nuts instead of just cashews and almonds, but otherwise followed their recipe.

Sugar and Spice Nuts

Based on a recipe from Food and Wine magazine

3/4 cup sugar

1 tablespoon kosher salt

1 tablespoon chile powder

2 teaspoons cinnamon

1 teaspoon cayenne pepper

1 large egg white

16 oz mixed raw nuts

Preheat the oven to 300°. Coat a rimmed baking sheet with nonstick cooking spray. In a small bowl, whisk the sugar with the salt, chile powder, cinnamon and cayenne pepper. In a large bowl, beat the egg white until frothy. Add the nuts and spiced sugar and toss. Spread out the nuts on the prepared baking sheet and bake for about 45 minutes, stirring once, until browned. Let the nuts cool on the baking sheet, stirring occasionally.

MAKE AHEAD The spiced nuts can be stored in an airtight container for up to 2 days.

Here’s my favorite photo of our little squirrel buddy! How can we say no to that little face? 😉 That’s why we keep a stash of nuts for him!

Warm Muffins for a Chilly Day ~ Pear and Granola Muffins

Here’s a sweet treat for the New Year. Perfect for a light breakfast, or a pick-me-up in the middle of the day. We enjoyed them for our first breakfast of 2014. 🙂

I replaced the low fat yogurt with non-fat, and the butter with Earth Balance. Since Earth Balance already has salt in the mix, no extra salt was needed. I couldn’t find store bought plain granola, so I used an apple cinnamon flavor instead of making some from scratch. It was a really nice combination with the pears. I tried replacing the all purpose flour with 100% whole wheat pastry flour, as well. It is a heartier (and healthier) muffin if you choose to do it that way. They are lighter and fluffier with a mixture of the two types of flours. Your choice. 🙂 I think I preferred the blend, however, so that is how the recipe is as follows:

Pear and Granola Muffins

Based on a Recipe from MarthaStewart.com

For the muffins:

1 cup all-purpose flour

3/4 cup whole-wheat pastry flour

2 teaspoons baking powder

1/2 teaspoon ground cinnamon

2 large eggs

3/4 cup packed light-brown sugar

1/2 cup plain non-fat yogurt

2 tablespoons Earth Balance, melted

2 D’Anjou pears (2 cups), peeled and cut into 1/4-inch dice

3/4 cup plain or apple cinnamon granola

For the topping:

1/2 cup granola

1/4 cup all-purpose flour

1/4 cup packed light-brown sugar

3 tablespoons chilled Earth Balance

STEP 1 
Preheat oven to 400 degrees. Line a 12-cup standard muffin tin with paper liners; set aside. In a large bowl, whisk together flours, baking powder, and cinnamon.

STEP 2 
In a separate bowl, whisk together eggs, brown sugar, yogurt, and Earth Balance. Make a well in the center of flour mixture. Add egg mixture to well, and mix in flour mixture until just combined. Gently fold in the granola and pears.

STEP 3
 Make Granola Crisp Topping: In a bowl, toss together 1/2 cup granola, and 1/4 cup each all-purpose flour and packed light-brown sugar. Cut 3 tablespoons chilled Earth Balance into pieces; add to granola mixture, and rub in with fingertips until clumps form.

STEP 4 
Divide batter evenly among lined cups, filling each 3/4 full. Sprinkle with granola topping. Bake until a toothpick inserted in the center of a muffin comes out clean, about 20 minutes. Cool 5 minutes before removing from tin. Serve warm or at room temperature.

Holiday Treat ~ Snowflake Marshmallows

Happy holidays!

We had a festive weekend – We put up our Christmas tree, decorated the house, and baked gingerbread Christmas cookies. We also cut out some snowflake shaped marshmallows to go with our hot cocoa. Since I learned how to make homemade marshmallows last month, I am excited about all of the possibilities! This one is perfect for the season, I think. 🙂

The recipe for the marshmallows can be found here.

Happy Thanksgiving ~ Homemade Marshmallows

Happy Thanksgiving!

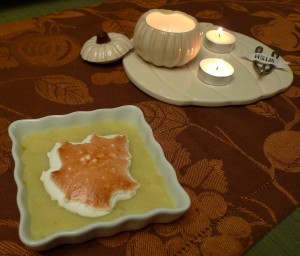
This year I learned how to make homemade marshmallows during the week of Thanksgiving. So fun! I thought it was pretty amazing to see how they come together and how easy they are to make at home. Now I have all kinds of ideas about how to use this recipe throughout the winter. You can add coloring or flavoring and cut them into any shape you’d like. Maybe I’ll make peppermint flavored marshmallows in the shape of snowflakes for hot cocoa, or red and green marshmallows for Christmas gifts. The possibilities are endless. 🙂 For Thanksgiving, I cut them into the shape of a leaf and toasted them on top of our mashed sweet potatoes. This is the basic marshmallow recipe from a candy workshop at Sur La Table.

Homemade Marshmallows

From Sur La Table cooking classes

Yield: about 60 marshmallows

2 teaspoons unsalted butter, softened

3 envelopes unflavored powdered gelatin

1 cup cold water, divided

2 cups sugar

1 cup light corn syrup

1/4 teaspoon kosher salt

1 teaspoon pure vanilla extract

Equal parts cornstarch and powdered sugar for dusting

Line a 9×14 inch baking pan with aluminum foil, allowing two opposite sides to overhang by 3 inches. Grease the foil with the softened butter. Set aside.

In the bowl of a stand mixer, add 1/2 cup cold water. Sprinkle gelatin over the water and set aside to soften.

In a large saucepan, combine remaining 1/2 cup water, sugar, corn syrup, and salt. Bring mixture to a boil, stirring occasionally. Cook, without stirring, until a candy thermometer reads 240 degrees, or the soft ball stage.

Remove saucepan from heat and gradually whisk sugar mixture into the softened gelatin, Fit the mixer with a paddle attachment and beat mixture on high speed until thick and the volume is doubled. Beat in the vanilla. Spread mixture into the prepared pan using a greased icing spatula. Cover with plastic wrap and let marshmallow mixture stand at room temperature for 6 hours or overnight.

Using the foil overhang as handles, lift the marshmallows out of pan. With a sharp chef’s knife or pizza cutter coated with cooking spray, cut marshmallows into 1 x 2 inch squares.

You can also cut them with cookie cutters into any shape you fancy. Make sure to keep all of your exposed sides coated in the mixture of cornstarch and powdered sugar. (It is incredibly sticky otherwise.) Give the final product a good dusting, as well.

To brown the top as I did, use a broiler or a kitchen torch. Just watch them closely in the broiler since they only need about a minute.

Happy holidays!

Happy Oktoberfest ~ Soft Pretzels

Happy Oktoberfest!

The world’s largest fair is being held in Munich Germany right now. I love the fact that it started as a wedding celebration about 200 years ago, and it continues today. Now *that* is a wedding reception! 😉

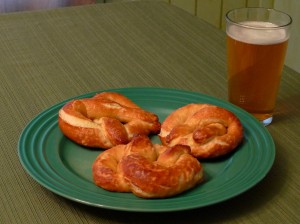
World celebrations and holidays give me a fun excuse to try recipes from different countries. To be a part of this celebration, I decided to try making one of my favorite German treats – Soft pretzels. I have to admit, this is not the first time I have attempted these, but they were nothing to write home about before. 😉 However, this latest attempt was a great success! They were so delicious and tender and comforting. Perfect to pair with a cold Oktoberfest beer. 🙂
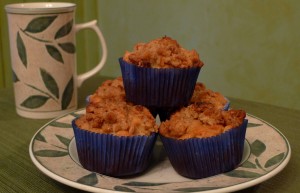

I used a recipe from Alton Brown this time. I followed it closely other than one deviation – I replaced the butter with Earth Balance, which worked beautifully. The result was worth the time and effort. Really, is there anything better than fresh baked bread? 🙂

Soft Pretzels

Recipe courtesy of the Food Network and Alton Brown

1 1/2 cups warm (110 to 115 degrees F) water

1 tablespoon sugar

2 teaspoons kosher salt

1 package active dry yeast

22 ounces all-purpose flour, approximately 4 1/2 cups

2 ounces unsalted butter, melted (or Earth Balance)

Vegetable oil, for pan

10 cups water

2/3 cup baking soda

1 large egg yolk beaten with 1 tablespoon water

Pretzel salt

Combine the water, sugar and kosher salt in the bowl of a stand mixer and sprinkle the yeast on top. Allow to sit for 5 minutes or until the mixture begins to foam. Add the flour and butter (or Earth Balance) and, using the dough hook attachment, mix on low speed until well combined. Change to medium speed and knead until the dough is smooth and pulls away from the side of the bowl, approximately 4 to 5 minutes. Remove the dough from the bowl, clean the bowl and then oil it well with vegetable oil. Return the dough to the bowl, cover with plastic wrap and sit in a warm place for approximately 50 to 55 minutes or until the dough has doubled in size.

Preheat the oven to 450 degrees F. Line 2 half-sheet pans with parchment paper and lightly brush with the vegetable oil. Set aside.

Bring the 10 cups of water and the baking soda to a rolling boil in an 8-quart saucepan or roasting pan.

In the meantime, turn the dough out onto a slightly oiled work surface and divide into 8 equal pieces. Roll out each piece of dough into a 24-inch rope. Make a U-shape with the rope, holding the ends of the rope, cross them over each other and press onto the bottom of the U in order to form the shape of a pretzel. Place onto the parchment-lined half sheet pan.

Place the pretzels into the boiling water, 1 by 1, for 30 seconds. Remove them from the water using a large flat spatula. Return to the half sheet pan, brush the top of each pretzel with the beaten egg yolk and water mixture and sprinkle with the pretzel salt. Bake until dark golden brown in color, approximately 12 to 14 minutes. Transfer to a cooling rack for at least 5 minutes before serving.

Happy 4th! ~ Watermelon and Cantaloupe Salad with Fresh Mint


Happy Fourth of July everyone!

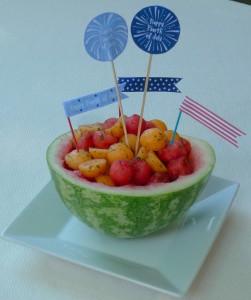
I made the most summery thing I could think of to celebrate this summer holiday today: A watermelon and cantaloupe salad tossed with mint and lemonade. A recipe inspired me from Giada DeLaurentis, but over the years, I have tweaked it to be the way I like it :). This is the streamlined version that is super easy to make anytime.

Watermelon and Cantaloupe Salad with Fresh Mint

1 bunch fresh mint

¼ cup lemonade (you may not need the full ¼ cup)

2 cups watermelon balls, from about half a watermelon

2 cups cantaloupe balls, from about 1 cantaloupe

In a blender, combine the mint and as much lemonade as you need for the mixture to become completely blended. (Up to ¼ cup.)

In a large bowl, combine the watermelon and the cantaloupe balls. Add the mint/lemonade mixture and toss. Transfer to a serving bowl (or half a watermelon rind) and serve.

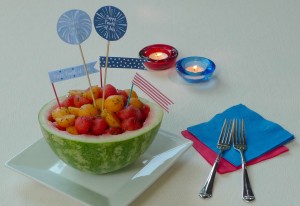
I also printed some very sweet little Fourth of July decorations from my favorite DIY site at the Elli blog. The patriotic decorations can be found here. So cute!


The Cottage at Glass Beach ~ Rhubarb Muffins

I am enjoying a summery book named The Cottage at Glass Beach by a local Seattle author, Heather Barbieri. I discovered the book on a fun little book and food website called Books and Bites. I’ve been choosing a lot of my recent book selections from the recommendations on that site. Not only do I get many good book suggestions from other authors I enjoy, but I also get a recipe that fits the theme of every book. So fun!

I tried the rhubarb muffins that the website pairs with The Cottage at Glass Beach. The author shared her own recipe for her delicious muffins. I put my own spin on them by using whole-wheat pastry flour instead of all-purpose flour and sprinkling simple cinnamon sugar on the top without the butter. They are so good for breakfast, or for a little mid day snack (while taking an afternoon break to read, of course! ;-))

Rhubarb Muffins

1 1/4 cups firmly packed brown sugar

1/2 cup light olive oil

1 egg

2 teaspoon vanilla

1 cup buttermilk

1 1/2 cups diced rhubarb

2 1/2 cups whole wheat pastry flour

1 teaspoon baking soda

1 teaspoon baking powder

Pinch of salt

3 tablespoons granulated sugar

½ teaspoon ground cinnamon

Combine the brown sugar, oil, egg, vanilla and buttermilk in a mixer bowl, and beat until well incorporated. Stir in the rhubarb by hand. In a separate bowl, combine the flour, baking soda, baking powder and salt. Stir into the rhubarb mixture until just blended.

Spoon the batter into a muffin tin filled with paper linings, about 2/3 full.

For the topping, combine the granulated sugar and cinnamon, and sprinkle evenly over the muffins.

Bake at 400 degrees for 20-25 minutes, or until a toothpick comes out clean when inserted into the center of a muffin.