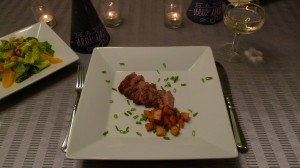
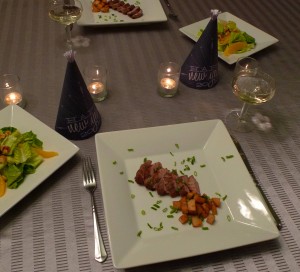
Happy Halloween! ~ Pork Tenderloin and Squash with Pumpkin Seed Vinaigrette

Halloween DinnerHappy Halloween!

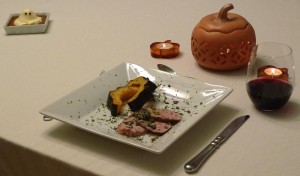
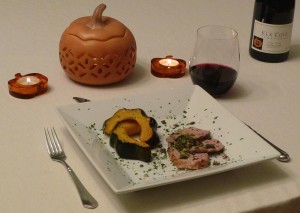
To celebrate, I made a festive autumn dinner tonight of pork tenderloin and squash with a pumpkin seed vinaigrette. I based the recipe on one I found from Bon Appétit. I substituted pork tenderloin for pork chops to make the dish a little leaner. (More room for chocolate Halloween candy later, I figure! 😉 ) I also added more pumpkin seeds than called for, since they are one of the stars of the dish. (And you may have read about my feelings about pumpkin in the last post. 🙂 It’s one of my favorite things!)
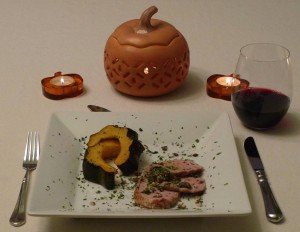
Halloween DinnerPork Tenderloin and Squash with Pumpkin Seed Vinaigrette

Based on a recipe from Bon Appétit

3 tablespoons shelled pumpkin seeds (pepitas), plus more for garnish

3 pounds winter squash (such as acorn, kabocha, delicata, or butternut), halved, seeded, cut into 1″ wedges

5 tablespoons olive oil, divided

Kosher salt, freshly ground pepper

1 pork tenderloin, silver skin removed

1/2 small garlic clove, crushed into a paste

3 tablespoons coarsely chopped fresh cilantro, plus more for garnish

2 tablespoons fresh lime juice

Preheat oven to 425°F. Spread out pumpkin seeds on a large rimmed baking sheet. Toast, tossing once, until just beginning to darken, about 4 minutes. Let cool. Coarsely chop; set aside.

Toss squash with 1 tablespoon oil on a large rimmed baking sheet; season with salt and pepper. Roast squash, turning occasionally, until golden brown and tender, about 25 minutes.

When squash has been roasting for about 20 minutes, heat 1 tablespoon oil in a large heavy oven proof skillet over medium-high heat. Season pork with salt and pepper and sear until brown on all sides. Finish in the oven until the internal temperature registers 145 degrees. Let rest before slicing.

Whisk garlic, 3 tablespoons chopped cilantro, 2 tablespoons lime juice, 3 tablespoons toasted pumpkin seeds, and remaining 3 tablespoons oil in a small bowl to combine. Season vinaigrette with salt and pepper to taste.

Divide squash and pork among plates; spoon vinaigrette over. Top with cilantro leaves and pumpkin seeds.
Halloween DinnerFor dessert, I served pumpkin custard that I dressed up for the holiday. I piped a whipped cream ghost on top and added two mini chocolate chips for his eyes. PS. I wouldn’t recommend eating all the whipped cream, since I made him big and plump! But I love how he looks…He makes me smile. 🙂

I hope you have a safe and happy Halloween!

Whipped Cream Ghost

Spooky Dinner ~ Chicken Bog

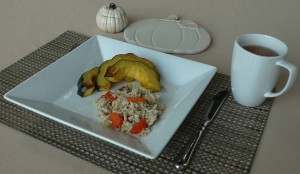
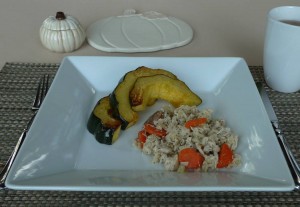
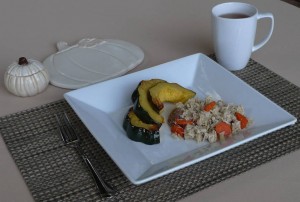
Chicken BogI love to read a good cozy mystery around Halloween. 🙂 Right now, I am enjoying one that takes place in October entitled The Jasmine Moon Murder by Laura Childs. It is another in a series I started this summer, set in a South Carolina tea shop. In the back of the book are recipes that compliment the storyline, including a recipe for a dish called Chicken Bog. Doesn’t that sound spooky and Halloweeny? I learned that the dish is a classic in the Lowcountry, and it is called “bog” because it isn’t a soup, but it is very moist. I thought it would be perfect to make to celebrate the Halloween season!
Chicken BogI based my dish on the recipe provided by Laura Childs, but I made a few tweaks of my own. One of the nice things about this recipe is that you also end up with a few cups of chicken stock to freeze for a future dish. It’s always nice to have homemade chicken stock in the freezer, especially now that the season for soups is right around the corner.

Chicken BogChicken Bog

Based on a recipe from The Jasmine Moon Murder

About 6 servings

6 cups water

1 large onion, coarsely chopped

Salt to taste

3 to 4 pound whole chicken (I used one that my butcher cut up already for ease)

5 carrots, sliced

5 celery stalks, sliced

1 tablespoon whole peppercorns

1 cup brown long grain rice

½ lb smoked chicken sausage, sliced

1 tablespoon poultry seasoning

1 tablespoon dried parsley flakes

Place the water, onion, salt, chicken, 3 carrots, 3 celery stalks, and peppercorns in a large pot, and bring to a boil. Cover, reduce heat to a simmer, and cook until chicken is tender, about 1 hour. Remove chicken and let cool, reserving the cooking liquid. Let the liquid cool, strain, and skim the fat from the top. Measure 3 ½ cups of the liquid, and pour into a fresh pot. (The remaining liquid can be put into the refrigerator or freezer for a future use.) Remove skin and bones from chicken, and chop into bite sized pieces. Add chicken pieces, remaining 2 carrots, remaining 2 celery stalks, rice, sausage, poultry seasoning, and parsley flakes to the stock. Make sure it is seasoned with enough salt to your liking. Add more if needed. Bring to a boil, cover, and reduce heat to a simmer. Cook for about 30 minutes, or until the rice is tender.

The Jasmine Moon Murder

One More Small Anniversary Celebration ~ Lemongrass-Crusted Salmon with a Watercress Coconut Sauce and 2000 Columbia Winery Peninsula

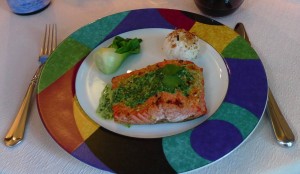
Spicy Salmon with Coconut Watercress SauceRob and I had our big wedding anniversary dinner celebration on Saturday of Labor Day weekend, which is the day of the week we got married. Our actual anniversary date fell in the middle of the week this year, but we couldn’t resist having a small, pared down celebration on the real date as well. We had lemongrass-crusted salmon with a watercress coconut sauce for dinner. Even though this salmon dish really was easy enough to make on a regular Tuesday, it was very delicious, and it felt like a dish fit for a special occasion. (Good thing, since I think this qualifies as a special occasion! 🙂 )

I was inspired once again by a recipe from Roy’s Fish and Seafood: Recipes from the Pacific Rim. I followed his recipe for the salmon crust, but I completely changed the sauce to make it my own. The original recipe used a cup of beurre blanc, but I replaced it with coconut milk. (It was a good use for the leftover milk from the cheesecake!) I don’t use a lot of butter in my cooking, and the coconut added an additional tropical element. It also mellowed the bitterness of the watercress nicely.

Lemongrass-Crusted Salmon with a Watercress Coconut Sauce

Based on a recipe from Roy’s Fish and Seafood cookbook

Serves 2, with leftover sauce

Salmon and Lemongrass Crust:

2 salmon fillets, about 6 oz each

1 tablespoon minced lemongrass (white part only)

½ tablespoon minced garlic

½ tablespoon grated fresh ginger

½ tablespoon minced shallot

½ tablespoon shichimi

Watercress Coconut Sauce:

1 bunch watercress, stemmed (reserve 4 sprigs for garnish)

½ tablespoon ginger juice (fresh ginger squeezed through a garlic press)

½ cup coconut milk

Safflower, sunflower, or peanut oil for cooking

Salt and pepper to taste

Preheat oven to 350 F.

Combine lemongrass, garlic, ginger, shallot, and shichimi in a bowl, and stir to blend. Set aside.

Bring a saucepan of water to a bowl. Place the watercress into a strainer, and when the water is bowling, pour over the watercress to wilt. Warm coconut milk. Combine watercress, milk and ginger juice in the bowl of a food processor, and pulse until it is to your desired texture. Add salt and pepper to taste. Set aside.

Preheat a medium non-stick saucepan over medium high heat. Evenly coat one side of the salmon fillets with the crust mixture. Drizzle the fillets with a high heat cooking oil, such as safflower, sunflower, or peanut oil. Carefully transfer the salmon to the hot pan, crust side down. Sear until the crust is a little browned. Turn, and finish in the oven for about 10 minutes, or until baked to desired doneness.

To serve, plate the salmon crust side up. Spoon the sauce on the top or side of the salmon fillets. Garnish with reserved watercress leaves.

We paired our dinner with a bottle of 2000 Columbia Winery Peninsula red wine. We got married in 2000, and we had our wedding reception at Columbia Winery, so we bought a case of this wine several years ago.  We like to open a bottle on our anniversary every year. It is aging nicely, which I’ll take as a good sign for us! 😉

Funny note: It began to absolutely pour down rain by the end of our dinner. Luckily, we decided to eat inside with the French doors open once again, so we could enjoy the thunder and showers instead of scrambling inside for cover. 😉 This bottom photo was taken in the middle of the downpour. It was actually kind of fun! It was definitely an anniversary to remember!

2000 Peninsula Red Wine

Wedding Anniversary, Part 2 ~ Macadamia Nut and Panko Crusted Ono with Happy Rice

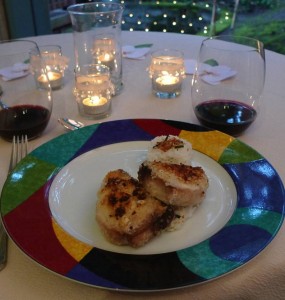
Macadamia and Panko Crusted OnoThe main course of our anniversary dinner was another recipe inspired by Roy’s Fish and Seafood: Recipes from the Pacific Rim. We had a macadamia nut and panko crusted ono fish, otherwise known as wahoo. (Wahoo! Sorry, couldn’t resist. 😉 ) It’s a Hawaiian fish with a dense but flaky texture, and a mild flavor. We also had a side dish of rice to accompany the fish. The cookbook calls this recipe Happy Rice. 🙂 So all in all, I’d say this is one of the happiest dishes I have ever made. 😉 Wahoo and Happy Rice!

We are lucky enough to have a Hawaiian fishmonger around Seattle called Tim’s Seafood in Kirkland. In addition to a wide selection of Northwest fish, he also gets fresh Hawaiian seafood. I had my choice of some beautiful fish for our dinner! He even makes his own poke.

I used coconut oil on the fish, and it gave it a subtle coconut flavor that was a nice compliment to the macadamia nuts. The original recipe used quite a bit of butter, but the coconut oil was a really nice alternative. This crust would work well with any firm white fish I think. The original recipe was for opakapaka, which I couldn’t find at the fish store that day, so I think any mild fish with a fairly firm texture would be lovely.

Macadamia Nut and Panko Crusted Ono with Happy Rice

Based on a recipe from Roy’s Fish and Seafood

Serves 2, with leftover rice for later

Happy Rice:

1 cup Japanese short-grain rice

1 cup water

1 tablespoon grated fresh ginger

1 tablespoon furikake, plus more for top

Macadamia and Panko Crusted Ono:

4 tablespoons macadamia nut halves

4 tablespoons coconut oil

½ cup panko breadcrumbs

Salt and pepper to taste

2 6 oz fillets of ono

Preheat oven to 350 F.

To prepare rice:

Put the rice in a fine mesh strainer and rinse under cold running water, until the water runs clear. Drain the rice and transfer to a bowl. Cover with fresh cold water, and let soak for 1 hour.

To cook the rice on the stovetop, place the drained rice in a saucepan and add 1 cup fresh water. Bring to boil, decrease heat, cover, and cook until the rice is soft and sticky and the water has just evaporated, about 15 minutes.

Combine the rice with ginger and furikake. Use small cookie cutters to form rice into compact shapes. Alternatively, dip your fingers in a bowl of slightly salted water to prevent the rice from sticking and mold 1 to 2 tablespoons of rice into triangles, cubes, or balls. Set aside and keep warm. Sprinkle the tops with more furikake.

To prepare fish:

In a food processor, pulse the nuts until they are cut into course pieces. Add the panko and oil, and pulse it all together until it is a thick paste, but still has some texture.

Coat one side of the ono with the paste. Preheat an oven-safe sauté pan over medium high heat, and when hot, place the ono in the pan, paste side down. Cook until golden, and then flip. Finish the fish in the oven. Cook until flaky, about 7 to 10 minutes.

Taste and say “Wahoo!!” OK, I have that out of my system now. 😉

Stay tuned for our Hawaiian dessert in the next entry!

Anniversary Dinner

South Carolina Kind of Summer ~ Lowcountry Boil

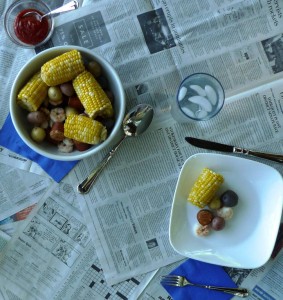
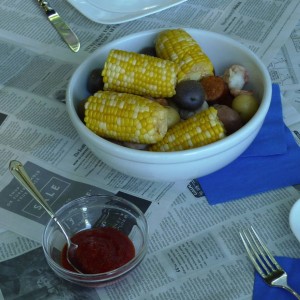
I got hooked on a mystery that was set in South Carolina, and became fascinated with that part of the country. This summer, I continue to read more stories from that region. It’s an interesting and beautiful place that I have not had the pleasure of visiting in person (yet, it’s on my list now!) Reading feels like a kind of virtual vacation, though. 🙂 I am getting to know the place through the stories. I just started a beach read that is set on Sullivan’s Island in the Lowcountry called The Summer Girls. To celebrate that part of the state, I made a Lowcountry Boil, also known as Frogmore Stew. It is a simple one-pot seafood boil, but it feels festive and summery! It would be perfect for a summer party.

I used Trader Joe’s smoked andouille chicken sausage rather than a full-fledged pork sausage. I also used shelled shrimp for ease, but unshelled shrimp would be more authentic. Your choice. 🙂

Lowcountry Boil AKA Frogmore Stew

Based on a recipe from Southern Living magazine

5 quarts water

1/4 cup Old Bay seasoning

4 pounds small red potatoes

2 pounds chicken kielbasa, chicken andouille, or other hot smoked link chicken sausage, cut into 1 1/2-inch pieces

6 ears fresh corn, halved

4 pounds unpeeled, large fresh shrimp (or peeled and deveined shrimp for easier eating)

Old Bay seasoning, for serving

Cocktail sauce, for serving

Bring 5 quarts water and 1/4 cup Old Bay seasoning to a rolling boil in a large covered stockpot.

Add potatoes; return to a boil, and cook, uncovered, 10 minutes.

Add sausage and corn, and return to a boil. Cook 10 minutes or until potatoes are tender.

Add shrimp to stockpot; cook 3 to 4 minutes or until shrimp turn pink. Drain. Serve with Old Bay seasoning and cocktail sauce.

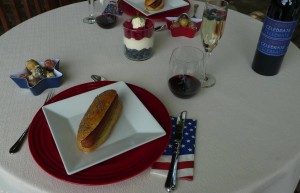
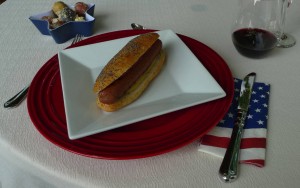
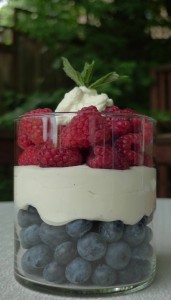
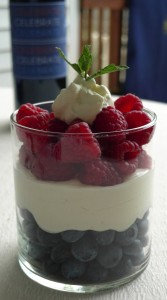
Happy Fourth of July! ~ Bison Hot Dogs on Homemade Buns; Red, White, and Blue Potato Salad; Blueberry and Raspberry Parfait with Vanilla Yogurt and Whipped Cream

Click photos to expand. 🙂

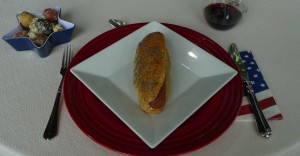
Bison hot dogs on homemade hot dog buns

Red, white and blue potato salad

Sparkling wine with blueberries and raspberries floating in the bubbles…

A red and blue berry parfait (with an equal combination of non-fat Greek vanilla yogurt and whipped cream for a layer of white)…

Fun patriotic decorations

It’s our Fourth of July celebration!

I hope you all have a fun, safe, and happy Independence Day! I’m off to Seattle’s festival on Lake Union! 🙂

Enjoy it all!


Red, White, and Blue Potato Salad

From Cooking Light magazine

2 cups fingerling potatoes, halved lengthwise (about 10 ounces)

2 cups small red potatoes, quartered (about 10 ounces)

2 cups small blue potatoes, halved lengthwise (about 10 ounces)

1/4 cup finely chopped red onion

2 tablespoons chopped fresh parsley

1 tablespoon chopped fresh dill

1 tablespoon chopped fresh chives

3 hard-cooked large eggs, finely chopped

1/4 cup red wine vinegar

2 tablespoons olive oil

1 1/4 teaspoons salt

2 teaspoons Dijon mustard

1/2 teaspoon freshly ground black pepper

1 garlic clove, minced

Place fingerling and red potatoes in a saucepan; cover with water. Bring to a boil. Reduce heat; simmer 15 minutes or until tender. Drain; cool slightly. Place potatoes in a large bowl.

Place blue potatoes in a saucepan; cover with water. Bring to a boil. Reduce heat; simmer 10 minutes or until tender. Drain; cool slightly. Add blue potatoes, onion, parsley, dill, chives, and eggs to bowl; toss gently.

Combine vinegar and remaining ingredients. Pour over potato mixture; toss gently to combine. Serve warm, at room temperature, or chilled.

Note: Blue potatoes are starchier than the others and tend to bleed, so cook them separately. If you need to, prepare this dish a day ahead, but add the blue potatoes just before serving. If your potatoes are larger than the ones we call for, cut them to a uniform size.

Swimsuit Season Is Here! ~ Cilantro, Jalapeño, and Cashew Sauce

Greetings from the train between Portland and Seattle! Isn’t technology amazing, so I can write about a recipe while going 75 miles an hour? 🙂

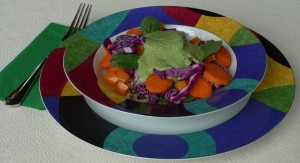
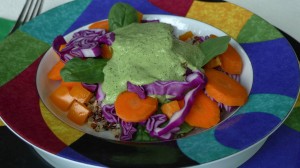
When I want to serve something extra healthy, (since swimsuit season is here!), I go back to this recipe again and again. It is from a raw vegan chef named Madeline Eyer who I had the pleasure of working with a couple of times. She is also the author of Essential Green Smoothies. This sauce is a good way to get a lot of fresh veggies into your diet, and it is seriously delicious (and colorful!) My favorite way to eat it is over cooked quinoa topped with a bunch of fresh veggies such as red cabbage, yellow peppers, carrot slices, mushroom slices and chopped spinach.

Cilantro, Jalapeño, and Cashew Sauce

From Madeline Eyer

1 cup cashews, soaked 2 – 4 hours, then rinsed

3/4 cup purified water

1/4 cup olive oil

1 bunch cilantro, bottom stems removed

3 cloves garlic, peeled

1/3 jalapeno, chopped (including seeds)

1 tablespoon lime juice

1 teaspoon Pink Himalayan or grey Celtic salt

Place all ingredients in high-speed blender and blend until creamy.

Store leftover sauce in an airtight container in the fridge. Will keep for approximately 5 days.

I hope you are enjoying the warmer, summery days that are here! Maybe even get out your swimsuit. 😉

Valentine Saturday ~ Crab Cake Breakfast

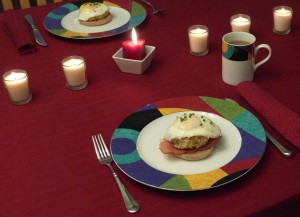
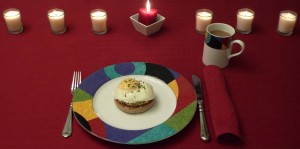
The leftover crab cakes make a really lovely breakfast in the morning. Just toast a whole-wheat English muffin for the base, place a reheated crab cake on top of that, and finish it off with a poached egg on top. Rob likes to put a little crispy prosciutto on his, as well. We are celebrating the whole Valentine weekend, so this was the perfect way to start the day after V-Day. 🙂

Happy Valentine’s Day! ~ Crab Cakes

Happy Valentine’s Day!

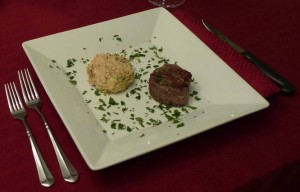
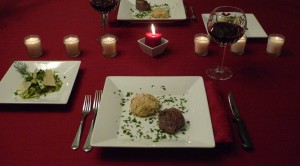
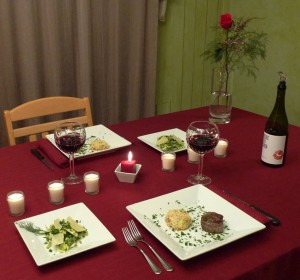
We enjoyed a low key, but special dinner tonight. Since I worked later in the evening, we just made a couple of our favorite dishes that are easy to put together. My Valentine requested his favorite crab cakes, which I wrote about a few years ago. They always feel like a special occasion dish. That with a little filet mignon and a fennel salad, and we had a gourmet meal in about 30 minutes! It really didn’t take any longer than that.

Since the crab cakes are one of our favorite dishes, I will reprint the recipe here. They are worth repeating! 🙂

Dungeness Crab Cakes

Based on a recipe from Sunset magazine

1 pound cooked and shelled Dungeness crab meat

1/4 cup finely diced celery

2 tablespoons minced fresh chives

2 tablespoons mayonnaise

1 large egg

2 teaspoons Dijon mustard

1/4 teaspoon hot sauce

1 1/4 cups panko, divided

Preheat your oven to 475 F. Make sure your crab doesn’t have any hidden bits of shell mixed in before you begin. In a large bowl, mix the celery, chives, mayonnaise, egg, mustard, and hot sauce with a fork. Then add the crab and 1/4 cup panko. Stir gently until everything is well blended.

Place the remaining 1 cup of panko in a shallow bowl. Shape the crab mixture into cakes. (I usually get about 6 or 7 large cakes, but make them the size you prefer. Whatever size you choose, they should be about 1/2 inch thick.) Place each cake in the panko and coat on all sides. Press gently to make sure the crumbs stick. Lay the panko-covered cakes slightly apart on a parchment-lined baking sheet. (You can make them up to this point earlier in the day. Just cover the pan lightly with plastic wrap and refrigerate until you are ready to bake.)

Bake until golden brown, 15 to 18 minutes. Serve immediately.

I gave Rob a bottle of wine from a new Washington winery called Result of a Crush. He was nice enough to share it with me. 😉 It was a perfect wine for Valentine’s Day!  Delicious, too. 🙂

New Year’s Eve ~ Paella Mixta

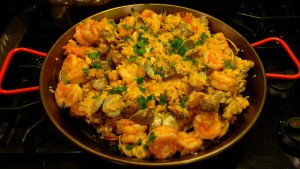
Almost every New Year’s Eve, we get together with some dear friends of ours and ring in the new year together. We usually pick a theme for our evening. This year we chose to try some Spanish dishes. They made a delicious mushroom tapas-style dish and flan for dessert (and also made sure we had some Spanish wine to pair with our meal!) We brought paella with chicken, clams and shrimp to the party. It’s a recipe I’d like to keep in my arsenal, since it was fairly easy and delicious! It has a little something for everyone.

I substituted the chicken thighs with boneless and skinless chicken breasts. I also used only half of the sausage that the recipe called for, but double the seafood. I used the gas stovetop at our friends’ house instead of the grill, as well, since it was chilly and rainy outside! 😉 Other than that, I followed the recipe fairly closely.

It’s the perfect party dish!

Paella Mixta (Paella with Seafood and Meat)

Based on a recipe from Chow

2 medium, ripe tomatoes (about 12 ounces)

32 large shrimp (about 24 ounces), peeled and deveined

1 ¼ teaspoon smoked Spanish paprika (pimentón dulce)

Freshly ground black pepper

1 pound boneless, skinless chicken breast, cut into 1-inch pieces

4 ounces Spanish chorizo, cut into 1/4-inch-thick rounds

1 to 2 tablespoons olive oil, as needed

1 medium yellow onion, small dice

2 medium garlic cloves, finely chopped

1 large pinch saffron threads

2 cups paella rice (about 1 pound), sometimes labeled bomba or Valencia

1 teaspoon kosher salt, plus more for seasoning the shrimp and chicken

4 cups (1 quart) low-sodium chicken broth

32 mussels, Manila clams, or a combination, scrubbed

2 tablespoons coarsely chopped fresh Italian parsley leaves

1 medium lemon, cut into 8 wedges, for serving

Core and halve the tomatoes. Grate the flesh side of each half on the large holes of a box grater set over a medium bowl, stopping when you get to the skin. Discard the skins. You should have about 3/4 cup of tomato pulp and juice; set aside.

Place the shrimp in a medium bowl, add 3/4 teaspoon of the paprika, and season with salt and pepper. Toss to combine and refrigerate.

Place the chicken in a medium bowl and season generously with salt and pepper; set aside.

Heat stovetop on high heat. Place a 15-inch paella pan on the stovetop, and heat until hot, about 2 minutes. Add the chorizo to the pan, and cook, stirring occasionally, until the sausage is starting to brown and the fat is rendered, about 2 to 3 minutes. Using tongs or a slotted spoon, transfer the chorizo to a large bowl; set aside.

There should be a thin layer of rendered fat in the pan. If there’s not enough, add 1 to 2 tablespoons of olive oil. Add the seasoned chicken to the pan in a single layer, and sear, stirring occasionally, until both sides of the chicken pieces are golden brown, about 6 minutes total. Using tongs or a slotted spoon, transfer the chicken to the bowl with the chorizo; set aside.

Add the onion to the pan, season with salt and pepper, and cook, stirring occasionally, until softened, about 5 minutes, adjusting the heat as needed so that the onions don’t burn. Add the garlic, remaining paprika, and saffron, stir to combine, and cook until fragrant, about 30 seconds.

Add the reserved tomato pulp and juice and cook until the mixture has slightly darkened in color, scraping up any browned bits from the bottom of the pan, about 3 minutes. Add the rice and measured salt and stir to coat in the tomato mixture.

Add the broth and stir to combine. Arrange the rice mixture in an even layer. Distribute the reserved chorizo and chicken over the rice, adding any accumulated juices from the bowl. (Do not stir the rice from this point on.)

Bring the mixture to a lively simmer. Continue to simmer, checking occasionally, until the rice grains have swelled, most of the liquid has been absorbed, about 12 minutes.

Arrange the reserved shrimp and the shellfish (hinge-side down) in the rice, nestling them slightly. Cook until the shellfish have opened, the shrimp are just cooked through, and the rice is tender but still al dente, about 10 to 12 minutes.

Before serving the paella, discard any unopened shellfish and sprinkle the dish with the parsley. Serve with the lemon wedges.

Happy Birthday! ~ Beef Wellington

Happy birthday to my hubby!

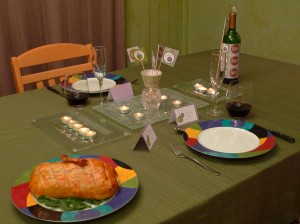
Every year he likes to have a fillet of beef dish for his birthday, so I decided to try beef Wellington this time around. I have tried several British/UK dishes this year, so this added to my collection. 🙂 He said it was within his top 1% of anything I have ever made for him, so I might make it a birthday tradition!

I used a recipe from the BBC, but tweaked it a bit for my American kitchen and for our tastes.

Beef Wellington

Based on a recipe from BBC Good Food

2 lbs beef tenderloin

Olive oil

10 oz crimini mushrooms

1 large sprig fresh thyme

Splash dry white wine

12 pieces thinly sliced prosciutto

1 pack frozen puff pastry, thawed

Flour for dusting

3 egg yolks beaten with 2 tsp water

1. Heat oven to 350 degrees F. Heat a large skillet over medium heat. Drizzle olive oil in pan until it is hot, but not smoking. Season beef with salt and pepper. Sear on all sides until golden. Then place beef on a roasting rack and cook in oven for about 20 minutes. (It will not be cooked through.) Remove from the oven to cool, and then chill in the refrigerator for about 20 minutes.

2. While beef is cooling, place the cleaned mushrooms in a food processor and pulse until fine. It should be the texture of coarse bread crumbs.

3. Preheat a large skillet over medium heat. Cook the mushrooms with the sprig of thyme in a dry pan with no oil, stirring often, about 10 minutes. When the liquid has cooked out of the mushrooms, pour a splash of white wine into the pan. Cook until dry once more. Remove thyme and season to taste with salt and pepper. Set aside.

4. Overlap 2 pieces of cling film (otherwise known as Saran wrap for us American cooks :)) over a large chopping board. Lay the prosciutto onto the cling film, slightly overlapping one another, in a double row. Spread the cooled mushrooms over the prosciutto evenly. Remove the beef from the refrigerator, and pat dry with a paper towel. Place it in the middle of the cling film with the prosciutto and mushrooms. Use the cling film’s edges to draw the prosciutto around the fillet tightly, and then roll it into a sausage shape, twisting the ends of the cling film to tighten. Chill the fillet once again.

5. Dust your clean work surface with a little flour. Roll out one piece of puff pastry until it is large enough to wrap around the fillet. Unravel the fillet from the cling film and set it in the center of the pastry. Beat the egg yolks and water together for an egg wash. Brush the pastry edges and the top and sides of the fillet with the egg wash. Wrap the pastry around the beef as tightly as you can, overlapping slightly to cover the whole fillet. Tuck the sides in as you would a package, so the beef is completely wrapped. Use the egg wash as a “glue” to make sure it stays together. Trim with kitchen shears if need be. Glaze the entire package with the egg wash. Using the back of a knife, mark the beef Wellington with long diagonal lines taking care not to cut through the pastry. Chill for at least 30 minutes.

6. Heat oven to 375 degrees F. Brush the Wellington with a little more egg wash and cook on a rack until golden and crisp, about 30 minutes, or until it is done to your liking. (Ours was still pink, but cooked through.) Allow to rest for about 20 minutes once it comes out of the oven. Serve in thick slices.

PS. I also made a little puff pastry “bow” with the extra pastry. Since this meal was part of Rob’s birthday gift, I thought I should wrap it like a present. 🙂 Just cut the rolled puff pastry into a ribbon shape, and twist once in the middle so it looks like a bow. Brush with the extra egg wash. Bake with the Wellington, but separately, on the side. It will cook faster than the Wellington, so remove when golden.

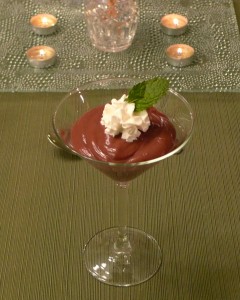
PPS. Rob asked for my chocolate mint pudding for dessert, so I served it in martini glasses with a little whipped cream and a sprig of mint for a classy presentation, fitting for a birthday! 🙂 The recipe can be found here.

PPPS. I used some adorable little printable decorations to make his birthday table unique and festive. I found them on a website called CatchMyParty.com. So cute! If you need some festive decorations for a party, they are easy and free. 🙂 I wrapped his wine bottle with them, made little flags, made a banner, used a cupcake wrap around a little vase, and wrote little birthday notes on the place cards.

Halloween Dinner ~ Pumpkin Shrimp Curry

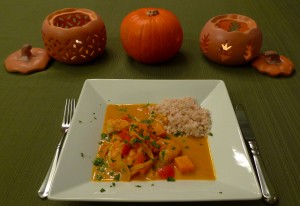
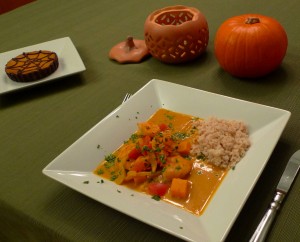
I made a pumpkin shrimp curry dish for dinner this Halloween. It is definitely one I’ll keep in my recipe archives to make again and again this fall. The pumpkin and butternut squash with a little bit of spice made it the perfect dish for my favorite autumn holiday. 🙂 Yummy and festive!

The recipe is originally from Bon Appétit magazine. I substituted light coconut milk instead of regular, and brown rice instead of white, but otherwise followed the recipe pretty closely.

Pumpkin Shrimp Curry

Based on a recipe from Bon Appétit magazine

2 tablespoons olive oil

1 cup sliced onion

1 tablespoon minced ginger

1 tablespoon minced garlic

1 plum tomato, chopped

1 15-ounce can pumpkin purée

2 cups vegetable broth

1 cup unsweetened light coconut milk

1 1/2 teaspoons curry powder

1/8 teaspoon cayenne pepper

1 cup butternut squash, diced and roasted (toss the cubes with olive oil and salt, and bake at 400 degrees for about 20 minutes, or until tender)

1 pound shrimp, peeled and deveined

1 1/2 teaspoons fresh lime juice

Steamed brown rice

Cilantro

Heat olive oil in a large saucepan over medium heat. Add onion and ginger; sauté until soft, about 8 minutes. Add garlic; cook for 1 minute. Stir in plum tomato and pumpkin purée; cook, stirring frequently, until pumpkin is golden brown, about 10 minutes. Add vegetable broth, coconut milk, curry powder, and cayenne pepper; simmer for 20 minutes. Add butternut squash, shrimp, and lime juice. Simmer until shrimp are cooked and squash is warm. Serve with a side of rice and a sprinkling of chopped cilantro.

Wedding Anniversary ~ Portobello Mushroom Ravioli

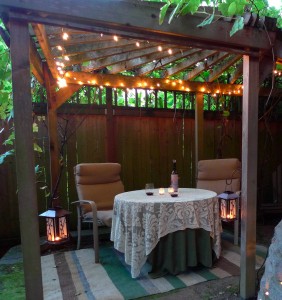
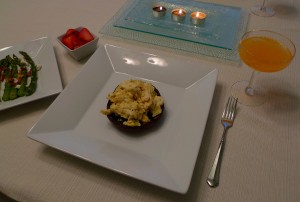
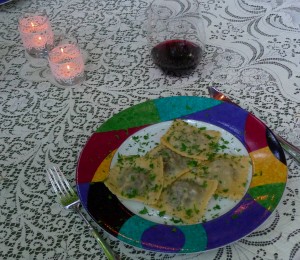
Our 13th wedding anniversary happened to fall on Labor Day this year, so we celebrated the whole weekend long! The grand finale was a homemade gourmet Italian dinner on Monday that we enjoyed under our grape arbor. 🙂 Dining under the vines made it feel a little like being in Tuscan wine country. Rob even added some little lights above the table, and we lit tea lights all around the yard for the occasion. So pretty!

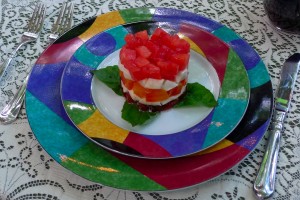
We made one special main dish, and a couple simple dishes surrounding it. We started with a simple Caprese salad that I made a little fancier by showcasing the different colored heirloom tomatoes in a tower with a food ring. We ended with a simple Earl Grey tea affogato, rather than the traditional coffee version. It tied this celebration back to the afternoon tea we had earlier in the weekend, and the bergamot orange that flavors Earl Grey tea is actually from Italy, which was very fitting! 🙂

For the main course, we made homemade portobello mushroom ravioli. I think that fresh pasta is much easier to make with a partner, so it is a perfect project to do together on an anniversary. 🙂 We also celebrated our engagement anniversary with a ravioli dish (on Valentine’s Day), so making ravioli again tied the two special anniversaries together.  Plus we had a portobello mushroom dish for dinner at our wedding reception at Columbia Winery, so that flavor brought us back to the reason for this celebration! (Have you noticed I like to find several layers of meaning in everything I cook for special occasions? 🙂 I think it makes it more fun and special!)

Portobello Mushroom Ravioli

Dough based on a recipe from Sur La Table cooking classes

Filling based on a recipe from ChasingSomeBlueSky.com

For the Fresh Pasta Dough:

Yield: 4 servings

2 1/2 cups (12 ounces) all-purpose flour or “00″ flour, plus more for dusting

1 tablespoon kosher salt

4 large eggs

1 tablespoon extra-virgin olive oil (optional)

Place flour and salt in a large mixing bowl and whisk to combine. Make a “well” in the center of the flour mixture and add eggs and oil, if using. Using your fingers, blend the eggs into the flour mixture, stirring the flour in from the sides of the well and working outwards. When the pasta dough is thoroughly mixed, turn it out on a lightly floured work surface. Knead dough until it is smooth and flexible but not sticky, about 5 to 10 minutes, adding small amounts of flour as needed. Gather the dough into a ball and flatten into a disk. Cover in plastic wrap and allow dough to rest for at least 10 minutes and up to 1 hour at room temperature.

To roll dough, secure a pasta machine to the edge of a long countertop. Using a bench scraper, cut dough into thirds. Keep extra dough covered in plastic while working with one piece. Flatten the piece of dough into a rough square that will fit inside the width of the pasta machine. Place the rollers on the widest setting and roll the dough through the machine, catching it with one hand as you roll with the other. Take the dough and fold into thirds towards the center of the dough. Turn the dough so one open end faces the machine and roll it through on the widest setting again. Fold, turn, and roll once more on the widest setting. Continue rolling the pasta through machine without folding, adjusting the rollers to the next smallest setting each time, until the desired thickness is reached. If the pasta sheet becomes too large to handle, use a bench scraper to cut it into more manageable lengths and continue rolling until pasta is less than 1/16-inch thick.

(This whole process can also be done with a rolling pin. It takes some muscle, but it works really well).

For the Ravioli Filling:

1 tablespoon olive oil

18 oz portobello mushrooms, finely chopped

1 garlic clove, minced

1/4 cup dry red wine

1/2 cup part skim ricotta

1/4 cup grated Parmesan

Salt and pepper to taste

For the Sauce:

2 tablespoons Earth Balance

Splash of white wine

Flat leaf parsley, for serving

Freshly grated Parmesan, for serving

Preheat a large non-stick pan over medium heat. Add the olive oil, and when it is shimmering, add the garlic. Cook until fragrant, about 30 seconds. Then add the chopped mushrooms, and salt and pepper lightly. Cook until the liquid from the mushrooms is mostly evaporated. Add the wine, and continue to cook until most of the wine has evaporated. Place the mixture into a large bowl. Mix in the ricotta and Parmesan, and season to taste.

Bring a large pot of water to a boil. When it is boiling, add a good amount of salt to season the cooking liquid.

To make the ravioli, take two pieces of uncut pasta dough. Place 1 teaspoon dollops of the mushroom mixture along one piece of the dough, with at least an inch and a half between them. With a pastry brush or your finger, brush water on the pasta around the mushrooms. Carefully place the second sheet of pasta dough over the top, taking care to press it around each teaspoon of mushroom filling to try to avoid any air bubbles. Cut around the raviolis with a ravioli cutter, cookie cutter, or a pizza cutter. Take care to keep enough flour on the outside of the ravioli so they don’t stick together before cooking.

Cook the ravioli in the boiling water until they float to the top, about 2-3 minutes.

I used a simple sauce for this dish by tossing the cooked raviolis in about 2 tablespoons of melted Earth Balance mixed with a splash of white wine in a sauté pan, and then serving the ravioli with freshly grated Parmesan and flat leaf parsley on top.

(For a little video of how to fill ravioli, here is one that is a short and sweet. 🙂 Much easier to understand than my explanation, I think. ;-))

We paired our meal with a special bottle of 2000 Peninsula red wine from Columbia Winery. We bought a case of the 2000 awhile back when it was still available, and we’ve been opening only one bottle a year for our wedding anniversary. It is aging really nicely! Hopefully that’s a good sign for our marriage, as well! 😉 We definitely savored this bottle.

Afternoon Anniversary Tea ~ Earl Grey Tea Smoked Salmon

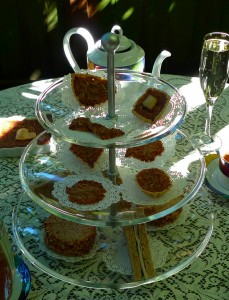
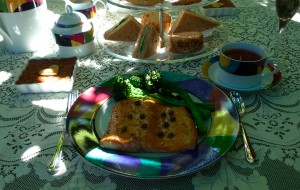
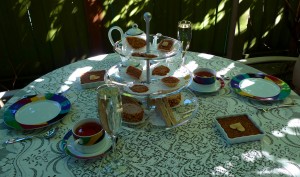
Our 13th wedding anniversary falls on Labor Day this year, so we are celebrating the whole holiday weekend! The traditional gift for the 13th year is lace, which led me to think about lacy afternoon teas. So, first stop, England! Virtually at least. 😉 I made a couple of little tea sandwiches and a couple of little desserts for the start and finish of our meal. I decided to add a more substantial main course in the middle for my sweetie, though. 🙂 I found a really interesting recipe from a British Pub called The Wellington Arms for a tea smoked salmon. I have to say, I was really intrigued, but also a little nervous that it might involve a few fire trucks. 😉 But I’m happy to report, no fire alarms or fire trucks, and it is one of the most exciting recipes I’ve tried in a while! Now I would like to smoke more things! Vegetables, eggs, cheese, chicken…The possibilities are endless. The types of tea to try are also plentiful. I used Earl Grey to stay with the British theme, but I’m excited to try different kinds for different flavors. I hope you’ll give this technique a go sometime. I think you’ll like it. 🙂

Tea Smoked Salmon

Based on a recipe from The Wellington Arms

Serves 2

For the fish:

2 fillets fresh wild salmon, about 6 oz each

Decaffeinated Earl Grey tea from 8 tea bags (approximately)

½ cup white rice (approximately)

1 tablespoon sugar (approximately)

Canola oil, or other high heat oil

Salt and pepper to taste

For the sauce:

2 tablespoons Earth Balance

1 teaspoon capers, rinsed

Squeeze of lemon juice

Salt and pepper to taste

Preheat oven to 350

Line an old pan that you are not very fond of with 2 layers of heavy duty tin foil, making sure there is plenty of extra overhanging to wrap around your lid. Form it to the bottom of the pan. Sprinkle the tea, rice and sugar in the bottom of the pan and combine.

Place a cake rack in the pan, and oil it with a high heat oil, such as canola. Place the fish skin-side down on top of the rack. Cover the pan with a lid. (It doesn’t need to fit tightly. I found that glass was nice because I could see my progress without removing the lid.) Wrap the excess tin foil up and around the lid to make sure there is a tight seal. This will keep almost all of the smoke inside of the pan. Put the pan on the stove and heat on high until smoking. Cook for about 8 minutes until the salmon is well infused with the smoke flavor. The top of the salmon will become a little dark. Remove the lid outside to avoid smoking your kitchen.

If you have thin fillets, they may be cooked through at this point. If they are still undercooked, place them in the preheated oven until they are done to your liking.

In the meantime, place the Earth Balance and capers in a saucepan and melt over medium heat. When they are melted and warm, add a squeeze of lemon juice and combine.

Serve the salmon with a spoonful of sauce over the top.

I found a few videos that helped me visualize how to do this technique before I tried it. One that is similar to the way I did it (only with wood chips instead of tea and without the lid) can be found here.

The small dishes we had with our afternoon tea were also lovely, and worth a try. I will keep these recipes in my collection. 🙂 We had chicken salad tea sandwiches with smoked almonds and smoked turkey tea sandwiches with arugula mayonnaise. I just replaced the regular mayonnaise in both of them with the reduced fat variety and I used a tender whole wheat bread instead of white, but I followed the recipes otherwise.

For dessert I made mini apple treacle tarts. Now I want to watch an episode of Downton Abbey! 😉 I wonder if they were as good as Mrs. Patmore’s? I actually substituted the butter completely with Earth Balance, and it worked beautifully. I just baked them for much less time than the big tart called for. I also made coconut oatmeal lace cookies. Again, I completely substituted the butter with Earth Balance, and they were delicious!

Next stop, Italy! We are planning to make ravioli and an Italian meal for our anniversary day. 🙂 Stay tuned….


Summery Tropical Breakfast ~ Whole Wheat Banana Pancakes

Summer is almost here, and that always makes me crave my favorite tropical flavors to match the warm weather. 🙂

I made these tropical whole wheat pancakes one morning, and now they keep showing up on our weekend breakfast menu! They are very easy and tasty, and I almost always have the ingredients on hand. The original recipe was from Bon Appétit magazine. I reduced the recipe by half, although they do reheat fairly well the next morning if you’d like to make a full batch. I used all whole wheat pastry flour instead of mixing it with all purpose flour. (If you would like fluffier pancakes, measure 1/4 cup and 1 tablespoon of all purpose flour and use only ½ cup and 2 tablespoons of whole wheat flour. But for the healthier version, which is also quite tasty, all whole wheat works very well.) I used skim milk instead of whole, and I also replaced the butter with coconut oil. (One more tropical ingredient! Plus it is a healthier fat.) I didn’t include pecans, as the original recipe called for, but I did chop up some macadamia nuts and tossed them in the batter for a little texture. That seemed to fit the tropical theme better than pecans. 🙂

Whole Wheat Pancakes with Bananas

Adapted from Bon Appétit magazine

Makes about 9 pancakes

3/4 cups and 3 tablespoons whole-wheat pastry flour

1 1/2 tablespoons sugar

2 teaspoons baking powder

Pinch of salt

1 cup skim milk

1 large egg

1/2 teaspoon vanilla extract

2 tablespoons coconut oil, melted

1 large banana (about), peeled, cut into 1/4-inch-thick rounds

1/2 cup macadamia nuts, chopped (optional)

Preheat oven to 250°F. Place baking sheet in oven. Whisk first 4 ingredients in large bowl. Whisk milk, eggs, and vanilla in medium bowl, then whisk in coconut oil. (It will clump a little when it hits to cool milk, but it will melt again in the pan when cooked.) Stir milk mixture into dry ingredients. Stir in chopped macadamias if using.

Heat large nonstick griddle or skillet over medium heat. For each pancake, drop 1/4 cup batter onto griddle. Arrange 3 banana rounds on each pancake. Cook until brown, about 2 minutes per side. Transfer to baking sheet in oven. Repeat with remaining batter and bananas. Serve with syrup.

I recently discovered all natural syrup that we have been using on our pancakes at my house called Sohgave! vanilla maple flavor agave syrup. I don’t like buying the artificial sugar free syrups, so this is a nice alternative if you’d like something other than maple syrup. Very yummy, and it doesn’t leave you with a sugar high like maple syrup can sometimes do.

Happy Cinco de Mayo ~ Mexican Chicken Pozole Verde

Happy Cinco de Mayo!

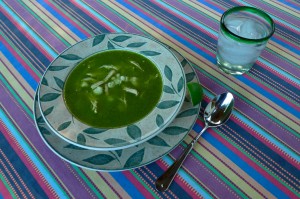
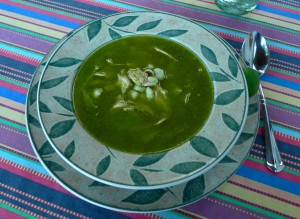
This year, I made a fresh and springy dish from Mexico to celebrate the day. I had this soup in a class from Sur La Table a few months ago, but I thought tonight was a perfect night to recreate it at home. It has a long history in Mexico, which makes it even more interesting to me. But mostly, it is just delicioso! 🙂 I hope you’ll give it a try.

Mexican Chicken Pozole Verde

Based on a recipe from Sur La Table

Serves 6 to 8

7 cups low sodium chicken stock

2 cups water

4 chicken breast halves on the bone, with the skin

1 pound tomatillos, husked and halved

1 small onion, quartered

2 poblano chilies-cored, seeded and quartered

2 jalapenos, seeded and quartered

4 large garlic cloves, smashed

1/2 cup chopped cilantro

1 tablespoon fresh oregano leaves

Salt and freshly ground black pepper to taste

3 15-ounce cans of hominy, drained and rinsed

Finely shredded iceberg lettuce, sliced radishes, chopped onion, diced avocado, sour cream, tortilla chips and/or lime wedges, for serving

In a large and heavy stockpot, bring the chicken stock and water to a boil. Add the chicken breasts, skin side down, cover and simmer over very low heat until they are tender and cooked through to an internal temperature of 165 degrees. Transfer the chicken breasts to a plate and shred the meat; discard the bones and skin. Skim any excess fat from the cooking liquid.

In a blender, combine the halved tomatillos, quartered onion, poblanos, jalapenos, smashed garlic, chopped cilantro and oregano. Pulse until coarsely chopped, scraping down the side. With the machine on, add 1 cup of the cooking liquid and puree until smooth. Season the tomatillo puree with salt and pepper.

Preheat a large deep skillet at moderate heat. Add the tomatillo puree and cook, stirring occasionally, until the sauce turns a deep green, about 12 minutes.

Pour the green sauce into the cooking liquid in the stockpot. Add the hominy and bring to a simmer over moderate heat. Add the shredded chicken to the stew, season with salt and pepper, and cook until just heated through.

Serve the pozole in deep bowls, passing the lettuce, radishes, onion, avocado, sour cream, tortilla chips and/or lime wedges at the table.

This would pair very nicely with the Mexican Sidecar that I wrote about last year or the sparkling wine “margarita” from the year before. 🙂

Elegant Spring Anniversary Brunch, Part 2 ~ Broiled Portobello Topped With Creamy Scrambled Eggs

We made a Broiled Portobello Topped With Creamy Scrambled Eggs as the main course of our spring anniversary brunch. We often make a scramble on a regular Sunday morning, and this was only minimally more effort. We usually lighten our scrambles by using about half of the egg yolks to egg whites, and we did the same here. I also omitted the butter from the original recipe completely and just used a non-stick pan with no oil for the eggs. I would recommend measuring both the Parmesan and the rosemary to taste. We used a little more cheese than the recipe called for, but we used less rosemary. (I will make exceptions when I think the fat is worth it…Cheese is worth it to me!) Make it your own, the way you like it :).

Broiled Portobello Topped with Creamy Scrambled Eggs

Adapted from Bon Appétit magazine

Makes 3 servings

3 4- to 5-inch-diameter portobello mushrooms

Olive oil

1 large garlic clove, minced

12 large egg whites and 6 of the yolks

Grated Parmesan cheese, to taste

Chopped fresh rosemary, to taste

Salt and pepper

Preheat broiler. Line large baking sheet with foil. Remove and discard mushroom stems. Scoop out and discard tough inside centers where mushroom stems were attached. Brush both sides of mushrooms generously with olive oil. Place mushrooms, dark gill side up, on prepared baking sheet. Sprinkle mushrooms with minced garlic, then sprinkle generously with salt and pepper. Broil mushrooms about 5 inches from heat source until beginning to soften, about 5 minutes. Turn mushrooms over; broil until tender when pierced with knife, about 7 minutes longer. (Can be made 2 hours ahead. Let stand at room temperature. Before continuing, rewarm in 350°F oven until heated through, about 10 minutes.)

Whisk eggs, Parmesan cheese, chopped rosemary, salt, and pepper in large bowl to blend. Heat large non-stick skillet over medium-low heat. Add eggs to skillet and stir gently in circular motion with wooden spoon or heat-resistant rubber spatula, releasing cooked eggs from bottom of skillet and allowing uncooked portion of eggs to flow underneath. Cook until eggs are set but still soft, about 4 minutes total.

Arrange hot portobello mushrooms, gill side up, on plates. Top with eggs, dividing equally. Sprinkle with more grated Parmesan cheese, dividing equally, and serve.

The Winter Sea ~ Cock-a-Leekie Soup

I read a page turning novel this winter called The Winter Sea by Susanna Kearsley. It is set in Scotland, and follows two interconnected story lines….One in the 1700s and one in the present day. I felt like I took a little trip to Scotland while learning a lot about their history. Much of the story revolves around Slains Castle, which looks to be an absolutely breathtaking place. That is now on my list of places I’d like to visit!

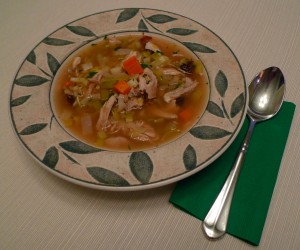
In the meantime, as I dream of that vacation, I cooked a Scottish dish at home for a little international culinary adventure today :). When I’m inspired by a place and a culture, I start researching their food. I discovered a Scottish soup called Cock-a-Leekie that looked intriguing, and I loved the name! It dates back farther than the 1700s, (a recipe for it was first published in 1598 according to Wikipedia), so the characters in the book might have enjoyed a steaming bowl at the dinner table of the castle. A perfect dish for a cold winter night, no matter the century or the continent :).

(Slains Castle photo courtesy of Wikipedia)

Cock-a-Leekie Soup

From Martha Stewart.com

1 1/4 pounds skinless chicken thighs (on the bone; 4 pieces)

1 1/4 pounds skinless chicken breast halves (on the bone; 3 pieces)

Four 14 1/2-ounce cans low-sodium chicken broth, skimmed of fat

2 cups white wine or water

2 large celery ribs, halved crosswise

1 large carrot, peeled

2 large garlic cloves, peeled

6 leeks, white and light-green parts only, halved lengthwise, thinly sliced crosswise

12 pitted prunes, quartered (2/3 cup packed)

1/2 cup barley

1/2 cup finely chopped fresh flat-leaf parsley

Salt and pepper to taste

Directions

Heat a 6-quart Dutch oven on medium-high until hot. Add thighs; cook until browned, turning once, about 8 minutes. Transfer to a bowl. Repeat with breasts.

Add broth, wine, celery, carrot, and garlic to Dutch oven. Bring to a boil; scrape any browned bits from pot; return chicken to pot, reduce heat, and simmer, skimming as necessary, for 1 hour. Transfer chicken to a plate; let cool. Transfer vegetables to another plate; reserve.

Add leeks, prunes, and barley to broth. Bring to a boil, reduce heat, and simmer until thick, about 40 minutes more. Once chicken has cooled, shred meat. Finely dice carrot and celery. Stir chicken, carrot, celery, and parsley into soup, heat through, season to taste and serve.

Valentine’s Day Dinner, Part 2 ~ Lobster Ravioli with Warm Lobster Vinaigrette


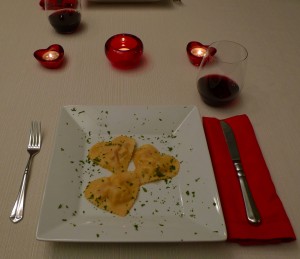
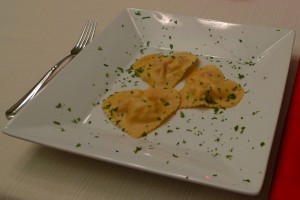
The second ravioli course that we made for our romantic Valentine’s Day dinner was lobster ravioli with warm lobster vinaigrette. The recipe is from the chef at Corton restaurant in New York City, so it was our second stop on our virtual trip to NYC. I could almost see Tom Hanks and Meg Ryan on top of the Empire State Building in the movie Sleepless in Seattle. 😉

The spices in the vinaigrette are a truly unique combination, and I would have never thought to put them together myself. It has a lot of Asian elements along with French and Indian. I found what I needed at Market Spice in Pike Place Market, which is always an adventure! If they don’t have a spice, I likely won’t find it in Seattle.

I followed the recipe closely, and I would highly recommend it for a special occasion. It is time consuming, but we thought it was well worth it. It made us appreciate what high end restaurants go through for one dish :).

Lobster Ravioli with Warm Lobster Vinaigrette

From Corton chef Paul Liebrandt

1 (1 1/2 pound) lobster

1 cup white-wine vinegar

1 cup dry white wine

1 carrot, finely chopped

1 medium onion, finely chopped

2 bay leaves

10 black peppercorns

1/2 lemon, sliced

Coarse salt and freshly ground pepper

Pinch of madras curry powder

1/2 large egg white

3 tablespoons olive oil

1 piece lemongrass, finely chopped

1 shallot, finely chopped

8 kaffir lime leaves

6 green cardamom pods, lightly crushed

1 tablespoon minced fresh ginger

3 star anise

2 tablespoons extra-virgin olive oil

1 tablespoon freshly squeezed lime juice

Pinch of espelette pepper

Pasta Dough (recipe follows)

All-purpose flour, for work surface (or ’00’)

1 large egg yolk, beaten

Prepare an ice-water bath; set aside. Fill a large pot with 32 cups water. Add vinegar, white wine, carrots, onion, bay leaves, peppercorns, and lemon; bring to a gentle simmer over medium-high heat. Add lobster headfirst. Cook for three minutes. Remove lobster from pot and remove claws. Return claws to pot and continue to cook 8 minutes more. Immediately transfer lobster to ice-water bath to cool; drain.

Remove meat from lobster, reserving shells. Cut lobster meat into 1/4-inch pieces and transfer to a large bowl; season with salt and pepper. Add curry powder and egg white; stir to combine. Using a teaspoon, form twelve 1-inch balls of lobster mixture and place on a parchment paper-lined baking sheet; transfer to refrigerator uncovered, until well chilled, about 1 1/2 hours.

Chop reserved shells into equal size pieces. Place olive oil and chopped shells in a large high-sided skillet over medium heat. Cook, stirring, until liquid has evaporated from shells. Reduce heat to low and continue cooking until shells are bright red, but not sizzling, about 10 minutes. Add lemongrass, shallot, kaffir lime leaves, cardamom, ginger, and star anise. Increase heat to medium and cook for 5 minutes. Add enough water to just cover; cook until liquid is reduced by two-thirds, stirring occasionally.

Strain mixture into a bowl through a fine mesh strainer, pressing down on solids to release liquids. Discard solids and return liquid to skillet. Cook over low heat until liquid is reduced and slightly syrupy, 3 to 5 minutes.

Remove from heat and stir in extra-virgin olive oil, lime juice, and esplette; vinaigrette will look broken. Keep warm.

Set the rollers of a hand-crank or electric pasta machine at their widest opening. Unwrap dough; flatten with the palms of your hands and run it once through the machine. Fold the dough in thirds like a letter and run through the machine again.

Now change the rollers of the pasta machine to the next decreasing setting; roll dough through machine twice. Keep rolling the sheet through the machine two times on each decreasing setting until you have rolled it through the last (thinnest) setting.

Cut sheet in half crosswise and place on a lightly floured surface. Using a 2 3/4-inch round cutter, cut out 24 rounds of pasta, covering cut pasta with plastic wrap as you work.

Working with 2 pasta rounds at a time (and keeping remaining pieces covered while working), brush 1 round with egg yolk and place 1 ball of lobster filling in the center. Lay second round directly on top and press edges together to seal. Repeat process with remaining pasta rounds and filling.

Bring a large pot of water to a gentle simmer over medium-high heat. Add raviolis, taking care not to overcrowd and working in batches if necessary, cook for 2 minutes. Meanwhile, rewarm vinaigrette, if necessary.

Using a slotted spoon, transfer ravioli to warm serving plates or bowls; top each with 2 tablespoons vinaigrette and serve immediately.


Pasta Dough

From Corton chef Paul Liebrandt

(Makes enough for 12 (2-inch-round) raviolis)

3 large egg yolks

2 large eggs

1 tablespoon olive oil

2 cups plus 3 tablespoons ’00’, flour plus more for work surface

In a large bowl, whisk together egg yolks and eggs; add olive oil and whisk until slightly emulsified. Transfer to the bowl of a food processor and pulse for 5 seconds. Add flour and pulse until a cohesive ball of dough forms, about 30 seconds.

Remove dough from food processor. Add a pinch of flour to work surface and knead until smooth, about 2 minutes. Wrap with plastic wrap and let rest in a cool place 2 hours before using.

Welcome 2013 ~ Five Spice Duck Breasts with Caramelized Quince

Happy New Year 2013!

On New Year’s Eve, we celebrated the last day of the year with a few Spanish tapas. My favorite was made with quince paste, Manchego cheese, and Marcona almonds. I had never cooked with quince before, and it really intrigued me! If you’ve never had it, I would describe it as a cross between a pear and an apple, but it needs to be cooked to bring out its sweetness. I love to explore ingredients I have never tried before. It keeps the kitchen fun and interesting.

I stayed with the quince theme for our New Year’s Day dinner. A new fruit for a new year seemed fitting! We had Five Spice Duck Breasts with Caramelized Quince to kick off 2013.  I followed the recipe from Cooking Light magazine pretty closely except that I cut the sugar in the poached quinces quite a bit. Other than that, we thought it was a really exceptional recipe!

Poached Quinces

Based on a recipe from Cooking Light magazine

2 cups water

1/8 cup sugar

1/2 teaspoon black peppercorns

1/2 cinnamon stick

1 (1-inch) julienne-cut lemon rind

2 cored peeled quinces, quartered

Bring first 5 ingredients to a boil in a sauce pan, and cook 2 minutes. Add quinces; reduce heat, and simmer 45 minutes or until tender, stirring occasionally. Remove from heat, and cool to room temperature. Remove quinces from liquid with a slotted spoon. Strain liquid through a sieve into a bowl; discard solids. Pour liquid over quinces.

Five Spice Duck Breasts with Caramelized Quince

From Cooking Light magazine

Poached Quinces from recipe above

1 teaspoon five-spice powder

2 teaspoons minced peeled fresh ginger

2 garlic cloves, minced

2 (12-ounce) packages boneless whole duck breasts, thawed and cut in half

1/2 teaspoon salt

1/2 teaspoon freshly ground black pepper

1 tablespoon thinly sliced green onions

Reserve 3/4 cup poaching liquid from Poached Quinces. Reserve remaining liquid for another use. Cut the quince quarters into cubes; set aside.

Combine 1/2 cup reserved poaching liquid, five-spice powder, ginger, and garlic in a large zip-top plastic bag. Add duck to bag; seal and toss to coat. Marinate in refrigerator at least 24 hours or up to 2 days, turning bag occasionally.

Preheat oven to 400°.

Remove duck from marinade; discard marinade. Sprinkle duck evenly with salt and pepper. Heat a large ovenproof skillet over medium-high heat. Place duck, skin side down, in pan; cook 1 1/2 minutes or until skin is golden brown. Turn meat over; cook 1 minute. Place pan in oven. Bake at 400° for 15 minutes or until a thermometer registers 160° (medium) or until desired degree of doneness. Remove duck from pan, reserving 2 teaspoons drippings in pan. Place duck, skin side down, on a cutting board or work surface. Brush meaty side of duck with remaining 1/4 cup poaching liquid.

Heat reserved drippings in pan over medium-high heat. Add cubed quince quarters; sauté 5 minutes or until golden brown. Remove from heat; stir in sliced green onions.

Remove skin from duck; discard. Cut duck diagonally across grain into thin slices. Divide duck slices evenly among each of 4 plates; top each serving with 1/4 cup quince mixture. Serve immediately.

PS. The leftover quince syrup was a nice addition to a glass of sparkling wine to ring in the new year :).

PPS. The festive little paper hats were free to download and print from http://www.ellinee.com. Super cute!