Happy Birthday USA ~ Fresh Oysters on the Half Shell with a Watermelon, Champagne and Cucumber Mignonette


Happy birthday USA!

Today is all about celebrating our country, and this year I decided to do that by celebrating our little corner of the country with some of the best treats that the Northwest has to offer.

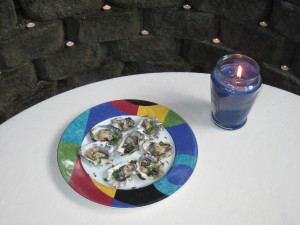
We started with a plate of Penn Cove Select oysters on the half shell with a watermelon, champagne and cucumber mignonette. I think of sparkling wine when I think of the Fourth, since the sparkles remind me of fireworks :). The watermelon and cucumber also added a summery sweet freshness to the oysters’ salty brininess. I must admit, oysters are something I am just now beginning to enjoy. I’ve tried them in the past, but they were never my favorite choices. I liked this mignonette so much, that I had three of them! The most important thing is to get live oysters from a fishmonger that you trust. The recipe is based on one from Oprah.com, and I’d like to pass it along to you.

Fresh Oysters on the Half Shell with a Watermelon, Champagne and Cucumber Mignonette

12 shucked fresh oysters

1/4 cup watermelon juice

1/4 cup champagne vinegar

1/2 cup champagne

1/2 tablespoon prepared horseradish

2 tablespoons minced English cucumber

2 tablespoons minced shallots

Freshly ground black pepper to taste

1/2 tablespoon finely chopped tarragon for garnish

To make the watermelon juice, place 1 inch pieces of melon into a food processor, and process until pureed. Place a coffee filter in a strainer, and place the strainer over a large cup. Pour the melon puree into the strainer, and let it drain into the cup. Discard the pulp.

Combine the watermelon juice, champagne vinegar, champagne, horseradish, cucumber, shallots and black pepper in a bowl. Mix well.

Serve about a teaspoon of the mignonette on top of each oyster. Garnish with the chopped tarragon. Serve immediately.

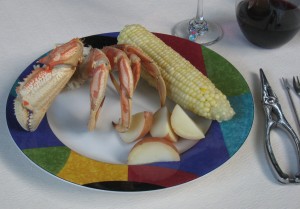
For the main course, we had a Dungeness crab boil…A classic American summer celebration dish with a Northwest twist. It was super easy and delicious. I always ask my fishmonger to dispatch and clean the crabs when I buy them. They are much sweeter if they are cleaned before they are cooked. For two crabs (about 2 lbs each), steam for about 17 minutes until they are cooked through. At the same time, in a separate pot, boil the potatoes and corn. That’s it! 🙂 It couldn’t be easier.

Dessert was even easier and equally as delicious. We had a big bowl of Rainier cherries. They have a very short season, so they always feel like a special treat. They don’t need any help from a recipe :).

We paired dinner with a Chandon Liberty Sparkle cocktail from DomaineChandon.com. The recipe is basically the same as the Pomegranate Fizzes that I wrote about earlier this year, but with an added patriotic name for a red sparkling cocktail! It’s just a splash of pomegranate juice and a splash of Grand Marnier topped with sparkling wine.

I hope you have a safe and happy Fourth of July!

It’s Canada Day! ~ Cedar Plank Roasted Salmon with a Maple Glaze


Happy Canada Day!

We love our neighbors to the north :). We spent our honeymoon on Vancouver Island, and British Columbia is one of our favorite places to visit. It’s just a hop, skip and a jump from Seattle, and it’s an absolutely beautiful province.

Even though we aren’t Canadian, who can’t use an extra reason to celebrate? Celebrating non-traditional holidays shakes things up a bit and it’s fun!

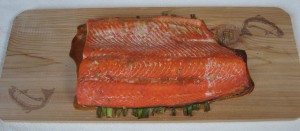
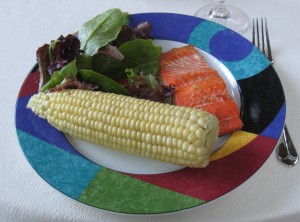
I think of maple syrup when I think of Canadian cuisine, and British Columbia has some great seafood similar to Seattle, so I decided to make cedar plank roasted salmon with a maple glaze. The wooden plank infuses a subtle smokey flavor into the fish. (Luckily it didn’t smoke the house, as well ;). It did make the kitchen smell nice and toasty, though.) I found the recipe at Epicurious.com. I followed it pretty closely, so I just want to pass the recipe onto you since it was so delicious and special!


Cedar Plank Roasted Salmon with a Maple Glaze

1 cup maple syrup

2 tablespoons grated fresh ginger

4 tablespoons lemon juice

3 tablespoons soy sauce

1 1/2 teaspoons minced garlic

An untreated cedar plank (you can find them at specialty cooking stores)

2 1/2-pound center-cut salmon fillet with skin

1 bunch of scallion greens

In a small saucepan, simmer the maple syrup, ginger, 3 tablespoons of lemon juice, soy sauce, garlic, and salt and pepper to taste until it is reduced to about 1 cup. (About 30 minutes). Let cool.

Place the oven rack in the middle position, and preheat your oven to 350. Heat the cedar plank by itself in the middle of the oven after it is up to temperature for about 15 minutes to get it a little toasty.

Pour half of the glaze into a small dish, and keep the other half in the pan. Stir the remaining 1 tablespoon of lemon juice into the sauce on the stove, warm and cover.

Arrange the scallion greens in one layer on the plank.

Put the salmon, skin side down, on the scallion greens and brush with the remaining glaze in the small dish. Season the salmon with salt and pepper and roast until just cooked through, about 35 minutes.

Cut the salmon crosswise into 6 pieces and drizzle with the warm sauce.

Happy Canada Day to all…Whether you live in Canada or just enjoy their beautiful country :).

It’s the first day of summer! ~ Oven Baked Fish with Chips

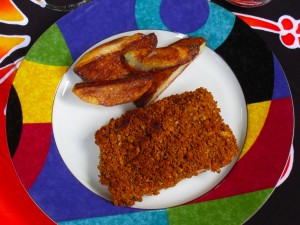
It’s the first day of summer! The sun actually cooperated in Seattle today, and it feels like summer is here. No coats necessary :). We celebrated by having fish and chips for dinner alfresco. In the summertime, we occasionally visit a little fish and chip place on Lake Union called Ivar’s. The view on their little deck overlooks the lake and the city skyline, and the food is very tasty, but it isn’t what I would call bikini friendly :). So I decided to try a baked version of this favorite summertime treat. A recipe in The Best Light Recipe cookbook inspired me again. It is basically the same as the “fried”chicken recipe I wrote about earlier this month, but with fish. We tried halibut and salmon, which were both delicious.

Oven Baked Fish Fillets

1 5 oz box of whole grain Melba toast broken into 1-inch pieces.

2 tablespoons canola oil

3 large egg whites

1 tablespoon Dijon mustard

1 teaspoon dried thyme

¼ teaspoon garlic powder

1/8 teaspoon cayenne pepper

4 fish fillets, about 1 inch thick and 6 oz each (A firm fleshed fish will work nicely like cod, halibut, or even salmon)

Salt and pepper

Canola oil cooking spray

Adjust your oven rack to the upper middle position, and preheat to 450. Cover a baking sheet with aluminum foil, and place a wire rack on top.

Pulse the Melba toast in a food processor until it is coarse crumbs. Place in a shallow bowl and mix in the oil.

In another shallow dish, whisk the egg whites through the cayenne together.

Pat the fish dry with paper towels, and season well with salt and pepper. Dip each fillet into the egg mix and then the Melba mix, pressing to make sure it adheres. Then place each piece of fish on the wire rack and spray the top with cooking spray.

Bake for about 12 to 15 minutes, or until the fish just flakes apart and the coating is golden brown.

Serve with baked chips and tartar sauce if you’d like.

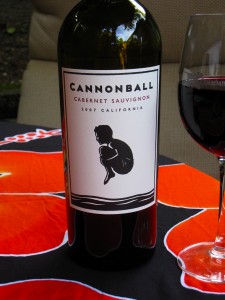
We also had a summery wine to go with dinner called 2007 Cannonball Cabernet Sauvignon. It starts with a berry aroma, but finishes as a full-bodied Cabernet. Yum! It might become our new house wine. I must admit I am inclined to fall for cute wine labels, and this one has a little boy who is poised to splash into a lake. Perfect for the season :).

The Help ~ Southern “Fried” Baked Chicken

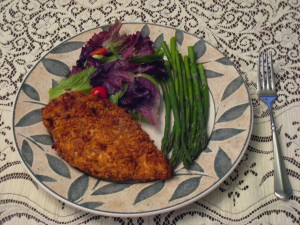
I just finished reading a really inspirational book called The Help by Kathryn Stockett. It’s about a group of women who take a big risk to make a big change in the Deep South of the 1960s. I would definitely recommend it if you’d like a book about a little American history mixed in with a story about friendships. Reading about that part of the country inspired me to try some Southern dishes…my way :).  To me, nothing says Southern cooking quite as much as fried chicken. I found a really good recipe for a baked version of “fried” chicken from a cookbook called The Best Light Recipe from the editors of Cook’s Illustrated magazine. That cookbook is filled with so many remarkable recipes, so while you are at the library or bookstore, I would highly recommend picking it up, as well! We were amazed by how much it really tasted like deep-fried chicken…only it’s much much lighter. I made it even a tad healthier by using whole grain Melba toast instead of the original kind.

Baked “Fried” Chicken Breasts

1 5 oz box of whole grain Melba toast broken into 1-inch pieces.

2 tablespoons canola oil

3 large egg whites

1 tablespoon Dijon mustard

1 teaspoon dried thyme

¼ teaspoon garlic powder

1/8 teaspoon cayenne pepper

4 bone-in skinless split chicken breasts (bone in is important…boneless chicken breasts make the dish too dry)

Salt and pepper

Canola oil cooking spray

Adjust your oven rack to the upper middle position, and preheat to 450. Cover a baking sheet with aluminum foil, and place a wire rack on top.

Using kitchen shears, trim the rib section off of the breasts by following the line of fat from the narrow end of the breast up to the socket where the wing was attached.

Pulse the Melba toast in a food processor until it is coarse crumbs. Place in a shallow bowl and mix in the oil.

In another shallow dish, whisk the egg whites through the cayenne together.

Pat the chicken dry with paper towels, and season well with salt and pepper. Dip each breast into the egg mix and then the Melba mix, pressing to make sure it adheres. Then place each piece of chicken on the wire rack and spray the top with cooking spray.

Bake until the center of the thickest part of the chicken breast registers to 160 degrees. (About 40 minutes.)

I hope you will give it a try the next time you are craving good old Southern fried chicken!

Summer is (almost) here ~ Dungeness Crab Cakes

We tend to do a little more entertaining as the weather (slowly but surely!) gets warmer and sunnier. It’s a treat to have dinner alfresco after staying inside over the winter.

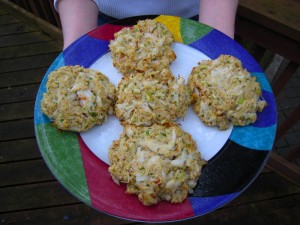
One dish that I make time and time again for entertaining in the warmer months is my Dungeness crab cakes. They are one of our very favorite things…Ever! One thing I love about them is that they can be made ahead of time, stored in the refrigerator, and then baked off once our guests arrive. I am not mussing and fussing in the kitchen, so I can enjoy a glass of wine with our friends out on the deck while the cakes bake in the oven. They are also full of crab…Very little filler. That’s how we like our crab cakes! I would highly recommend them for easy gourmet entertaining. 🙂

Dungeness Crab Cakes

Based on a recipe from Sunset magazine

1 pound cooked and shelled Dungeness crab meat

1/4 cup finely diced celery

2 tablespoons minced fresh chives

2 tablespoons mayonnaise

1 large egg

2 teaspoons Dijon mustard

1/4 teaspoon hot sauce

1 1/4 cups panko, divided

Preheat your oven to 475 F. Make sure your crab doesn’t have any hidden bits of shell mixed in before you begin. In a large bowl, mix the celery, chives, mayonnaise, egg, mustard, and hot sauce with a fork. Then add the crab and 1/4 cup panko. Stir gently until everything is well blended.

Place the remaining 1 cup of panko in a shallow bowl. Shape the crab mixture into cakes. (I usually get about 6 or 7 large cakes, but make them the size you prefer. Whatever size you choose, they should be about 1/2 inch thick.) Place each cake in the panko and coat on all sides. Press gently to make sure the crumbs stick. Lay the panko-covered cakes slightly apart on a parchment-lined baking sheet. (You can make them up to this point earlier in the day. Just cover the pan lightly with plastic wrap and refrigerate until you are ready to bake.)

Bake until golden brown, 15 to 18 minutes. Serve immediately.

I usually serve them with a good store-bought tartar sauce.

I hope you enjoy these as much as we do!

Memorial Day Weekend ~ Chicago Style Italian Beef Sandwiches

It’s Memorial Day weekend! The unofficial beginning of summer. 🙂

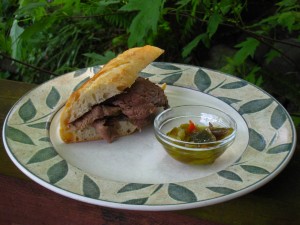
To celebrate this weekend, I tried making my own version of Chicago style Italian beef sandwiches. My husband is from Chicago, and this is one dish that is very hard to come by outside of the city limits. He misses his occasional beef sandwich in Seattle.

I found a recipe from Cook’s Country magazine that sounded promising. They do such a nice job testing recipes at that magazine, so I thought that would be a good place to go for an authentic dish. I would highly recommend subscribing to their magazine, or to their sister magazine, Cook’s Illustrated. They are definitely a trusted source in my kitchen.

We ended up sharing the beef with another of Rob’s friends from Chicago, and both he and Rob thought this recipe was very close to what they remembered from their childhoods!

I did change a couple of things from the original recipe to make them a little healthier and to make them a little more authentic. My butcher trimmed the beef very well, so very little fat remained. I also used kosher salt instead of table salt to reduce the sodium. The original recipe asked for the giardiniera to be blended with mayonnaise, but that’s not what I have experienced in Chicago, so I didn’t follow those instructions. I also didn’t put the giardiniera liquid into the jus for the same reason. The jus had a ton of flavor all by itself. One final thing I added was a bell pepper to include a vegetable and to stay authentic.

The whole dish only took a couple of hours, and most of that time was just roasting the beef (so I could go off and do other things.) It is definitely an easy recipe to repeat over and over again.

Chicago Style Italian Beef Sandwiches

4 teaspoons garlic powder

4 teaspoon dried basil

4 teaspoons dried oregano

1 tablespoon ground pepper

1 4-lb top sirloin roast, trimmed of most of the fat

2 tablespoons oil (canola, grape seed, or vegetable)

1 finely chopped onion

3 minced garlic cloves

1 tablespoon all purpose flour

2 cups low sodium beef broth

2 cups low sodium chicken broth

1 ½ cups water

1 teaspoon red pepper flakes

2 teaspoons kosher salt

1 green bell pepper, sliced into 1 inch strips

French bread for serving

Giardiniera packed in oil for serving

(If you are in the Seattle area, De Laurenti Specialty Food and Wine has a nice selection of authentic giardiniera. That’s the only ingredient that’s a little tricky to find.)

Preheat your oven to 300 degrees.

Combine the garlic powder, basil, oregano, and pepper in a small bowl.

Heat 1 tablespoon of oil in a skillet over medium high heat until it is almost smoking. Pat the meat dry with paper towels, and brown on all sides. Transfer to a roasting pan with a V-rack to keep the meat from resting on the bottom of the pan.

Add the onion to the remaining fat in the skillet and cook until softened, about 5 minutes. Add the garlic, flour and 1 teaspoon of the spice mix. Cook about 1 minute, or until fragrant. Add the broths and water, scraping up the brown bits on the bottom of the pan. Bring to a boil. Then add the liquid mixture to the roasting pan.

Stir 1 tablespoon of oil, red pepper flakes and salt into the remaining spice mix. Massage the mix all over the meat.

Roast for about 90 minutes, covered, and then transfer the meat to a cutting board. (It should still be a little pink in the middle). Tent with foil, and let it rest for 20 minutes before slicing.

Pour the jus through a fine mesh strainer into a pan, and keep at a low simmer.

Microwave the sliced bell pepper for two minutes to give it a head start. Then add it to the jus, and let it soften.

Slice the meat as finely as possible, and place it in the jus on the stove. Cook until it is no longer pink, about 5 minutes.

Serve the beef on French bread slices, with spicy giardiniera. We also like to serve it with a little bowl of jus to dip.

Take a bite and imagine you are at the shores of Lake Michigan on a picnic blanket on the beach!

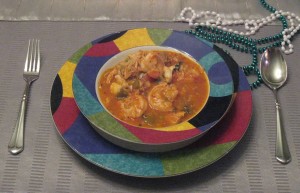
Happy Mardi Gras! ~ Red Jambalaya with Chicken, Shrimp and Lobster and Chandon Sidecars

This year, we had red jambalaya with chicken, shrimp and lobster for our Mardi Gras celebration. I’ve been working my way through the recipes on the Domaine Chandon website, and this one caught my eye awhile back. It seemed perfect for tonight, so I saved it until now. I must say, it was worth the wait!  I would recommend it highly. I did make a handful of changes to make it a little healthier. I used brown rice instead of white, I only used 2 andouille sausage links (chicken or turkey preferred to pork) instead of a pound, I omitted the bacon grease or butter and replaced it with grapeseed oil and I used skinless chicken with the bone in. Other than those differences, I followed the recipe closely. We thought it was a delicious gourmet spin on traditional jambalaya.

Red Jambalaya with Chicken, Shrimp and Lobster

3 lbs chicken breasts and thighs with the bone in but skin removed

3-4 tbsp grape seed oil, or any other oil with a high smoke point

2 medium-sized onions, chopped

1 green pepper, diced

1 clove garlic, finely chopped

2 tbsp flour

2 links of sliced chicken or turkey andouille (about ½ lb) (if you would like less heat, you might want to use only one link)

3 cups tomato plus one extra medium tomato, chopped

½ tsp thyme

½ tsp pepper

½ tsp Tabasco sauce
(if you don’t like things very spicy, use a little less)

1 cup water

1 cup tomato juice

¾ cup uncooked long grain brown rice

½ lb jumbo shrimp, shelled and deveined

2 small lobster tails, shelled and cut into small pieces (may substitute 12 oz small shrimp, shelled and deveined)

½ cup scallions, diced (discard green stalks)

¼ cup fresh parsley, chopped


Season the chicken with salt and pepper. Heat 2 tbsp oil and sauté until just browned and remove from pan. (It will not be cooked through.) Do not discard oil.

In the same pan, sauté onions, green pepper and garlic until onions are translucent. Remove from skillet.

Add remaining oil and gradually add flour, stirring often. Simmer until the color turns light brown.

In the same pan, stir in sausage, chicken, onion, pepper and garlic mixture and tomatoes (except for the extra medium tomato). Cook 10 minutes on medium high, stirring continuously.

Add thyme, ½ tsp pepper, Tabasco sauce, water, tomato juice and rice. Mix well and bring to a boil. Reduce heat and cover. Simmer for 30 minutes, or until the rice is tender.

Stir in shrimp, lobster, scallions, remaining tomato and parsley. Cook an additional 5 minutes until the seafood is just cooked through.

Makes 8–10 servings.

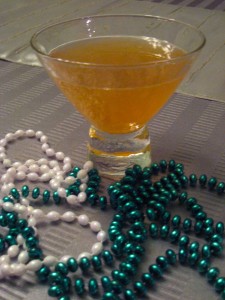
We also had my take on a Chandon Sidecar cocktail to go with our dinner. We were first introduced to sidecars at one of our favorite nightspots in Seattle called the New Orleans Creole Restaurant, so I always associate them with Creole cooking. For our drinks, I used ¾ oz of Grand Marnier, ½ oz Meyer lemon juice (its a little sweeter than regular lemon juice, so we didn’t need any simple syrup to balance it) and ¾ oz of Cognac. Then top it with dry sparkling wine to your liking.

I hope you have a festive Mardi Gras! 🙂

Merry Christmas ~ Three Kings Salad

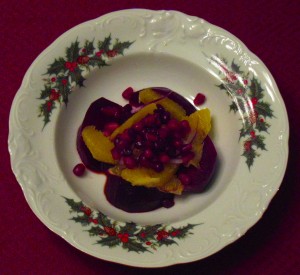
One of our favorite salads for Christmas is called a Three Kings Salad. It fuses a colorful group of three of the season’s best and tastiest :). I was inspired by the original recipe, which can be found at MyRecipes.com, but I added and omitted ingredients to our taste. It is forgiving, so use whatever you like. If you like less orange or more onion, that’s fine. Make it yours :). Honestly, we kind of changed one of the “kings” from red onion to pomegranate seeds. I only used a tiny bit of onion for garnish, since neither Rob nor I are big raw onion fans, and I used a ton of pomegranate seeds since we love them! Is there anything more festive than roasted beets and pomegranate seeds? I don’t know what it is about those two, but it just feels like a holiday to me! Both take a wee bit of work to prepare, so they feel like food for a special occasion.

Three Kings Salad

4 seedless oranges

3 or 4 beets…One big bunch

3 tablespoons balsamic vinegar

2 tablespoons olive oil, plus a little more to drizzle over the beets

Salt to taste

Black pepper to taste

1/4 cup thinly slivered red onion

Pomegranate seeds from ½ of the fruit

Preheat your oven to 375. Trim the beets of their greens, drizzle with a little olive oil and wrap tightly in tin foil. Roast for 45 to 55 minutes (depending on the size of your beets) or until they can be pierced with a fork. Let them cool. Preferably with some sort of thin disposable gloves so you don’t dye your fingers, peel the outside and cut into wedges.

Peel and section oranges over a bowl with a knife so none of the pith or membrane remains. Squeeze the extra juice into the bowl when finished. Set the orange sections aside and reserve about 2 tablespoons of the juice.

Combine the reserved 2 tablespoons of orange juice, vinegar, oil, salt, and pepper in a medium bowl and whisk well.

Divide the beets, oranges, pomegranate seeds and onion evenly among 4-6 salad plates, depending on the size salad you would like to serve. Drizzle with as much of the vinaigrette as you like.

I hope you all have a very merry Christmas!

Happy Thanksgiving ~ Wild Rice and Goat Cheese Stuffing with Chorizo

Happy Thanksgiving!

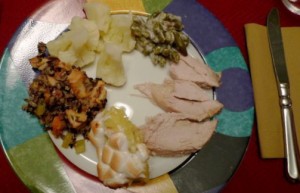
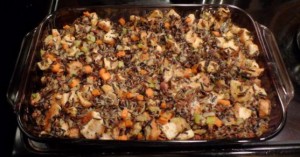
For one of my favorite holidays, we hosted a little family get together at our house this year, and we made all of our traditional favorites – Slow roasted turkey breast with gravy (I tried a new recipe from America’s Test Kitchen this year for the main course, which I would highly recommend. The breast is my favorite part of the turkey, and this is a way to make sure it stays moist and flavorful), cauliflower and cheese, green beans with mushroom sauce, marshmallow sweet potatoes, wild rice and goat cheese stuffing with chorizo, and of course, pumpkin pie! I started making this stuffing for Thanksgiving a few years ago when we celebrated the holiday in Palm Springs and I was looking for a Southwest twist on the traditional recipe. It has since become a favorite that I make every year. The original recipe came from the Food Network, and I follow it fairly closely. I make it a pinch healthier by omitting the butter and using low sodium free-range chicken broth. I use real chorizo since it only requires a little bit, and it is a holiday after all :).

Wild Rice and Goat Cheese Stuffing with Chorizo

1 1/2 cups wild rice

5 cups water

Salt to taste

1/2 cup finely ground chorizo

1 finely diced large onion

1 tablespoon minced garlic

2 finely chopped carrots

3 finely chopped celery stalks

3/4 pound cubed stale hearty white bread

6 ounces goat cheese

2 tablespoons chopped fresh flat leaf parsley

1 tablespoon chopped fresh thyme

1 1/2 cups low sodium free-range chicken stock

Boil the rice, water, and a little salt to taste in a medium saucepan until the grains open and the rice is tender. Drain. (This can be done a day ahead if you desire.)  Cook the chorizo in a large saucepan over medium heat. Pour the chorizo over a bowl lined with a paper towel to drain the excess fat. In the same pan, add the onion, garlic, carrots, and celery and cook until the onion is tender but not browned. Add the rice, chorizo, bread, cheese, parsley, thyme, and stock and combine it all together. Season to taste with a little salt and pepper. Transfer to a baking dish and bake at 350, uncovered, until golden brown on top, about 25 to 30 minutes.

We paired dinner with our two house wines – Sofia Blanc de Blancs from California and Chateau Ste. Michelle Cabernet Sauvignon from Washington. American wines for an American holiday! 🙂

Sweetest Day ~ Butternut Squash Soup with Pear, Cider and Vanilla Bean and Cider Glazed Salmon

Happy Sweetest Day! This is one of those little holidays that gives us an excuse for a little celebration. I am all for that :). I decided to make a special dinner menu to mark the occasion. The recipes were from a really good book I read this year called A Homemade Life: Stories and Recipes from My Kitchen Table. It was written by an author who lives here in Seattle, Molly Wizenberg, who has a well-respected recipe blog called Orangette. I read the book in the spring and have been saving these two autumn recipes until now. They are a little gourmet, a little decadent, and very delicious. Perfect for a fall evening that feels a little special.

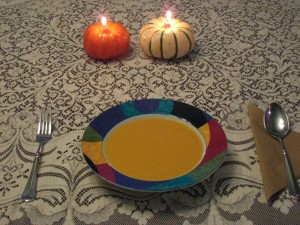
The first recipe I made was a butternut squash soup with pear, cider, and vanilla bean. It’s a very funky combination, I know, which is why I had to try it! It just sounded so unique and special with the vanilla. Both Rob and I agreed it was a very nice and refreshing flavor combination. I would highly recommend it! I lightened the recipe a touch by using less half and half, and replacing the other portion with skim milk. It was still very creamy and silky because of the squash, so we didn’t miss the extra richness at all. I also only needed 1 tablespoon of olive oil instead of 3. Other than those two little details I followed the recipe, so I am just passing it along in all of its goodness :).

Butternut Squash Soup with Pear, Cider and Vanilla Bean

1 tablespoon olive oil

2 lbs of peeled and seeded butternut squash cut into 1-inch cubes (about 4 cups)

2 peeled and cored pears cut into 1 inch cubes (about 2 cups)

1 chopped
white onion

1 cup apple cider

4 cups low sodium chicken broth

Salt

¼ cup half-and-half

¼ cup skim milk

1 vanilla bean

Add the oil, squash, pears and onion to a large pot over medium low heat, and cook uncovered for about 10-15 minutes, stirring occasionally, until the onion is translucent and the pears are soft. Add the cider and bring it to a boil over medium high heat. Add the broth, lower the heat to medium low, and simmer partially covered for about 30 minutes until everything is tender.

Carefully puree the mixture in small batches in a blender. Return the soup to the pot and continue to cook over medium low heat, uncovered, until it has reduced to a thick and creamy consistency that you like. While the soup is bubbling, put the half-and-half and milk in a small saucepan. Cut the vanilla bean in half lengthwise and scrape the seeds with the back of a knife. Put the pod and seeds in the dairy and put the pan over low heat until it is just steaming, but not boiling. Strain the vanilla pod from the mix and set aside. When your soup has reduced to the thickness you desire, stir in the vanilla mixture. Season with salt to taste and enjoy!

Makes 4-5 servings

The main course was a cider glazed salmon dish. It was so simple, but so delicious. Isn’t that the way with the best recipes? 🙂 I used half and half instead of all cream, but other than that detail I followed the recipe. I usually don’t use cream or butter, but because you only need a little bit of this glaze to make an impact, I didn’t skimp. I think a little bit is just fine :).

Cider Glazed Salmon

1 tablespoon butter

1 medium shallot, cut in half and peeled

2 cups apple cider

2, 3 or 4 salmon fillets (depending on the number of portions)

Salt

½ cup half and half

In a large skillet bring the shallot, butter and cider to a simmer over medium high heat.

Place the salmon in the cider blend, cover and simmer gently. Flip half way through. For every inch of thickness the salmon needs about 10 minutes to cook until it is just cooked through.

Remove the fish from the pan and cover with tin foil.

For the glaze, raise the heat under the pan to medium high, add a pinch of salt and simmer until the liquid is reduced by about 2/3. It will be a slightly thickened. Reduce the heat to medium and add the half and half. Bring to a boil, stirring frequently, until the mixture darkens to a light caramel color.

Plate the salmon and top with a spoonful of the glaze.

Rob also treated me to special little chocolate pumpkin truffles for dessert. One of my favorite local chocolatiers called Moonstruck Chocolate makes creative little pieces to go with the seasons. Almost too cute to eat….Almost :).


Wine Pairing

We had a new wine tonight from Columbia Winery called Romance Red. Since Rob and I had our wedding reception at that winery, it seemed like a good choice for a romantic evening celebration :).

Make an ordinary summer night special ~ Steamed Clams

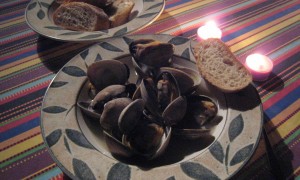
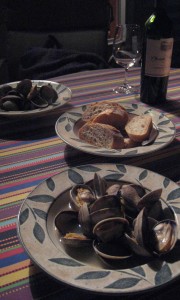
Rob and I have started a new little tradition that makes an ordinary evening feel like a special occasion to us. We light some candles and our tiki torches outside, have a glass of wine and enjoy this steamed clam dish together. We used to go out for a similar dish at a nearby restaurant called BluWater Bistro, but I figured out a comparable recipe that we like even more at home. I don’t use nearly the amount of butter they use, but I think it still needs a tiny bit for flavor. I also think half the fun of clams is watching them pop open as they cook…Something we miss when we go out to eat. Not to mention, it is much less spendy to make at home :). This is not a strict recipe. Just taste as you go to make sure you have the flavors you like.

Steamed Clams

1 or 2 cloves minced garlic (depending on how much garlic you like)

1/2 tablespoon butter

2 cups low sodium free-range chicken stock

Splash of dry white wine, such as Chardonnay or Sauvignon Blanc

About 2 lbs of farmed clams

Salt to taste

2 tablespoons fresh flat leaf parsley (optional)

French bread (optional)

Scrub your clams very well and discard any that are cracked or open. (If any clams are just a tiny bit open, tap them on the counter…If they close, they are still alive and good to use. If they don’t, they are not safe to eat, so toss them.) Melt the butter in a large pan (one that has a lid), and sauté the garlic for a minute or until fragrant. Pour the chicken broth and white wine into the pan and bring to a boil. Taste for seasoning once it is hot, and add salt if you desire. When the mixture is boiling, put all of the clams in the pan and cover with the lid. Watch them closely. When all of them have opened, take the lid off and take the pan off the heat. (If any did not open, discard them.) Spoon the clams and broth into two big bowls. If you desire, finish with a sprinkling of fresh chopped parsley and serve with slices of French bread to soak up the extra broth. Also, be sure to serve with an extra bowl for the shells.

Memorial Day ~ Lime Marinated Pork Tenderloin Medallions with Tomato, Mint and Watercress Salad and Lemon Blini with Raspberry Sorbet

Cheers and thank you to all of the members of our military, past and present!

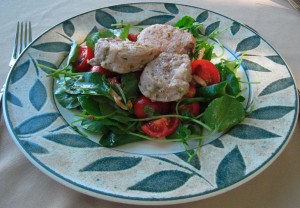
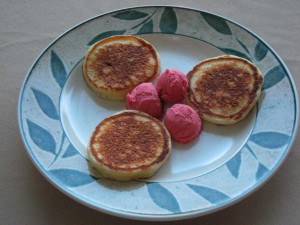
I attended one of my favorite Williams-Sonoma technique classes this weekend, which featured recipes for Memorial Day. They are free cooking classes held almost every Sunday before the store opens, and you get to taste the creations after they are made. I would highly recommend checking them out! I had a whole Memorial Day menu already figured out, but the samples were so tasty at the class that I changed my mind. We had lime marinated pork tenderloin medallions over a tomato, mint and watercress salad and lemon blini with raspberry sorbet. A very summery menu to kick off the unofficial start of summer! 🙂 This is my take on the recipes I learned. As usual, I tried to make them a tad healthier. For example, I used less salt in the marinade, quite a bit less olive oil for the dressing and more veggies than called for. In the dessert, I used skim milk instead of whole.


Lime Marinated Pork Tenderloin Medallions with Tomato, Mint and Watercress Salad

1 lb pork tenderloin, trimmed of any excess fat

1/2 teaspoon ground coriander

1/8 teaspoon ground cumin

Zest and juice of 1 lime

1 1/2 tablespoons light olive oil

1/4 teaspoon salt

Small garlic clove, minced

2 tablespoons finely minced onion

2 oz chicken stock

1 oz red wine vinegar

1/2 teaspoon honey

1 oz extra virgin olive oil

1 1/2 cups cubed tomatoes (bite size)

2 cups watercress

2 tablespoons fresh mint

2 tablespoons toasted slivered almonds

Cut the pork into uniform medallions, about 1 1/2 to 2 inches thick, and place in a baking dish. In a small bowl, whisk the coriander, cumin, lime zest and juice, olive oil, salt, garlic and onion. Pour the marinade over the pork, mix well so every piece is coated, cover, and refrigerate for 2 hours.

Preheat your oven to 375

Preheat an oven proof grill pan over medium heat. Remove the pork from the marinade, and reserve the remaining marinade. Grill the pork on the preheated pan, about 3 minutes per side. Transfer the pan to the oven, and finish cooking for about 6 minutes, or until cooked through.

Remove the pan from the oven and transfer the pork to a platter to rest under a tent of tin foil. Add the remaining marinade, stock, vinegar, and honey to the pan and simmer together until it is reduced by one third on the stovetop. Whisk in the extra virgin olive oil.

Mix the tomatoes, watercress, mint and almonds in a large bowl. Toss the warm dressing into the salad and serve with the pork on top.

Serves 2

Lemon Blini with Raspberry Sorbet

1/2 cup part skim ricotta cheese

1/2 cup skim milk

1 full egg (separated) and 1 egg white

2 tablespoons sugar

Zest and juice of 1/2 lemon

3/4 cup unbleached all purpose flour

1/2 tablespoon baking powder

Two pinches of salt

Store bought raspberry sorbet

In a large bowl, whisk the ricotta, milk, egg yolk, sugar, lemon zest and lemon juice until the mixture is smooth. Sift the flour, baking powder and a pinch of salt over the ricotta mix and stir until everything is combined.

In a separate bowl, whisk the egg whites until they are frothy. Add one more pinch of salt to this, and continue whisking until you have soft peaks.

Fold 1/3 of the egg whites with a spatula into the ricotta mix, and then gently fold the remainder of the whites in.

Preheat a pan over medium low heat and spray with cooking spray. 1 tablespoon at a time, drop the mixture onto the preheated pan. (This will make each blin about 3 inches in diameter.) Make sure not to crowd the pan. Cook about 2 minutes per side, until golden on the outside and cooked through.

Serve with small melon ball sized scoops of raspberry sorbet for a nice compliment to the mildly sweet lemony pancakes.

Serves 2, with leftovers

By the way, I’d like to note that I’m normally not a huge watercress fan. I find it too peppery and strong for my taste. But this dressing mellows out the flavor, so I actually enjoyed it! I think I’ll be eating more of this vegetable in the future with this new recipe. I’d recommend trying it if you find you steer away from peppery greens like I do.

I should also mention these aren’t technically blini, which are made of buckwheat flour and often served with caviar. But these are sweet little dessert pancakes along the same lines as that classic. Whatever you call them, I hope you enjoy!

Valentine’s Day/Chinese New Year ~ Moo Shu Pork and Homemade Fortune Cookies

This year Valentine’s Day (and our engagement anniversary) and Chinese New Year happened to fall on the same day, so we celebrated everything together with a romantic Chinese dinner at home. I love to celebrate holidays from all over the world in my own little way. It gives me one more way to spice things up with special moments. Who can’t use another reason to celebrate in the dark winter months? I tried two new recipes, and I would recommend them both if you would like a quiet night at home with Chinese take-in ~ Moo shu pork and homemade fortune cookies. It was an adventure in the kitchen, and I now have a greater appreciation for what my favorite local Chinese restaurant does after trying these dishes! The dishes were a little healthier since I could control the salt, cuts of meat, etc. Plus, we could make our own personal fortunes for each other to open, which was a fun bonus of making our own fortune cookies. (Is it cheating if you write your own fortunes?) 🙂 The first recipe I tried was Moo Shu Pork. The original recipe was from my favorite Cooking Light magazine, and it can be found at MyRecipes.com. I used simple cremini mushrooms instead of shiitake and wood ear to save quite a bit of money. But other than that detail, I followed the recipe pretty closely since it was already a lightened version of the dish.Moo Shu Pork2 tablespoons low-sodium soy sauce

2 tablespoons sake

1 teaspoon dark sesame oil

2 teaspoons cornstarch

1 (1 1/2-pound) pork tenderloin, trimmed of excess fat, and cut into 1 x 1/4-inch strips

4 ounces sliced cremini mushrooms

1/2 cup sliced green onions

3 tablespoons minced garlic (about 12 cloves)

2 tablespoons fresh ginger grated on a Microplane

3 tablespoons sake

3 tablespoons low-sodium soy sauce

1/2 teaspoon cornstarch

1/2 teaspoon sugar

1/4 teaspoon black pepper

1 tablespoon vegetable oil

2 eggs, lightly beaten

3 cups thinly sliced napa cabbage stalks

4 cups thinly sliced napa cabbage leaves

2 tablespoons sake

Hoisin sauce and flour tortillas for serving

Combine the first 4 ingredients in a zip top plastic bag. Add the pork. Seal and marinate in the refrigerator for about an hour, turning occasionally. Remove the pork from the bag, and discard the marinade.

Combine the sliced mushrooms, green onions, garlic, and ginger in a small bowl, and set aside.

Combine 3 tablespoons of sake and the next 4 ingredients (through black pepper) in a small bowl. Stir well with a whisk, and set aside.

Heat 1 1/2 teaspoons vegetable oil in a large nonstick skillet over medium-high heat. Add the pork, and stir-fry for 3 minutes.

Remove the pork from the pan. Add 1 1/2 teaspoons of vegetable oil to the pan. Add the eggs, and stir-fry 30 seconds or until soft-scrambled. Add the mushroom mixture and stir-fry 1 1/2 minutes. Add the cabbage stalks and stir-fry 30 seconds. Add the cabbage leaves and 2 tablespoons of sake. Stir-fry for 1 minute. Add the pork and the cornstarch mixture. Stir-fry 2 minutes or until the sauce is thickened.

Serve wrapped in warmed tortillas with hoisin sauce.

The second thing my husband and I made together was a batch of fortune cookies. I would recommend doing these with a partner, since they harden very quickly once they come out of the oven. We each filled out personalized little strips of paper for the fortunes, and then opened each other’s for a surprise. The original recipe was from the Food Network.

Homemade Fortune Cookies

1/2 cup all-purpose flour

1 teaspoon cornstarch

1/2 cup sugar

2 large egg whites

1 teaspoon vanilla extract

2 tablespoons canola oil

1 tablespoon water

Cooking spray for the pans

Write your fortunes on little pieces of paper before you begin.

Preheat the oven to 300 degrees.

In a small bowl, sift together the flour, cornstarch and sugar.

In a medium bowl, whisk together the egg whites, vanilla, oil, and water. Add the dry ingredients into the wet ingredients and mix until smooth.

Working in batches of 4, drop the batter by tablespoons on a baking sheet covered with a silicone mat. Tilt the baking sheet in a circular motion (and use your finger if need be) to spread the batter into 4-inch diameter circles.

Bake until the edges of the cookies are golden brown, about 10 minutes. Remove from the oven, and working quickly, use a spatula to remove the cookies from the baking sheet. Put a fortune into the center of a cookie and fold it in half. Bring the points together with open seams on the outside. Arrange in muffin tins to help keep their shape while they are cooling.

Repeat with the remaining fortunes and cookies.

We paired the meal with Sofia Blanc de Blancs (the same kind of sparkling wine that we enjoyed on New Year’s Day, which seemed fitting) with mandarin orange slices floating in the bubbles for the occasion.

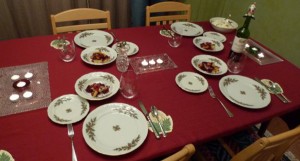
I decorated the table with red (the color of both holidays) and a blend of Chinese New Year and heart decorations for Valentine’s Day and our engagement anniversary. For example, I printed a Year of the Rat image and a Year of the Dragon image, since they were the years that Rob and I were born. That added a little personal romantic touch. I also printed a matching Year of the Tiger image for the middle of the table, which was the year we celebrated today.