First Day of Summer ~ Calamari in a Zingy Tomato Sauce


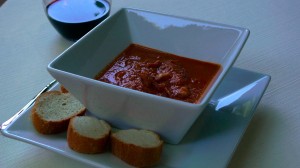
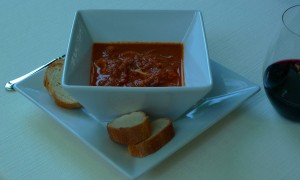
We have a romantic little Italian restaurant in Seattle underneath Pike Place Market called Il Bistro that has one of our favorite calamari dishes in the city. They serve it in a tomato sauce instead of frying it, as most places do. Since we can’t go downtown everyday, I worked on replicating the dish at home to enjoy on our patio on warm summer nights. I finally made a version that is fairly close to the flavors at the restaurant, and I’d like to share it with you! 🙂

We enjoyed it on the first day of summer, outside with a glass of wine.

Calamari in a Zingy Tomato Sauce

1 lb calamari (I buy pre-cleaned, pre-sliced, frozen calamari to make this nice and easy. Just put as many as you would like in a bowl of cold water to thaw quickly.)

1 14.5 oz can tomatoes

2 oz can anchovies in oil, drained

2 garlic cloves, minced

1 small shallot, minced

¼ cup dry white wine

2 tablespoons extra virgin olive oil

15 medium sized green olives

1 tablespoon capers (I use the kind packed in brine rather than salt)

Salt and pepper to taste (I recommend you wait until everything is blended to add very much seasoning, since the other ingredients have a lot of salt. It is easier to tell if you need more after everything is blended together.)

Rustic bread slices, for serving

Heat the oil in a medium sauté pan, and add the garlic and shallot. Cook until fragrant. Stir in the remaining ingredients, except for the calamari (or bread.) Heat through, until it just begins to boil. Then place everything into a blender and pulse until smooth. Adjust the seasoning to your liking. Pour everything back into the pan. Bring to a boil again, and add the calamari. Cook until the calamari turn opaque, about 1 to 2 minutes.

Serve in a big bowl with sliced bread for dipping into the sauce.

Poolside Snack ~ Smoked Salmon Dip with Celery

We have been thoroughly enjoying our little pool this summer :). Even when it’s too chilly to put my feet in, I like to sit beside the water with a magazine (or my blog!) since it makes me feel like I am on a little vacation at home. I am soaking up all of the summertime sunshine I can!

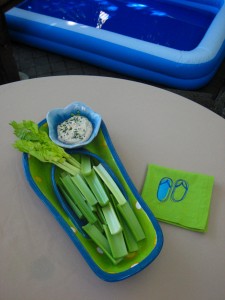
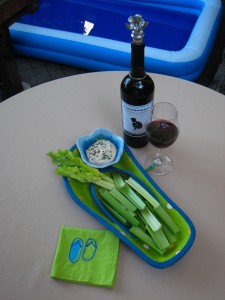
I made a little salmon dip to nibble on these warm summer days. The original recipe came from MarthaStewart.com. I reduced the mayonnaise a tad, and I replaced the cream cheese with Neufchatel. I also served this creamy rich dip with celery stalks instead of bagel chips, since that is a little more bikini friendly :).

Smoked Salmon Dip

Adapted from MarthaStewart.com

3 tablespoons mayonnaise

4 ounces Neufchatel cheese

1 tablespoon capers, rinsed and drained

1 tablespoon red onion, diced small

1 to 2 teaspoons fresh lemon juice

1/2 teaspoon prepared horseradish

2 ounces plus 2 more ounces smoked salmon, crumbled

1 tablespoon chopped fresh parsley

Celery, for serving

In a food processor, combine mayonnaise, Neufchatel, capers, red onion, lemon juice, horseradish, and 2 ounces smoked salmon. Process until smooth, about 20 seconds. Transfer to a small bowl and stir in remaining 2 ounces smoked salmon. Top with fresh parsley and serve with celery.

I was inspired to pair this recipe with Cannonball Cabernet Sauvignon….The perfect poolside wine!

The Bungalow ~ Poisson Cru

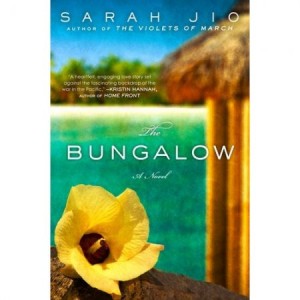
I can’t put down the new book by Sarah Jio called The Bungalow. I would highly recommend it if you are looking for your next summery book to read at the beach (as long as you don’t have anything else on your calendar to do, since it is a page-turner! ;)) The story starts in Seattle in the 1940s, but it quickly moves to Bora Bora. I feel as if I am on a trip to that part of the world when I open the pages!

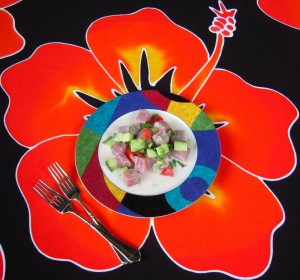
The story inspired me to research dishes from French Polynesia, and I stumbled upon one called Poisson Cru, which means “raw fish” in French. The way I like to travel (virtually or in reality) is to make and sample foods from different places. Since I can’t make it to Bora Bora this week, this is something I could enjoy in my own back yard in Seattle with the tiki torches burning. 🙂 I think a mai tai would be the perfect accompaniment!

Poisson Cru

From Epicurious.com

(6 appetizers or 4 entrees)

1 pound very fresh high-grade ahi tuna, diced in neat 1/2-inch cubes

1/2 cup fresh lime juice

1/2 cup coconut milk (I used light coconut milk)

1/2 cup diced peeled and seeded cucumber

4 to 5 scallions, green and white portions, split lengthwise and minced

1 fresh hot small green or red chile, seeded and minced, optional

Several tablespoons shredded coconut, optional

3/4 teaspoon salt, or more to taste

Freshly ground pepper

1 medium tomato, seeded and squeezed to eliminate liquid, diced

Combine in a medium bowl the tuna, lime juice, coconut milk, cucumber, scallions, optional chile and coconut, salt, and pepper. Refrigerate 30 minutes to 1 hour. Mix in the tomato and serve right away.

It’s Spring ~ Pea, Mint and Parmesan Crostini

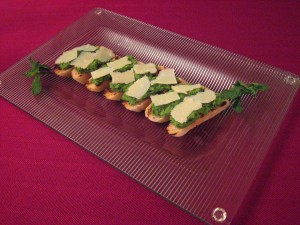
I brought home some delicious homemade bread from Sur La Table’s artisan bread class, so we decided to make a spring crostini dish with one of the baguettes. I think there is something extraordinary about peas and fresh mint together. Top that slightly sweet combination with salty Parmesan, and it’s a really special dish. Simple, fresh and delicious. A recipe from Bon Appétit magazine inspired me, but we made it our own. Just add as much or as little of each component until it tastes good to you. 🙂 This is really more of an idea than an actual recipe to follow.

Pea, Mint and Parmesan Crostini

Adapted from Bon Appétit magazine

Fresh baguette

1 ½ cups frozen peas

Handful of fresh mint

Salt and pepper

Drizzle of extra virgin olive oil

Blanch the peas in salty water for about a minute. Drain well. In a food processor, add blanched peas, mint, olive oil, salt and pepper to taste. Process until it is blended, but still has some texture. Scrape down the bowl to ensure it is all evenly mixed.

Slice the baguette into thin slices, and grill lightly on a grill pan.

Spread a dollop of the pea mixture onto the baguette slices, and then top with thinly sliced Parmesan cheese. Garnish with extra mint and some freshly ground pepper if you’d like.

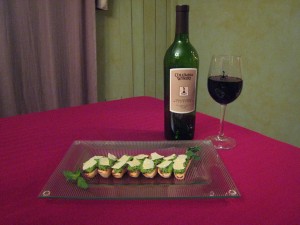
These would be great appetizers for a spring cocktail party, or even for an Easter meal. They are so easy to make that they would also be perfect for a late night snack with a nice bottle of wine. Or in this case, they were a part of one of our little anniversary celebrations. Saturday marked the day that Rob and I met 14 years ago. We do something special every year on that date when we unknowingly met our future spouse. 🙂 These little crostini definitely felt like a treat fitting for a special celebration.

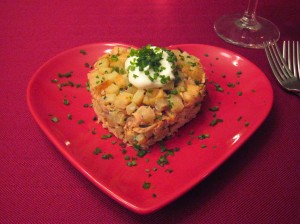
Happy Heart Day ~ Smoked Salmon and Crispy Potato Tian with Sour Cream

Happy Valentine’s Day!

We had a special little heart shaped appetizer to celebrate Heart Day :). The original recipe was from one of Sur La Table’s cooking classes entitled Great Restaurant Recipes of Seattle, and this one was courtesy of Rover’s. I streamlined it to make it a little more weeknight friendly, and I also made it a little healthier with a couple of substitutions. I replaced the crème fraiche with reduced fat sour cream, and I used Earth Balance in place of the butter. The original recipe mixes salmon with several other ingredients, but smoked salmon is so flavorful on its own that it really doesn’t need more flavor to be delicious. By streamlining the recipe this way, I’m more likely to make it again for a special weeknight appetizer. The recipe below only took about 15 minutes to put together, and it has a great “wow” factor ;).

Smoked Salmon and Crispy Potato Tian with Sour Cream

2 servings

3 oz smoked salmon

6 oz Yukon Gold potatoes

2 tbsp Earth Balance buttery spread

1/8 tsp minced garlic

Pinch of thyme

1 tbsp minced fresh chives, plus more for garnish

1 tbsp reduced fat sour cream, plus more for garnish

Salt and pepper to taste

Crumble the salmon into fine bits, and set aside.

Cut the potatoes into a ¼ inch dice. (You may peel them if you wish, but the skin is just fine). Heat a large sauté pan over medium high heat, and then add the Earth Balance. Add the potatoes and sauté until they are golden and cooked through. Add the garlic and thyme and toss for 30 seconds. Transfer the potatoes to a plate lined with a paper towel to drain and cool slightly. Combine the potatoes, chives and sour cream in a small bowl and season with salt and pepper to taste.

To serve, set a 3-inch ring mold (or I used a heart shaped cookie cutter) in the center of a plate. Spoon the smoked salmon into the mold, pressing to form an even layer. Top with the potato mixture, again pressing lightly for an even layer. Repeat with the remaining salmon and potatoes. Top with a little sour cream and garnish with more chives.

Snow Day = Muffin Day

Seattle woke up to quite a bit of snow today, which is a rare treat for us! It is so gorgeous and white outside of my window.

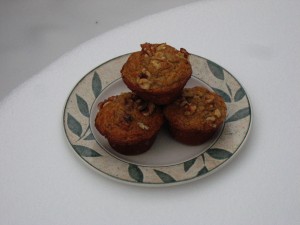
The snow inspired me to bake some muffins to warm up our kitchen and make the house cozy :). After several batches, these banana buttermilk muffins were our favorite. I used all whole-wheat pastry flour instead of mixing it with all-purpose flour. I think banana muffins can stand up well to the nuttier flavor of whole-wheat flour. Other than that, I followed the recipe pretty closely. They are tender from the buttermilk and nice and sweet from the ripe bananas I pulled out of our freezer. It will definitely be a good one to go with our morning coffee even after the snow melts :).

Banana Buttermilk Muffins

Adapted from Williams-Sonoma

1 3/4 cup whole-wheat pastry flour

1/2 cup sugar

2 tsp. baking powder

1 tsp. baking soda

1 cup low-fat buttermilk

1 cup well-mashed ripe banana

2 Tbs. canola oil

1 egg

1 tsp. vanilla extract

1/2 cup chopped walnuts

Preheat an oven to 375°F. Spray 12 standard muffin cups with canola-oil cooking spray, or use paper liners.

In a large bowl, stir together the flour, sugar, baking powder and baking soda.

In another bowl or a large, glass measuring pitcher, whisk together the buttermilk, banana, oil, egg and vanilla. Pour the wet ingredients over the dry ingredients and stir just until blended. Do not over mix. Spoon the batter into the prepared muffin cups, filling each about three-fourths full. Sprinkle the tops evenly with the walnuts.

Bake the muffins until they are lightly browned and a toothpick inserted in the center of a muffin comes out clean, 15 to 20 minutes. Let cool in the pan on a wire rack for 15 minutes, then turn out onto the rack and let cool completely. The muffins will keep in a zippered plastic bag at room temperature for 2 or 3 days, or in the freezer for up to 2 months. Makes 12 muffins.

A little holiday treat ~ Pumpkin Muffins

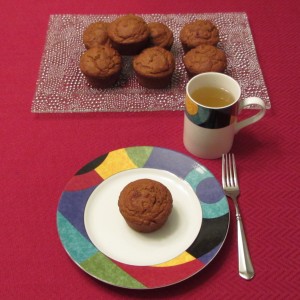
I have tried many pumpkin muffin recipes since pumpkin is one of my favorite fall flavors, but this is the one I keep coming back to. They are now an autumn/holiday treat that I make every year. (Sometimes I even make them in the spring or summer since they are so good, and canned pumpkin is available year round!) I follow the original recipe pretty closely, except I use 100% whole-wheat pastry flour instead of any white flour. I think the spices and the pumpkin combine well with the nuttier flavors in the whole grain flour. I hope you’ll give these a try! They are definitely a favorite at our house :).

Pumpkin Muffins

Adapted from Ellie Krieger’s book The Food You Crave: Luscious Recipes for a Healthy Life

Cooking spray

2 cups whole-wheat pastry flour

1 teaspoon baking soda

Pinch of salt

1 teaspoon ground cinnamon

1/2 teaspoon ground ginger

1/4 teaspoon ground cloves

1/8 teaspoon ground nutmeg

3/4 cup packed dark brown sugar

3 tablespoons unsulphered molasses

1/4 cup canola oil

2 large eggs

1 cup canned pumpkin

1 teaspoon vanilla extract

3/4 cup lowfat buttermilk

Preheat oven to 400 degrees F. Coat a 12-cup muffin pan with cooking spray.

In a medium bowl, whisk together the flour, baking soda, salt, cinnamon, ginger, cloves, and nutmeg.

In a large bowl, whisk the sugar, molasses, oil and 1 egg until combined. Add the other egg and whisk well. Whisk in the pumpkin and vanilla. Whisk in the flour mixture in 2 batches, alternating with the buttermilk. Whisk just until combined.

Pour the batter into the prepared muffin pan. Tap the pan on the counter a few times to remove any air bubbles. Bake for 20 minutes or until a wooden pick inserted in center of 1 of the muffins comes out clean.

Let cool on a wire rack for 15 minutes. Run a knife around the muffins to loosen them and unmold. Cool completely on the rack.

PS. If you don’t have buttermilk on hand, reduced fat sour cream can be a good substitute.

Halloween Season ~ Applesauce Spice Muffins

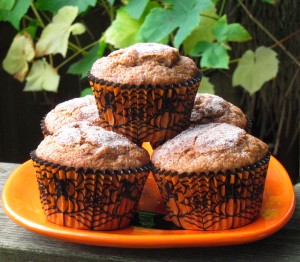
I made a couple of batches of applesauce spice muffins to warm up the house on chilly October days. The original recipe was from Gourmet magazine, and it can be found at Epicurious.com. I used a few tricks to make these treats a little healthier, though ;).  I substituted whole-wheat pastry flour for the all-purpose flour, I reduced the sugar a little and I replaced the butter with a blend of canola oil and light sour cream.

Applesauce Spice Muffins

Muffin Ingredients:

1 1/2 cups whole wheat pastry flour

1 1/2 teaspoons baking powder

1/2 teaspoon baking soda

1/2 teaspoon cinnamon

1/2 teaspoon ground allspice

1/4 teaspoon ground nutmeg

Pinch of salt

2 large eggs

1 cup lightly packed light brown sugar

¼ cup canola oil

¼ cup and 3 tablespoons light sour cream

1 cup unsweetened applesauce (cinnamon or plain work well)

1 cup pecans or walnuts, coarsely chopped (optional)

Topping Ingredients:

1 1/2 tablespoons granulated sugar

1/4 teaspoon cinnamon

1/4 teaspoon ground allspice

1/4 teaspoon ground nutmeg

¼ cup sliced almonds (optional)

Put your oven rack in the middle position and preheat to 400 degrees. Grease the muffin pan or line it with cupcake papers.

Stir together the flour, baking powder, baking soda, spices, and salt in a medium bowl. In a large bowl, whisk together the eggs and brown sugar, then whisk in the canola oil and sour cream until well combined. Stir in the applesauce. Add the flour mixture to the wet mixture until the flour is just moistened. Stir in the nuts at this point if you are using them. Divide the batter between 12 muffin cups.

For the topping, stir together all of the topping ingredients with the almonds if you are using them.  Sprinkle evenly over the muffins.

Bake until the muffins are puffed and golden, about 20 minutes. A wooden skewer inserted should come out clean.

Happy Halloween!

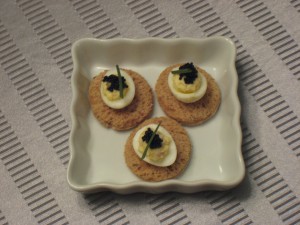
Working my way through the delicious Domaine Chandon Cookbook ~ Deviled Quail Eggs with Caviar and Chives

This January, I have been working my way through the Domaine Chandon Cookbook: Recipes from Étoile Restaurant. I associate sparkling wine with the beginning of the year, so it seemed like the perfect cookbook for this month. (In case you aren’t familiar with the winery, Domaine Chandon is best known for its bubbly since it is the American little sister to Moët & Chandon.) Rob and I also had a very memorable visit to that winery a couple of years ago, so it’s a special place for us. We joined their wine club for a time, had a fabulous dinner at the restaurant and enjoyed their beautiful grounds on a warm September evening. So many recipes from the cookbook sounded delicious and inspired me to try them. Cooking fine recipes makes an ordinary meal feel a little special to me. As Rob said, it’s my art. It isn’t just the necessary fare, but something higher. So it makes me feel like we are living life well, even when it’s cold and dark outside. I ended up trying a healthier twist on quite a few of the cookbook’s recipes…deviled quail eggs with caviar and chives, pomegranate fizz cocktails, green vegetable gazpacho with shrimp, truffled popcorn, brandy spiced shrimp, coconut lime mussels, Parmesan soufflés with a leek purée, salmon and tuna tartare and chicken breasts with toasted orzo and a thyme infusion. Out of all of those very good recipes, we really enjoyed the quail eggs. They were absolutely adorable! Plus, I always enjoy cooking with something I’ve never tried before, and quail eggs were new to my kitchen. They are a little bit time consuming because they are so tiny, but if you are in the mood to spend some quality time making a gourmet creation, they are a lot of fun! It wouldn’t be like me to completely follow a recipe, so I did lighten them a little by omitting the crème fraiche and using Neufchâtel instead. The filling was a little firmer with this substitution, but we thought it was very delicious. I also used whole grain bread for the base instead of brioche.
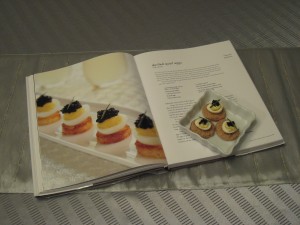
Deviled Quail Eggs with Caviar and Chives

1 loaf sliced whole grain bread

2 tablespoons minced shallot

1 teaspoon lemon juice

20 quail eggs

2 tablespoons Neufchâtel cheese

1 teaspoon Dijon mustard

Salt and ground black pepper to taste

1 ounce caviar

5 fresh chives, cut into 1 centimeter long pieces

Preheat your oven to 350 degrees.

With the rim of a sparkling wine glass flute, cut rounds of bread from your bread slices. (Take care to avoid the crusts). Pinch a small indentation into the center of each round with your index finger and thumb to hold the quail eggs. Place the bread rounds on a baking sheet and bake until golden brown, 10 to 12 minutes. Remove and cool.

In a small bowl, combine the shallot and lemon juice.

In a medium saucepan, place the quail eggs and enough cold water to cover the eggs. Bring to a boil over high heat, and then reduce the heat to medium-low. Cook the eggs for 3 minutes until they are hard boiled. Remove from the heat and carefully place the eggs in cold water for 5 minutes.

Peel away the shells, starting at the wide bottom end of each egg. Rinse each egg with cold water to make sure no little pieces of shell remain. Set them on paper towels to dry. Cut each egg in half lengthwise with a sharp knife. Remove the yolks with a very small spoon and place them in the bowl with the shallot and lemon juice mix.

Add the Neufchâtel, mustard, salt and pepper to the yolks. Using a fork, mash the yolk mixture until a thick paste forms and everything is well combined.

Using a very small spoon, fill the cavity of each egg-white half with the yolk mixture. Set each egg half in an indentation on top of the toasted bread rounds.

Place a tiny bit of caviar and one small slice of chive on top of each egg. Serve chilled or at room temperature.

These paired very well with pomegranate fizz cocktails from the cookbook. I made them with just a splash of Grand Marnier and pomegranate juice in a glass of sparkling wine. Garnish with a little bit of orange peel for an added special touch.

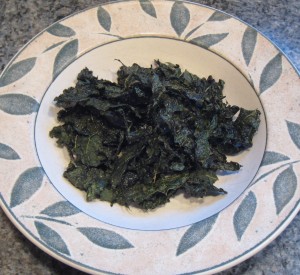
New snacks for the new year ~ Kale chips

A friend of mine introduced me to this cool new snack this winter. Kale gets crispy like potato chips in the oven. Who knew? I would have never guessed that is how it would turn out. They are a fun way to get more greens! They feel like junk food, but they’re definitely not :). That’s my kind of snack! Thanks Kristi!

Kale Chips

One bunch of kale

1 tablespoon olive oil

Kosher salt to taste

Preheat your oven to 275 degrees

Remove the stems, and rip the leaves into pieces. Place on a cookie sheet lined with parchment paper. Drizzle with olive oil and rub it into the leaves so it is evenly distributed. Then put the kale in an even layer on the cookie sheet. Sprinkle with salt to taste. (Remember, these will shrink significantly in the oven, so be careful not to over salt.) Bake for about 30 minutes, stirring a couple of times throughout to ensure even baking. They are finished when they are crispy. That’s it!

As a side note, the flavor is condensed and very potent, so these would also be good as a garnish or over popcorn.

Hope you enjoy!

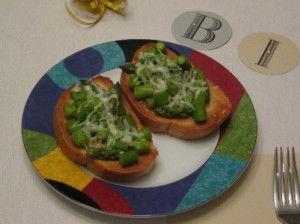
Happy Birthday ~ Truffled Asparagus Crostini

Happy birthday to Rob! On this day, I usually make him dinner with his favorite ingredients including beef tenderloin, asparagus and carrot cake. This year he said it might be fun to try a less traditional main course to shake things up :). After searching my favorite markets, I found a rabbit! The menu included recipes that were new as well as a couple of old favorites – Braised rabbit with mustard sauce, truffled asparagus crostini, golden beets in a cider vinaigrette and carrot cupcakes. I have already written about our favorite carrot cupcakes on this blog, and the truffled asparagus crostini are also one of our favorite appetizers. They are simple to make and they have a touch of class for any special occasion.

Truffled Asparagus Crostini

Baguette, sliced into ¾ inch pieces

1 pound asparagus

2 teaspoons truffle oil

Salt to taste

Freshly ground black pepper to taste

1/4 cup fontina cheese, grated (or any semi-hard cheese that you like)

Preheat you broiler.

Place the slices of bread in a single layer on a baking sheet. Broil for about 1 minute or until they are lightly browned. Turn them over and do the same on the other side. Cool on the pan.

Steam the asparagus for about 2 minutes or until slightly tender. Place in an ice bath to stop the cooking. Chop the asparagus into small pieces. Add oil, salt and pepper, and toss well.

Top each piece of bread with the asparagus mixture. Sprinkle the cheese over each crostini. Broil for about 1 minute or until the cheese melts a little. Serve warm.

We paired the meal with one of Rob’s favorite wines from Columbia Winery called Otis Vineyard Cabernet Sauvignon. I decided on this wine since we held our wedding reception at Columbia Winery, and both Rob’s birthday and our anniversary fall on the 2nd of a month. I almost always try to find some special significance with any bottle of wine I choose for a special occasion :). Cheers!

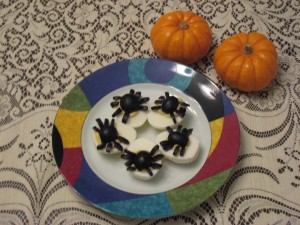
Happy Halloween ~ Deviled Eggs with Black Olive “Spiders”

Happy Halloween! For one of my favorite holidays, I tried a fun idea this year from Sunset magazine for deviled eggs with little black olive spiders on top.  Super cute! Just choose your favorite deviled egg recipe, or use the one below for a very simple and reduced fat version.

Deviled Spider Eggs

6 hard-boiled eggs

2 tablespoons reduced fat mayonnaise

1 teaspoon Dijon mustard

Salt to taste

Pepper to taste

Whole pitted black olives

Hard-boil your eggs. The trick I use for this treat (I couldn’t resist! Ha!) is to put the raw eggs in a pot of warm water, and bring the pot to a boil. As soon as it starts to boil, shut off the heat, and cover the pot for 20 minutes. This ensures the eggs don’t overcook. Chill in the refrigerator until cool.

Once cooled, cut the eggs in half crosswise and scoop out the yolks into a bowl. Add the remaining ingredients to the yolks (except for the olives) and mash until smooth with a fork. Place the mixture in a zip top bag and squish it to one corner. Cut a tiny hole in the corner of the bag and pipe the mixture into the empty portion of the egg whites so it mounds slightly.

Then for the spider, cut an olive in half lengthwise. Place the half (dome side up) in the middle of the yolk mixture. Then cut the other half into 4 thin strips crosswise, and cut the strips in half to make the legs. Nestle the legs beside the body. (See photo). The yolk mixture should hold them in place.

These cocktail party snacks go well with a Halloween wine like Phantom by Bogle Vineyards or blood orange Champagne cocktails! Cheers to a fun Halloween night!

Happy Seafair ~ Blueberry Blue Angel Muffins

*About the photos

This is Seafair weekend in Seattle, which is an annual summer celebration including hydroplane racing and an air show featuring the Blue Angels. We live very close to the flight path where the Blue Angels fly, so I get a great view of the synchronized air show from my kitchen. Occasionally, the jets come close to breaking the sound barrier and they cause the kitchen to rumble and shake a bit as they fly over!

This year happens to be a cooler and wetter weekend than usual.  I find that when the weather cools down I like to make our home cozy and warm with baked goodies. That along with all of the Seafair festivities inspired me to bake what I’d like to call “Blueberry Blue Angel Muffins!” 🙂

I found a really good blueberry muffin recipe from America’s Test Kitchen and I changed a few things to make it a little healthier. (I used less sugar, I substituted whole-wheat pastry flour for the all-purpose flour and I switched the butter to applesauce.) It takes advantage of the fresh summer blueberries at the market now. The extra non-traditional step of swirling homemade blueberry jam into the muffins makes them very flavorful and special. The lemon zest and sugar topping also gives them a fresh and crunchy finishing touch.

Blueberry Blue Angel Muffins

Ingredients:

Cooking spray

1/2 tablespoon lemon zest

2
cups fresh blueberries

1
cup sugar, plus 1 teaspoon, plus 2 tablespoons

2 1/2
cups whole-wheat pastry flour

2 1/2
teaspoons baking powder

1/4 teaspoon salt

2
eggs

1/4 cup applesauce

1/4
cup canola oil

1
cup buttermilk

1 1/2
teaspoons vanilla extract

Preheat your oven to 425 degrees with the rack in the upper middle position. Spray a muffin tin with nonstick cooking spray.

Bring 1 cup of blueberries and 1 teaspoon of sugar to a simmer in a small saucepan over medium heat. Mash the berries with a potato masher and stir frequently until the mixture is a little thickened and reduced to about ¼ cup. Take off the heat, and let cool.

For the topping, stir together 2 tablespoons of sugar and the lemon zest in a small bowl until combined.

Whisk the flour, baking powder, and salt together in a large bowl. In a medium bowl, whisk 1 cup of sugar and the eggs together until they are well incorporated. Slowly whisk in the applesauce and oil. Then whisk in the buttermilk and vanilla until everything is blended well. Using a rubber spatula, fold the egg mixture and the remaining blueberries into the flour mixture until everything is just moistened.

Divide the batter equally into the 12 muffin cups. Each cup should be completely full. Then put about a teaspoon of the cooked berry jam mixture onto the center of each muffin. Using a chopstick or other skewer, swirl the jam into the batter. Then sprinkle the lemon sugar equally over the muffins.

Bake about 17 minutes, until the muffin tops are firm and a toothpick inserted comes out clean. Cool slightly before serving.

Happy Seafair!

*Watching the Blue Angels air show while enjoying a plate of blueberry muffins on the deck :). As a funny side note, the right photo would have been very very cool since the plane on the right proceded to come straight over our house, but I ran into the kitchen when he got closer! Ha ha! They are *loud.*

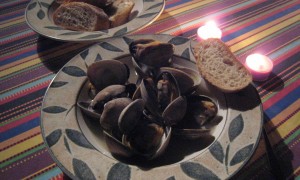
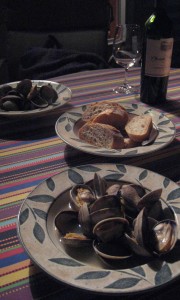
Make an ordinary summer night special ~ Steamed Clams

Rob and I have started a new little tradition that makes an ordinary evening feel like a special occasion to us. We light some candles and our tiki torches outside, have a glass of wine and enjoy this steamed clam dish together. We used to go out for a similar dish at a nearby restaurant called BluWater Bistro, but I figured out a comparable recipe that we like even more at home. I don’t use nearly the amount of butter they use, but I think it still needs a tiny bit for flavor. I also think half the fun of clams is watching them pop open as they cook…Something we miss when we go out to eat. Not to mention, it is much less spendy to make at home :). This is not a strict recipe. Just taste as you go to make sure you have the flavors you like.

Steamed Clams

1 or 2 cloves minced garlic (depending on how much garlic you like)

1/2 tablespoon butter

2 cups low sodium free-range chicken stock

Splash of dry white wine, such as Chardonnay or Sauvignon Blanc

About 2 lbs of farmed clams

Salt to taste

2 tablespoons fresh flat leaf parsley (optional)

French bread (optional)

Scrub your clams very well and discard any that are cracked or open. (If any clams are just a tiny bit open, tap them on the counter…If they close, they are still alive and good to use. If they don’t, they are not safe to eat, so toss them.) Melt the butter in a large pan (one that has a lid), and sauté the garlic for a minute or until fragrant. Pour the chicken broth and white wine into the pan and bring to a boil. Taste for seasoning once it is hot, and add salt if you desire. When the mixture is boiling, put all of the clams in the pan and cover with the lid. Watch them closely. When all of them have opened, take the lid off and take the pan off the heat. (If any did not open, discard them.) Spoon the clams and broth into two big bowls. If you desire, finish with a sprinkling of fresh chopped parsley and serve with slices of French bread to soak up the extra broth. Also, be sure to serve with an extra bowl for the shells.

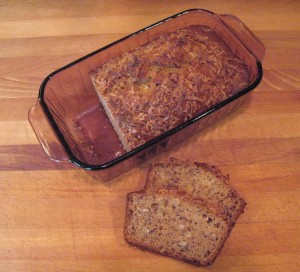
Tropical Banana Coconut Bread

I have a tendency to buy a bunch of bananas that we can’t finish before they get really really ripe. That’s why I make a lot of banana bread and banana muffins! Peeling and freezing them stops them from ripening too far, and then I always have some ready to grab whenever I want. One of our favorite recipes for these bananas is banana coconut bread. As the weather gets warmer, I get more and more in the mood for something tropical, so I’ve made quite a few loaves so far this spring :). The original recipe was from Cooking Light magazine, and it can be found at MyRecipes.com. I changed it slightly to make it a little simpler (using things I usually have in the kitchen) and to make it a little healthier. For example, I substitute one more banana for the yogurt, since I usually have a lot of bananas to use. I also substitute canola oil for the butter, and it works just fine. This bread recipe is pretty forgiving, so you can add some extra goodies if you like, such as chopped macadamia nuts. They are one of my favorite additions.

Banana Coconut Bread

2 cups unbleached all-purpose flour

3/4 teaspoon baking soda

Pinch of salt

1 cup granulated sugar (a little less if the bananas are very very ripe)

1/4 cup canola oil

2 large eggs

1 3/4 cups mashed ripe banana (about 4 bananas)

1 tablespoon vanilla extract

1/2 cup flaked sweetened coconut, plus a little more for the top

Cooking spray

Preheat your oven to 350. Whisk the flour, baking soda and salt in a medium bowl. In a large bowl, whisk the sugar and oil until they are well blended. Add the eggs, 1 at a time, beating well after each. Add the mashed banana and vanilla, and whisk until they are incorporated. Add the flour mixture, and mix until everything is moist. Stir in 1/2 cup of coconut and any other dry goodies you think would be yummy. Spoon the batter into a 9×5 inch loaf pan coated with cooking spray. Sprinkle with a little coconut on top. Bake for about 1 hour and 17 minutes, or until a toothpick inserted in the center comes out clean.

A slice of this bread goes very well with a cup of coffee in the morning, since coffee is tropical too! 🙂

PS. Our backyard squirrel, who is a frequent visitor, also enjoyed a little of the stale end of one loaf. So cute!

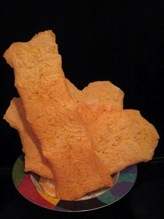
Our Favorite Homemade Crackers

One of my favorite things to do with my husband is to make homemade crackers. We have a tag team system where I make the dough, he rolls it out and I apply the final toppings. Then we watch a movie while we wait for them to bake, savoring the aroma that wafts through the house. It’s a really cozy way to have a date at home on a cold and rainy night. 🙂

Our Favorite Tomato, Oregano and Parmesan Crackers

1 cup and 1 tablespoon whole-wheat pastry flour

¾ cup and 3 tablespoons all-purpose flour

½ teaspoon table salt

2 tablespoons canola oil

1 tablespoon and 1 teaspoon tomato paste

½ cup and 2 tablespoons water

Grated Parmesan and dried oregano for sprinkling on top

Preheat your oven to 350 degrees. Mix all of the ingredients together except for the Parmesan and oregano. (I find that kneading it together with my hands is a bit messy, but it works the best.) Then roll out little pieces of the dough as thinly as possible on a lightly floured surface. Place the very thin dough in a single layer on a baking sheet covered with parchment paper. (This will make enough crackers to cover about 6 baking sheets, so we do them in a few separate batches.) Sprinkle the crackers with a little grated Parmesan and dried oregano to taste. Bake for 12-18 minutes, depending on how thin you were able to make the crackers and depending on your oven. (Just watch them very closely because they are easy to burn.) They are done when they are golden and crispy.

I hope you like them as much as we do!

Baked Coconut Shrimp

One of my favorite restaurants in town called Cactus used to have my very favorite coconut shrimp in the city. Actually, I would say they were my favorite coconut shrimp, period. I have tried them in quite a few places and nothing ever beat theirs, in my humble opinion. Their chef decided to change the menu recently, however, and they no longer serve them. Soo…That inspired me to try to figure out the recipe! I learned that baking them works really well, as opposed to frying them. This recipe is based on one I found in Cooking Light magazine (the original can be found at MyRecipes.com) with a few personal touches.

Baked Coconut Shrimp

30 large peeled and deveined shrimp with the tails still attached

1/3 cup cornstarch

Pinch of salt

3 egg whites

2 cups sweetened flaked coconut

Cooking spray

Aluminum foil

Preheat oven to 400°.

Coat a baking sheet with aluminum foil and cooking spray. Rinse and dry shrimp. Combine the cornstarch and salt in a little dish. Beat the egg whites in a separate bowl with a hand mixer until they are slightly frothy. Place the coconut in a third dish. Dredge each shrimp in the cornstarch mixture, the egg white and then the coconut. (Press gently to keep the flakes in place). Place the coated shrimp on the baking sheet, and spray the top of the shrimp lightly with cooking spray. Bake for about 20 minutes, depending on the size of your shrimp, turning once. (Watch them closely, so as not to over bake).

I also made a super easy salsa to go with them…Just a mix of crushed pineapple with jalapeno pepper jelly to taste.

A little side note is that I try to find farm raised or wild shrimp from the US or Canada instead of imported shrimp. I like this little seafood selector website (find a fish) since it’s sometimes hard to remember which choices are the healthiest when I’m at the store.

Happy New Year! Rice Pudding with Pomegranate Syrup

Welcome 2010! To celebrate this day, I decided to make dinner with an array of lucky New Year dishes from all over the world. I got my inspiration from an article from Epicurious.com. We had thyme coated pork tenderloin, braised lentils with onions and spinach and rice pudding with pomegranate syrup (with an almond hidden in each serving for luck.) Of the three, the dessert was our favorite! Definitely a keeper to make again throughout the rest of the year. The original recipe was from Cooking Light magazine, and it can be found at MyRecipes.com. I followed the recipe pretty closely since it was already a lightened version of traditional rice pudding, but I changed a few little things to lighten it up even more. (For example, I used skim milk instead of 2% and I omitted the butter.)

Rice Pudding with Pomegranate Syrup

3 1/2 cups skim milk

1/2 cup uncooked Arborio rice, sushi rice or other short-grain rice

1/3 cup sugar

1 egg

1 teaspoon vanilla extract

6 whole almonds

2 pomegranates

1/4 cup sugar

6 tablespoons pomegranate seeds

(Or you can cheat a tiny bit and replace one pomegranate fruit with a small bottle of pomegranate juice.)

Combine 3 cups of milk, rice and 1/3 cup of sugar in a medium saucepan, and bring to a boil. Reduce heat. Simmer uncovered for 10 minutes, stirring occasionally. Remove from heat. Whisk 1/2 cup of milk and the egg. Gradually stir about one quarter of the warm rice mixture into the egg mixture. Add it all back to the pan, stirring constantly. Simmer uncovered for 30 minutes or until the rice is tender, stirring occasionally. Remove from heat. Stir in the vanilla.

To prepare the syrup, squeeze the juice from the pomegranate halves to measure 1 cup. (Or use a bottle of juice.) Combine the juice and 1/4 cup of sugar in a small saucepan. Bring to a boil. Reduce heat. Simmer until reduced to 1/3 cup, (about 20 minutes), stirring frequently.

Spoon the pudding into 6 individual dishes. (Martini glasses are an elegant presentation.) Drizzle the syrup evenly over the pudding, and sprinkle with pomegranate seeds. Also, don’t forget to hide an almond in them for luck in the New Year! 🙂

We also had the classic pairing for this day…sparkling wine. This year I chose cute little individual cans of Sofia Blanc de Blancs by Francis Ford Coppola Winery. They were a unique, economical and fun way to go.

Here’s to lots of luck in the New Year!