Wedding Anniversary Hors d’Oeuvres ~ Clams Casino
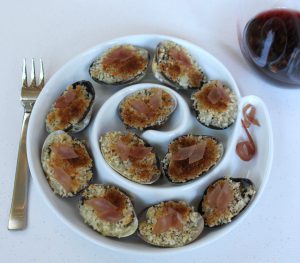
Legend has it that clams casino was first served at the Narragansett Pier Casino in Rhode Island in 1917, or possibly earlier. It is fun to imagine dining at this luxury resort on the water 100 years ago. Eater.com featured an in depth article about the history of clams casino, which I found fascinating. If you’d like to learn more, I think it’s an interesting read!

The dish has stood the test of time for good reason. Traditionally the clams are served on the half shell and topped with toasted breadcrumbs and bacon. How can you go wrong with that? 😉 I used panko breadcrumbs and prosciutto for my version.

Clams Casino

Serves 2

About 1 tablespoon high heat cooking oil

1 small shallot, minced

1 garlic clove, minced

Pinch of red pepper flakes

1/4 cup dry white wine

1/2 cup low-sodium chicken stock

1 pound Manila clams

Salt to taste

Freshly ground black pepper to taste

1/2 cup (approximately) panko breadcrumbs

High heat cooking spray

2 or 3 slices prosciutto, sliced into small pieces

Place your oven rack in the middle and preheat the broiler. Set aside a casserole dish that is large enough to hold all of the clam halves in a single layer.

In a large sauté pan with a lid, heat the oil. Once the oil is hot and shimmering, cook the shallot until softened. Then add the garlic and red pepper flakes, and cook until fragrant. Add the white wine and stock, and bring to a boil. Add the clams, cover the pan, and cook until they are just opened. Transfer the opened clams to a plate to cool slightly. Season the broth with salt and pepper.

Remove the top shell of each clam. (I found that kitchen shears worked well.) Loosen the meat from the bottom shell. Place each clam half in the casserole dish.

Spoon a little bit of the white wine mixture (that the clams cooked in) to each clam. Top the clams evenly with panko. Spray the top of the breadcrumbs with a light coating of cooking spray.

Broil until the panko is lightly golden brown, about 3 or 4 minutes. Watch them very carefully so they don’t burn.

Top each clam with a small piece or two of prosciutto. Serve immediately.

Wedding Anniversary Hors d’Oeuvres ~ Crab Imperial Bites

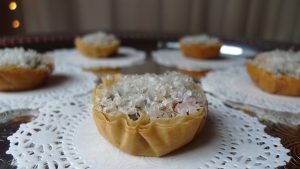
For our second special anniversary dish, I made crab imperial bites. Crab imperial is a type of crab casserole or dip from Maryland, and it is usually served in a ramekin or baking dish. I made my version into bite-sized hors d’oeuvres with our favorite local Dungeness crab for a West Coast twist. 🙂

Crab Imperial Bites

Makes about 18 hors d’oeuvres

18 wonton wrappers

High heat cooking spray

1 tablespoon mayonnaise

2 tablespoons minced fresh Italian parsley

2 tablespoons panko breadcrumbs, plus more for the top

1 1/2 teaspoons lemon juice

1 teaspoon Worcestershire sauce

1 teaspoon Dijon mustard

1/2 teaspoon Old Bay seasoning

Pinch of cayenne

Salt to taste (if needed)

Freshly ground black pepper to taste

1/2 pound lump crabmeat, picked through to make sure there are no hidden bits of shell.

Preheat your oven to 350 F.

Cut the wonton wrappers into circles that will fit into the holes of a mini muffin pan. I used a circular cookie cutter for this, but kitchen scissors also work. Spray the wrappers with a light coating of cooking spray on both sides, and rub the oil with your fingers to ensure an even coating. Form the wrappers into cup shapes in the mini muffin pan.

Bake for about 10 to 15 minutes, or until the wonton wrappers are golden and crunchy.

Set aside.

Turn up your oven to 400 F.

In a medium bowl, mix the remaining ingredients except for the crab. Add the crab, and mix well, but try to keep the bigger pieces of crab intact.

Place the filling into the prepared wonton shells.

Top the bites with more panko. Spray the top of the breadcrumbs with a light coating of cooking spray.

Bake until heated through, about 4 minutes. Then turn on the broiler, and broil until the breadcrumbs are lightly golden. Keep a close eye on them so they don’t get too brown.

Wedding Anniversary Hors d’Oeuvres ~ Crab Rangoon Dip with Wonton Crackers

It’s our wedding anniversary weekend once again! This year was lucky 17. 🙂

We celebrated at home with delicious Northwest seafood. I’ve been exploring vintage recipes this year, and I made three classic seafood hors d’oeuvres with a twist for this occasion: crab Rangoon, crab imperial, and clams casino.

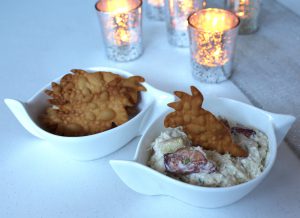
Crab Rangoon is an old tiki bar classic, and it can sometimes be found at Chinese or Thai restaurants. The filling is typically made with cream cheese and a tiny bit of imitation crabmeat. Then the filling is wrapped in a wonton wrapper and the whole thing is deep-fried. For my version, I made a dip based on the classic filling, but I used real Dungeness crab and a higher ratio of crab to cream cheese. I also made crab shaped crackers for dipping. 🙂

Crab Rangoon Dip with Wonton Crackers

Wonton wrappers

High heat cooking spray

Sea salt, to taste

2 ounces reduced-fat cream cheese

4 ounces lump crabmeat, picked through to make sure there are no hidden shells

1 scallion, green part only, minced

1/4 teaspoon soy sauce

1/8 teaspoon fish sauce

1/8 teaspoon Worcestershire sauce

1/4 teaspoon toasted sesame oil

Freshly ground black pepper to taste

Salt (if needed) to taste

Preheat your oven to 350 F. Line a baking sheet with parchment paper.

Cut your wonton wrappers into desired shapes. Spray the wrappers with a light coating of cooking spray, and season with a sprinkling of sea salt.

Bake for about 10 to 15 minutes, or until the wonton wrappers are golden brown and crunchy.

In a medium bowl, mix together all of the remaining ingredients.

Serve the dip in a ramekin or dish alongside the crunchy wonton wrappers for dipping.

More Elegant Bites for Valentine’s Day ~ Lobster Thermidor Tartlets

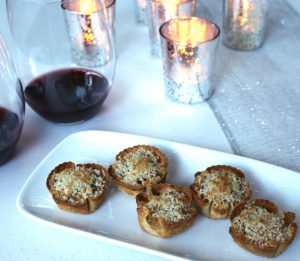
We paired our lobster Newburg canapés with lobster thermidor tartlets. And we paired them both with a little wine of course! It was Valentine’s Day after all. 😉

You can buy premade tartlet shells or make your own with store-bought phyllo dough. I made my own, but only because my local stores didn’t have the shells. I think there was a run on them for Valentine’s Day! 😉 The filling for this appetizer can be made ahead and reheated in a warm pan. I love recipes I can make ahead. Then I can focus on the celebration instead of being back in the kitchen. This recipe also works really well with shrimp. This month, my Valentine tasted three batches with shrimp while I was testing the recipe before we enjoyed the lobster version on the big day, (but I don’t think he minded. 😉 )

Lobster Thermidor Tartlets

4 tablespoons unsalted butter, divided

2 small raw lobster tails, split in half lengthwise

About 4 ounces white mushrooms, finely diced

1 small shallot, minced

2 tablespoons all-purpose flour

1 tablespoon dry sherry

1 tablespoon brandy

1 cup skim milk

1/4 teaspoon paprika

1 1/2 teaspoons Dijon mustard

White pepper to taste

Salt to taste

Mini phyllo tartlet shells

Parmesan and/or Gruyère cheese

In a medium sauté pan over medium heat, melt 2 tablespoons of butter. Add the lobster tails, including the shells, and cook until the shells are red. They do not need to be completely cooked through at this point.

Pull out the lobster and set aside on a plate to cool.

In the same pan, add the mushrooms and shallot, and cook until they soften and brown slightly.

Remove the mushrooms and shallot with a slotted spoon and set aside.

Wipe out the pan to make sure you don’t have any bits of shallot or mushroom left that may burn. Over medium heat, melt the remaining 2 tablespoons of butter. Let the bubbles subside. Sprinkle the flour in the pan, and whisk to make a roux. Cook until the roux turns golden. While continuing to whisk, add the sherry, brandy, and milk, and cook until the mixture is thickened. Add the paprika, mustard, and pepper, and whisk to combine.

Strain the mixture for any lumps. Return the sauce to the pan off the heat.

Take the lobster meat out of the shells and cut into a small dice.

Add the lobster meat, mushrooms, and shallots back to the pan with the sauce. Mix until everything is well coated. Over low heat, cook until the lobster meat is just cooked through. Season with salt if needed, (but remember there will be salty cheese added as a final edition, so be careful not to over salt.)

Spoon the mixture into the tartlet shells. Grate a little cheese over the top of each tartlet. With a kitchen torch, melt the cheese. Add a little more grated cheese on top for a pretty presentation.

Serve immediately.
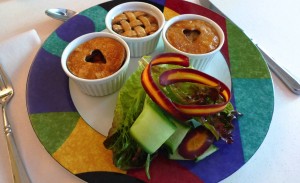
Elegant Bites for Valentine’s Day ~ Lobster Newburg Canapés

This year, rather than an elaborate Valentine dinner, I focused on hors d’oeuvres I could enjoy with my hubby later in the evening. 🙂 I made lobster Newburg canapés and lobster thermidor tartlets, two classic lobster dishes converted into small bites. I have to say, both went quite nicely with a glass of wine by the fire!

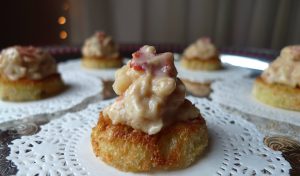
I’ll start with the canapés. I love that the topping can be made ahead and reheated in a warm pan, and the lobster can totally be substituted for shrimp for a more modest dish. I made a couple batches with shrimp as I was testing the recipe this month, and my taste tester (AKA, my hubby) loved it! The lobster was perfect for our special Valentine’s Day celebration, though. I think this is a recipe I will go back to again and again. It is fancy enough for a special occasion, but simple enough to make on a weeknight.

Lobster Newburg Canapés

Sliced artisan bread, cut into approximately 1 1/2-inch rounds with a cookie cutter

Extra virgin olive oil

3 tablespoons unsalted butter

2 small raw lobster tails, split in half lengthwise

2 tablespoons all-purpose flour

1 tablespoon dry sherry

1 tablespoon brandy

1 cup skim milk

Pinch of freshly ground nutmeg

Pinch of cayenne pepper

Ground white pepper to taste

Salt to taste

Preheat broiler. Cover a sheet pan with parchment paper.

Brush the tops of the bread with a little olive oil. Arrange the bread with the oil side facing up on the prepared sheet pan. Broil for a minute or two until the bread is golden on top. Watch them closely, because they can burn very quickly. Set aside.

In a medium sauté pan, heat the butter over medium heat until melted. Add the lobster tails, including the shells, and cook until the shells are red. They do not need to be completely cooked through at this point. Set aside to cool.

Continuing to cook over medium heat, sprinkle the flour in the pan, and whisk to combine with the remaining butter. Cook until the roux is golden brown. While whisking, add the sherry, brandy, and milk. Continue to whisk until the mixture is thickened. Add the nutmeg, cayenne, and white pepper, and whisk until well combined.

Strain the mixture for any lumps. Return the sauce to the pan off the heat.

Take the lobster meat out of the shells, and cut into a small dice.

Add the lobster meat back to the pan with the sauce. Mix until the lobster is well coated. Over low heat, cook until the meat is just cooked through. Season with salt if needed.

Spoon a small amount of the lobster mixture onto the toast rounds. Serve immediately.
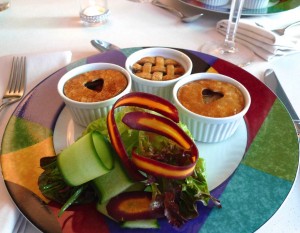
Wedding Anniversary Dinner ~ Lemon Verbena Whole-Wheat Shortbread Cookies

Lemon Verbena ShortbreadI made two desserts for our sweet sixteenth wedding anniversary dinner – The blackberry cabernet gelée I blogged about earlier, and these lemon verbena whole-wheat shortbread cookies. I love the bright citrusy flavor of lemon verbena, which is a nice compliment to these buttery cookies. They were the perfect ending to a beautiful summer evening celebration!

Lemon Verbena Whole-Wheat Shortbread Cookies

Approximately 20 leaves of fresh lemon verbena, stems removed, roughly chopped

1 cup whole-wheat pastry flour

Pinch of salt

1/2 cup unsalted butter, room temperature

1/4 cup confectioner’s sugar

1/2 teaspoon vanilla extract or vanilla bean paste

1/2 teaspoon lemon zest

All-purpose flour for dusting work surface

In the bowl of a food processor, add the lemon verbena, whole-wheat pastry flour, and salt. Process until the lemon verbena leaves are cut into tiny pieces.

In the bowl of a stand mixer fitted with a paddle attachment, cream the butter, sugar, vanilla, and lemon zest until light and fluffy. Add the flour mixture, and mix until just combined. Be careful not to overmix at this point.

Form the dough into a disc and cover with plastic wrap. Let chill in the refrigerator at least 2 hours or overnight.

Preheat oven to 325 degrees F.

Line a baking sheet with parchment paper.

Sprinkle a little all-purpose flour on a rolling pin and a clean work surface. Roll out the dough until it is about 1/8-inch thick. Cut into desired shapes with cookie cutters. Place the cookies on the prepared baking sheet. Bake for about 12 minutes, or until cooked through.Lemon Verbena Shortbread

Wedding Anniversary Dinner ~ Blackberry Cabernet Gelée

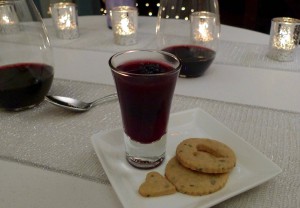
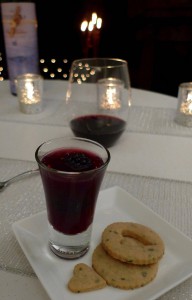
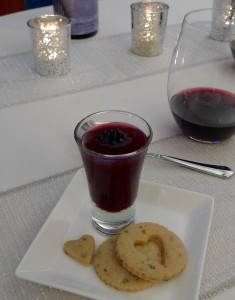
Blackberry Cabernet GeléeAfter the main course of duck breast with a farmers’ market plum sauce, the grand finale of our anniversary dinner was a duo of desserts. (Since this anniversary was our sweet sixteen, I thought two desserts were in order! 😉 ) I made blackberry cabernet gelée accompanied by lemon verbena shortbread cookies. (The cookie recipe will follow in my next post.)

I have enjoyed making several gelatin desserts this summer, and I thought this blackberry and cabernet gelée was an elegant way to close the season. I also loved that they could be made a day in advance, so I wasn’t in the kitchen all day on our anniversary.

Blackberry Cabernet Gelée

Based on a recipe from Martha Stewart

1/2 cup apple juice

1/2 cup cold water

1 packet or 2 1/2 teaspoons of Knox powdered gelatin

1 cup Cabernet Sauvignon (I used one from 14 Hands Winery)

3 tablespoons granulated sugar

1 pint of blackberries

Set aside pretty serving glasses. Add several blackberries to each glass.

In a medium bowl, add the apple juice and water. Sprinkle the gelatin over the top of the liquids. Let stand about 5 minutes, or until the gelatin has bloomed.

In a medium saucepan, add the wine and the sugar. Bring to a boil and let the sugar dissolve.

Once the sugar has dissolved, pour the wine mixture into the apple juice mixture. Whisk to combine.

Transfer the mixture to a vessel with a spout. Fill the serving glasses. Refrigerate until the gelatin has set. I let mine chill overnight.

Wedding Anniversary Dinner ~ Whole-Wheat Dinner Rolls with Dill

Dill RollsThis weekend, my hubby and I celebrated our wedding anniversary! This year was our sweet 16. 🙂

Every year I love to make a special meal for the occasion, and this year was no different. This year’s dinner featured the beautiful summer produce that I found at our farmers’ markets. All of the dishes were fresh and summery.

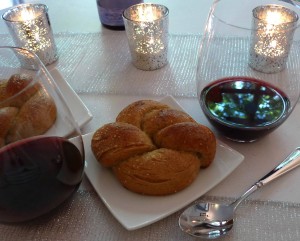
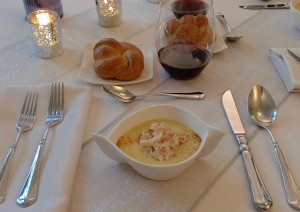
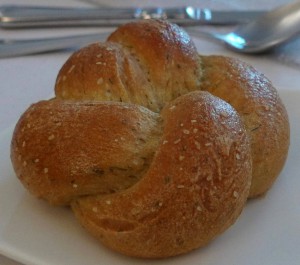
We started with whole-wheat dinner rolls seasoned with fresh dill. I tied them into a knot (since we tied the knot 16 years ago! 😉 ) I served them with corn and coconut soup garnished with a good bit of Dungeness crab. The rolls were a nice accompaniment to dip into the soup.Dill RollsWhole-Wheat Dinner Rolls with Dill

Makes 6 dinner rolls

2 tablespoons warm water (about 80 degrees F.)

1/2 tablespoon dry active yeast

1 teaspoon granulated sugar

1/2 teaspoon kosher salt

2 tablespoons fresh dill, minced (measure after mincing)

1/2 teaspoon dill seed

1 tablespoon unsalted butter, melted

1 large egg

1/2 cup low-fat buttermilk

1 3/4 cups white whole-wheat flour

All-purpose flour for dusting work surface

Approximately 1 tablespoon beaten egg

Approximately 1/2 tablespoon coarse salt

Place a piece of parchment paper on a half sheet pan, and spray the parchment with cooking spray. Make sure you have enough room in your refrigerator for the sheet pan where the rolls will rest overnight.

In the bowl of a stand mixer with a dough hook attachment, add the water. Sprinkle the yeast over the water. Let stand until the yeast and water mixture looks creamy, about 5 minutes. Next, add the ingredients from the sugar through the whole-wheat flour to the bowl. Let the mixer knead the dough for about 10 minutes. The dough will be elastic and sticky.

Remove the dough from the bowl onto a clean work surface that is lightly dusted with all-purpose flour. Divide the dough into 6 equal pieces. Sprinkle a little extra all-purpose flour over the dough and on your hands if the dough sticks.

Form the rolls into your desired shape. To make knots like I did, roll one piece of dough between your hands until it is about 12 inches long. Tie the dough into a loose knot. Then take one loose end of dough and bring it up and over to the center of the knot. Take the other end of the dough, and gently pull it down and under to the center of the knot. The ends should be tucked underneath so no loose ends are visible. Gently press the sides of the knot so it is round. Place the roll on the prepared baking sheet. Repeat with the remaining 5 rolls. Take care to leave enough space between the rolls to allow them to rise without touching each other.

Spray the tops of the rolls with nonstick cooking spray and cover with plastic wrap. Let the rolls rest in the refrigerator overnight.

The next day, remove the rolls from the refrigerator. Let the dough rise in a warm place for about 90 minutes, or until close to doubled in size.

Preheat your oven to 350 F. Brush the rolls with the beaten egg, and sprinkle a little coarse salt on top. Bake for about 25 minutes, or until the rolls are golden brown and cooked through.Dill Rolls

Seattle Anniversary ~ Cappuccino Panna Cotta

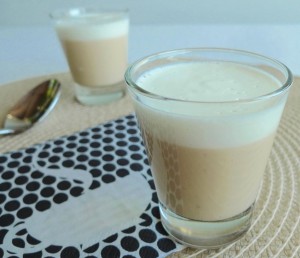
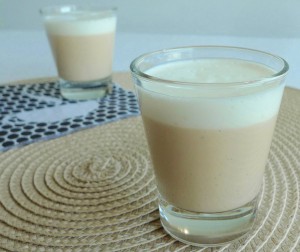
Cappuccino Panna CottaToday I am celebrating 21 years living in Seattle and 18 years in Leschi! Seattle is full of coffee shops, so I couldn’t think of anything more fitting to make to celebrate my home than an espresso dessert. In honor of the day, I made cappuccino panna cotta!

I used the creamy gelatin dessert recipe I have used a few times this summer. It is made with whole milk and 2% Greek-style yogurt rather than the heavy cream that is traditional in panna cotta. Even without the cream, I think it is quite luscious. 🙂 I just added a little espresso powder to the original recipe to make this version coffee-flavored.

Cappuccino Panna Cotta

1 1/2 teaspoons plain powdered gelatin

2 teaspoons cold water

2 cups 2% Greek-style yogurt

1/2 teaspoon vanilla extract or vanilla bean paste

1 cup whole milk

1/3 cup granulated sugar

2 teaspoons espresso powder

In a small bowl, add the gelatin to the water and let it bloom. In a medium bowl, add the yogurt and vanilla. In a medium saucepan, bring the milk and sugar to a simmer, whisking to dissolve the sugar. Once the milk is simmering, remove from the heat, add the bloomed gelatin, and whisk to combine. Let the milk cool to room temperature. Pour the milk mixture into the bowl with the yogurt mixture and whisk until well combined.

Transfer 1/3 of the mixture to a container with a spout.

Add the espresso powder to the remaining mixture, and whisk until the powder is dissolved and well combined.

Transfer the mixture with the espresso into a second container with a spout.

Pour the espresso-flavored mixture into serving glasses, leaving a little room on top for a thin white layer. Let the first layer completely set in the refrigerator. Then top with the reserved white mixture to make the cappuccino’s “foam.” Let the dessert set completely in the refrigerator before serving.Cappuccino Panna Cotta

British Wedding Anniversary Dinner ~ Dessert ~ Lemon Syllabub Trifle

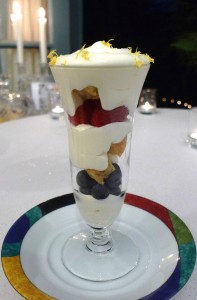
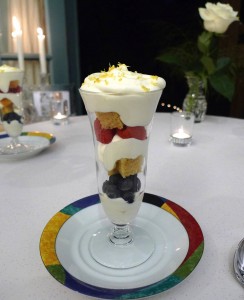
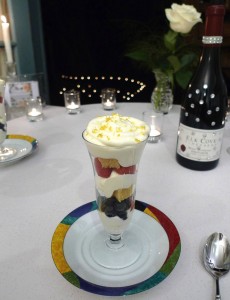
Lemon Syllabub TrifleThe grand finale to our British anniversary dinner was a lemon syllabub trifle. I couldn’t make up my mind as to which dessert I wanted to make, so I combined three classic British sweets into one – Lemon drizzle cupcakes, lemon syllabub, and a trifle. 🙂

The lemon drizzle cupcakes were based on a recipe from BBC Good Food. I replaced half of the butter with coconut oil and the other half with nonfat Greek yogurt. I cut the sugar in half, and I replaced the self-rising flour with a combination of whole-wheat pastry flour, baking powder, and a pinch of salt. (I put the leftovers in the freezer, and after thawing in the microwave for 30 seconds, they make a nice little treat with afternoon tea. 🙂 )

Lemon Drizzle Cupcakes

Based on a recipe from BBC Good Food

For the cakes:

1/2 cup coconut oil

1/2 cup nonfat Greek yogurt

1/2 cup caster or fine sugar

Zest of 1 lemon, finely grated

4 eggs

1 cup whole-wheat pastry flour

1 1/2 teaspoons baking powder

Pinch of salt

For the drizzle:

Juice of 2 lemons

Powdered sugar, to taste (Maybe start with 2 tablespoons and add from there if you like it sweeter)

Preheat oven to 350. Line a muffin tin with 12 cupcake papers. Whisk together the coconut oil, yogurt, sugar, and lemon zest until well blended. Then add the eggs, one at a time, and whisk until incorporated. In a separate bowl, whisk together the flour, baking powder, and salt. Add the dry ingredients into the wet ingredients, and mix until well combined, being careful not to over mix. Spoon the mixture into the lined muffin tin.

Bake for about 20 minutes, or until a toothpick inserted in the middle of a cupcake comes out clean.

While the cakes are cooling, make the glaze drizzle. Whisk together the lemon juice and enough powdered sugar to your liking. Prick the warm cakes in several places with a skewer, and then pour the drizzle over the top. Let cool completely.Lemon Syllabub TrifleFor the syllabub, I started with one more recipe from BBC Good Food. I replaced half of the heavy cream with nonfat Greek yogurt, and I cut back on the sugar. It was a delicious, creamy dessert on its own with a lovely little tang from the yogurt, wine, and lemon.

Lemon Syllabub

Based on a recipe from BBC Good Food

2/3 cup heavy whipping cream

3 tablespoons caster or fine sugar

2/3 cup nonfat Greek yogurt

3 tablespoons dry white wine

Zest of 1/2 lemon, finely grated

Juice of 1/2 lemon

Whip the cream and sugar together until stiff peaks form. Stir in the yogurt, and blend well. Add the wine, the lemon zest, and the lemon juice. Mix until everything is evenly incorporated.

Trifle

Lemon syllabub

Small berries, such as raspberries or blueberries

Lemon drizzle cupcakes, cut into small cubes

Zest of 1/2 lemon, finely grated

For ease, place the syllabub into a piping bag. In the base of a tall glass, pipe a shallow layer of syllabub in the bottom. Top with a few berries and then a few cubes of cake. Repeat until you finish at the top with the syllabub. Sprinkle with lemon zest on top.

That is the last stop on our virtual culinary getaway to the UK. 🙂 Cheerio for now!Lemon Syllabub Trifle

British Wedding Anniversary Dinner ~ Pie 3 ~ Pheasant, Leek, and Parsley Pie

British PiesThe final pie I made for our British anniversary pie extravaganza was a pheasant, leek, and parsley pie. 🙂 I started with a chicken pie recipe from BBC Good Food, which I thought would lend itself well to the gamier pheasant. I loved the clean, fresh flavors of the leek, parsley and lemon zest that complimented the pheasant well.

Again, I did a slow braise with the pheasant, just as I did with the rabbit, which resulted in very tender meat and a bunch of extra pheasant stock to use for future recipes.

Pheasant, Leek, and Parsley Pie

Based on a recipe from BBC Good Food

Cooking the pheasant and the stock:

1 tablespoon high heat oil, such as safflower

1 pheasant, about 3 pounds, cleaned

2 carrots, roughly chopped

1 onion, roughly chopped

1 stalk of celery, roughly chopped

1 bay leaf

1 tablespoon whole peppercorns

2 garlic cloves, crushed

½ tablespoon kosher salt

Preheat oven to 220 degrees. Preheat a large stockpot on medium high heat. When hot, add oil, and wait until the oil is hot and shimmering. Add the whole pheasant, and brown on all sides. Add the remaining ingredients and cover everything with water. Bring to a boil. Once the water is boiling, cover the pot and place it in the oven. Cook for about 2 hours, or until the pheasant meat is easily shredded with a fork.

Strain the stock, and discard the vegetables and seasonings.

Shred all of the meat, and reserve 2 ¼ cups of the stock for the pie. Freeze the rest of the stock for future recipes.

Cooking the pie:

1 tablespoon high heat oil, such as safflower

2 leeks, thinly sliced

2 tablespoons all-purpose flour

2 ¼ cups pheasant stock

¼ cup dry white wine

1 3-pound cooked pheasant, shredded

Zest of 1 lemon

1 small bunch Italian flat leaf parsley, chopped

Salt and pepper, to taste

Preheat a large sauté pan over medium high heat. When hot, add the oil, and wait until hot and shimmering. Add the leeks, and cook until softened. Add the flour, stir well, and cook for about a minute. Gradually stir in the stock and wine, cooking until the sauce is thickened slightly. Add the pheasant meat, and heat until warmed through. Take the pan off the heat, and add the lemon zest and parsley. Season to taste with salt and pepper.

To serve, add the stew to small ramekins and top with the pre-baked shortcrust pastry. (The instructions for the pastry can be found here in the first beef pie blog entry.)

The sweet ending to our meal is up next. 🙂 A lemon syllabub trifle!

British Wedding Anniversary Dinner ~ Pie 2 ~ Rabbit Pie with Cider and Mustard

British PiesThe second pie I made for our trio of British anniversary pies was a rabbit pie. 🙂 I wanted to make something out of the box, and rabbit isn’t something I use everyday. It was fun for me to cook with something different, and it felt like a special ingredient to use on our special day. It tastes a lot like chicken to me, so this recipe could be swapped with chicken, as well.

I started with a basic braise that left me with very tender meat and enough rabbit stock to freeze for later. (I use this method with chicken frequently. It’s a nice way to stock your freezer for the coming winter soup months! 🙂 )

Rabbit Pie with Cider and Mustard

Based on a recipe from BBC Good Food

Cooking the rabbit and the stock:

1 tablespoon high heat oil, such as safflower

1 rabbit, about 3 pounds, cleaned

2 carrots, roughly chopped

1 onion, roughly chopped

1 stalk of celery, roughly chopped

1 bay leaf

1 tablespoon whole peppercorns

2 garlic cloves, crushed

½ tablespoon kosher salt

Preheat oven to 220 degrees. Preheat a large stockpot on medium high heat. When hot, add oil, and wait until the oil is hot and shimmering. Add the whole rabbit, and brown on all sides. Add the remaining ingredients and cover everything with water. Bring to a boil. Once the water is boiling, cover the pot and place it in the oven. Cook for about 2 hours, or until the rabbit meat is easily shredded with a fork.

Strain the stock, and discard the vegetables and seasonings.

Shred all of the meat, and reserve 2 cups of the stock for the pie. Freeze the rest of the stock for future recipes.

Cooking the pie:

1 tablespoon high heat oil, such as safflower

1 small leek, finely sliced

1 teaspoon fennel seed

3 tablespoons all-purpose flour

½ cup dry hard cider

2 cups rabbit stock

1 tablespoon wholegrain mustard

Salt and pepper, to taste

1 3-pound cooked rabbit, shredded

Preheat a large sauté pan over medium high heat. When hot, add the oil, and wait until hot and shimmering. Add the leek and fennel seeds, and cook until caramelized and softened. Stir in the flour, and cook for about a minute. Add the cider, stir well to fully incorporate the flour and scrape up the brown bits from the bottom of the pan. Add the stock, and bring to a simmer. Reduce the cooking liquid by half.

Stir in the mustard, add salt and pepper to taste, and then add the rabbit meat. Cook until warmed through.

To serve, add the stew to small ramekins and top with the pre-baked shortcrust pastry. (The instructions for the pastry can be found here in the previous beef pie blog entry.)

Up next, pheasant pie!British Pies

British Wedding Anniversary Dinner ~ Pie 1 ~ Beef, Ale, and Mushroom Pie

British PiesI decided to make a meat pie for the main course of our British anniversary dinner. There are so many to choose from, however! I couldn’t make up my mind…So I made 3! 🙂 I made these all ahead of time and froze them until we were ready. Now we have lots of leftovers to thaw whenever we want a special meal.

I used the same shortcrust pastry for all three pies. The recipe I used came from the BBC recipe website. I replaced the plain flour with ivory whole-wheat flour, and I ended up using a little more water than the recipe called for to properly moisten the whole grain flour. I ended up using 5 tablespoons, but add just enough for the crust to come together. This crust also freezes well for future use. I served my pies in little ramekins and just topped them with crust. Not only was it a cute presentation, but also I only needed a small amount of the rich pastry for each pie. To make the little interchangeable and removable crusts like I did, line a sheet pan with parchment paper. On a lightly floured surface, roll out the refrigerated crust to about 1/8 inch thick, and cut it into the shapes you want with cookie cutters. Brush the pieces with an egg wash and bake at 350 for about 15-18 minutes, or until golden, turning halfway through for even cooking.

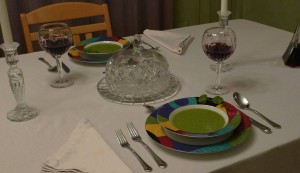
The first pie I made was a beef, ale, and mushroom pie. I used a round roast, which is a fairly lean cut that braises well. I also used Canadian bacon rather than traditional bacon, and omitted the sugar completely. I replaced the chestnut mushrooms with criminis, since they are easier for me to find in the States. I also made several tweaks to the recipe for my American kitchen, converting grams to ounces and changing the temperature from Celsius to Fahrenheit.
Beef, Ale, and Mushroom Pie

Based on a recipe from BBC Good Food

1/3 ounce dried porcini mushrooms

3/4 cup boiling water

2-4 tablespoons high heat cooking oil, such as safflower

2 1/2 pounds round roast, trimmed of excess fat, cut into inch-sized cubes

1 large onion, diced

4 large carrots, diced

4 tablespoons all-purpose flour

10 ounces dark ale, such as Guinness

14 ounces low-sodium beef stock

Salt and pepper, to taste

1 small bunch of mixed herbs (thyme, bay leaf, and parsley), tied together

6 ounces Canadian bacon, small diced

8 ounces crimini mushrooms, sliced

Cover the porcini mushrooms in the boiling water for about 20 minutes, or until they are tender. Then remove the mushrooms, squeeze out the excess moisture, and reserve the liquid.

Preheat oven to 320 degrees. Using a large pot with a lid and a heavy bottom, preheat on medium high heat. When it is hot, add some of the oil to coat the bottom, and wait until the oil is hot and shimmering. Add the beef in small batches, and brown on all sides. Set aside. Add the onion and carrots, and cook until caramelized and softened. Add the soaked mushrooms, and cook for about a minute more. Add the flour, stirring until it turns slightly golden. Place the meat and any juices back into the pan and stir well. Add the ale, stock, and porcini soaking liquid. Stir well to fully incorporate the flour into the liquid. Season the stew with salt and pepper to taste. Add the herbs. Bring the stew to a simmer. Cover the pot with a lid and place it in the oven for about 2 hours, or until the meat is tender enough to shred with a fork.

Meanwhile, preheat a sauté pan over medium high heat. Add a little more oil. Add the Canadian bacon, and cook until caramelized. Then add the crimini mushrooms and cook until they release most of their moisture. Remove from the heat. When the stew is cooked, stir the bacon and mushrooms into the stew.

To serve, add the stew to small ramekins and top with the pre-baked shortcrust pastry.British Pies

British Wedding Anniversary Dinner ~ Soup ~ Rocket and Courgette Soup (Arugula and Zucchini Soup)

Rocket and Courgette SoupThis week marks our 15th wedding anniversary, and since it’s a big year, we wanted to celebrate in a big way! We had an extravagant British-themed dinner that took me several days to complete, but it was a fun project that was well worth the effort. I wanted to tie this anniversary back to our engagement anniversary/Valentine’s Day celebration when we enjoyed a Downton Abbey themed dinner. Given that the traditional gift for the 15th wedding anniversary is crystal, I thought another classic British meal with all the trimmings would also give us a great excuse to get out the crystal pieces we were given as wedding gifts but don’t use as often as we could. This crystal-studded celebration dinner was my anniversary gift to my hubby. 🙂

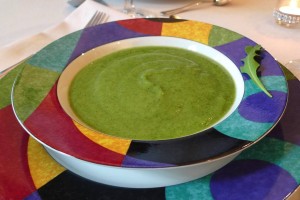
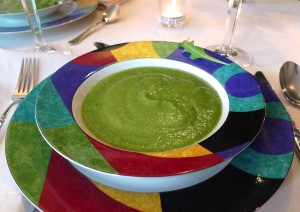
We started with a simple summery soup called rocket and courgette soup in the UK, but here in the States, we would call it arugula and zucchini soup. 🙂 I based the dish on a recipe from BBC Good Food, and then added a couple touches of my own.Rocket and Courgette SoupRocket and Courgette Soup

Based on a recipe from BBC Good Food

1 teaspoon high heat oil, such as safflower

1 onion, finely chopped

1 medium russet potato, finely chopped

2 cloves of garlic, minced

4 courgettes (zucchini), roughly chopped

4 cups vegetable or chicken stock

About 3 1/5 ounces, or 2 large handfuls, rocket (arugula)

Salt and pepper, to taste

Preheat a large sauté pan. Add oil. When the oil is hot and shimmering, add the onion and potato. Cook until the vegetables are softened. Add the garlic, and cook until fragrant, about 30 seconds. Then add the courgettes and stock. Scrape the bottom of the pan to release the brown bits. Bring to a boil. Cook until the courgettes are tender. Next, add the rocket, and cook until wilted, about 30 seconds. In small batches, blend the soup in a blender until smooth. Season to taste with salt and pepper. Serve warm.

Stay tuned for the main course…A trio of mini British meat pies!Rocket and Courgette Soup

Seafair Weekend Anniversary ~ Hibiscus Summer Party Wine Labels and Markers

Summer Party Wine LabelIt’s Seafair Saturday! Our neighborhood is right in the middle of the party, so we don’t need to go anywhere to enjoy the festivities. 🙂

Today also marks 17 years that I’ve lived in this neighborhood with my hubby, and 20 years that I’ve been in Seattle. Wow!

Between Seafair and our anniversaries, we had lots of reasons to celebrate today…and we celebrated all day long! We started with our favorite crab cake breakfast in the morning. Then I went swimming in Lake Washington while the Blue Angels roared overhead. Awesome! They came to Seattle as a part of the Seafair air show. In the evening, we enjoyed some fresh steamed Dungeness crab for dinner, which has become our tradition on this anniversary.

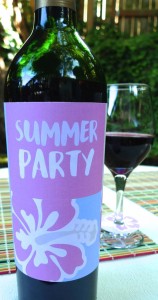
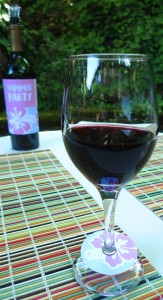
I made these cute little wine bottle labels to dress up the occasion a bit. They are from Catch My Party, which is one of my favorite websites for free printable decorations. They have so many adorable designs. These labels came with matching wine glass markers, too. Cute! I hope you’ll check out the website the next time you need some festive decorations. 🙂Summer Party Wine Label

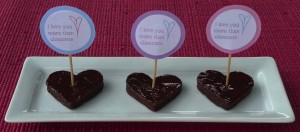
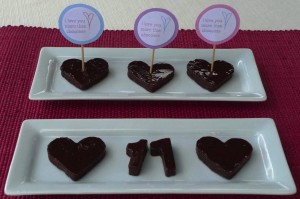
Sweets for my sweet ~ Date and Almond Fudge

Date and Almond Fudge17 years ago, I met my hubby on this date. We like to celebrate the anniversary every year in some way. 🙂

This year I chose to make some healthy, vegan fudge to mark the occasion. The fudge is sweetened completely with dates. It is something to feel good about eating, and they are sweet and chocolaty. Those two benefits rarely go together! 😉

Date and Almond FudgeDate and Almond Fudge

14 ounces Medjool dates (about 2 cups), pitted

½ cup almond butter

¼ cup extra virgin coconut oil

6 tablespoons cocoa powder

½ teaspoon vanilla extract

Line a square 8-inch baking dish with parchment paper, leaving a few inches to overhang on the sides. (These will be your handles to pull the fudge out when it is set.) Combine all of the ingredients in a food processor and blend until smooth. Spread the fudge evenly into the baking dish. Refrigerate until firm, about an hour. Pull the fudge out of the baking dish, and cut into desired shapes.

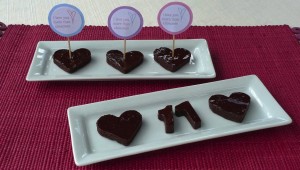
The little flags came from a website called Honey Bear Lane. They were created for Valentine’s Day, but I thought they were perfect to dress up this fudge. You could also sprinkle it with shredded coconut, sliced almonds, or anything else that strikes your fancy.

Happy anniversary, my sweet!

Date and Almond Fudge

Downton Abbey Valentine Dinner, Final Course ~ Battenberg Cake

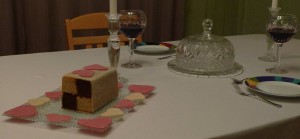
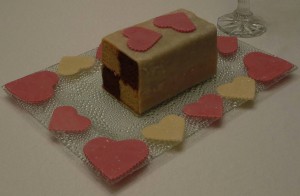
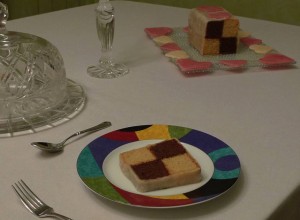
Battenberg CakeFor the grand finale of our Downton Abbey-inspired Valentine dinner, I made a Battenberg cake! It is a classic British checkerboard-style cake, held together with jam and a marzipan coating.

The tale behind the cake is that it was created to celebrate the wedding of Princess Victoria (Queen Victoria’s granddaughter) to Prince Louis of Battenberg in 1884. Given the romantic story about the cake, I think it is the perfect dessert for Valentine’s Day! A little more about the cake’s background and some fun facts can be found at SeriousEats.com.

I decided to make a chocolate and vanilla version rather than a traditional pink and yellow version, so I would not require any food coloring. (Or rather, since I am in a British state of mind, I should say “colouring.” 😉 ) I started with a recipe from Jamie Oliver, but I changed it so significantly that the final result was a completely different cake. For my healthier Nooncafe Battenberg, I wanted to use whole grains rather than self rising flour, so I used whole-wheat pastry flour with the addition of baking powder and salt. I also didn’t want to use butter, so I replaced it with coconut oil, and added less oil than the recipe called for. To offset that change, I added more milk for moisture. I also reduced the sugar quite a bit in the batter, since the jam and marzipan also added a lot of sweetness. The final product was denser and heartier than a traditional sponge cake, but it was quite delicious!

For decoration, I dyed some of the marzipan pink with beet juice. Just grate a raw beet on a cheese grater, place the grated beet inside of 2 or 3 layers of cheese cloth, and squeeze out the juice. Knead a little of the juice into the marzipan until it is uniformly pink. It’s a little messy, but so pretty! In the book A Year in the Life of Downton Abbey: Seasonal Celebrations, Traditions, and Recipes, it mentions that in the era of Downton Abbey, the food was highly decorated. Even the serving platters would have been decorated. Inspired by that fact, I cut out hearts with my pink marzipan and placed them all around my cake platter, as well as on top of the cake.

Since this is a very British recipe, I wrote most of the measurements in grams (and even gave you the Celsius temperature for the oven if you please!)

Battenberg CakeBattenberg Cake

200g coconut oil, plus extra for greasing the pans

250g fine or caster sugar

6 eggs

½ tbsp vanilla extract

6 tbsp milk

285g whole-wheat pastry flour

3 tsp baking powder

Pinch of salt

50g ground almonds

40g cocoa

125g apricot jam

450g marzipan

Preheat oven to 180C/350F. Grease 2 small loaf pans, line the bottom with parchment paper, and grease the parchment as well. This will ensure the cakes come out of the pans in one piece.

In a bowl, whisk the flour, baking powder and salt until very well combined. Set aside. Divide the coconut oil and sugar evenly between 2 bowls, and whisk until well incorporated. Beat 3 eggs into each bowl. Stir the vanilla and half the milk into one bowl, then fold in 175g of the flour mixture until just combined.
 In the other bowl, fold in the remaining flour mixture, almonds, cocoa and remaining milk. Mix until just combined. Take care not to over mix the flour. Spoon the two batters into the greased pans. Bake both together for about 40–50 minutes, or until a wooden skewer comes out clean. The chocolate cake may take longer to cook than the vanilla, so check often towards the end of the baking time. Cool for 10 minutes, and then turn the cakes out onto a rack.

To assemble, warm and strain the jam. Level off the tops and sides of the cakes with a serrated knife so each cake is a rectangle and the same size. Cut in half lengthwise so you have 2 long strips of each. Place 1 of the vanilla cakes on a board and brush the top and sides generously with jam, then do the same with a strip of chocolate cake and stick the 2 together, side by side. Gently place the remaining cakes on top, opposite colors on each, brushing all the edges with jam. Trim the cake so the sides are straight, if necessary.

Roll out the marzipan on a board sprinkled with confectioner’s sugar so it is large enough to completely cover the cake (with a little extra to use for decoration.) Place the cake on one of the shorter sides, and bring the marzipan up and over the top to cover 4 sides. Pat to make sure the marzipan adheres to the jam on all 4 sides. Trim to neaten the two exposed checkerboard edges with a serrated knife.

I find that videos are easier to follow than words when I have a technical recipe such as this one, so here is a link to a video I found helpful when assembling my Battenberg.

Battenberg Cake

Downton Abbey Valentine Dinner, Main Course ~ Mini Beef Wellingtons

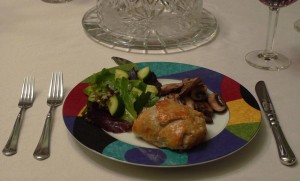
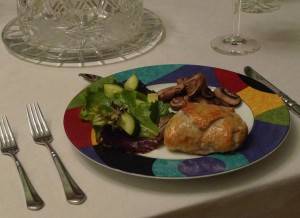
Mini Beef WellingtonMy Valentine requested his favorite dish for our Downton Abbey themed dinner – Beef Wellington. I have made a full beef Wellington as well as a salmon version on previous occasions, both with delicious success! This time I decided to try mini Wellingtons with pâté, and I think my Valentine was happy with the result. 🙂

Looking into the history of the dish, the origin is a bit cloudy. It may have been around during the Downton era, or it may not have. It may have British origins, or it may actually be American. (Gasp!!) Anyway, the dish is a favorite in our abbey, so we included it in our celebration.

I used a tried and true recipe from Martha Stewart. This mini version is much easier to make than the full beef Wellington. It can also be made ahead of time, which is a lovely feature! It is admittedly a rich dish, but the base of beef tenderloin is a very lean cut of beef. To make it a little healthier, I used less of the pâté than the recipe called for, and I also rolled the pastry thin and cut off the excess, so I didn’t use the entire sheet. Since it was Valentine’s Day, I cut out little hearts for the top of the Wellingtons with some of the extra puff pastry. Just stick them on with a little egg wash. I only made half the recipe, but I will include the original full recipe below:

Mini Beef Wellingtons

From MarthaStewart.com

1 beef tenderloin (5 pounds), trimmed and halved crosswise

Coarse salt and freshly ground pepper

2 tablespoons safflower oil

2 packages (12 ounces each) all-butter puff pastry, such as Dufours

8 ounces mousse pâté, such as D’Artagnan mousse de foie de canard

2 large eggs

Season beef with salt and pepper. Heat 1 tablespoon oil in a heavy skillet over high heat. Add half of beef; cook, turning, until browned all over, 2 to 3 minutes per side. Transfer to a cutting board; repeat with second half. Let cool, 40 minutes. Cut each half into 4 equal pieces.

Roll out 1 sheet of puff pastry to a little larger than 16 by 12 inches. Trim edges; cut into four 8-by-6-inch squares. Place one piece of beef, cut-side down, on a pastry square; top with 2 tablespoons mousse, spreading evenly. Lightly beat 1 egg, then brush over edges of pastry, fold up corners to enclose filling, and gently press to seal. Repeat with remaining pastry, beef, and mousse. Arrange Wellingtons, seam-side up, on parchment-lined baking sheet; wrap well in plastic and then foil. Freeze up to 2 weeks. Alternatively, if you are not freezing the Wellingtons for later, wrapping is unnecessary. Just chill for an hour in the refrigerator before baking.

Preheat oven to 425 degrees. Lightly beat remaining egg, then brush over frozen Wellingtons. Divide between 2 parchment-lined baking sheets. Bake about 35 minutes for medium-rare. If your Wellingtons are not frozen, bake for only about 25 minutes. The internal temperature of medium-rare beef is between 130-135 degrees.

Remove Wellingtons from baking sheet and let rest 10 minutes before serving with mushrooms.

Serve with sautéed mushrooms (I made this recipe, which is the recommended pairing on MarthaStewart.com), and a salad.

Next course, Battenberg cake!

P1240983

Downton Abbey Valentine Dinner, First Course ~ Cream of Watercress Soup

Cream of Watercress SoupHappy Valentine’s Day!

My hubby and I enjoyed another themed dinner at home for Valentine’s Day, which is the way we like to celebrate this holiday every year. 🙂 We love to try new things together in the kitchen, and we have had a lot of fun over the years making new and different recipes – Most recently, for Valentine’s Day two years ago we made two kinds of ravioli (beet and lobster), and last year we made sushi with miso soup. This year we decided to try a Downton Abbey theme! I made three vintage British dishes the characters might have enjoyed at one of their elaborate dinner parties on the show.

I learned that for a grand dinner, there could be as many as nine courses. Since I was playing the part of both Mrs. Patmore while cooking the dinner, and Lady Grantham while enjoying the dinner, I limited our meal to three courses. 😉 Our first course was a cream of watercress soup based on a recipe I found in A Year in the Life of Downton Abbey: Seasonal Celebrations, Traditions, and Recipes. I replaced the butter with safflower oil, and replaced the cream with 2% milk, but otherwise followed the recipe rather closely. I ended up using three bunches of watercress. Remember to save a few sprigs to garnish the plate. 🙂 Also, this can be made a day or two ahead of time, which is always a plus.
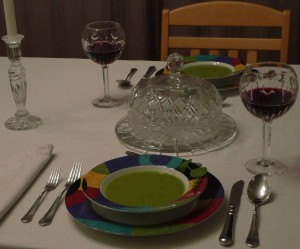
Cream of Watercress SoupCream of Watercress Soup

Based on a recipe from A Year in the Life of Downton Abbey

Serves 4

1 tablespoon light high heat oil, such as safflower oil

1 large onion, peeled and chopped

1 large leek (white part only), washed and sliced

1 large potato, peeled and chopped

Salt and pepper

3 cups hot chicken stock

9 cups watercress, de-stalked and chopped

A large pinch of freshly grated nutmeg

⅔ cup 2% milk

Heat the oil in a heavy-based saucepan, then add the onion, leek and potato and stir to coat them in the oil. Season with salt and pepper and let the vegetables sweat with the lid on over a low heat for about 10 minutes, stirring occasionally. When the vegetables are tender, add the hot stock. Bring back to the boil, then add the watercress and cook for a further 5 minutes. Season with salt, pepper and nutmeg. Take the pan off the heat and liquidise the soup. Stir in the milk and pour into bowls to serve.
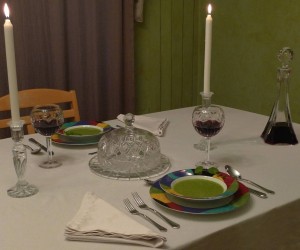
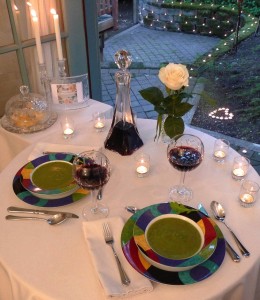
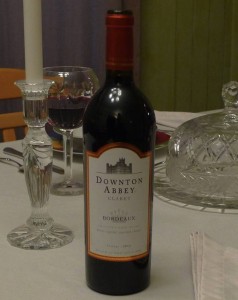
Cream of Watercress SoupWe paired our dinner with the perfect wine: Downton Abbey Bordeaux Claret 2012. I learned that great English houses of the Downton era enjoyed many French wines and foods, so this was similar to the wine the characters on the show may have paired with their fine meals.

Stay tuned for episode 2 of our Downton Abbey dinner – The main course!

Cream of Watercress Soup

One More Small Anniversary Celebration ~ Lemongrass-Crusted Salmon with a Watercress Coconut Sauce and 2000 Columbia Winery Peninsula

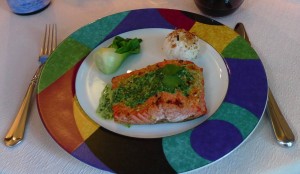
Spicy Salmon with Coconut Watercress SauceRob and I had our big wedding anniversary dinner celebration on Saturday of Labor Day weekend, which is the day of the week we got married. Our actual anniversary date fell in the middle of the week this year, but we couldn’t resist having a small, pared down celebration on the real date as well. We had lemongrass-crusted salmon with a watercress coconut sauce for dinner. Even though this salmon dish really was easy enough to make on a regular Tuesday, it was very delicious, and it felt like a dish fit for a special occasion. (Good thing, since I think this qualifies as a special occasion! 🙂 )

I was inspired once again by a recipe from Roy’s Fish and Seafood: Recipes from the Pacific Rim. I followed his recipe for the salmon crust, but I completely changed the sauce to make it my own. The original recipe used a cup of beurre blanc, but I replaced it with coconut milk. (It was a good use for the leftover milk from the cheesecake!) I don’t use a lot of butter in my cooking, and the coconut added an additional tropical element. It also mellowed the bitterness of the watercress nicely.
Lemongrass-Crusted Salmon with a Watercress Coconut Sauce

Based on a recipe from Roy’s Fish and Seafood cookbook

Serves 2, with leftover sauce

Salmon and Lemongrass Crust:

2 salmon fillets, about 6 oz each

1 tablespoon minced lemongrass (white part only)

½ tablespoon minced garlic

½ tablespoon grated fresh ginger

½ tablespoon minced shallot

½ tablespoon shichimi

Watercress Coconut Sauce:

1 bunch watercress, stemmed (reserve 4 sprigs for garnish)

½ tablespoon ginger juice (fresh ginger squeezed through a garlic press)

½ cup coconut milk

Safflower, sunflower, or peanut oil for cooking

Salt and pepper to taste

Preheat oven to 350 F.
Combine lemongrass, garlic, ginger, shallot, and shichimi in a bowl, and stir to blend. Set aside.

Bring a saucepan of water to a bowl. Place the watercress into a strainer, and when the water is bowling, pour over the watercress to wilt. Warm coconut milk. Combine watercress, milk and ginger juice in the bowl of a food processor, and pulse until it is to your desired texture. Add salt and pepper to taste. Set aside.

Preheat a medium non-stick saucepan over medium high heat. Evenly coat one side of the salmon fillets with the crust mixture. Drizzle the fillets with a high heat cooking oil, such as safflower, sunflower, or peanut oil. Carefully transfer the salmon to the hot pan, crust side down. Sear until the crust is a little browned. Turn, and finish in the oven for about 10 minutes, or until baked to desired doneness.

To serve, plate the salmon crust side up. Spoon the sauce on the top or side of the salmon fillets. Garnish with reserved watercress leaves.

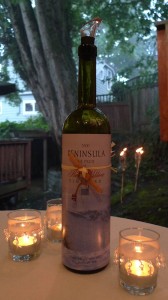
We paired our dinner with a bottle of 2000 Columbia Winery Peninsula red wine. We got married in 2000, and we had our wedding reception at Columbia Winery, so we bought a case of this wine several years ago.  We like to open a bottle on our anniversary every year. It is aging nicely, which I’ll take as a good sign for us! 😉

Funny note: It began to absolutely pour down rain by the end of our dinner. Luckily, we decided to eat inside with the French doors open once again, so we could enjoy the thunder and showers instead of scrambling inside for cover. 😉 This bottom photo was taken in the middle of the downpour. It was actually kind of fun! It was definitely an anniversary to remember!

2000 Peninsula Red Wine