Easter Brunch Addition ~ Quail Scotch Eggs with Smoked Halibut Mashed Potatoes

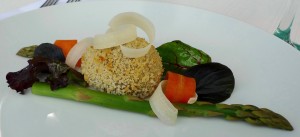
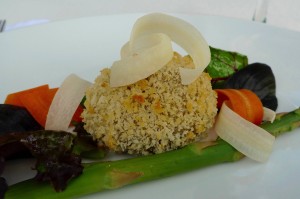
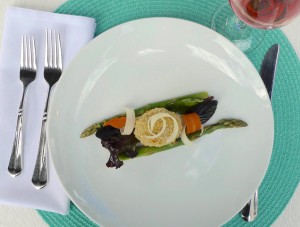
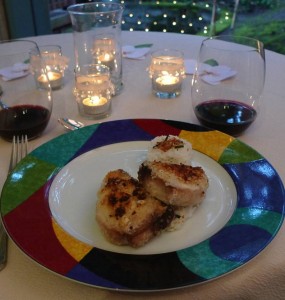
Scotch Quail Egg with Smoked Halibut Mashed PotatoesWhat’s better for Easter brunch than Scotch eggs? Two different kinds of Scotch eggs! 😉Scotch Quail Egg with Smoked Halibut Mashed PotatoesIn addition to crab Scotch eggs, I made one more version with cute little quail eggs encased in smoked halibut mashed potatoes. It was a festive little dish that was a perfect accompaniment to our Easter brunch.Scotch Quail Egg with Smoked Halibut Mashed PotatoesQuail Scotch Eggs with Smoked Halibut Mashed Potatoes

Inspired by a recipe from BBC Good Food

1 large russet potato

Skim milk, to taste

Smoked halibut, to taste

Salt and pepper, to taste

10 quail eggs

1 cup (approximately) all-purpose flour

2 beaten eggs

1 cup (approximately) panko

Peel and coarsely chop the potato. Add to a medium saucepan. Fill the pan with cold water so the potatoes are covered. Bring the water to a boil. Cook the potatoes until they are tender. Drain the water. Mash the potatoes, adding the milk a little at a time to thin them out into a thick and creamy texture that will hold up around the eggs. Flake the smoked fish with your fingers and add it to the potatoes. Mix well. Season the potatoes with salt and pepper.

In the meantime, fill a medium saucepan with water, and bring to a boil. Once boiling, adjust the heat so the water stays at a gentle boil. Add the quail eggs. Cook for 3 minutes. Remove the eggs immediately after 3 minutes and run under cold water to stop the cooking. Carefully remove the shells.

Gently press and shape a couple of tablespoons of the fish and potato mixture around each egg. The result should be in the shape of an egg.

Preheat oven to 475 F. Line a sheet pan with parchment paper.

Add the flour, beaten eggs, and panko to three separate shallow bowls.

Roll the potato-covered eggs in the flour, making sure they are completely coated. Gently knock off the excess flour. Then roll the eggs into the beaten egg until they are fully coated. Let the excess beaten egg drip off. Finally, roll the eggs in the panko. Press gently to make sure the crumbs stick.

Lay the panko-covered eggs slightly apart on the prepared baking sheet. Spray the tops of the eggs lightly with cooking spray to help them brown. Bake until lightly golden brown, about 20 minutes. Serve immediately.

PS. I made mine with smoked halibut, but I think hot smoked salmon would also be delicious.

PPS. Here’s sending you one final happy Easter wish!!Quail Scotch Egg with Smoked Halibut Mashed Potatoes

Happy Fourth of July ~ Part 1 ~ Homemade Dill Pickles

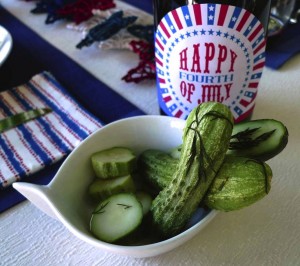
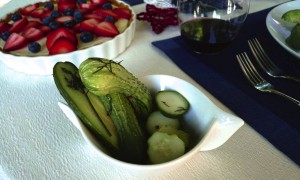
Dill PicklesI hope you had a lovely Fourth of July weekend!

To celebrate the occasion this year, I made fresh dill pickles from the farmers’ market, trout burgers with a tarragon mayonnaise, and my hubby’s favorite summer strawberry cheesecake tart. I’ll share all three recipes since we really enjoyed them all, starting with the pickles. 🙂

I stumbled upon a farmers’ market last week where I saw some beautiful Kirby cucumbers that I couldn’t resist, along with a big bunch of fresh dill. (I must admit, I’m one of those people who gets much more excited about beautiful cucumbers and herbs than I do about beautiful shoes and purses. 😉 ) For a couple of dollars, I knew I could make something fresh and delicious with my discoveries.

I used a dill pickle recipe from Food and Wine magazine with only a few small changes. I reduced the amount of sugar by half and added some whole peppercorns for added seasoning. I also omitted the dill seeds and used more fresh dill than the recipe called for (since I had a huge bunch). These pickles were so flavorful and delicious! I have a feeling I’ll be making this recipe again and again. Maybe I’ll try radishes or green beans next time? I can see what my local farmers’ market has to play with next week!

Dill Pickles

Based on a recipe from Food and Wine magazine

1 1/2 cups distilled white vinegar

2 tablespoons granulated sugar

4 teaspoons kosher salt

1 teaspoon mustard seeds

1 teaspoon coriander seeds

1 teaspoon whole peppercorns

2 cups hot water

2 pounds Kirby cucumbers, cut in half lengthwise or sliced 1/2 inch thick

1 1/2 cups fresh dill, coarsely chopped

3 garlic cloves, coarsely chopped

In a large, heatproof measuring cup, combine the vinegar, sugar, salt, mustard seeds, coriander seeds, and peppercorns with the hot water and stir until the sugar and salt are dissolved. Let the brine cool.

In a large bowl, toss the cucumbers with the dill and garlic. Pour the brine over the cucumbers and turn to coat. Place a small plate over the cucumbers to keep them submerged, then cover the bowl with plastic wrap. Refrigerate the pickles overnight, stirring once or twice. Serve cold.

The dill pickles can be refrigerated in an airtight container for up to 1 week.

Stay tuned for the trout burger recipe next! 🙂

Dill Pickles

One more culinary stop in Asia ~ Vietnamese Baby Clams with Sesame Rice Crackers

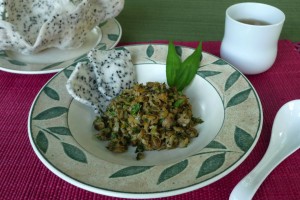
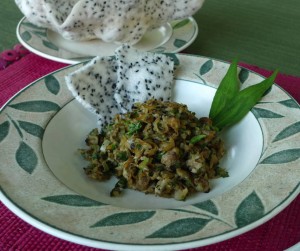
Baby Clams with Rice CrackersAfter my virtual stop in South Korea to try their famous bibimbap, I decided to try a Vietnamese dish on my next stop. After all, it’s only a 4 ½ hour plane ride from Seoul to Da Nang, so I’ll make a quick culinary visit, just long enough for an appetizer in Vietnam. 😉

This is a dish I order over and over again at one of my favorite Vietnamese restaurants, so I decided to figure out how to make it at home! Turns out, it is really easy! It just requires two special ingredients from the Asian grocery store. The first is a Vietnamese herb that is sort of like mint or cilantro called rau ram. The pretty little leaves are a little peppery and delicious. I also used black sesame rice crackers on the side to scoop up the clams. They puff up when they are cooked, which is so much fun to watch!

Baby Clams with Rice Crackers

Inspired by a recipe from Danang Cuisine

1 tablespoon safflower oil (or other high heat cooking oil)

2 small shallots, finely sliced

1 teaspoon lemongrass, minced

1 teaspoon fresh chili pepper, seeds and ribs removed, minced (I like jalapeño or serrano)

1 garlic clove, minced

5 oz canned baby clams or chopped clams, drained and rinsed (Just try to find an all-natural brand, without any added preservatives)

4 tablespoons (approximately) of rau ram, roughly chopped (Fresh basil also works if you can’t find rau ram)

1/2 teaspoon fish sauce

1/2 teaspoon soy sauce

Freshly ground black pepper to taste

1-2 sesame rice crackers

Preheat a wok or nonstick pan. Add oil. When the oil is shimmering and hot, add the shallots, and cook until caramelized. Add the lemongrass and chili pepper, and cook until fragrant. Add the garlic and cook until just fragrant, about 15 seconds. Add the clams. Toss until warmed through. Turn off the heat and add rau ram, fish sauce, soy sauce, and black pepper. Toss and serve.

Take one rice cracker and microwave for one minute until puffy. Break into pieces. Serve as a “spoon” with the clams.

Baby Clams with Rice Crackers

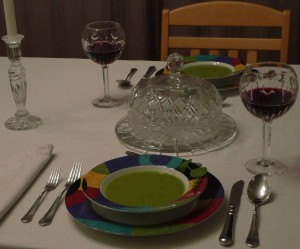
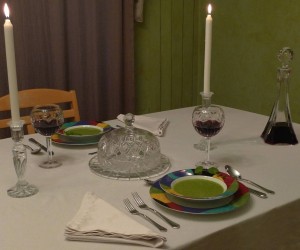
Downton Abbey Valentine Dinner, First Course ~ Cream of Watercress Soup

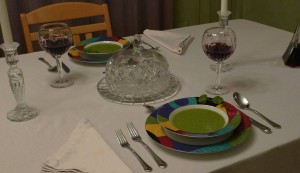
Cream of Watercress SoupHappy Valentine’s Day!

My hubby and I enjoyed another themed dinner at home for Valentine’s Day, which is the way we like to celebrate this holiday every year. 🙂 We love to try new things together in the kitchen, and we have had a lot of fun over the years making new and different recipes – Most recently, for Valentine’s Day two years ago we made two kinds of ravioli (beet and lobster), and last year we made sushi with miso soup. This year we decided to try a Downton Abbey theme! I made three vintage British dishes the characters might have enjoyed at one of their elaborate dinner parties on the show.

I learned that for a grand dinner, there could be as many as nine courses. Since I was playing the part of both Mrs. Patmore while cooking the dinner, and Lady Grantham while enjoying the dinner, I limited our meal to three courses. 😉 Our first course was a cream of watercress soup based on a recipe I found in A Year in the Life of Downton Abbey: Seasonal Celebrations, Traditions, and Recipes. I replaced the butter with safflower oil, and replaced the cream with 2% milk, but otherwise followed the recipe rather closely. I ended up using three bunches of watercress. Remember to save a few sprigs to garnish the plate. 🙂 Also, this can be made a day or two ahead of time, which is always a plus.

Cream of Watercress SoupCream of Watercress Soup

Based on a recipe from A Year in the Life of Downton Abbey

Serves 4

1 tablespoon light high heat oil, such as safflower oil

1 large onion, peeled and chopped

1 large leek (white part only), washed and sliced

1 large potato, peeled and chopped

Salt and pepper

3 cups hot chicken stock

9 cups watercress, de-stalked and chopped

A large pinch of freshly grated nutmeg

⅔ cup 2% milk

Heat the oil in a heavy-based saucepan, then add the onion, leek and potato and stir to coat them in the oil. Season with salt and pepper and let the vegetables sweat with the lid on over a low heat for about 10 minutes, stirring occasionally. When the vegetables are tender, add the hot stock. Bring back to the boil, then add the watercress and cook for a further 5 minutes. Season with salt, pepper and nutmeg. Take the pan off the heat and liquidise the soup. Stir in the milk and pour into bowls to serve.

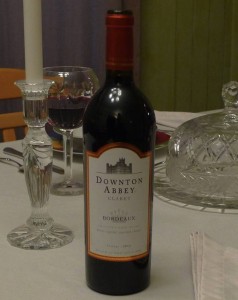
Cream of Watercress SoupWe paired our dinner with the perfect wine: Downton Abbey Bordeaux Claret 2012. I learned that great English houses of the Downton era enjoyed many French wines and foods, so this was similar to the wine the characters on the show may have paired with their fine meals.

Stay tuned for episode 2 of our Downton Abbey dinner – The main course!

Cream of Watercress Soup

Happy Australia Day! ~ Cheddar and Chive Dampers

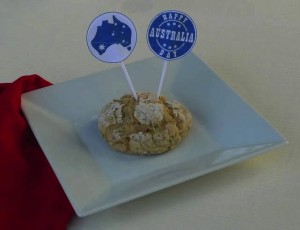
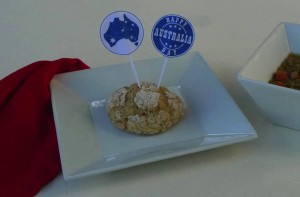
Cheddar and Chive DampersHappy Australia Day! Every January 26th, Australia celebrates this national holiday. It falls in the middle of summer in the southern hemisphere, so much like the way we celebrate the Fourth of July, they celebrate with barbeques, fireworks and outdoor concerts.

Twenty years ago this month, I had the good fortune to travel to Australia through my university. (How did twenty years go by already? Wow!) It was an extraordinary experience I will never forget.

Cheddar and Chive DampersTo celebrate the holiday and the good times I had in Australia, I decided to make a special Australian dinner. We had split pea and ham soup with Cheddar and chive dampers. I chose the menu based on an article from CNN Travel about forty dishes Australians call their own. It is a fun article filled with many foods I have never tried before. There is much more to explore!

For the dampers, I was inspired by an Australian recipe website called Taste, but I ended up changing the recipe to a large extent for my own version. Mainly, I used 100% whole-wheat pastry flour combined with baking powder rather than self-rising flour, and I made individual dampers rather than one large one. I also made only half of the recipe, and reduced the portion size. They were the perfect accompaniment to the split pea and ham soup!

The cute little flags were printed from Jellyfish Prints. I couldn’t resist adding them for a festive touch. 🙂 They are completely adorable, and also free!

Cheddar and Chive DampersCheddar and Chive Dampers

1 ¼ cups whole-wheat pastry flour

2 teaspoons baking powder

¼ teaspoon kosher salt

½ cup Cheddar, coarsely grated

½ bunch chives, finely chopped

½ cup buttermilk

1 egg, scrambled

Preheat oven to 350 degrees.

Combine the flour, baking powder, salt, cheese and chives in a large bowl, whisking to combine. Add the buttermilk and egg, and stir until well combined. On a lightly floured surface, knead the dough until it comes together. Divide into 4 equal pieces, and shape each piece into a ball. Place each ball onto a parchment lined baking sheet, flattening the top slightly. Bake about 15 minutes, or until the underside of each damper sounds hollow when tapped.

Cool for 5 or 10 minutes, and serve warm.

Cheddar and Chive Dampers

Happy Thanksgiving ~ Wild Rice and Goat Cheese Stuffing with Chorizo

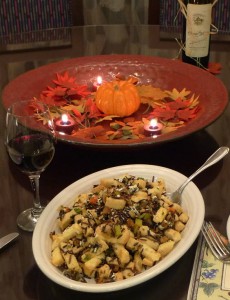
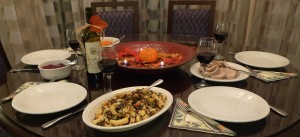
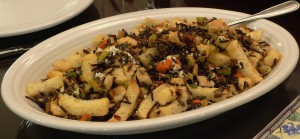
Wild Rice and Goat Cheese Stuffing with ChorizoHappy Thanksgiving!

This stuffing recipe has become a Thanksgiving standard in my family. 🙂 It adds a little spice and a little Southwestern touch to the dinner! I wrote about this recipe in Noon Café’s first year, and I thought I would repost it this year since it still holds up as a delicious addition to my Thanksgiving table. 🙂

Wild Rice and Goat Cheese Stuffing with ChorizoWild Rice and Goat Cheese Stuffing with Chorizo

Based on a recipe from Chef Bobby Flay

1 1/2 cups wild rice

5 cups water

Salt to taste

1/2 cup finely ground chorizo (Mexican)

1 finely diced large onion

1 tablespoon minced garlic

2 finely chopped carrots

3 finely chopped celery stalks

3/4 pound cubed stale hearty white bread

6 ounces goat cheese

2 tablespoons chopped fresh flat leaf parsley

1 tablespoon chopped fresh thyme

1 1/2 cups low sodium free-range chicken stock

Boil the rice, water, and a little salt to taste in a medium saucepan until the grains open and the rice is tender. Drain. (This can be done a day ahead if you desire.)  Cook the chorizo in a large saucepan over medium heat. Pour the chorizo over a bowl lined with a paper towel to drain the excess fat. In the same pan, add the onion, garlic, carrots, and celery and cook until the onion is tender but not browned. Add the rice, chorizo, bread, cheese, parsley, thyme, and stock and combine it all together. Season to taste with a little salt and pepper. Transfer to a baking dish and bake at 350, uncovered, until golden brown on top, about 25 to 30 minutes.

Wild Rice and Goat Cheese Stuffing with Chorizo

Happy Halloween! ~ Pork Tenderloin and Squash with Pumpkin Seed Vinaigrette

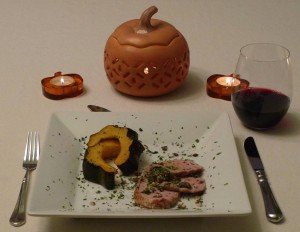
Halloween DinnerHappy Halloween!

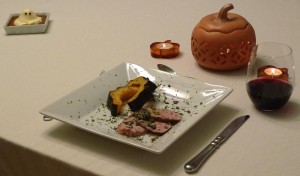
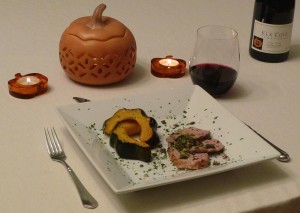
To celebrate, I made a festive autumn dinner tonight of pork tenderloin and squash with a pumpkin seed vinaigrette. I based the recipe on one I found from Bon Appétit. I substituted pork tenderloin for pork chops to make the dish a little leaner. (More room for chocolate Halloween candy later, I figure! 😉 ) I also added more pumpkin seeds than called for, since they are one of the stars of the dish. (And you may have read about my feelings about pumpkin in the last post. 🙂 It’s one of my favorite things!)

Halloween DinnerPork Tenderloin and Squash with Pumpkin Seed Vinaigrette

Based on a recipe from Bon Appétit

3 tablespoons shelled pumpkin seeds (pepitas), plus more for garnish

3 pounds winter squash (such as acorn, kabocha, delicata, or butternut), halved, seeded, cut into 1″ wedges

5 tablespoons olive oil, divided

Kosher salt, freshly ground pepper

1 pork tenderloin, silver skin removed

1/2 small garlic clove, crushed into a paste

3 tablespoons coarsely chopped fresh cilantro, plus more for garnish

2 tablespoons fresh lime juice

Preheat oven to 425°F. Spread out pumpkin seeds on a large rimmed baking sheet. Toast, tossing once, until just beginning to darken, about 4 minutes. Let cool. Coarsely chop; set aside.

Toss squash with 1 tablespoon oil on a large rimmed baking sheet; season with salt and pepper. Roast squash, turning occasionally, until golden brown and tender, about 25 minutes.

When squash has been roasting for about 20 minutes, heat 1 tablespoon oil in a large heavy oven proof skillet over medium-high heat. Season pork with salt and pepper and sear until brown on all sides. Finish in the oven until the internal temperature registers 145 degrees. Let rest before slicing.

Whisk garlic, 3 tablespoons chopped cilantro, 2 tablespoons lime juice, 3 tablespoons toasted pumpkin seeds, and remaining 3 tablespoons oil in a small bowl to combine. Season vinaigrette with salt and pepper to taste.

Divide squash and pork among plates; spoon vinaigrette over. Top with cilantro leaves and pumpkin seeds.

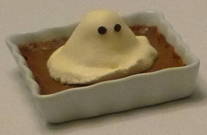
Halloween DinnerFor dessert, I served pumpkin custard that I dressed up for the holiday. I piped a whipped cream ghost on top and added two mini chocolate chips for his eyes. PS. I wouldn’t recommend eating all the whipped cream, since I made him big and plump! But I love how he looks…He makes me smile. 🙂

I hope you have a safe and happy Halloween!

Whipped Cream Ghost

Wedding Anniversary, Part 2 ~ Macadamia Nut and Panko Crusted Ono with Happy Rice

Macadamia and Panko Crusted OnoThe main course of our anniversary dinner was another recipe inspired by Roy’s Fish and Seafood: Recipes from the Pacific Rim. We had a macadamia nut and panko crusted ono fish, otherwise known as wahoo. (Wahoo! Sorry, couldn’t resist. 😉 ) It’s a Hawaiian fish with a dense but flaky texture, and a mild flavor. We also had a side dish of rice to accompany the fish. The cookbook calls this recipe Happy Rice. 🙂 So all in all, I’d say this is one of the happiest dishes I have ever made. 😉 Wahoo and Happy Rice!

We are lucky enough to have a Hawaiian fishmonger around Seattle called Tim’s Seafood in Kirkland. In addition to a wide selection of Northwest fish, he also gets fresh Hawaiian seafood. I had my choice of some beautiful fish for our dinner! He even makes his own poke.

I used coconut oil on the fish, and it gave it a subtle coconut flavor that was a nice compliment to the macadamia nuts. The original recipe used quite a bit of butter, but the coconut oil was a really nice alternative. This crust would work well with any firm white fish I think. The original recipe was for opakapaka, which I couldn’t find at the fish store that day, so I think any mild fish with a fairly firm texture would be lovely.

Macadamia Nut and Panko Crusted Ono with Happy Rice

Based on a recipe from Roy’s Fish and Seafood

Serves 2, with leftover rice for later

Happy Rice:

1 cup Japanese short-grain rice

1 cup water

1 tablespoon grated fresh ginger

1 tablespoon furikake, plus more for top

Macadamia and Panko Crusted Ono:

4 tablespoons macadamia nut halves

4 tablespoons coconut oil

½ cup panko breadcrumbs

Salt and pepper to taste

2 6 oz fillets of ono

Preheat oven to 350 F.

To prepare rice:

Put the rice in a fine mesh strainer and rinse under cold running water, until the water runs clear. Drain the rice and transfer to a bowl. Cover with fresh cold water, and let soak for 1 hour.

To cook the rice on the stovetop, place the drained rice in a saucepan and add 1 cup fresh water. Bring to boil, decrease heat, cover, and cook until the rice is soft and sticky and the water has just evaporated, about 15 minutes.

Combine the rice with ginger and furikake. Use small cookie cutters to form rice into compact shapes. Alternatively, dip your fingers in a bowl of slightly salted water to prevent the rice from sticking and mold 1 to 2 tablespoons of rice into triangles, cubes, or balls. Set aside and keep warm. Sprinkle the tops with more furikake.

To prepare fish:

In a food processor, pulse the nuts until they are cut into course pieces. Add the panko and oil, and pulse it all together until it is a thick paste, but still has some texture.

Coat one side of the ono with the paste. Preheat an oven-safe sauté pan over medium high heat, and when hot, place the ono in the pan, paste side down. Cook until golden, and then flip. Finish the fish in the oven. Cook until flaky, about 7 to 10 minutes.

Taste and say “Wahoo!!” OK, I have that out of my system now. 😉

Stay tuned for our Hawaiian dessert in the next entry!

Anniversary Dinner

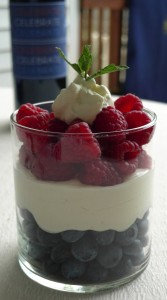
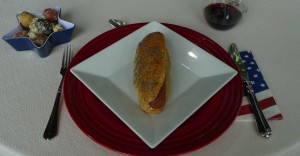
Happy Fourth of July! ~ Bison Hot Dogs on Homemade Buns; Red, White, and Blue Potato Salad; Blueberry and Raspberry Parfait with Vanilla Yogurt and Whipped Cream

Click photos to expand. 🙂

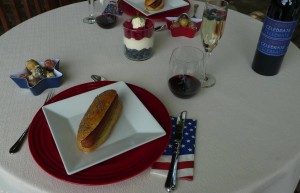
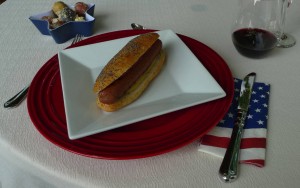
Bison hot dogs on homemade hot dog buns

Red, white and blue potato salad

Sparkling wine with blueberries and raspberries floating in the bubbles…

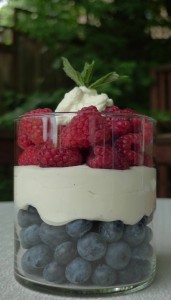
A red and blue berry parfait (with an equal combination of non-fat Greek vanilla yogurt and whipped cream for a layer of white)…

Fun patriotic decorations

It’s our Fourth of July celebration!

I hope you all have a fun, safe, and happy Independence Day! I’m off to Seattle’s festival on Lake Union! 🙂

Enjoy it all!


Red, White, and Blue Potato Salad

From Cooking Light magazine

2 cups fingerling potatoes, halved lengthwise (about 10 ounces)

2 cups small red potatoes, quartered (about 10 ounces)

2 cups small blue potatoes, halved lengthwise (about 10 ounces)

1/4 cup finely chopped red onion

2 tablespoons chopped fresh parsley

1 tablespoon chopped fresh dill

1 tablespoon chopped fresh chives

3 hard-cooked large eggs, finely chopped

1/4 cup red wine vinegar

2 tablespoons olive oil

1 1/4 teaspoons salt

2 teaspoons Dijon mustard

1/2 teaspoon freshly ground black pepper

1 garlic clove, minced

Place fingerling and red potatoes in a saucepan; cover with water. Bring to a boil. Reduce heat; simmer 15 minutes or until tender. Drain; cool slightly. Place potatoes in a large bowl.

Place blue potatoes in a saucepan; cover with water. Bring to a boil. Reduce heat; simmer 10 minutes or until tender. Drain; cool slightly. Add blue potatoes, onion, parsley, dill, chives, and eggs to bowl; toss gently.

Combine vinegar and remaining ingredients. Pour over potato mixture; toss gently to combine. Serve warm, at room temperature, or chilled.

Note: Blue potatoes are starchier than the others and tend to bleed, so cook them separately. If you need to, prepare this dish a day ahead, but add the blue potatoes just before serving. If your potatoes are larger than the ones we call for, cut them to a uniform size.

Dos de Junio ~ Elote from Elote Cafe

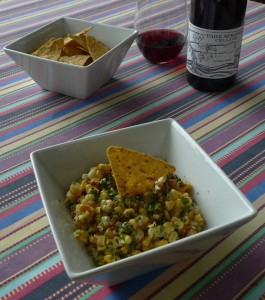
Happy Dos de Junio! OK, it isn’t really a Mexican holiday today. But it is a gorgeous Monday, the sun is shining, and I think there is a reason to celebrate every day. 🙂 I didn’t make a Mexican dish this year for Cinco de Mayo, so I made up for that today. This recipe for Elote has been on my list to try for quite some time, and now that corn is starting to come into the markets, today seemed like a perfect time to make it.

I had this dish in Arizona at a place called Elote Café. If you are ever in the Sedona area, I would highly recommend checking them out! It is such a popular place that people will wait in a long line outside just to experience the food. Get there early is all I have to say! 🙂

This recipe is based on the signature dish at Elote Café with a couple of small changes to make it a bit healthier. I used reduced fat mayonnaise instead of the full fat version. I also didn’t use the entire amount of the mayonnaise mixture on the corn. I just added a little at a time and tasted as I went until I was happy with the flavor. I had a couple tablespoons left of the sauce in the end. I also grilled the corn inside on a grill pan, since I don’t have an outdoor grill. It worked just fine!  Just make sure you have a fan on, since the husks get a little smoky.

Elote

Based on a recipe from Elote Café

2 ears corn, husks intact

1/4 cup light mayonnaise

1/4 tablespoon Cholula brand hot sauce

1/2 tablespoon fresh lime juice

Pinch of kosher salt

1/4 teaspoon fresh ground black pepper

1/4 teaspoon sugar

1 tablespoon chicken stock

1 tablespoon Cotija cheese, crumbled for garnish

1 tablespoon cilantro, chopped, for garnish

Tortilla chips, for serving

Over a medium-high grill or on a grill pan over high heat, roast the corn until the husks are well charred, about 5 minutes. Turn occasionally so as not to burn the side contacting the direct heat.

Set the roasted ears aside until cool enough to handle, then shuck them.

Cut the kernels off the cob.

When ready to eat, mix the mayonnaise and all the other ingredients through chicken stock in a sauté pan over medium heat.

Add the corn kernels and warm through.

Pour into a bowl and garnish with the cheese, and cilantro.

Serve immediately with tortilla chips.

When I was in Arizona, I also picked up a bottle of local wine by Page Springs Cellars called Mule’s Mistake. It doesn’t sound like a fancy wine, but it is actually quite lovely! It reminds me a little of Oregon Pinot Noirs that we love so much.

Lei Day Celebration ~ Island Salsa

It was about 85 degrees in Seattle today, which felt like a Hawaiian breeze to me! It is only supposed to last one day, and then go back to our usual Northwest weather. Today also happens to be Lei Day in Hawaii, so the unseasonably warm weather was perfect for a little Hawaiian inspired celebration at home. 🙂

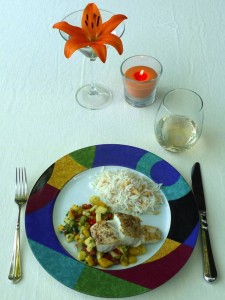
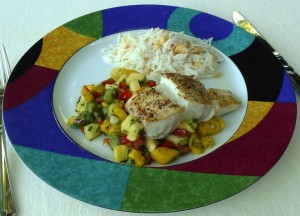
I put a few tropical touches on our dinner tonight to get us into the spirit. 🙂 We had sautéed halibut with an island salsa, and a little jasmine rice with macadamia nuts on the side. Simple and delicious!

The island salsa was from a classic recipe from Bon Appétit magazine. It is tried and true, so I didn’t fiddle with it much. 😉 I think it would also pair well with chicken, shrimp, or even pork tenderloin.

Island Salsa

From Bon Appétit magazine

1 cup chopped peeled pineapple

1 cup chopped peeled mango

1 cup chopped yellow or red bell pepper

2/3 cup chopped peeled kiwi fruit

1/2 cup finely chopped red onion

1/4 cup finely chopped fresh cilantro

1 teaspoon fresh lime juice

1/2 teaspoon minced serrano chili, seeds and ribs removed

Ground white pepper, to taste

Combine all ingredients in medium bowl. Season with white pepper and salt. (Can be made 3 hours ahead.)

Happy Lei Day! I hope you enjoy something Hawaiian to celebrate. 🙂

Valentine Sushi Dinner ~ Miso Soup

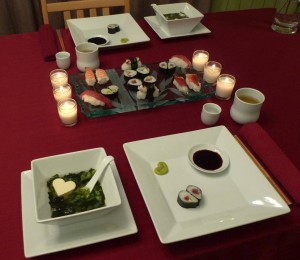
Rob and I celebrated Valentine’s Day and our engagement anniversary all weekend, culminating with a fancy sushi dinner! I decided to try making miso soup from scratch to go with the dinner, since it is almost always served at Japanese sushi restaurants. I really had no idea how it was made or what went into it before I tried it at home. I just knew it was delicious! 😉 Now I have a whole new appreciation for it, so I thought I would share the recipe I used. It’s a traditional soup in Japan, but in my American kitchen, it was a new and exciting culinary adventure.

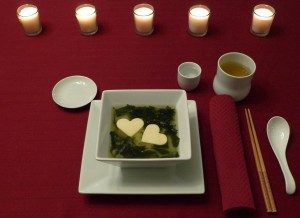
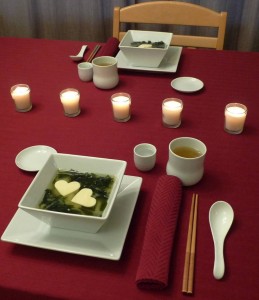
Since we were celebrating Valentine’s Day and to make the soup a little more special, I cut the tofu into heart shapes with a little cookie cutter. So cute! 🙂

Miso Soup

From Gourmet magazine

1/2 cup dried wakame (a type of seaweed)

1/4 cup shiro miso (white fermented-soybean paste)

6 cups Dashi (recipe follows)

1/2 pound soft tofu, drained and cut into 1/2-inch cubes

1/4 cup thinly sliced scallion greens

Prepare wakame:
Combine wakame with warm water to cover by 1 inch and let stand 15 minutes, or until reconstituted. Drain in a sieve.

Make soup:
Stir together miso and 1/2 cup dashi in a bowl until smooth. Heat remaining dashi in a saucepan over moderately high heat until hot, then gently stir in tofu and reconstituted wakame. Simmer 1 minute and remove from heat. Immediately stir in miso mixture and scallion greens and serve.

Dashi (Japanese Sea Stock)

From Gourmet magazine

6 cups cold water

1 oz (30 grams) kombu (dried kelp), about 20 square inches

2 (5-gram) packages katsuo bushi (dried bonito flakes), about 1 cup

Bring cold water and kombu just to a boil in a large saucepan over high heat. Remove from heat and remove kombu. Sprinkle katsuo bushi over liquid; let stand 3 minutes and, if necessary, stir to make katsuo bushi sink. Pour through a cheesecloth-lined sieve or a coffee filter into a bowl.

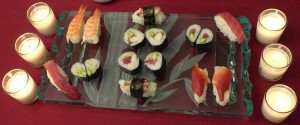
For the sushi we enjoyed with the soup, I used this sushi rice recipe. If you are using a pot on the stovetop rather than a rice cooker, we thought it was a very good one. Along with the traditional rolls, we also made a couple of pieces in heart shapes. 🙂 To see how to do that, here is a little video. So fun!

We paired our dinner with a little sake, since that only seemed fitting! There is a Northwest sake maker in Oregon called Momokawa, and we had their Organic Junmai Ginjo with our sushi feast. I would highly recommend it. 🙂

幸せなバレンタインデー (Happy Valentine’s Day)!

Happy 4th! ~ Watermelon and Cantaloupe Salad with Fresh Mint


Happy Fourth of July everyone!

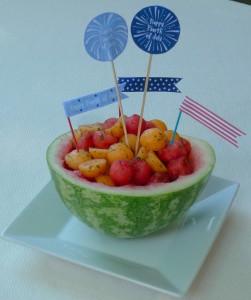
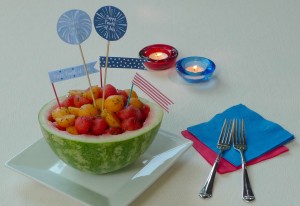
I made the most summery thing I could think of to celebrate this summer holiday today: A watermelon and cantaloupe salad tossed with mint and lemonade. A recipe inspired me from Giada DeLaurentis, but over the years, I have tweaked it to be the way I like it :). This is the streamlined version that is super easy to make anytime.

Watermelon and Cantaloupe Salad with Fresh Mint

1 bunch fresh mint

¼ cup lemonade (you may not need the full ¼ cup)

2 cups watermelon balls, from about half a watermelon

2 cups cantaloupe balls, from about 1 cantaloupe

In a blender, combine the mint and as much lemonade as you need for the mixture to become completely blended. (Up to ¼ cup.)

In a large bowl, combine the watermelon and the cantaloupe balls. Add the mint/lemonade mixture and toss. Transfer to a serving bowl (or half a watermelon rind) and serve.

I also printed some very sweet little Fourth of July decorations from my favorite DIY site at the Elli blog. The patriotic decorations can be found here. So cute!


Elegant Spring Anniversary Brunch, Part 1 ~ Roasted Asparagus with Goat Cheese and Crispy Prosciutto

Every year on March 24th, my hubby and I celebrate the anniversary from the day that we met. We love to mark our little milestone anniversaries, which gives us a reason for a nice meal. I’m always up for another excuse for a celebration! 😉

This year we made a nice brunch at home. The first meal of the day to celebrate the beginning of us :).

I found a menu from Bon Appétit magazine that was both simple and elegant. We made three of the dishes, and we thought they all turned out really well. They would be perfect for Easter, or Mother’s Day, or any other spring celebration. I will definitely keep these recipes at the front of my list when I need a special, but quick, brunch recipe.  I am rarely up for a big cooking project first thing in the morning ;-).

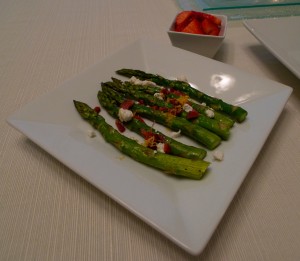
First we made Roasted Asparagus with Goat Cheese and Crispy Prosciutto. It was a fresh and light dish. Prosciutto can be fried in a dry, non-stick sauté pan until it gets crispy just like bacon, which is a little healthier option than traditional bacon. I also didn’t drizzle olive oil over the asparagus at the end, as the original recipe called for, to keep the dish a little bit lighter. Other than that, I followed this recipe pretty closely. Just be sure to keep a close eye on the asparagus in the oven so it doesn’t over cook.

Roasted Asparagus with Goat Cheese and Crispy Prosciutto

Based on a recipe from Bon Appétit magazine

6 prosciutto slices

2 pounds medium asparagus, tough ends trimmed

2 tablespoons olive oil

1 3 1/2- to 4-ounce log soft fresh goat cheese, crumbled

2 teaspoons fresh lemon juice

1 teaspoon grated lemon peel

Cook prosciutto in large non-stick skillet over medium heat until brown and crisp. Transfer to paper towels and drain. Crumble prosciutto; set aside.

Position rack in center of oven and preheat to 500°F.

Arrange asparagus on large rimmed baking sheet. Drizzle with 2 tablespoons oil and turn asparagus to coat well. Sprinkle generously with salt and pepper. Roast asparagus until crisp-tender when pierced with knife, about 7 minutes.

Arrange asparagus in single layer on platter. Sprinkle with goat cheese, then prosciutto. Drizzle with lemon juice. Sprinkle grated lemon peel over. (Can be prepared 1 hour ahead. Cover with plastic wrap. Let stand at room temperature.)

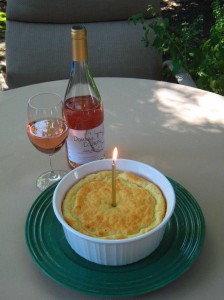
Happy 100th Birthday, Julia Child ~ Cheese Soufflé

Julia Child would have turned 100 years old today. That milestone has inspired cooks everywhere to remember her and to cook something a little French this evening :).

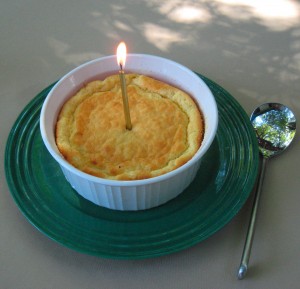
Sur La Table is hosting cooking classes this month to celebrate her birthday including 4 of Julia’s recipes. I recreated my favorite of the 4 at home ~ The cheese soufflé. The original is published in The Way to Cook, and Bon Appétit magazine also published an adaptation of the recipe a few years ago.

I used Earth Balance instead of butter, because ever since I discovered it, I don’t buy butter anymore. It does everything I need. I also used skim milk instead of whole. Other than that, I followed the recipe closely, since Julia was known for testing her recipes thoroughly. Don’t want to question the master! 😉

Cheese Soufflé

Adapted from The Way to Cook

2 tablespoons finely grated Parmesan cheese (or other hard cheese)

1 cup skim milk

2 1/2 tablespoons Earth Balance, plus more for greasing pan

3 tablespoons unbleached all purpose flour

1/2 teaspoon paprika

1/2 teaspoon salt

3 grinds of pepper

Speck of ground nutmeg

4 large egg yolks

5 large egg whites

1 cup (packed) coarsely grated Gruyère cheese (about 4 ounces)

Position rack in lower third of oven and preheat to 400 F.

Grease 6-cup (1 1/2-quart) soufflé dish with Earth Balance. Add Parmesan cheese and tilt dish, coating bottom and sides.

Warm milk in heavy small saucepan over medium-low heat until steaming.

Meanwhile, melt Earth Balance in heavy large saucepan over medium heat. Add flour and whisk until mixture begins to foam and loses raw taste, about 3 minutes (do not allow mixture to brown). Remove saucepan from heat; let stand 1 minute. Pour in warm milk, whisking until smooth. Return to heat and cook, whisking constantly until very thick, 2 to 3 minutes. Remove from heat; whisk in paprika, salt, pepper, and nutmeg. Add egg yolks 1 at a time, whisking to blend after each addition. Scrape soufflé base into large bowl. Cool to lukewarm. DO AHEAD: Can be made 2 hours ahead. Cover and let stand at room temperature.

Using electric mixer, beat egg whites in another large bowl until stiff but not dry. Fold 1/4 of whites into lukewarm or room temperature soufflé base to lighten. Fold in remaining whites in 2 additions while gradually sprinkling in Gruyère cheese. Transfer batter to prepared dish.

Place dish in oven and immediately reduce oven temperature to 375_F. Bake until soufflé is puffed and golden brown on top and center moves only slightly when dish is shaken gently, about 25 minutes (do not open oven door during first 20 minutes). Serve immediately.

This pairs well with a summery rosé wine. French of course ;-). Our house rosé at the moment is Domaine Couron Grenache Rosé from France, which was perfect.

Bon appétit!

The Bungalow ~ Poisson Cru

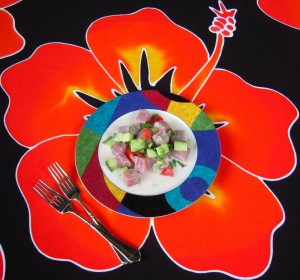
I can’t put down the new book by Sarah Jio called The Bungalow. I would highly recommend it if you are looking for your next summery book to read at the beach (as long as you don’t have anything else on your calendar to do, since it is a page-turner! ;)) The story starts in Seattle in the 1940s, but it quickly moves to Bora Bora. I feel as if I am on a trip to that part of the world when I open the pages!

The story inspired me to research dishes from French Polynesia, and I stumbled upon one called Poisson Cru, which means “raw fish” in French. The way I like to travel (virtually or in reality) is to make and sample foods from different places. Since I can’t make it to Bora Bora this week, this is something I could enjoy in my own back yard in Seattle with the tiki torches burning. 🙂 I think a mai tai would be the perfect accompaniment!

Poisson Cru

From Epicurious.com

(6 appetizers or 4 entrees)

1 pound very fresh high-grade ahi tuna, diced in neat 1/2-inch cubes

1/2 cup fresh lime juice

1/2 cup coconut milk (I used light coconut milk)

1/2 cup diced peeled and seeded cucumber

4 to 5 scallions, green and white portions, split lengthwise and minced

1 fresh hot small green or red chile, seeded and minced, optional

Several tablespoons shredded coconut, optional

3/4 teaspoon salt, or more to taste

Freshly ground pepper

1 medium tomato, seeded and squeezed to eliminate liquid, diced

Combine in a medium bowl the tuna, lime juice, coconut milk, cucumber, scallions, optional chile and coconut, salt, and pepper. Refrigerate 30 minutes to 1 hour. Mix in the tomato and serve right away.

The School of Essential Ingredients ~ Spring Risotto

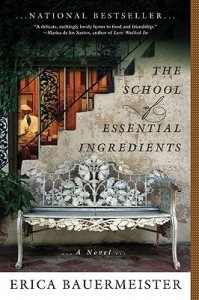
I’ve been working at two separate cooking schools this spring, which inspired me to pick up a book about a group of people who meet every week for a cooking class. It is entitled The School of Essential Ingredients by Erica Bauermeister. The way she writes about cooking and food is so descriptive that it encouraged me to stop and really take in all of the experiences at my own cooking schools…The smells, textures, colors and tastes, as well as the people, places and experiences associated with every dish.

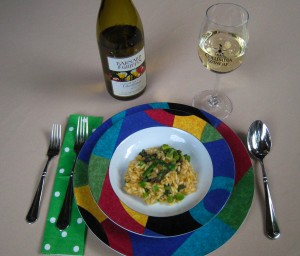
Her website includes a few recipes to bring the experience home, so I decided to try her spring risotto to celebrate the end of the season :).

Spring Risotto

From www.EricaBauermeister.com

4 cups chicken or vegetable broth

1/2 lb asparagus

3 T butter (I actually used Earth Balance instead, which worked beautifully)

3 T olive oil

1 cup chopped onions

1 1/3 cup arborio rice

1/2 cup white wine

1 bay leaf

salt and pepper (to taste)

lemon zest (optional)

shaved parmesan

Cut asparagus tips into 1 1/2 inch pieces. Cut half of the stocks into finely chopped pieces; cut the other half into 1 inch pieces.

Heat broth in a heavy saucepan. When boiling, add asparagus and cook until just tender (3-5 minutes). Take out asparagus with a slotted spoon and set aside in a bowl. Turn down heat under broth to a low simmer.

In a different heavy saucepan, melt butter and add olive oil. Add chopped onions and saute until translucent (about 5 minutes). Add rice and bay leaf and stir until well coated with the butter. Add wine and cook, stirring, until liquid has evaporated.

Add a ladleful of heated broth to the rice, stirring until liquid is absorbed. Continue adding a ladleful at a time, until broth is gone and rice is creamy but grains are still firm.

Add the asparagus and a pinch of lemon zest (optional). Add salt and pepper to taste. Put in a serving bowl and top with Parmesan shavings.

Prep time: 45-50 minutes (with much contemplative stirring)

Serves 6

I paired it with a local wine called Barnard Griffin 2010 Chardonnay. The tulips on the label always remind me of spring :). I also used this wine in the dish.

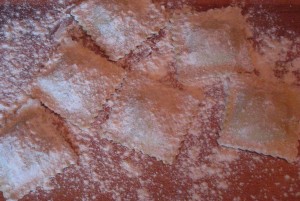
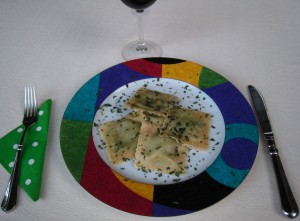
Happy Mother’s Day Weekend ~ Fresh Asparagus, Pine Nut and Tarragon Ravioli


To celebrate Mother’s Day weekend this year, my mom came up for a visit filled with the things we love to do together! Things like shopping at some of our favorite stores, taking a cooking class, and enjoying this fresh ravioli for dinner.

I have recently learned that fresh pasta is actually amazingly easy, and it feels so much more special than dried. It is a little time consuming, but it freezes beautifully, so you can make it on a night when you have time and enjoy it whenever you’d like.

This dish was based on a recipe from one of Sur La Table’s cooking classes. They offer many fresh pasta classes that have really demystified the process for me. The original dish was tossed in a mushroom cream sauce, but I simply tossed the finished ravioli in a little bit of melted Earth Balance buttery spread and sprinkled them with fresh tarragon. I also used less vinegar than called for. Just add the filling ingredients to your taste, and sample as you go before you fill the ravioli.

Fresh Pasta Dough

Yield: 4 servings

2 1/2 cups (12 ounces) all-purpose flour or “00” flour, plus more for dusting

1 tablespoon kosher salt

4 large eggs

1 tablespoon extra-virgin olive oil (optional)

Place flour and salt in a large mixing bowl and whisk to combine. Make a “well” in the center of the flour mixture and add eggs and oil, if using. Using your fingers, blend the eggs into the flour mixture, stirring the flour in from the sides of the well and working outwards. When the pasta dough is thoroughly mixed, turn it out on a lightly floured work surface. Knead dough until it is smooth and flexible but not sticky, about 5 to 10 minutes, adding small amounts of flour as needed. Gather the dough into a ball and flatten into a disk. Cover in plastic wrap and allow dough to rest for at least 10 minutes and up to 1 hour at room temperature.

To roll dough, secure a pasta machine to the edge of a long countertop. Using a bench scraper, cut dough into thirds. Keep extra dough covered in plastic while working with one piece. Flatten the piece of dough into a rough square that will fit inside the width of the pasta machine. Place the rollers on the widest setting and roll the dough through the machine, catching it with one hand as you roll with the other. Take the dough and fold into thirds towards the center of the dough. Turn the dough so one open end faces the machine and roll it through on the widest setting again. Fold, turn, and roll once more on the widest setting. Continue rolling the pasta through machine without folding, adjusting the rollers to the next smallest setting each time, until the desired thickness is reached. If the pasta sheet becomes too large to handle, use a bench scraper to cut it into more manageable lengths and continue rolling until pasta is less than 1/16-inch thick.

(This whole process can also be done with a rolling pin. It takes some muscle, but it works really well).

Asparagus, Pine Nut and Tarragon Ravioli

Yield: 4 servings

2 cloves garlic, peeled

1/2 cup pine nuts, toasted

1 large bunch tarragon, washed and dried, stems removed

1/2 pound asparagus spears, trimmed, cut into 2-inch lengths, blanched and cooled

1/3 cup extra-virgin olive oil

1/3 cup grated Parmesan cheese

3 tablespoons white wine vinegar, plus more as needed

Kosher salt and freshly ground black pepper

1 recipe Fresh Pasta Dough

To prepare filling, place garlic, pine nuts, tarragon, and asparagus pieces in the bowl of a food processor fitted with a metal blade. Pulse to a rough chop. Add 1/3 cup olive oil in a steady steam and process to a smooth paste. Stop motor and add cheese and vinegar, stirring by hand to combine. Taste and season with salt, pepper and more vinegar as needed. Set aside.

Place pasta sheets on a lightly floured work surface. Place tablespoons of filling in rows down the length of the pasta sheet, leaving at least 2 inches of space around each tablespoon of filling. Using a pastry brush, moisten the surface of the pasta around the filling with water or egg wash. Place a similarly sized pasta sheet on top of the filling, gently pressing to seal the pasta around the filling without creating air pockets inside the ravioli. Cut the ravioli using a cookie cutter, a ravioli stamp, a pizza wheel, or a ravioli maker. Place ravioli on a rimmed baking sheet lightly coated with flour. Dust the tops of the ravioli with flour and cover loosely with a clean kitchen towel. The filled ravioli can be cooked immediately or covered with plastic wrap and refrigerated for up to 1 hour before cooking.

To cook ravioli, heat a large pot over high heat until boiling. Add enough kosher salt to season the water like seawater. While salted water boils vigorously, add ravioli and stir immediately to prevent them from sticking. Boil until ravioli are al dente, about 4 to 5 minutes. Reserve about 1/4 cup pasta water and drain ravioli through a colander. Alternately, remove the cooked ravioli with a slotted spoon or spider and reheat water to boiling before cooking another batch.

Toss hot ravioli with your sauce of choice, using the reserved pasta water to thin the mixture as needed. Garnish as desired and serve immediately.

(If you decide to freeze your ravioli, don’t thaw them before placing in boiling water. They will just take about a minute or two longer than room temperature dough to thaw and cook).

I hope you’ll give these a try for a spring dinner! 🙂

Lots to be thankful for ~ Roasted Pheasant with Chestnuts, Wild Rice and Fennel, Frisée Salad with Blue Cheese, Walnut and Cranberry Crostini and a Pumpkin Cake Roll with Cream Cheese Frosting

Happy Thanksgiving!

We celebrated a little early with family this year, so Rob and I had a quiet and cozy Thanksgiving for two on the actual holiday. I decided to shake things up a bit since we had the traditional turkey and sweet potatoes and all of that last week. For our own little celebration, we had Roasted Pheasant with Chestnuts, Wild Rice and Fennel, Frisée Salad with Blue Cheese, Walnut and Cranberry Crostini and a Pumpkin Cake Roll with Cream Cheese Frosting. If you would like to try something off the beaten path for your holidays, we both thought all three were exceptional! The recipes were twists on the traditional fare, so it still felt like Thanksgiving, but it was fun to try a few new things.

The frisée salad was a festive little starter for our meal. I have to admit, I am not a big cranberry sauce fan, and so the addition of dried cranberries on the crostini was my version of “cranberry sauce.” 😉 I used quite a bit less blue cheese than the original recipe called for, and I was actually able to find a reduced fat cheese by Stella that had a very full flavor. I also used a baguette instead of ciabatta since I liked the size better, and it has fewer holes to let the goodies fall through ;). I made the whole recipe for the crostini, so as to have leftovers as snacks in the coming days.


Frisée Salad with Blue Cheese, Walnut, and Cranberry Crostini

Adapted from Bon Appétit magazine

24 ½ or ¼ inch-thick slices of a French baguette, depending on your preference

3 tablespoons walnut oil, divided

1/2 cup chopped toasted walnuts

1/4 cup reduced fat blue cheese, crumbled

5 tablespoons minced shallots, divided

1/3 cup dried cranberries

1 bunch of frisée lettuce

1 teaspoon red wine vinegar

Preheat oven to 400°F. Arrange bread slices on baking sheet. Brush bread slices on top side with 2 tablespoons walnut oil. Bake until crisp, about 5 minutes.

Mix walnuts, cheese, 4 tablespoons shallots, and dried cranberries in medium bowl. Sprinkle mixture on toasts. Bake until cheese melts, about 4 minutes.

Meanwhile, combine frisée, 1 tablespoon shallots, 1 tablespoon walnut oil, and vinegar in bowl. Serve with crostini on top of the frisée.
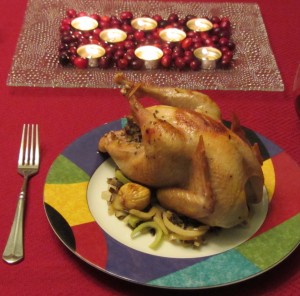
For the pheasant dish, I followed the recipe pretty closely. I did omit the butter when called for and used olive oil instead. I also needed to cook the pheasant longer than 40 minutes to get the breast meat to 160 degrees. If you haven’t ever had pheasant before (like we hadn’t) it has a very mild taste, but it is definitely not chicken or turkey. It was less gamey than I expected. A nice refreshing change from our usual poultry choices :). The sizes of the pheasants were also perfect for two with leftovers. I used two little 2 lb birds. (If you are in the Seattle area, Don and Joe’s Meats in Pike Place Market carries pheasant along with many other specialty meats. It’s a fun place to visit if you are looking for a little culinary adventure!)


Roasted Pheasant with Chestnuts, Wild Rice and Fennel

Adapted from MarthaStewart.com

2 cups fresh chestnuts

3/4 cup wild rice

1 teaspoon salt, plus more to taste

2 pheasants (about 2 pounds each)

1/4 cup fresh rosemary, finely chopped

1 clove garlic, minced

6 shallots, 2 minced and 4 slivered lengthwise

Freshly ground pepper

2 tablespoons plus 2 teaspoons olive oil

2 fennel bulbs (about 8 ounces each), sliced thinly crosswise

1 cup homemade chicken stock, or canned low-sodium chicken broth, skimmed of fat

Preheat oven to 425 degrees. With a sharp knife, make two crosscut gashes on flat side of chestnuts. Place on a baking sheet, and roast for 15 to 20 minutes. When cool enough to handle, peel off skins and set aside.

Rinse rice well. In a medium saucepan, combine with 3 cups water. Bring to a boil, reduce heat, cover loosely, and allow to simmer for 25 minutes. Remove from heat, add 1/2 teaspoon salt, and let sit for 10 minutes. Drain, and set aside.

Rinse pheasant, and pat dry. Combine rosemary, garlic, minced shallots, and salt and pepper to taste. Rub cavity with mixture. Season outside with salt and pepper. Tie pheasant’s legs together with kitchen twine. Tuck wings under breast.

Reduce heat to 350 degrees. Pour 1 tablespoon oil in a roasting pan over medium heat. Brown bird evenly on all sides, about 15 minutes. Place breast side up; transfer to oven. Cook for about 40 more minutes, basting often, until legs are a little loose when you shake them.

Meanwhile, pour 1 teaspoon oil in a skillet. Add slivered shallots, and cook over medium heat for 5 to 6 minutes. Transfer shallots to a bowl.

Pour another 1 teaspoon oil in skillet. Add fennel slices, and cook for 5 minutes. Transfer to bowl.

Pour remaining tablespoon oil in skillet. Add chestnuts; cook for 2 minutes. Add 1/2 cup stock and 1/2 teaspoon salt. Bring to a boil and simmer until reduced to a glaze, about 10 minutes. Add remaining stock; simmer until again reduced to a glaze, about 5 minutes. Transfer to a plate.

Add rice, shallots, fennel, and 1 cup water to skillet and cook for 5 minutes. Add chestnuts. Season to taste with salt and pepper. Serve with pheasant.

For dessert, we had a pumpkin cake roll with cream cheese frosting. I reduced the sugar from the original recipe and I made a simple Neufchatel frosting for the middle instead of the traditional full fat cream cheese filling. The presentation was quite beautiful, but I must say, it looks harder to make than it actually was. My favorite kind of recipe! 😉


Pumpkin Cake Roll with Cream Cheese Frosting

Adapted from Cook’s Country magazine

1
cup cake flour, sifted

2
teaspoons pumpkin pie spice

1/2
teaspoon baking soda

Pinch of salt

5
large eggs

1
cup sugar

1
cup canned pumpkin puree

16 ounces Neufchatel, room temperature

3/4 cup confectioners’ sugar, plus more for garnish

For the Cake: Adjust oven rack to middle position and heat oven to 350 degrees. Grease 18- by 13-inch rimmed baking sheet and line with greased parchment paper. Whisk flour, spice, baking soda, and salt in medium bowl; set aside. With electric mixer on medium-high speed, beat eggs and sugar until pale yellow and thick, 6 to 10 minutes. Add pumpkin and mix on low until incorporated. Fold in flour mixture until combined. Spread batter evenly in prepared pan. Bake until cake is firm and springs back when touched, about 15 minutes. Before cooling, run knife around edge of cake to loosen, and turn out onto clean sheet of parchment paper that has been dusted with confectioners’ sugar. Gently peel off parchment attached to cake and discard. Roll cake and fresh parchment into log and cool completely, about 1 hour.

For the Filling: Place the room temperature Neufchatel cheese in a food processor, and blend with ¾ cup confectioner’s sugar until smooth.

To Assemble: Gently unroll cake and spread with frosting, leaving 1-inch border at edges. Re-roll cake snugly, leaving parchment behind. Wrap cake firmly in plastic wrap and chill completely, at least 1 hour or up to 2 days. Remove plastic, dust with confectioners’ sugar.
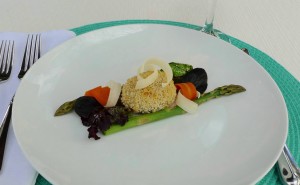
All Hallow’s Eve ~ Black and Orange Halloween Pasta

Happy Halloween!

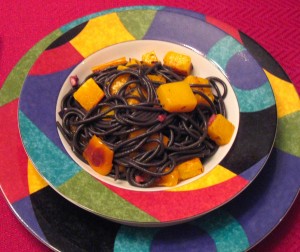
We had a fun little Halloween dinner tonight based on the colors of the holiday – Black squid ink pasta and Kalamata olives with orange butternut squash and bell peppers. It not only looked festive and elegant, but the flavors also worked very well together. I would highly recommend it for your next Halloween dinner party if you’d like to try something new and fun :).
The trickiest part of the recipe was finding the black pasta. If you live in the Seattle area, Pasta & Co. has it in stock.  The flavor is about the same as typical pasta, but the look really stands out. I think it’s well worth the hunt for this recipe.

Black and Orange Halloween Pasta

From Epicurious.com

2 pounds butternut squash, peeled, seeded, and cut into 3/4-inch chunks

2 orange bell peppers, cut into 1-inch pieces

4 garlic cloves, thinly sliced

1 tablespoon thyme leaves

1/2 teaspoon hot red pepper flakes

1/4 cup extra-virgin olive oil

1 pound black linguine or spaghetti (squid or cuttlefish ink pasta)

1/2 cup pitted Kalamata olives, chopped

Preheat oven to 425°F with rack in middle.

Toss squash and bell peppers with garlic, thyme, red pepper flakes, oil, and 1/2 teaspoon each of salt and pepper in a 17- by 11-inch 4-sided sheet pan. Roast, stirring once, until vegetables are just tender and browned in spots, 25 to 35 minutes.

While vegetables finish roasting, cook linguine in a pasta pot of well-salted boiling water until al dente. Reserve 1/2 cup cooking water, then drain pasta and return to pot.

Remove sheet pan from oven and pour reserved water over vegetables, stirring to loosen from pan. Stir in olives, then add vegetable mixture to pasta in pot and toss to combine.

We paired dinner with a red wine by Owen Roe Winery called Sinister Hand. Ooooh, spooky! 😉 Also yummy! 🙂