Happy Easter! ~ Easter Bunny Rolls
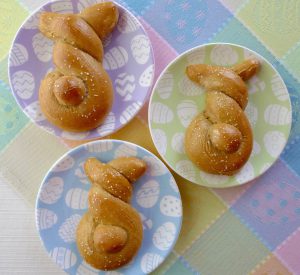
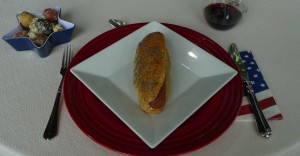
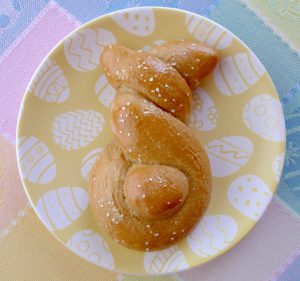
The Easter bunny came to our house today! 😉

I found this bunny roll idea in several places online, and I couldn’t resist making a batch of my own. They are simple and quite adorable.

I made these rolls with my basic whole-wheat dinner roll recipe. I didn’t use dill this time around, but I think an herb of some sort would be delicious. I love this recipe because I can make the rolls in the evening, let them rest in the refrigerator overnight, and then bake them in the morning. There is nothing quite like fresh bread on Easter morning (without having to get up early to make it! 😉 )

Easter Bunny Rolls

Makes 5 dinner rolls

2 tablespoons warm water (about 80 degrees F.)

1/2 tablespoon dry active yeast

1 teaspoon granulated sugar

1/2 teaspoon kosher salt

1 tablespoon unsalted butter, melted

1 large egg

1/2 cup low-fat buttermilk

1 3/4 cups white whole-wheat flour

All-purpose flour for dusting work surface

Approximately 1 tablespoon beaten egg

Approximately 1/2 tablespoon coarse salt

Place a piece of parchment paper on a half sheet pan, and spray the parchment with cooking spray. Make sure you have enough room in your refrigerator for the sheet pan where the rolls will rest overnight.

In the bowl of a stand mixer with a dough hook attachment, add the water. Sprinkle the yeast over the water. Let stand until the yeast and water mixture looks creamy, about 5 minutes. Next, add the ingredients from the sugar through the whole-wheat flour to the bowl. Let the mixer knead the dough for about 10 minutes. The dough will be elastic and sticky.

Remove the dough from the bowl onto a clean work surface that is lightly dusted with all-purpose flour. Divide the dough into 6 equal pieces. Sprinkle a little extra all-purpose flour over the dough and on your hands if the dough sticks.

To make bunnies, roll 5 of the pieces of dough into long ropes, each about 12 inches long. Take the two ends of each rope and twist them over each other twice, leaving about an inch of both ends sticking out on top for the ears. Make sure the bottom has a loop with a hole in the middle to make room for the tail. Cut the remaining piece of dough into small pieces for the tails. Roll each piece into a ball, and place the ball in the center of the loop. (If you have leftover dough, you can form a little Easter egg shape to go with the bunnies!) Place all of the rolls on the prepared baking sheet. Take care to leave enough space between the rolls to allow them to rise without touching each other.

Spray the tops of the rolls with nonstick cooking spray and cover with plastic wrap. Let the rolls rest in the refrigerator overnight.

The next day, remove the rolls from the refrigerator. Let the dough rise in a warm place for about 90 minutes, or until close to doubled in size.

Preheat your oven to 350 F. Brush the rolls with the beaten egg, and sprinkle a little coarse salt on top. Bake for about 20 minutes, or until the rolls are golden brown and cooked through.
Pumpkin Season ~ Pumpkin Whole-Wheat Dinner Rolls

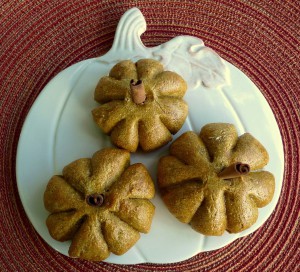
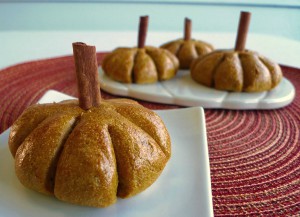
Pumpkin Dinner RollsTonight is a blustery and rainy night in Seattle. Perfect for a bowl of hot soup and warm pumpkin dinner rolls!

I transformed my recipe for whole-wheat dinner rolls with dill to make these pumpkin rolls. I love creative and fun pumpkin recipes at this time of the year, so when I discovered different versions of this idea online, I knew I wanted to try a batch with my own recipe. I think they are almost too cute to eat…*Almost.* 😉 They are savory, but they have a hint of warm pumpkin spice.

Pumpkin Whole-Wheat Dinner Rolls

Makes 8 dinner rolls

1/4 cup warm skim milk (about 80 degrees F.)

1/2 tablespoon dry active yeast

1 teaspoon granulated sugar

1/4 teaspoon kosher salt

1 teaspoon pumpkin pie spice

2 tablespoons unsalted butter, melted

1 large egg

1/2 cup pumpkin puree

1 3/4 cups white whole-wheat flour

All-purpose flour for dusting work surface

Approximately 1 tablespoon beaten egg

4 cinnamon sticks broken in half to make 8 pieces

Place a piece of parchment paper on a half sheet pan, and spray the parchment with cooking spray. Make sure you have enough room in your refrigerator for the sheet pan where the rolls will rest overnight.

In the bowl of a stand mixer with a dough hook attachment, add the milk. Sprinkle the yeast over the milk. Let stand until the yeast and milk mixture looks a little frothy, about 5 minutes. Next, add the ingredients from the sugar through the whole-wheat flour to the bowl. Let the mixer knead the dough for about 10 minutes. The dough will be elastic and sticky.

Remove the dough from the bowl onto a clean work surface that is lightly dusted with all-purpose flour. Divide the dough into 8 equal pieces. Sprinkle a little extra all-purpose flour over the dough and on your hands if the dough sticks.

Form the rolls into your desired shape. To make the pumpkin shaped rolls, form each piece into a ball. Gently press each ball into a disc. With a very sharp knife, cut 8 slits all around the sides of each disc, taking care to leave the center intact. Press a small indentation into the center of each roll. Place the rolls on the prepared baking sheet. Take care to leave enough space between the rolls to allow them to rise without touching each other.

Spray the tops of the rolls with nonstick cooking spray and cover with plastic wrap. Let the rolls rest in the refrigerator overnight.

The next day, remove the rolls from the refrigerator. Let the dough rise in a warm place for about 90 minutes, or until close to doubled in size.

Preheat your oven to 350 F. Brush the rolls with the beaten egg. Bake for about 25 minutes, or until the rolls are golden brown and cooked through. Push the cinnamon sticks into the center of each roll to make the “stems.”Pumpkin Dinner Rolls
Halloween Season ~ Barmbrack

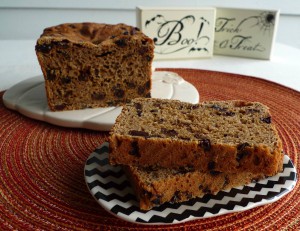
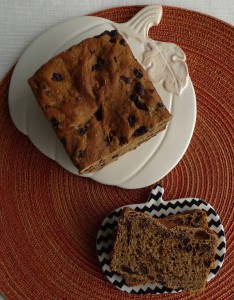
BarmbrackIt’s that time of year again for all things Halloween!

For my first treat of the season, I made Irish Halloween bread called Barmbrack. Since the holiday began with an ancient Celtic festival, I thought this bread would be a nice way to celebrate the history of Halloween.

I also love the tradition that goes along with this bread. In the past, different objects were baked into the loaf, such as a ring or a coin. The ring meant that the person who received it would be married within the year, and the coin meant riches. There were also items baked into the bread that were said to signify bad luck. For instance, a piece of cloth meant poverty, and a thimble meant you would never marry. These customs have mostly gone by the wayside, and I didn’t bake any objects into my cake since I didn’t want to chance an unexpected visit to the dentist. 😉 But I still love the tradition!

Barmbrack

Based on a recipe from The New York Times

1 cup strong hot black tea (preferably Irish breakfast tea!)

1 cup currants

1/2 cup raisins

1/3 cup + 1 tablespoon skim milk, slightly warmed

1 teaspoon dry active yeast

1 large egg, beaten

1 2/3 cups white whole-wheat flour

1 teaspoon ground cinnamon

1/4 teaspoon ground nutmeg

1/4 teaspoon ground clove

Pinch of salt

2 tablespoons unsalted butter, softened, plus extra for greasing the loaf pan

1 teaspoon grated lemon zest

1 teaspoon grated orange zest

In a medium bowl, combine the tea, currants, and raisins. Let sit for about 2 hours, or until the fruit plumps up with the tea. Strain, but reserve the extra liquid.

In a liquid measuring cup, combine the milk and the yeast. Let sit for about 10 minutes, or until the mixture looks frothy. Add the beaten egg and 1/3 cup of the strained tea to the milk mixture.

In the bowl of a stand mixer fitted with a dough hook, add the flour, spices, and salt. Mix the dry ingredients. Then add 2 tablespoons of butter and beat until it is combined into the flour mixture. Add the milk mixture, and beat until the dough forms a large ball. Add the fruit and zests. Beat until well combined, about 5 minutes. The dough will be very sticky.

Butter a nonstick loaf pan.

Transfer the dough to the prepared loaf pan, and spread until it is an even layer across the bottom of the pan. Cover with a kitchen towel. Let the dough rise in a warm place for about 1 1/2 hours, or until doubled in size.

Check to make sure your oven rack is in the center. Preheat oven to 350 F. Bake the loaf for about 48 minutes. When it is done, the top should be brown, and the bottom should sound hollow when tapped with your finger.

Allow the loaf to completely cool on a wire rack before cutting with a serrated knife.Barmbrack

Wedding Anniversary Dinner ~ Whole-Wheat Dinner Rolls with Dill

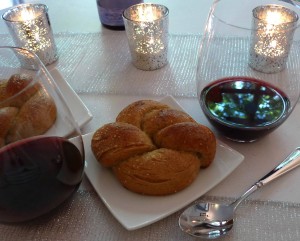
Dill RollsThis weekend, my hubby and I celebrated our wedding anniversary! This year was our sweet 16. 🙂

Every year I love to make a special meal for the occasion, and this year was no different. This year’s dinner featured the beautiful summer produce that I found at our farmers’ markets. All of the dishes were fresh and summery.

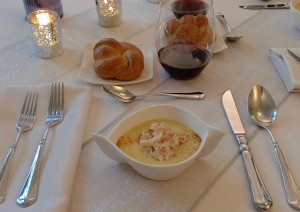
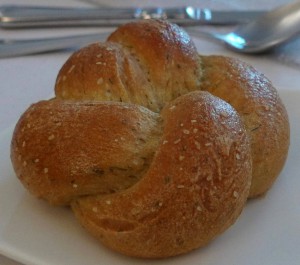
We started with whole-wheat dinner rolls seasoned with fresh dill. I tied them into a knot (since we tied the knot 16 years ago! 😉 ) I served them with corn and coconut soup garnished with a good bit of Dungeness crab. The rolls were a nice accompaniment to dip into the soup.Dill RollsWhole-Wheat Dinner Rolls with Dill

Makes 6 dinner rolls

2 tablespoons warm water (about 80 degrees F.)

1/2 tablespoon dry active yeast

1 teaspoon granulated sugar

1/2 teaspoon kosher salt

2 tablespoons fresh dill, minced (measure after mincing)

1/2 teaspoon dill seed

1 tablespoon unsalted butter, melted

1 large egg

1/2 cup low-fat buttermilk

1 3/4 cups white whole-wheat flour

All-purpose flour for dusting work surface

Approximately 1 tablespoon beaten egg

Approximately 1/2 tablespoon coarse salt

Place a piece of parchment paper on a half sheet pan, and spray the parchment with cooking spray. Make sure you have enough room in your refrigerator for the sheet pan where the rolls will rest overnight.

In the bowl of a stand mixer with a dough hook attachment, add the water. Sprinkle the yeast over the water. Let stand until the yeast and water mixture looks creamy, about 5 minutes. Next, add the ingredients from the sugar through the whole-wheat flour to the bowl. Let the mixer knead the dough for about 10 minutes. The dough will be elastic and sticky.

Remove the dough from the bowl onto a clean work surface that is lightly dusted with all-purpose flour. Divide the dough into 6 equal pieces. Sprinkle a little extra all-purpose flour over the dough and on your hands if the dough sticks.

Form the rolls into your desired shape. To make knots like I did, roll one piece of dough between your hands until it is about 12 inches long. Tie the dough into a loose knot. Then take one loose end of dough and bring it up and over to the center of the knot. Take the other end of the dough, and gently pull it down and under to the center of the knot. The ends should be tucked underneath so no loose ends are visible. Gently press the sides of the knot so it is round. Place the roll on the prepared baking sheet. Repeat with the remaining 5 rolls. Take care to leave enough space between the rolls to allow them to rise without touching each other.

Spray the tops of the rolls with nonstick cooking spray and cover with plastic wrap. Let the rolls rest in the refrigerator overnight.

The next day, remove the rolls from the refrigerator. Let the dough rise in a warm place for about 90 minutes, or until close to doubled in size.

Preheat your oven to 350 F. Brush the rolls with the beaten egg, and sprinkle a little coarse salt on top. Bake for about 25 minutes, or until the rolls are golden brown and cooked through.Dill Rolls

It’s Oktoberfest! ~ Beer, Sauerkraut, and Cheese Muffins

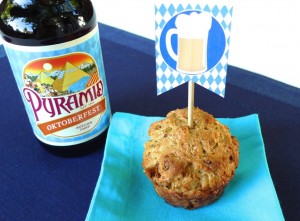
Oktoberfest MuffinsHappy Oktoberfest!

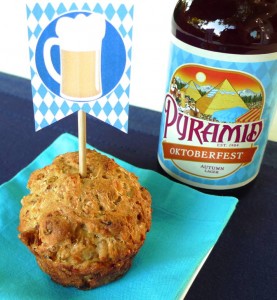
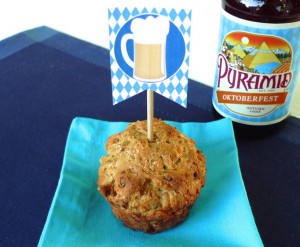
Even though I am typically a wine kind of girl, when Oktoberfest rolls around, I love to try the autumn beer at the market. Many of our local breweries make special beer just for the season. I picked up one from Pyramid Brewery, and instead of just drinking it, I decided to use it in some muffins. 🙂 Then I took these muffins one step further…I wanted to add one more Oktoberfest flavor, so I added a little sauerkraut! I know it sounds a little odd, but it actually added a lot of moisture and flavor to the muffins without making them taste like pickles. These go well with chili, or they are great just as a snack (with a little beer of course! 😉 )

Oktoberfest MuffinsBeer, Sauerkraut, and Cheese Muffins

Makes 12

1 tablespoon olive oil

1/2 yellow onion, minced

3 cups ivory whole-wheat flour

1 tablespoon granulated sugar

2 teaspoons baking powder

1 teaspoon kosher salt

1/4 teaspoon freshly ground black pepper

4 ounces sharp cheddar cheese, shredded

1/2 cup sauerkraut, squeezed to remove excess brine and finely chopped

12 ounces Oktoberfest beer

1/4 cup skim milk

Cooking spray

Preheat your oven to 375.

Heat a small sauté pan over medium heat. Add the oil and onion, and cook until the onion is slightly caramelized. Set aside.

In a medium bowl, whisk together the flour, sugar, baking powder, salt, and pepper. Then stir in the caramelized onions, cheese, sauerkraut, beer, and milk. You may need to work it with your hands to make sure everything is well combined because the batter is very thick.

Spray a muffin tin with cooking spray. Divide the batter evenly into 12 muffins.

Bake for about 35 minutes, until cooked through but still moist.

The cute little flags came from PreppingParties.com. I actually used the artwork for the party banner, but printed it very small to make muffin flags instead. There are a lot of other sweet Oktoberfest printables in the same place that you might want to check out this season. 🙂

Prost!Oktoberfest Muffins


Happy Fourth of July ~ Part 2 ~ Trout Burgers with Tarragon Mayonnaise

Trout BurgerWhat could be more American than a thick, juicy burger on the Fourth of July? 🙂 I made trout burgers with a tarragon mayonnaise for our holiday dinner. The steelhead trout I used came from the Columbia River, which is just south of Seattle. I wanted my celebration of the USA’s birthday to include some of the things I love and appreciate about my corner of this county, like fresh seafood! 🙂

I based my recipe on a salmon burger recipe from Bon Appétit magazine. The two fish are related, so they can be swapped with each other in most cases. I also changed a few things besides the fish. Most notably, I reduced the amount of mayonnaise and increased the amount of nonfat yogurt for the tarragon mayonnaise spread. I also added lemon zest in addition to the juice, and I used freshly grated horseradish rather than the prepared variety. To serve, I used homemade whole-wheat brioche buns rather than buns made with white flour.

Trout Burgers with Tarragon Mayonnaise

Based on a recipe from Bon Appétit magazine

Serves 4

1 pound skinless trout fillet, cut into 1/4-inch pieces (about 2 1/4 cups)

4 green onions, chopped

1 tablespoon drained small capers

1 tablespoon fresh lemon juice

1 tablespoon fresh tarragon, chopped

1 teaspoon Dijon mustard

1 teaspoon fresh white horseradish, grated

1/2 teaspoon kosher salt

1/2 teaspoon freshly ground black pepper

2 tablespoons mayonnaise

1/4 cup dry breadcrumbs

1 tablespoon high heat oil, such as safflower

4 whole-wheat buns

4 large tomato slices

8 butter lettuce leaves

Tarragon mayonnaise (recipe follows)

To make burgers:

Combine first 10 ingredients in medium bowl, and mix well. (Can be prepared 6 hours ahead. Cover and refrigerate.)

Mix breadcrumbs into salmon mixture. Form into four 1-inch-thick patties. Preheat a heavy large skillet over medium-high heat. Add oil when the pan is hot. Add salmon patties; cook until just firm to touch and brown and crusty, about 3 minutes per side.

Assemble each burger on a bun with a generous amount of tarragon mayonnaise, a trout patty, a slice of tomato, and lettuce leaves. Serve immediately.

Tarragon Mayonnaise

1/4 cup mayonnaise

1/4 cup plain nonfat Greek yogurt

2 green onions, chopped

1/2 tablespoon drained small capers

Zest of 1/2 a lemon

1/2 tablespoon fresh lemon juice

1 tablespoon chopped fresh tarragon

1 teaspoon Dijon mustard

1 teaspoon freshly grated white horseradish, or more to taste

To make mayonnaise:

Combine all ingredients in bowl and mix well. Season with salt and pepper. (Can be made 1 day ahead. Cover; chill.)

My festive Fourth of July wine bottle label came from Catch My Party. They have the cutest free downloads to kick up your celebration a notch. 🙂

Fourth of July Wine Bottle Label

It’s officially summer! ~ Kalua Pork on Whole-Wheat Taro Rolls with Poi Spread and Pineapple Slaw

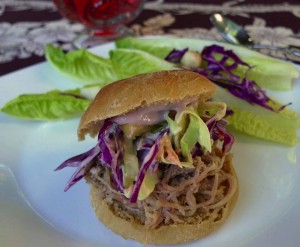
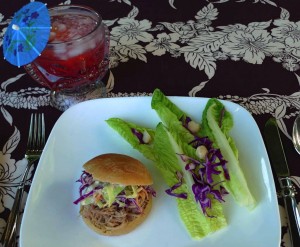
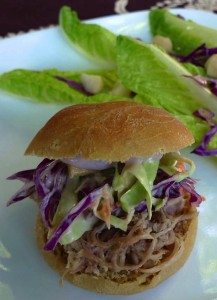
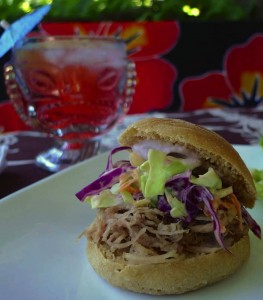
Kalua Pork SandwichesWhen summer rolls around, my backyard starts to feel a little tropical. Seattle’s temperatures are about the same as Lahaina’s this week. 🙂 I absolutely love the Hawaiian Islands, and so this warm weather gets me in the mood to cook Hawaiian-style dishes!

Kalua Pork SandwichesI based this dish on a recipe I found on CookingHawaiianStyle.com. It’s a really fun recipe that uses a few of Hawaii’s most famous ingredients in a fresh new way.

I made a few tweaks to make the recipes a little healthier. For the taro rolls, I used whole-wheat pastry flour and skim milk, I replaced the butter with coconut oil, and I reduced the amount of sugar. For the slaw, I used nonfat Greek yogurt in place of the sour cream, and I omitted the sugar altogether. I also reduced the amount of dressing by half, and added a little extra pineapple. (After all, the pineapple is one of the stars of the dish!) For the spread, I used fresh horseradish root rather than prepared horseradish.

And since I don’t have an imu in my backyard to cook the pork, I chose a frozen kalua pork imported from Hawaii to keep it authentic. 😉 (I was able to find all of the ingredients I needed, including the pork and the poi, at my local Asian grocery store.)

Kalua Pork SandwichesKalua Pork on Whole-Wheat Taro Rolls with Poi Spread and Pineapple Slaw

Based on a recipe from Cooking Hawaiian Style

Taro Rolls:

1 (1/4 oz.) packet active dry yeast

1/4 cup lukewarm water

1/2 cup skim milk

1/3 cup coconut oil

2 tablespoons sugar

1/2 teaspoon kosher salt

2 large eggs, beaten

1/2 cup cooked taro, mashed

3 cups whole-wheat pastry flour

All-purpose flour for dusting hands and work surface

In a small mixing bowl, dissolve the yeast in lukewarm water. Let sit for a few minutes until the mixture is a little frothy on the top. (If there is no froth forming after 10 minutes or so, start again with a fresh packet of yeast. This means your yeast was not alive.) Scald milk by heating in a small saucepan over medium heat until bubbles appear around the inside edge of the pan and the milk is just about to boil. Pour milk into a mixing bowl. Combine the milk with the oil, sugar, and salt. Allow to cool, about 2 minutes. Into milk mixture, stir in the eggs, taro, and yeast mixture. In a large bowl, add the flour. Make a well in the center. Add the liquid mixture to the flour. Mix thoroughly until the dough comes together. On a floured work surface, turn the dough out. Knead until smooth. Transfer the dough into a well greased bowl. Cover with a damp towel, and let rise in a warm area until doubled in size, about 1 hour. Flour hands, and punch down the dough. Divide into 16-17 even portions. Shape into small balls and place onto two baking sheets lined with parchment paper. Cover with a damp towel, and let rise in a warm area until doubled in size, about 1 hour. Preheat oven to 350°. Bake until golden brown, about 15-20 minutes. Serve immediately and freeze the extras. Makes approximately 16-17 rolls.


Poi Horseradish Mayonnaise Spread:

1/2 cup fresh poi

1/4 cup water

Fresh horseradish, grated (to taste)

2 tablespoons mayonnaise


Slaw Dressing:

1/4 cup nonfat Greek yogurt

1/4 cup mayonnaise

1 green onion, green part only, finely chopped

1/2 teaspoon lemon juice


Slaw:

1 cup red cabbage, shredded

2 cups green cabbage, shredded

1 cup carrots, shredded

1 cup fresh pineapple, chopped


Pork:

12 oz. store-bought kalua pork


Poi Horseradish Mayonnaise Spread

In small mixing bowl, combine the poi and water and mix well using a wire whisk. Add the horseradish and mayonnaise, and whisk until smooth. Chill before serving.


Pineapple Slaw

In small bowl, combine all of the dressing ingredients. Blend well. In large bowl, combine all of the salad ingredients. Toss lightly. Pour dressing over salad. Mix well. Cover and refrigerate.


How to serve:

Take a taro roll and spread with the poi mayonnaise. Add kalua pork and top with pineapple coleslaw.

This pairs well with any drink served in a tiki glass! 🙂

Kalua Pork Sandwiches

Happy Australia Day! ~ Cheddar and Chive Dampers

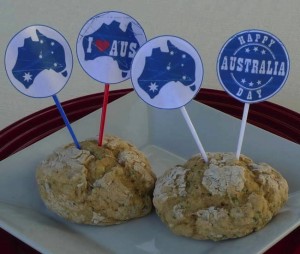
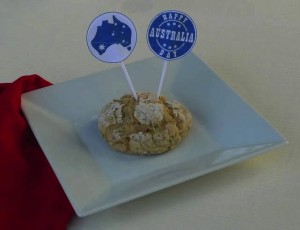
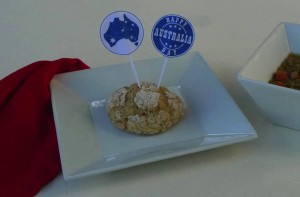
Cheddar and Chive DampersHappy Australia Day! Every January 26th, Australia celebrates this national holiday. It falls in the middle of summer in the southern hemisphere, so much like the way we celebrate the Fourth of July, they celebrate with barbeques, fireworks and outdoor concerts.

Twenty years ago this month, I had the good fortune to travel to Australia through my university. (How did twenty years go by already? Wow!) It was an extraordinary experience I will never forget.

Cheddar and Chive DampersTo celebrate the holiday and the good times I had in Australia, I decided to make a special Australian dinner. We had split pea and ham soup with Cheddar and chive dampers. I chose the menu based on an article from CNN Travel about forty dishes Australians call their own. It is a fun article filled with many foods I have never tried before. There is much more to explore!

For the dampers, I was inspired by an Australian recipe website called Taste, but I ended up changing the recipe to a large extent for my own version. Mainly, I used 100% whole-wheat pastry flour combined with baking powder rather than self-rising flour, and I made individual dampers rather than one large one. I also made only half of the recipe, and reduced the portion size. They were the perfect accompaniment to the split pea and ham soup!

The cute little flags were printed from Jellyfish Prints. I couldn’t resist adding them for a festive touch. 🙂 They are completely adorable, and also free!

Cheddar and Chive DampersCheddar and Chive Dampers

1 ¼ cups whole-wheat pastry flour

2 teaspoons baking powder

¼ teaspoon kosher salt

½ cup Cheddar, coarsely grated

½ bunch chives, finely chopped

½ cup buttermilk

1 egg, scrambled

Preheat oven to 350 degrees.

Combine the flour, baking powder, salt, cheese and chives in a large bowl, whisking to combine. Add the buttermilk and egg, and stir until well combined. On a lightly floured surface, knead the dough until it comes together. Divide into 4 equal pieces, and shape each piece into a ball. Place each ball onto a parchment lined baking sheet, flattening the top slightly. Bake about 15 minutes, or until the underside of each damper sounds hollow when tapped.

Cool for 5 or 10 minutes, and serve warm.

Cheddar and Chive Dampers

Happy Thanksgiving ~ Wild Rice and Goat Cheese Stuffing with Chorizo

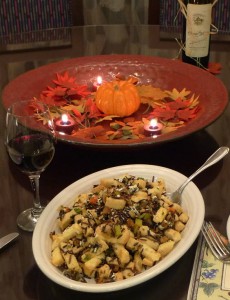
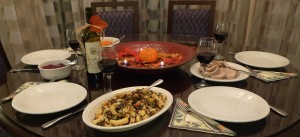
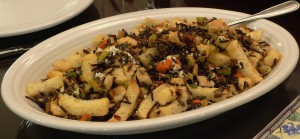
Wild Rice and Goat Cheese Stuffing with ChorizoHappy Thanksgiving!

This stuffing recipe has become a Thanksgiving standard in my family. 🙂 It adds a little spice and a little Southwestern touch to the dinner! I wrote about this recipe in Noon Café’s first year, and I thought I would repost it this year since it still holds up as a delicious addition to my Thanksgiving table. 🙂

Wild Rice and Goat Cheese Stuffing with ChorizoWild Rice and Goat Cheese Stuffing with Chorizo

Based on a recipe from Chef Bobby Flay

1 1/2 cups wild rice

5 cups water

Salt to taste

1/2 cup finely ground chorizo (Mexican)

1 finely diced large onion

1 tablespoon minced garlic

2 finely chopped carrots

3 finely chopped celery stalks

3/4 pound cubed stale hearty white bread

6 ounces goat cheese

2 tablespoons chopped fresh flat leaf parsley

1 tablespoon chopped fresh thyme

1 1/2 cups low sodium free-range chicken stock

Boil the rice, water, and a little salt to taste in a medium saucepan until the grains open and the rice is tender. Drain. (This can be done a day ahead if you desire.)  Cook the chorizo in a large saucepan over medium heat. Pour the chorizo over a bowl lined with a paper towel to drain the excess fat. In the same pan, add the onion, garlic, carrots, and celery and cook until the onion is tender but not browned. Add the rice, chorizo, bread, cheese, parsley, thyme, and stock and combine it all together. Season to taste with a little salt and pepper. Transfer to a baking dish and bake at 350, uncovered, until golden brown on top, about 25 to 30 minutes.

Wild Rice and Goat Cheese Stuffing with Chorizo

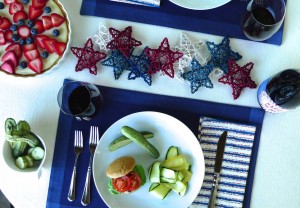
Happy Fourth of July! ~ Bison Hot Dogs on Homemade Buns; Red, White, and Blue Potato Salad; Blueberry and Raspberry Parfait with Vanilla Yogurt and Whipped Cream

Click photos to expand. 🙂

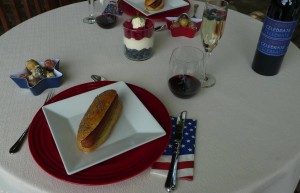
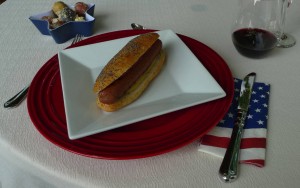
Bison hot dogs on homemade hot dog buns

Red, white and blue potato salad

Sparkling wine with blueberries and raspberries floating in the bubbles…

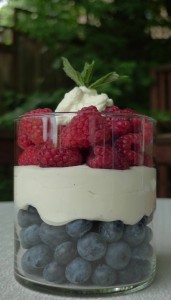
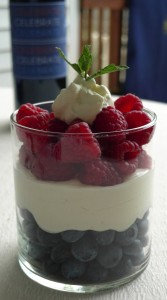
A red and blue berry parfait (with an equal combination of non-fat Greek vanilla yogurt and whipped cream for a layer of white)…

Fun patriotic decorations

It’s our Fourth of July celebration!

I hope you all have a fun, safe, and happy Independence Day! I’m off to Seattle’s festival on Lake Union! 🙂

Enjoy it all!


Red, White, and Blue Potato Salad

From Cooking Light magazine

2 cups fingerling potatoes, halved lengthwise (about 10 ounces)

2 cups small red potatoes, quartered (about 10 ounces)

2 cups small blue potatoes, halved lengthwise (about 10 ounces)

1/4 cup finely chopped red onion

2 tablespoons chopped fresh parsley

1 tablespoon chopped fresh dill

1 tablespoon chopped fresh chives

3 hard-cooked large eggs, finely chopped

1/4 cup red wine vinegar

2 tablespoons olive oil

1 1/4 teaspoons salt

2 teaspoons Dijon mustard

1/2 teaspoon freshly ground black pepper

1 garlic clove, minced

Place fingerling and red potatoes in a saucepan; cover with water. Bring to a boil. Reduce heat; simmer 15 minutes or until tender. Drain; cool slightly. Place potatoes in a large bowl.

Place blue potatoes in a saucepan; cover with water. Bring to a boil. Reduce heat; simmer 10 minutes or until tender. Drain; cool slightly. Add blue potatoes, onion, parsley, dill, chives, and eggs to bowl; toss gently.

Combine vinegar and remaining ingredients. Pour over potato mixture; toss gently to combine. Serve warm, at room temperature, or chilled.

Note: Blue potatoes are starchier than the others and tend to bleed, so cook them separately. If you need to, prepare this dish a day ahead, but add the blue potatoes just before serving. If your potatoes are larger than the ones we call for, cut them to a uniform size.

Teashop Mystery ~ Chamomile Muffins

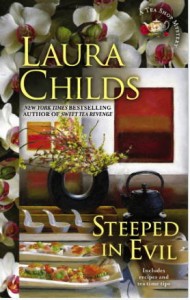
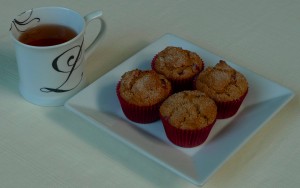
This month, I am thoroughly enjoying a cozy mystery that is set in a Charleston, South Carolina tearoom entitled Steeped in Evil. It is such a descriptive book and the characters are so vividly written, that I feel like I am taking a virtual vacation to Charleston! When I find an absorbing book like this, I often get inspired to make a recipe to compliment the story. It’s my way to get a little more into the storyline, and to make it come to life. 🙂 With this book, I wanted to make something small and sweet that might be served in a tearoom, and I also wanted to incorporate tea within the treat. Chamomile muffins fit the bill! They are perfect to nibble on a lazy and decadent afternoon of reading. I enjoyed some quiet time alone outside on this lovely summer day with a cup of tea, a muffin, and my book. 🙂 I even got out my teapot and poured a glass of bubbly as the fancy teashops do. I felt a little like I was a part of an afternoon tea at the main character’s store, the Indigo Tea Shop.

I based these muffins on a recipe from Joy the Baker. I substituted whole-wheat pastry flour for the all-purpose flour, light olive oil for the butter, and I reduced the sugar from the original recipe. The end result was moist, delicate, and delicious! The chamomile flavor really shines through. I didn’t top them with a glaze, but just a light dusting of powdered sugar.

Chamomile Muffins

Based on a recipe from Joy the Baker

1/4 cup light olive oil

1 cup whole-wheat pastry flour

1/2 cup granulated sugar

1 teaspoon baking powder

1/2 teaspoon baking soda

Pinch of salt

3 tablespoons dried chamomile (from tea bags)

1/2 cup skim milk

1 large egg

1 teaspoon pure vanilla extract

Place a rack in the upper third of the oven and preheat oven to 325 degrees F.  Line a muffin pan with paper or foil liners and set aside. (It makes about 12 standard size muffins.)

To make the cakes:  in the bowl of an electric stand mixer fitted with a paddle attachment, mix together oil, flour, sugar, baking powder, baking soda, pinch of salt, and chamomile leaves.  Mix on medium speed until the mixture is slightly coarse and sandy.

While the mixture beats, in a small bowl, whisk together milk, egg, and vanilla extract.

Pour half of the milk mixture into the flour mixture.  Beat until just incorporated.  Pour in the remaining milk mixture, turn the mixer up to medium-high speed and beat for 1 minute, until well blended.

Divide the batter between the prepared cups, filling only half way.

Bake the muffins for 17 to 20 minutes for the standard size, 10 to 14 minutes for the mini size, or until a skewer inserted in the center comes out clean. Remove from the oven and allow to cool in the pan for 10 minutes. Remove the muffins from the pan to cool completely before frosting.

Cakes will last, well wrapped, at room temperature for up to three days.

Steeped in Evil is the latest release in the series, but I am looking forward to reading more of the teashop mysteries by Laura Childs. If you are looking for a fun and light summer book, you might enjoy one of these mysteries, too!

First Day of Summer! ~ Banana Coconut Muffins

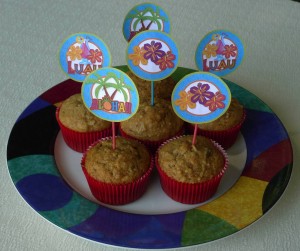
Happy summer! It is officially here! The weather in Seattle feels a little tropical in the summertime, so I decided to make my tropical banana coconut bread recipe into muffins to celebrate the season. 🙂

Dividing the batter into individual muffin portions allowed me to use whole-wheat pastry flour instead of all-purpose flour. (I tried using whole-wheat pastry flour in the original loaf recipe, however it didn’t turn out very well.) I like to use whole grains when I can, so I was happy that these turned out wonderfully moist and delicious. 🙂

Banana Coconut Muffins

2 cups whole-wheat pastry flour

3/4 teaspoon baking soda

Pinch of salt

1 cup granulated sugar (a little less if the bananas are very very ripe)

1/4 cup canola oil

2 large eggs

1 3/4 cups mashed ripe banana (about 4 bananas)

1 tablespoon vanilla extract

1/2 cup flaked sweetened coconut

Cooking spray

Preheat your oven to 350. Whisk the flour, baking soda and salt in a medium bowl. In a large bowl, whisk the sugar and oil until they are well blended. Add the eggs, 1 at a time, beating well after each. Add the mashed banana and vanilla, and whisk until they are incorporated. Add the flour mixture, and mix until everything is moist. Stir in 1/2 cup of coconut. Spoon the batter into 14 muffin tin cups, (about 3/4 full), either lined with paper or sprayed with cooking spray. Bake for about 25 minutes, or until a toothpick inserted in the center comes out clean.

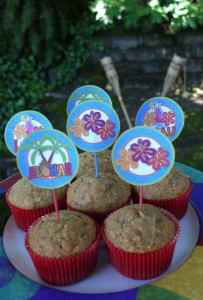
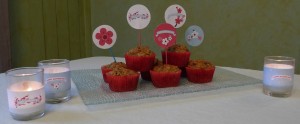
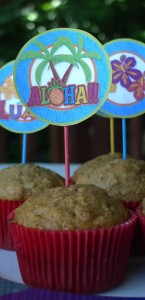
I found cute little tropical Hawaiian cupcake flags on a website called Party Planning Center. They are so adorable, and also free! I love to add a little pizzazz to my cupcakes and muffins with printables. Then I don’t need to use frosting or food coloring to make them look festive, and I think they are so pretty!

Mother’s Day Weekend ~ Healthy Morning Muffins

Almost every Mother’s Day weekend, my mom and I get together for a girls’ weekend to celebrate! We love to spend the time together doing our favorite things like shopping, exploring wineries, and staying up late chatting. 🙂 Given that I am less of a morning person than she is, I made sure she had a bunch of muffins for breakfast when she got up before me. 😉 I decided to make these healthy morning muffins this year.

I replaced the all-purpose flour with whole-wheat pastry flour, and I also added a tad more skim milk to make sure they stayed moist. I replaced the raisins with currants, since Mom is not a big raisin fan. 😉 I also reduced the salt to a pinch.

Healthy Morning Muffins

Based on a recipe from Martha Stewart

1 1/4 cups whole-wheat pastry flour (spooned and leveled)

1/2 cup packed dark-brown sugar

1/2 teaspoon baking soda

1/2 teaspoon baking powder

1/2 teaspoon ground nutmeg

Pinch of coarse salt

1 cup old-fashioned rolled oats

1/4 cup currants

3 tablespoons light olive oil

1 large egg

1/3 cup + 1 tablespoon skim milk

4 medium carrots, shredded

1 medium ripe banana, mashed

Preheat oven to 400 degrees. Line a 12-cup muffin pan with cupcake liners. In a large bowl, whisk together flour, brown sugar, baking soda, baking powder, nutmeg, and salt until there are no lumps. Stir in oats and currants. Add oil, egg, milk, carrots, and banana and stir until blended.

Fill each muffin cup with 1/4 cup batter. Bake until a toothpick inserted in center of a muffin comes out clean, 23 to 25 minutes. Serve muffins warm or at room temperature.

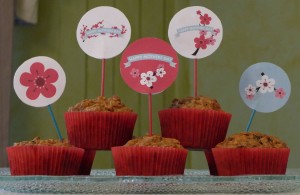
The super cute little decorations are from CatchMyParty.com. They have a large collection of free and printable decorations for all sorts of celebrations, and I would highly recommend checking them out! I made cupcake flags and matching votive wraps from the pretty Mother’s Day “Blossoms” design.

Happy Shamrock Day ~ Irish Soda Bread Biscuits

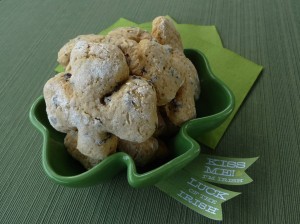
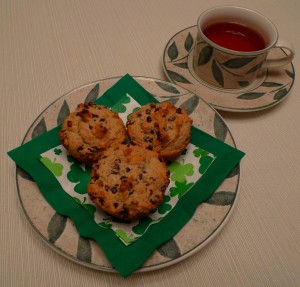
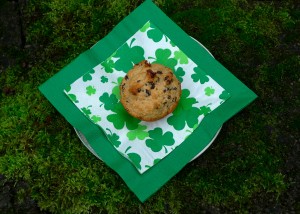
Happy St. Patrick’s Day! I’m not even a wee bit Irish, but I always have fun celebrating this holiday. We really enjoyed the Irish soda bread muffins I made last year, so this year I decided to try another spin on the same idea. I baked Irish soda bread biscuits. 🙂 I went an extra step and cut them out with a shamrock cookie cutter. What could be more festive that? 🙂

Irish Soda Bread Biscuits

2 cups whole-wheat pastry flour

1/2 cup sugar

1/2 teaspoon baking soda

¼ cup Earth Balance

1/2 cup dried currants

1/2 cup low fat buttermilk

1 egg

1 teaspoon caraway seeds

Preheat the oven to 350 degrees F.

Combine the dry ingredients in a medium sized mixing bowl. With a fork or pastry blender, cut in the Earth Balance. Stir in the currants and caraway.

Mix the egg and buttermilk in a separate bowl, and then combine the wet ingredients with the dry ingredients.

On a floured surface, shape the dough into a ball. It is a sticky and wet dough, so use as much all-purpose flour as you need on your hands and the bench to pull it together into a cohesive dough ball. Roll the dough so it is about ½ inch thick. Cut with a cookie cutter or a knife. Transfer biscuits to a baking sheet lined with parchment paper and sprayed with non-stick spray. Bake for about 12 minutes, or until golden brown on top.

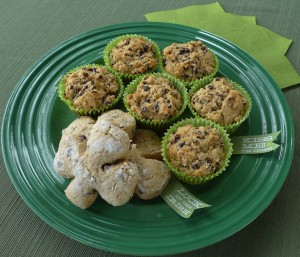
I also baked a batch of the soda bread muffins that I wrote about last year. They freeze well, so our freezer is now stocked! Just microwave for 30 seconds for a warm, fresh muffin in the morning.

The cute little printable flags are from Elli.com. They are free to download and print for your St. Patrick’s Day celebration. 🙂

Mardi Gras ~ King Cake

Happy Mardi Gras!

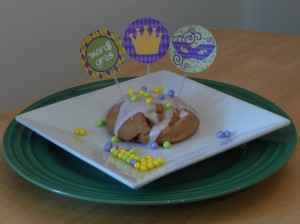
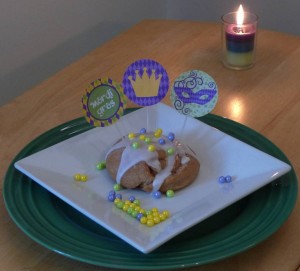
I couldn’t think of anything better to celebrate the holiday than king cake. I love the story and history surrounding the cake. In Louisiana, they decorate the top with the colors of Mardi Gras – purple, yellow, and green. They also hide a small plastic baby or a trinket inside. I made mini cakes this year based on a recipe from AllRecipes.com. I substituted all of the butter with Earth Balance, and replaced half of the all-purpose flour with whole-wheat flour. The result was nutty and delicious! With the glaze, they make a nice dessert, but without the glaze, they are perfect for breakfast. 🙂

Mardi Gras King Cake

Based on a recipe from AllRecipes.com

Pastry:

½ cup + 2 tablespoons non-fat milk

2 tablespoons Earth Balance

1 (.25 ounce) package active dry yeast

1/3 cup warm water (110 degrees F/45

degrees C)

1/4 cup white sugar

1 egg

1/4 teaspoon freshly grated nutmeg

1 ¼ cups + 2 tablespoons all-purpose flour

1 ¼ cups + 2 tablespoons whole-wheat flour

Filling:

1/2 cup packed brown sugar

1-1/2 teaspoons ground cinnamon

1/3 cup chopped pecans

1/4 cup all-purpose flour

1/4 cup melted Earth Balance

Glaze:

1/2 cup confectioners’ sugar

1-1/2 teaspoons water (approximately…add a little more or less to get the consistency you desire)

To make the pastry: Combine warmed milk and melted Earth Balance. Allow mixture to cool to room temperature. In a large bowl, dissolve yeast in the warm water with 1/2 tablespoon of the white sugar. Let stand until frothy, about 10 minutes.

When yeast mixture is bubbling, add the cooled milk mixture. Whisk in the egg. Stir in the remaining white sugar, and nutmeg. Stir both flours into the milk/egg mixture a little at a time. When the dough has pulled together, turn it out onto a lightly floured surface and knead until smooth and elastic, about 2 minutes.

Lightly oil a large bowl, place the dough in the bowl and turn to coat with oil. Cover with a damp cloth or plastic wrap and let rise in a warm place until doubled in volume, about 1 to 2 hours. When risen, punch down.

To make the filling: Combine the brown sugar, ground cinnamon, chopped pecans, and flour. Pour 1/4 cup melted Earth Balance over the cinnamon mixture and mix until crumbly.

Preheat oven to 375 degrees F (190 degrees C). Grease a cookie sheet or line with parchment paper.

Divide the dough into 8 equal pieces. Roll each piece into a rectangle (approximately 6 by 8 inches or so). Sprinkle 1/8th of the filling evenly over each piece of the dough. Roll up each piece tightly like a little jelly roll, beginning at the wide side. Bring the ends of each roll together to form 8 oval shaped rings. Place each ring on a prepared cookie sheet. If you wish, make cuts with scissors 1/3 of the way through the rings at 1 inch intervals. Let rise in a warm spot until doubled in size, about 45 minutes.
Bake in preheated oven for about 20 minutes, until golden. If you are partaking in the tradition of adding a baby or trinket, place it in the bottom of one of the cakes after it is baked. Whisk together the glaze ingredients. Frost the cakes with the glaze and purple, green, and yellow sprinkles if you wish.

I decorated with some cute Mardi Gras printables from MardiGrasOutlet.com. They are free, so help yourself! 🙂 I also found some pretty little edible beads in purple, yellow, and green. They looked like Mardi Gras beads to me, so they seemed perfect for the cake! We don’t plan to eat them, but they were too cute for me to pass up for decoration. 🙂

I hope you enjoy your Fat Tuesday!

Warm Muffins for a Chilly Day ~ Pear and Granola Muffins

Here’s a sweet treat for the New Year. Perfect for a light breakfast, or a pick-me-up in the middle of the day. We enjoyed them for our first breakfast of 2014. 🙂

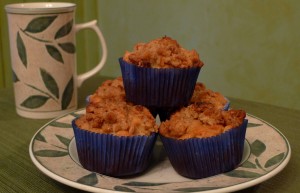
I replaced the low fat yogurt with non-fat, and the butter with Earth Balance. Since Earth Balance already has salt in the mix, no extra salt was needed. I couldn’t find store bought plain granola, so I used an apple cinnamon flavor instead of making some from scratch. It was a really nice combination with the pears. I tried replacing the all purpose flour with 100% whole wheat pastry flour, as well. It is a heartier (and healthier) muffin if you choose to do it that way. They are lighter and fluffier with a mixture of the two types of flours. Your choice. 🙂 I think I preferred the blend, however, so that is how the recipe is as follows:

Pear and Granola Muffins

Based on a Recipe from MarthaStewart.com

For the muffins:

1 cup all-purpose flour

3/4 cup whole-wheat pastry flour

2 teaspoons baking powder

1/2 teaspoon ground cinnamon

2 large eggs

3/4 cup packed light-brown sugar

1/2 cup plain non-fat yogurt

2 tablespoons Earth Balance, melted

2 D’Anjou pears (2 cups), peeled and cut into 1/4-inch dice

3/4 cup plain or apple cinnamon granola

For the topping:

1/2 cup granola

1/4 cup all-purpose flour

1/4 cup packed light-brown sugar

3 tablespoons chilled Earth Balance

STEP 1 
Preheat oven to 400 degrees. Line a 12-cup standard muffin tin with paper liners; set aside. In a large bowl, whisk together flours, baking powder, and cinnamon.

STEP 2 
In a separate bowl, whisk together eggs, brown sugar, yogurt, and Earth Balance. Make a well in the center of flour mixture. Add egg mixture to well, and mix in flour mixture until just combined. Gently fold in the granola and pears.

STEP 3
 Make Granola Crisp Topping: In a bowl, toss together 1/2 cup granola, and 1/4 cup each all-purpose flour and packed light-brown sugar. Cut 3 tablespoons chilled Earth Balance into pieces; add to granola mixture, and rub in with fingertips until clumps form.

STEP 4 
Divide batter evenly among lined cups, filling each 3/4 full. Sprinkle with granola topping. Bake until a toothpick inserted in the center of a muffin comes out clean, about 20 minutes. Cool 5 minutes before removing from tin. Serve warm or at room temperature.

Happy Oktoberfest ~ Soft Pretzels

Happy Oktoberfest!

The world’s largest fair is being held in Munich Germany right now. I love the fact that it started as a wedding celebration about 200 years ago, and it continues today. Now *that* is a wedding reception! 😉

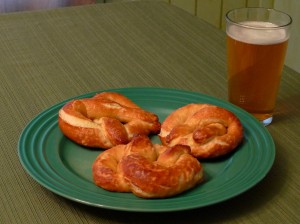
World celebrations and holidays give me a fun excuse to try recipes from different countries. To be a part of this celebration, I decided to try making one of my favorite German treats – Soft pretzels. I have to admit, this is not the first time I have attempted these, but they were nothing to write home about before. 😉 However, this latest attempt was a great success! They were so delicious and tender and comforting. Perfect to pair with a cold Oktoberfest beer. 🙂

I used a recipe from Alton Brown this time. I followed it closely other than one deviation – I replaced the butter with Earth Balance, which worked beautifully. The result was worth the time and effort. Really, is there anything better than fresh baked bread? 🙂

Soft Pretzels

Recipe courtesy of the Food Network and Alton Brown

1 1/2 cups warm (110 to 115 degrees F) water

1 tablespoon sugar

2 teaspoons kosher salt

1 package active dry yeast

22 ounces all-purpose flour, approximately 4 1/2 cups

2 ounces unsalted butter, melted (or Earth Balance)

Vegetable oil, for pan

10 cups water

2/3 cup baking soda

1 large egg yolk beaten with 1 tablespoon water

Pretzel salt

Combine the water, sugar and kosher salt in the bowl of a stand mixer and sprinkle the yeast on top. Allow to sit for 5 minutes or until the mixture begins to foam. Add the flour and butter (or Earth Balance) and, using the dough hook attachment, mix on low speed until well combined. Change to medium speed and knead until the dough is smooth and pulls away from the side of the bowl, approximately 4 to 5 minutes. Remove the dough from the bowl, clean the bowl and then oil it well with vegetable oil. Return the dough to the bowl, cover with plastic wrap and sit in a warm place for approximately 50 to 55 minutes or until the dough has doubled in size.

Preheat the oven to 450 degrees F. Line 2 half-sheet pans with parchment paper and lightly brush with the vegetable oil. Set aside.

Bring the 10 cups of water and the baking soda to a rolling boil in an 8-quart saucepan or roasting pan.

In the meantime, turn the dough out onto a slightly oiled work surface and divide into 8 equal pieces. Roll out each piece of dough into a 24-inch rope. Make a U-shape with the rope, holding the ends of the rope, cross them over each other and press onto the bottom of the U in order to form the shape of a pretzel. Place onto the parchment-lined half sheet pan.

Place the pretzels into the boiling water, 1 by 1, for 30 seconds. Remove them from the water using a large flat spatula. Return to the half sheet pan, brush the top of each pretzel with the beaten egg yolk and water mixture and sprinkle with the pretzel salt. Bake until dark golden brown in color, approximately 12 to 14 minutes. Transfer to a cooling rack for at least 5 minutes before serving.

The Cottage at Glass Beach ~ Rhubarb Muffins

I am enjoying a summery book named The Cottage at Glass Beach by a local Seattle author, Heather Barbieri. I discovered the book on a fun little book and food website called Books and Bites. I’ve been choosing a lot of my recent book selections from the recommendations on that site. Not only do I get many good book suggestions from other authors I enjoy, but I also get a recipe that fits the theme of every book. So fun!

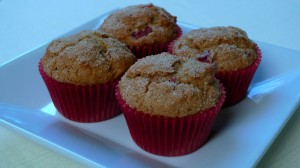
I tried the rhubarb muffins that the website pairs with The Cottage at Glass Beach. The author shared her own recipe for her delicious muffins. I put my own spin on them by using whole-wheat pastry flour instead of all-purpose flour and sprinkling simple cinnamon sugar on the top without the butter. They are so good for breakfast, or for a little mid day snack (while taking an afternoon break to read, of course! ;-))

Rhubarb Muffins

1 1/4 cups firmly packed brown sugar

1/2 cup light olive oil

1 egg

2 teaspoon vanilla

1 cup buttermilk

1 1/2 cups diced rhubarb

2 1/2 cups whole wheat pastry flour

1 teaspoon baking soda

1 teaspoon baking powder

Pinch of salt

3 tablespoons granulated sugar

½ teaspoon ground cinnamon

Combine the brown sugar, oil, egg, vanilla and buttermilk in a mixer bowl, and beat until well incorporated. Stir in the rhubarb by hand. In a separate bowl, combine the flour, baking soda, baking powder and salt. Stir into the rhubarb mixture until just blended.

Spoon the batter into a muffin tin filled with paper linings, about 2/3 full.

For the topping, combine the granulated sugar and cinnamon, and sprinkle evenly over the muffins.

Bake at 400 degrees for 20-25 minutes, or until a toothpick comes out clean when inserted into the center of a muffin.

Happy Saint Patrick’s Day ~ Irish Soda Bread Muffins

Happy Saint Patrick’s Day! (Well, almost ;-). I start to get in the Irish holiday mood once March begins).

I love this holiday, even though I’m not even a wee bit Irish. I make a different Irish inspired recipe every year to celebrate. (Check out some of the fun and festive recipes from years past ~ ’10, ’11, and ‘12).

This year, I decided to make Irish soda bread muffins, which my hubby and I have been enjoying for breakfast. They have unique flavors between the caraway seeds and the dried currants, so they are a really refreshing change from the usual banana or berry muffin recipes I usually make. I found the original recipe on the website hosted by King Arthur Flour. They make high quality flours that pastry chefs I know swear by. I did bake my version of the muffins with 100% whole-wheat pastry flour instead of using any all-purpose flour to make them a little healthier. I only used 1 teaspoon of caraway seeds, but you can add as many or as few as you’d like. I chose vegetable oil instead of butter, and I used buttermilk instead of the other options. (The yogurt and sour cream are perfectly fine substitutes if you choose the low fat versions, however). I omitted the sugar topping, as well, since I thought they were sweet enough with all of the currants. (My hubby, who is Irish, said they are some of the best muffins he’s ever had :)). I hope you’ll give them a try this month!

Irish Soda Bread Muffins

Based on a recipe from KingArthurFlour.com

2 1/4 cups whole-wheat pastry flour

2 teaspoons baking powder

1/4 teaspoon baking soda

1/2 teaspoon salt

1/3 cup granulated sugar

1 1/2 cups currants

1/2 to 2 teaspoons caraway seeds, to taste

1 large egg

1 cup buttermilk, yogurt, or sour cream

1/3 cup vegetable oil

1) Preheat the oven to 400°F. Lightly grease a standard muffin pan; or line with papers, and grease the papers.

2) In a medium-sized mixing bowl, whisk together the flour, baking powder, baking soda, salt, sugar, currants, and caraway seeds.

3) In a separate bowl, whisk together the egg, buttermilk (or equivalent) and oil.

4) Quickly and gently combine the dry and wet ingredients; honestly, this won’t take more than a few stirs with a bowl scraper or large spoon. As soon as everything is evenly moistened, quit; further stirring will cause the muffins to be tough.
5) Spoon the batter into the prepared pan, filling the cups about 3/4 full; the stiff batter will look mounded in the cups.
6) Bake the muffins for 20 minutes, until a cake tester inserted into the center of a muffin comes out clean. Remove them from the oven. Tip the muffins in the pan, so their bottoms don’t get soggy. Wait 5 minutes, then transfer the muffins to a rack to cool.

I hope you have fun on the 17th, whether you are in the Emerald City, the Emerald Isle, or someplace without even a wee bit of green ;).

(PS. Thanks for the cute clover napkins, Mom! Someone else who loves this holiday as much as I do. Must be the 17 connection ;-)).

Happy wedding anniversary ~ Part 2 ~ Pepper-Crusted Steak with Horseradish Cream on Grilled Garlic Crostini

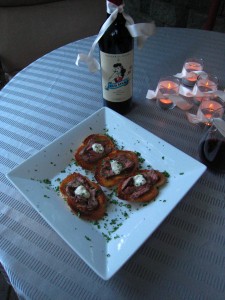
We enjoyed an Italian steak dish to compliment our crab ravioli on our anniversary. Surf and turf :). We just wanted a little something to snack on as we lingered at the table, enjoyed the candles surrounding us, and sipped our wine. These were perfect.

The original recipe was from Epicurious.com. I replaced the heavy cream with light sour cream, which is a different flavor, but delicious all the same. I also trimmed the steak very well before I cooked it.

Pepper-Crusted Steak with Horseradish Cream on Grilled Garlic Crostini

Based on a recipe from Epicurious.com

For the crostini:

1/2 cup extra virgin olive oil

2 garlic cloves, crushed

Salt and pepper to taste

15 1/3-inch slices cut from a French baguette

Italian parsley, minced

Mix the olive oil, garlic, salt, and pepper together in a small bowl and brush lightly on both sides of the bread slices. To broil, position the rack so the slices are 2 inches from the top and turn when the crostini starts to brown at the edges. It will only take a couple of minutes, so watch them very closely.

For the cream:

1/3 cup freshly grated horseradish

1 teaspoon white wine vinegar

1 teaspoon Dijon mustard

Salt and pepper to taste

1/2 cup light sour cream

Use a microplane grater to grate the horseradish root, and then mix the horseradish with the vinegar. Add the mustard, salt, and pepper, and mix again. Then fold into the sour cream.

For the marinated beef:

3 cloves garlic, crushed

1/2 teaspoon hot red pepper flakes

1 tablespoon whole black peppercorns, cracked

1 tablespoon minced fresh rosemary leaves

1/3 cup olive oil

2 pounds London broil (top sirloin), cut 1 1/2 inches thick

Kosher salt

Combine the garlic, hot red pepper flakes, peppercorns, rosemary, and olive oil in a Zip-loc bag. Add the beef, coating it with the marinade. Squeeze all the air out of the bag so the marinade envelops the beef, and refrigerate for at least 6 hours, or overnight.

Preheat the grill or broiler for 15 to 20 minutes. Sprinkle the steak with the salt and grill or broil to rare or medium rare, depending on your preference. (Our steak took about 6 minutes in the broiler to cook to our liking).

Let the steak rest for at least 20 minutes, to get the juices back into the meat, and then cut into short, very thin slices.

Arrange a few shaved slices of beef on each piece of bread, top with a dot of horseradish cream, scatter with minced Italian parsley, and finish with a little kosher salt.

The wine we paired with dinner was called Red Silk 2010 Shiraz by Oliverhill Winery in Australia. Since the traditional anniversary gift for the 12th anniversary is silk, this was our twist on it. Funny thing, out of all of the wines to choose from in the world, I chose this one for Rob, and my mom happened to choose the very same wine as a gift to us! What are the chances? 😉  So we still have one bottle to enjoy after our anniversary. Let the celebration continue!