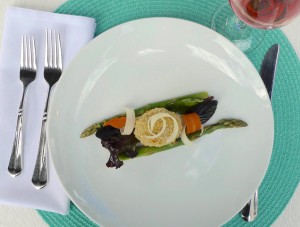
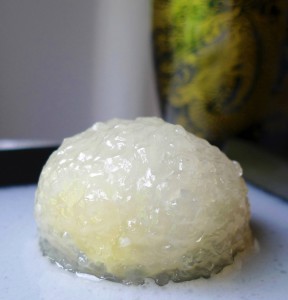
 My hubby just returned from a business trip to Danang, Vietnam. While he was gone, I spent a lot of time learning about Vietnamese food! Cooking is one way I like to explore different cultures and “travel” in a way. Since I couldn’t go with him on this particular trip, spending time in my kitchen making Vietnamese dishes was a close second for me. 🙂 On my cooking adventure, I made Bo La Lot, Banh Xeo, and these little tapioca pearl balls filled with a sweet mung bean paste called Banh Bot Bang.
I used a recipe from my favorite Vietnamese recipe website that I discovered a couple of years ago called Danang Cuisine. The texture of this dessert is really what makes it interesting – It is springy and chewy on the outside and dense and rich on the inside. Then the luscious coconut sauce raises the bar to make this quite a remarkable dessert!
Banh Bot Bang
Based on a recipe from DanangCuisine.com
For the balls:
½ cup peeled split mung beans, rinsed, soaked in water for at least 2 hours or overnight, drained
4 tablespoons plus 3 teaspoons granulated sugar
½ cup unsweetened canned coconut milk
1 ½ cups small tapioca pearls, soaked in water for about 30 minutes, drained
3 teaspoons cornstarch
For the sauce:
½ cup unsweetened canned coconut milk
1 teaspoon cornstarch
2 tablespoons granulated sugar
Pinch of salt
2 pandan leaves (optional)
For the balls:
In a small saucepan with a lid, add the mung beans and enough water to cover the beans. Cover the pot with the lid. Bring the beans to a low boil and cook until they are soft enough to smash with a spoon. Drain the excess water. Add the cooked mung beans, 4 tablespoons of sugar, and ½ cup coconut milk to a food processor. Process until smooth. Return the mixture to the saucepan. Over medium heat, stirring occasionally, cook down the mung bean mixture until it is the consistency of paste.
Scoop the paste out onto a plate and let cool.
When the mung bean paste is cool, roll it into small balls, each about 1 centimeter in diameter. Set aside while you make the outer tapioca portion of the dessert.
Preheat a large steamer pot or a bamboo steamer on medium heat. Cut a piece a parchment to cover the portion of the steamer that will come in contact with the food. Wrap the pot’s lid with a kitchen towel so the condensation from the steam doesn’t drip down into the pot.
Mix ½ cup of the tapioca pearls with 1 teaspoon of cornstarch and 1 teaspoon of granulated sugar. Microwave the mixture on high for about 20 seconds, or until it is a little sticky.
Lay a piece of plastic wrap on a clean work surface. Place a small amount (approximately 1 ½ tablespoons) of the sticky tapioca pearls to the center of the plastic wrap, and press down into a disc. Add one of the mung bean balls in the center of the disc. Using the plastic wrap to help, wrap the mung bean ball completely with the tapioca mixture. Then remove the plastic wrap.
Place the balls into the prepared steamer basket. Be sure they don’t touch, or they will stick together. Cover and steam for about 15 minutes. Remove the pot from the heat, but keep the lid in place. Let sit for another 10 minutes, or until the tapioca is translucent.
Repeat the process with the remaining ingredients, working in 2 more batches.
For the sauce:
In the meantime, make the coconut sauce. In a small saucepan, combine the coconut milk, cornstarch, sugar, and salt. Whisk well. Then add the pandan leaves to the pot. Bring the mixture to a boil, and cook for 30 seconds. Remove from the heat, and let the mixture cool to room temperature. Remove the pandan leaves.
Serve the tapioca balls with the sauce.
Cozy Autumn Treat ~ Pumpkin Spice Latte Muffins
/0 Comments/in Autumn, Breakfast/Brunch, Muffin, Snack /by LauraTo recreate the flavors at home, I made a batch of pumpkin spice latte muffins. 🙂 They are filled with a good bit of pumpkin puree, warm spices, and a generous amount of espresso. A perfect breakfast treat to start any autumn day.
The cute (and free!) printables are from a website called Weigh to Maintain. They were actually meant for another purpose, but I thought they were a perfect way to dress up these little muffins.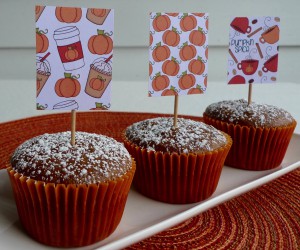 Pumpkin Spice Latte Muffins
Makes about 16 muffins
1 3/4 cups whole-wheat pastry flour
2 teaspoons baking powder
5 teaspoons instant espresso powder
1 1/2 teaspoons pumpkin pie spice
Pinch of kosher salt
2 large eggs
1 cup pumpkin puree
1/4 cup light olive oil
1/2 cup granulated sugar
1/2 cup lightly packed light brown sugar
2/3 cup skim milk
1/2 teaspoon vanilla
Preheat your oven to 350 F.
Line a muffin tin with paper liners.
In a large bowl, whisk all of the dry ingredients, from the flour through the salt.
In a medium bowl, whisk all of the wet ingredients, from the eggs to the vanilla.
Then add the wet mixture to the dry mixture, and whisk until just combined. Take care not to mix the batter too much at this point.
Fill your paper liners about 3/4 full. Bake the muffins for about 22 minutes, or until a toothpick inserted into one of the muffins comes out clean.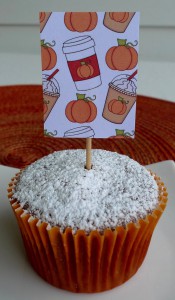
Pumpkin Season ~ Pumpkin Whole-Wheat Dinner Rolls
/0 Comments/in Autumn, Bread, Halloween, Thanksgiving /by LauraI transformed my recipe for whole-wheat dinner rolls with dill to make these pumpkin rolls. I love creative and fun pumpkin recipes at this time of the year, so when I discovered different versions of this idea online, I knew I wanted to try a batch with my own recipe. I think they are almost too cute to eat…*Almost.* 😉 They are savory, but they have a hint of warm pumpkin spice.
Pumpkin Whole-Wheat Dinner Rolls
Makes 8 dinner rolls
1/4 cup warm skim milk (about 80 degrees F.)
1/2 tablespoon dry active yeast
1 teaspoon granulated sugar
1/4 teaspoon kosher salt
1 teaspoon pumpkin pie spice
2 tablespoons unsalted butter, melted
1 large egg
1/2 cup pumpkin puree
1 3/4 cups white whole-wheat flour
All-purpose flour for dusting work surface
Approximately 1 tablespoon beaten egg
4 cinnamon sticks broken in half to make 8 pieces
Place a piece of parchment paper on a half sheet pan, and spray the parchment with cooking spray. Make sure you have enough room in your refrigerator for the sheet pan where the rolls will rest overnight.
In the bowl of a stand mixer with a dough hook attachment, add the milk. Sprinkle the yeast over the milk. Let stand until the yeast and milk mixture looks a little frothy, about 5 minutes. Next, add the ingredients from the sugar through the whole-wheat flour to the bowl. Let the mixer knead the dough for about 10 minutes. The dough will be elastic and sticky.
Remove the dough from the bowl onto a clean work surface that is lightly dusted with all-purpose flour. Divide the dough into 8 equal pieces. Sprinkle a little extra all-purpose flour over the dough and on your hands if the dough sticks.
Form the rolls into your desired shape. To make the pumpkin shaped rolls, form each piece into a ball. Gently press each ball into a disc. With a very sharp knife, cut 8 slits all around the sides of each disc, taking care to leave the center intact. Press a small indentation into the center of each roll. Place the rolls on the prepared baking sheet. Take care to leave enough space between the rolls to allow them to rise without touching each other.
Spray the tops of the rolls with nonstick cooking spray and cover with plastic wrap. Let the rolls rest in the refrigerator overnight.
The next day, remove the rolls from the refrigerator. Let the dough rise in a warm place for about 90 minutes, or until close to doubled in size.
Preheat your oven to 350 F. Brush the rolls with the beaten egg. Bake for about 25 minutes, or until the rolls are golden brown and cooked through. Push the cinnamon sticks into the center of each roll to make the “stems.”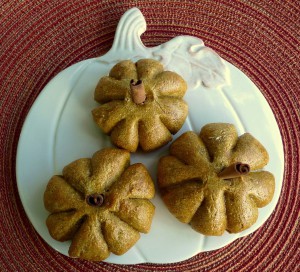
Halloween Season ~ Barmbrack
/0 Comments/in Autumn, Bread, Halloween /by LauraFor my first treat of the season, I made Irish Halloween bread called Barmbrack. Since the holiday began with an ancient Celtic festival, I thought this bread would be a nice way to celebrate the history of Halloween.
I also love the tradition that goes along with this bread. In the past, different objects were baked into the loaf, such as a ring or a coin. The ring meant that the person who received it would be married within the year, and the coin meant riches. There were also items baked into the bread that were said to signify bad luck. For instance, a piece of cloth meant poverty, and a thimble meant you would never marry. These customs have mostly gone by the wayside, and I didn’t bake any objects into my cake since I didn’t want to chance an unexpected visit to the dentist. 😉 But I still love the tradition!
Barmbrack
Based on a recipe from The New York Times
1 cup strong hot black tea (preferably Irish breakfast tea!)
1 cup currants
1/2 cup raisins
1/3 cup + 1 tablespoon skim milk, slightly warmed
1 teaspoon dry active yeast
1 large egg, beaten
1 2/3 cups white whole-wheat flour
1 teaspoon ground cinnamon
1/4 teaspoon ground nutmeg
1/4 teaspoon ground clove
Pinch of salt
2 tablespoons unsalted butter, softened, plus extra for greasing the loaf pan
1 teaspoon grated lemon zest
1 teaspoon grated orange zest
In a medium bowl, combine the tea, currants, and raisins. Let sit for about 2 hours, or until the fruit plumps up with the tea. Strain, but reserve the extra liquid.
In a liquid measuring cup, combine the milk and the yeast. Let sit for about 10 minutes, or until the mixture looks frothy. Add the beaten egg and 1/3 cup of the strained tea to the milk mixture.
In the bowl of a stand mixer fitted with a dough hook, add the flour, spices, and salt. Mix the dry ingredients. Then add 2 tablespoons of butter and beat until it is combined into the flour mixture. Add the milk mixture, and beat until the dough forms a large ball. Add the fruit and zests. Beat until well combined, about 5 minutes. The dough will be very sticky.
Butter a nonstick loaf pan.
Transfer the dough to the prepared loaf pan, and spread until it is an even layer across the bottom of the pan. Cover with a kitchen towel. Let the dough rise in a warm place for about 1 1/2 hours, or until doubled in size.
Check to make sure your oven rack is in the center. Preheat oven to 350 F. Bake the loaf for about 48 minutes. When it is done, the top should be brown, and the bottom should sound hollow when tapped with your finger.
Allow the loaf to completely cool on a wire rack before cutting with a serrated knife.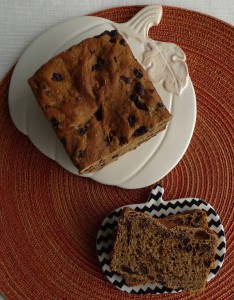
Wedding Anniversary Dinner ~ Lemon Verbena Whole-Wheat Shortbread Cookies
/0 Comments/in Anniversary, Cookie, Dessert, Summer /by LauraLemon Verbena Whole-Wheat Shortbread Cookies
Approximately 20 leaves of fresh lemon verbena, stems removed, roughly chopped
1 cup whole-wheat pastry flour
Pinch of salt
1/2 cup unsalted butter, room temperature
1/4 cup confectioner’s sugar
1/2 teaspoon vanilla extract or vanilla bean paste
1/2 teaspoon lemon zest
All-purpose flour for dusting work surface
In the bowl of a food processor, add the lemon verbena, whole-wheat pastry flour, and salt. Process until the lemon verbena leaves are cut into tiny pieces.
In the bowl of a stand mixer fitted with a paddle attachment, cream the butter, sugar, vanilla, and lemon zest until light and fluffy. Add the flour mixture, and mix until just combined. Be careful not to overmix at this point.
Form the dough into a disc and cover with plastic wrap. Let chill in the refrigerator at least 2 hours or overnight.
Preheat oven to 325 degrees F.
Line a baking sheet with parchment paper.
Sprinkle a little all-purpose flour on a rolling pin and a clean work surface. Roll out the dough until it is about 1/8-inch thick. Cut into desired shapes with cookie cutters. Place the cookies on the prepared baking sheet. Bake for about 12 minutes, or until cooked through.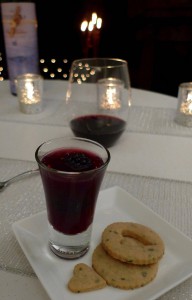
Wedding Anniversary Dinner ~ Blackberry Cabernet Gelée
/1 Comment/in Anniversary, Dessert, Summer /by LauraI have enjoyed making several gelatin desserts this summer, and I thought this blackberry and cabernet gelée was an elegant way to close the season. I also loved that they could be made a day in advance, so I wasn’t in the kitchen all day on our anniversary.
Blackberry Cabernet Gelée
Based on a recipe from Martha Stewart
1/2 cup apple juice
1/2 cup cold water
1 packet or 2 1/2 teaspoons of Knox powdered gelatin
1 cup Cabernet Sauvignon (I used one from 14 Hands Winery)
3 tablespoons granulated sugar
1 pint of blackberries
Set aside pretty serving glasses. Add several blackberries to each glass.
In a medium bowl, add the apple juice and water. Sprinkle the gelatin over the top of the liquids. Let stand about 5 minutes, or until the gelatin has bloomed.
In a medium saucepan, add the wine and the sugar. Bring to a boil and let the sugar dissolve.
Once the sugar has dissolved, pour the wine mixture into the apple juice mixture. Whisk to combine.
Transfer the mixture to a vessel with a spout. Fill the serving glasses. Refrigerate until the gelatin has set. I let mine chill overnight.
Wedding Anniversary Dinner ~ Whole-Wheat Dinner Rolls with Dill
/2 Comments/in Anniversary, Bread, Summer /by LauraEvery year I love to make a special meal for the occasion, and this year was no different. This year’s dinner featured the beautiful summer produce that I found at our farmers’ markets. All of the dishes were fresh and summery.
We started with whole-wheat dinner rolls seasoned with fresh dill. I tied them into a knot (since we tied the knot 16 years ago! 😉 ) I served them with corn and coconut soup garnished with a good bit of Dungeness crab. The rolls were a nice accompaniment to dip into the soup.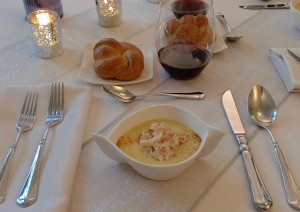 Whole-Wheat Dinner Rolls with Dill
Makes 6 dinner rolls
2 tablespoons warm water (about 80 degrees F.)
1/2 tablespoon dry active yeast
1 teaspoon granulated sugar
1/2 teaspoon kosher salt
2 tablespoons fresh dill, minced (measure after mincing)
1/2 teaspoon dill seed
1 tablespoon unsalted butter, melted
1 large egg
1/2 cup low-fat buttermilk
1 3/4 cups white whole-wheat flour
All-purpose flour for dusting work surface
Approximately 1 tablespoon beaten egg
Approximately 1/2 tablespoon coarse salt
Place a piece of parchment paper on a half sheet pan, and spray the parchment with cooking spray. Make sure you have enough room in your refrigerator for the sheet pan where the rolls will rest overnight.
In the bowl of a stand mixer with a dough hook attachment, add the water. Sprinkle the yeast over the water. Let stand until the yeast and water mixture looks creamy, about 5 minutes. Next, add the ingredients from the sugar through the whole-wheat flour to the bowl. Let the mixer knead the dough for about 10 minutes. The dough will be elastic and sticky.
Remove the dough from the bowl onto a clean work surface that is lightly dusted with all-purpose flour. Divide the dough into 6 equal pieces. Sprinkle a little extra all-purpose flour over the dough and on your hands if the dough sticks.
Form the rolls into your desired shape. To make knots like I did, roll one piece of dough between your hands until it is about 12 inches long. Tie the dough into a loose knot. Then take one loose end of dough and bring it up and over to the center of the knot. Take the other end of the dough, and gently pull it down and under to the center of the knot. The ends should be tucked underneath so no loose ends are visible. Gently press the sides of the knot so it is round. Place the roll on the prepared baking sheet. Repeat with the remaining 5 rolls. Take care to leave enough space between the rolls to allow them to rise without touching each other.
Spray the tops of the rolls with nonstick cooking spray and cover with plastic wrap. Let the rolls rest in the refrigerator overnight.
The next day, remove the rolls from the refrigerator. Let the dough rise in a warm place for about 90 minutes, or until close to doubled in size.
Preheat your oven to 350 F. Brush the rolls with the beaten egg, and sprinkle a little coarse salt on top. Bake for about 25 minutes, or until the rolls are golden brown and cooked through.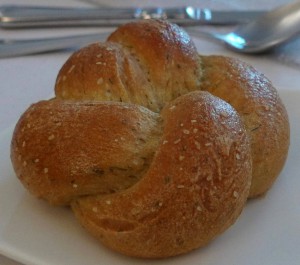
Savoring the end of summer ~ Corn Dog Muffins
/0 Comments/in Muffin, Snack, Summer /by LauraBefore August comes to a close, I wanted to share one more summery recipe. These little corn dog mini muffins were inspired by the fun food I see at festivals and carnivals. Dip these little muffins into ketchup for the full corn dog experience.
The sweet little summer printables on top of my muffins are from a blog called Glued To My Crafts. So adorable! They are free to print for personal use, so maybe you can incorporate them into your end-of-summer celebrations. 🙂
Corn Dog Muffins
1 cup all-purpose flour
1 cup finely ground cornmeal
1/4 cup granulated sugar
3/4 teaspoon baking soda
Pinch of salt
1 1/4 cup low-fat buttermilk
3 tablespoons light olive oil
1 large egg
3 vegetarian frankfurters cut into approximately 1/4-inch pieces (I used frankfurters from Field Roast)
Preheat your oven to 350 F. Line a mini muffin tin with paper liners. Spray the inside of the liners with cooking spray.
In a large bowl, whisk together the dry ingredients (from the flour to the salt.)
In a medium bowl, whisk together the wet ingredients (from the buttermilk to the egg.)
Add the wet ingredients to the dry, and whisk until just combined. Add the chopped frankfurters, and stir until they are coated in batter.
Fill the muffin liners about 3/4 of the way full.
Bake for about 13 minutes, or until the muffins spring back to the touch.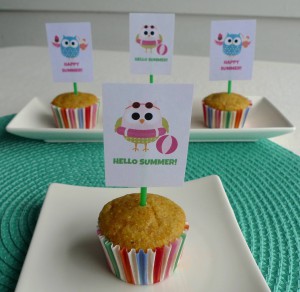
Seattle Anniversary ~ Cappuccino Panna Cotta
/0 Comments/in Anniversary, Dessert /by LauraI used the creamy gelatin dessert recipe I have used a few times this summer. It is made with whole milk and 2% Greek-style yogurt rather than the heavy cream that is traditional in panna cotta. Even without the cream, I think it is quite luscious. 🙂 I just added a little espresso powder to the original recipe to make this version coffee-flavored.
Cappuccino Panna Cotta
1 1/2 teaspoons plain powdered gelatin
2 teaspoons cold water
2 cups 2% Greek-style yogurt
1/2 teaspoon vanilla extract or vanilla bean paste
1 cup whole milk
1/3 cup granulated sugar
2 teaspoons espresso powder
In a small bowl, add the gelatin to the water and let it bloom. In a medium bowl, add the yogurt and vanilla. In a medium saucepan, bring the milk and sugar to a simmer, whisking to dissolve the sugar. Once the milk is simmering, remove from the heat, add the bloomed gelatin, and whisk to combine. Let the milk cool to room temperature. Pour the milk mixture into the bowl with the yogurt mixture and whisk until well combined.
Transfer 1/3 of the mixture to a container with a spout.
Add the espresso powder to the remaining mixture, and whisk until the powder is dissolved and well combined.
Transfer the mixture with the espresso into a second container with a spout.
Pour the espresso-flavored mixture into serving glasses, leaving a little room on top for a thin white layer. Let the first layer completely set in the refrigerator. Then top with the reserved white mixture to make the cappuccino’s “foam.” Let the dessert set completely in the refrigerator before serving.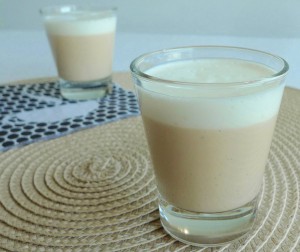
Summertime Sweets ~ Orange and Cream Gelatin Cups
/0 Comments/in Dessert, Summer /by LauraI used my red, white, and blue parfait recipe, but I just swapped the cherry juice for orange.
Orange and Cream Gelatin Cups
For the white layer:
1 1/2 teaspoons plain powdered gelatin
2 teaspoons cold water
2 cups 2% Greek-style yogurt
1/2 teaspoon vanilla extract or vanilla bean paste
1 cup whole milk
1/3 cup granulated sugar
For the orange layer:
3 teaspoons plain powdered gelatin
3 cups freshly squeezed orange juice, strained
Set aside 4 serving glasses.
For the white layer:
In a small bowl, add the gelatin to the water and let it bloom. In a medium bowl, add the yogurt and vanilla. In a medium saucepan, bring the milk and sugar to a simmer, whisking to dissolve the sugar. Once the milk is simmering, remove from the heat, add the bloomed gelatin, and whisk to combine. Let the milk cool to room temperature. Pour the milk mixture into the bowl with the yogurt mixture and whisk until well combined. Transfer the mixture to a container with a spout.
To get the diagonal look, prop your serving glasses at an angle in a muffin tin. Pour the white layer into the angled glasses. Keeping the glasses at an angle, refrigerate until the white layer is set.
For the orange layer:
In a medium bowl, sprinkle the gelatin over 1 cup of orange juice. Let the gelatin bloom. In a medium saucepan, bring the remaining 2 cups of orange juice to a boil. Once it is boiling, remove from the heat. Add the bowl with the gelatin to the hot juice and whisk well. Transfer the mixture to a container with a spout.
Once the white gelatin is completely set, set the glasses upright. Fill the serving glasses to the top with the orange gelatin. Chill until well set, preferably overnight.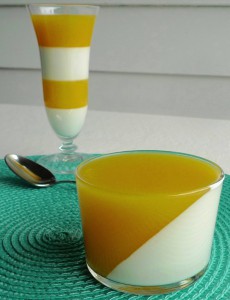
Fourth of July Sweets ~ Red, White, and Blue Parfaits
/2 Comments/in Bastille Day, Dessert, Fourth of July, Summer /by LauraThe little desserts did take a bit of time to make since I needed to wait for each layer to set before I could pour the next, but most of that time was not spent actively in the kitchen. I could kick back and read a Fourth of July mystery out on the deck while I waited. 🙂 But I think they were well worth the effort. Plus, they can be made a day or two ahead, which is an added bonus.
If you didn’t have time to cook all of the red, white, and blue dishes you wanted to make this weekend, this one would also be perfect for Bastille Day on the 14th!
Red, White, and Blue Parfaits
For the red layer:
3 teaspoons plain powdered gelatin
3 cups tart cherry juice (or really any natural red 100% fruit juice you like!)
For the white layer:
1 1/2 teaspoons plain powdered gelatin
2 teaspoons cold water
2 cups 2% Greek-style yogurt
1/2 teaspoon vanilla extract or vanilla bean paste
1 cup whole milk
1/3 cup granulated sugar
Set aside 4 serving glasses. I used two tall parfait glasses and two martini glasses. I think wine glasses would also be pretty.
For the red layer:
In a medium bowl, sprinkle the gelatin over 1 cup of cherry juice. Let the gelatin bloom. In a medium saucepan, bring the remaining 2 cups of cherry juice to a boil. Once it is boiling, remove from the heat. Add the bowl with the gelatin to the hot juice and whisk well. Transfer the mixture to a container with a spout.
Fill the serving glasses about 1/4 full with the cherry gelatin. Refrigerate the glasses until the red layer is set. (Mine took a couple of hours.) Set aside the remaining cherry gelatin and hold at room temperature.
For the white layer:
In a small bowl, add the gelatin to the water and let it bloom. In a medium bowl, add the yogurt and vanilla. In a medium saucepan, bring the milk and sugar to a simmer, whisking to dissolve the sugar. Once the milk is simmering, remove from the heat, add the bloomed gelatin, and whisk to combine. Let the milk cool to room temperature. Pour the milk mixture into the bowl with the yogurt mixture and whisk until well combined. Transfer the mixture to a container with a spout.
Pour the white gelatin onto the set layer of red gelatin so the height of the white layer is approximately the same as the red. (Make sure the gelatin layer below is truly set before pouring the next layer on top.) Refrigerate the glasses until the white layer is set. Set aside the remaining white gelatin and hold at room temperature.
Repeat the layers until you have two layers of red and two of white. Chill until well set, preferably overnight. Top with blueberries and a cherry in the middle right before serving.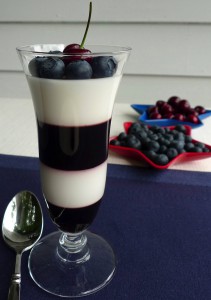
Happy Fourth of July! ~ Northwest Salmon Burgers
/0 Comments/in Dinner, Fourth of July, Lunch, Main dish, Seafood, Summer /by LauraI made Northwest salmon burgers for dinner tonight to celebrate the date. 🙂 They were summery, festive, delicious, and easy to make. I will definitely keep this recipe in my collection for future summer celebrations.
Northwest Salmon Burgers
Based on a recipe from The New York Times
1 ½ pounds wild-caught salmon
2 teaspoons Dijon mustard
2 medium shallots, chopped into approximately ¼ inch pieces
½ cup panko breadcrumbs
1 ½ tablespoons capers, drained and rinsed, roughly chopped
Salt to taste
Freshly ground black pepper to taste
High heat cooking oil, such as safflower
Remove the skin and the pin bones from the salmon, and chop into coarse pieces.
In the bowl of a food processor, process about ¼ of the salmon and the mustard until the combination forms a paste. Then add the remaining chunks of salmon and the shallots. Pulse the ingredients together in the food processor until the mixture comes together, but make sure it still has some texture. For best results, the chunks of salmon shouldn’t be bigger than ¼ inch, but they shouldn’t be a purée.
Transfer the salmon mixture to a large bowl. Stir in the breadcrumbs, capers, salt, and pepper until everything is well incorporated.
Form the mixture into approximately 6 patties and set aside on a plate.
Preheat a large nonstick skillet. When the skillet is hot, add a couple of tablespoons of oil. When the oil is hot and shimmering, add the salmon patties. Be careful not to crowd the pan. You may need to cook them in two batches. Cook the first side for about 2 or 3 minutes, or until golden. Flip, and cook on the second side until the burgers are cooked through. Take care not to overcook.
I served mine on rosemary rolls with a little butter lettuce and a dollop of lemon mayonnaise on top.
A Lowcountry Wedding ~ Pickled Shrimp
/0 Comments/in Appetizer, Seafood, Snack /by LauraInspired by the story, I made a Southern celebration dinner! I made three of the recipes included in the back of the novel. We had pickled shrimp as an appetizer, and a chicken and shrimp gumbo for the main course. I paired dinner with a cocktail called A Lowcountry Wedding, which combined sparkling wine with peach moonshine made by Firefly Distillery in South Carolina. All three recipes were quite delicious, but I think my favorite was the pickled shrimp. It is a light and easy appetizer that is perfect for summer entertaining. I’ll definitely keep this recipe on hand for future cocktail parties and celebrations.
Based on a recipe from A Lowcountry Wedding
1 1/2 quarts water
2 tablespoons Old Bay Seasoning
1 1/2 pounds large, wild-caught shrimp, peeled, deveined
4 tender inner stalks of celery, cut into thin 2-inch strips
1/2 medium sweet onion, such as Vidalia or Walla Walla, thinly sliced
2 ounces jarred sliced pimento, drained
1 1/2 tablespoons capers, drained and rinsed
2 tablespoons fresh dill, minced, plus a couple of sprigs for garnish
3/4 cup light olive oil
1/4 cup plus 2 tablespoons apple cider vinegar
1/4 teaspoon Dijon mustard
1/2 teaspoon kosher salt
1/8 teaspoon freshly ground black pepper
In a large pot, bring the water and the Old Bay to a boil. Stir in the shrimp, cover, and remove from the heat. Let the covered pot sit for about 5 minutes, or until the shrimp are cooked through. Drain the shrimp, but do not rinse.
In a large bowl, mix the shrimp, celery, onion, pimento, capers, and minced dill. In a separate bowl, whisk together the oil, vinegar, mustard, salt, and pepper. Pour the oil mixture over the shrimp mixture and toss to coat.
Cover and refrigerate overnight.
Before serving, drain the excess liquid and garnish with sprigs of dill.
A Culinary Trip to Vietnam ~ Banh Bot Bang
/0 Comments/in Dessert /by LauraI used a recipe from my favorite Vietnamese recipe website that I discovered a couple of years ago called Danang Cuisine. The texture of this dessert is really what makes it interesting – It is springy and chewy on the outside and dense and rich on the inside. Then the luscious coconut sauce raises the bar to make this quite a remarkable dessert!
Banh Bot Bang
Based on a recipe from DanangCuisine.com
For the balls:
½ cup peeled split mung beans, rinsed, soaked in water for at least 2 hours or overnight, drained
4 tablespoons plus 3 teaspoons granulated sugar
½ cup unsweetened canned coconut milk
1 ½ cups small tapioca pearls, soaked in water for about 30 minutes, drained
3 teaspoons cornstarch
For the sauce:
½ cup unsweetened canned coconut milk
1 teaspoon cornstarch
2 tablespoons granulated sugar
Pinch of salt
2 pandan leaves (optional)
For the balls:
In a small saucepan with a lid, add the mung beans and enough water to cover the beans. Cover the pot with the lid. Bring the beans to a low boil and cook until they are soft enough to smash with a spoon. Drain the excess water. Add the cooked mung beans, 4 tablespoons of sugar, and ½ cup coconut milk to a food processor. Process until smooth. Return the mixture to the saucepan. Over medium heat, stirring occasionally, cook down the mung bean mixture until it is the consistency of paste.
Scoop the paste out onto a plate and let cool.
When the mung bean paste is cool, roll it into small balls, each about 1 centimeter in diameter. Set aside while you make the outer tapioca portion of the dessert.
Preheat a large steamer pot or a bamboo steamer on medium heat. Cut a piece a parchment to cover the portion of the steamer that will come in contact with the food. Wrap the pot’s lid with a kitchen towel so the condensation from the steam doesn’t drip down into the pot.
Mix ½ cup of the tapioca pearls with 1 teaspoon of cornstarch and 1 teaspoon of granulated sugar. Microwave the mixture on high for about 20 seconds, or until it is a little sticky.
Lay a piece of plastic wrap on a clean work surface. Place a small amount (approximately 1 ½ tablespoons) of the sticky tapioca pearls to the center of the plastic wrap, and press down into a disc. Add one of the mung bean balls in the center of the disc. Using the plastic wrap to help, wrap the mung bean ball completely with the tapioca mixture. Then remove the plastic wrap.
Place the balls into the prepared steamer basket. Be sure they don’t touch, or they will stick together. Cover and steam for about 15 minutes. Remove the pot from the heat, but keep the lid in place. Let sit for another 10 minutes, or until the tapioca is translucent.
Repeat the process with the remaining ingredients, working in 2 more batches.
For the sauce:
In the meantime, make the coconut sauce. In a small saucepan, combine the coconut milk, cornstarch, sugar, and salt. Whisk well. Then add the pandan leaves to the pot. Bring the mixture to a boil, and cook for 30 seconds. Remove from the heat, and let the mixture cool to room temperature. Remove the pandan leaves.
Serve the tapioca balls with the sauce.
National Wine Day ~ Chocolate Cabernet Cupcakes
/0 Comments/in Cupcake, Dessert /by LauraThese little cupcakes have a good amount of wine in the batter, and the wine pairs well with the cocoa powder and chocolate chips. The cabernet flavor is prominent when they are warm, but subtler when they cool. They are perfect for an evening snack, paired with a glass of cabernet of course. 😉
Chocolate Cabernet Cupcakes
Makes 6
¼ cup + 2 tablespoons cabernet sauvignon (I used 14 Hands)
2 tablespoons light olive oil
2 tablespoons skim milk
2 tablespoons packed brown sugar
3 tablespoons granulated sugar
½ teaspoon vanilla
1 egg
½ cup ivory whole-wheat flour
¼ cup cocoa powder
¼ teaspoon baking powder
¼ teaspoon baking soda
Pinch of salt
¼ cup mini chocolate chips
Preheat oven to 350 F.
Line a muffin tin with 6 paper liners.
In a medium bowl, whisk together the first seven ingredients (through the egg) until well combined. In a second medium bowl, whisk together the remaining dry ingredients (minus the chocolate chips) until well combined. Then add the chocolate chips to the dry ingredients, and toss until coated in the floury mixture. Merge the ingredients from both bowls, and whisk until just combined, being careful not to over mix.
Fill the muffin liners evenly with the batter. Bake for about 18 minutes, or until a toothpick inserted in one of the cupcakes comes out clean.
Cheers!
The sweet little chalkboard wine decorations are from Yesterday on Tuesday. The set was actually created for Valentine’s Day, but I thought they were perfect for my cupcakes. I think the designs are so adorable I might use them again in February!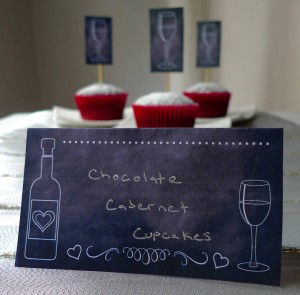
Kentucky Derby Day Treats ~ Horseshoe Sugar Cookies with Mint Julep Glaze
/0 Comments/in Cookie, Derby Day, Dessert /by LauraI used my whole-wheat sugar cookie dough as the base, cut the dough into horseshoe shapes, and then topped them with a sugary glaze made with mint and bourbon. Yum!
Horseshoe Sugar Cookies with Mint Julep Glaze
For the cookies:
2 cups whole-wheat pastry flour
Pinch of salt
1/2 cup unsalted room temperature butter
1/2 cup granulated sugar
1 teaspoon vanilla extract
2 eggs
For the glaze:
1/4 cup powdered sugar
3 drops mint extract
1/2 teaspoon water, or more for a thinner consistency
1 teaspoon bourbon
For the cookies:
In a large bowl, whisk together the flour and salt. In a second large bowl, beat the butter and sugar with an electric mixer until light and fluffy. Add the vanilla. Beat in the eggs, one at a time. Add the flour mixture, and beat until just combined. You may need to hand mix the last bit if the dough becomes too thick for the mixer.
Wrap the dough in plastic wrap and refrigerate for at least an hour.
Preheat oven to 350 F.
Prepare a baking sheet with parchment paper.
On a floured work surface, roll the dough until it is slightly thicker than 1/8 inch. Cut into desired shapes with a cookie cutter.
Place the cookies on the prepared baking sheet.
Bake for about 7 minutes, or until slightly firm, rotating the pan halfway through. Cool the cookies completely on a wire rack.
For the glaze:
In a small bowl, whisk all of the ingredients very well until silky smooth. Add more water if you would like a thinner glaze. With an offset spatula, apply the glaze to the cookies.
Let dry before serving.
Kentucky Derby Day ~ Printable Party Decorations
/0 Comments/in Derby Day /by LauraCheers!
Cinco de Mayo Celebration ~ Homemade Corn Tortillas
/0 Comments/in Cinco de Mayo /by LauraOh, right, I got a little distracted…back to the kitchen! 😉 This year I decided to make homemade corn tortillas for baked fish tacos. There is really nothing like fresh tortillas, and they aren’t very difficult to make. I think they are well worth the effort since I’ve never had a premade tortilla that even comes close to the flavor and texture of homemade. I hope you’ll give it a try!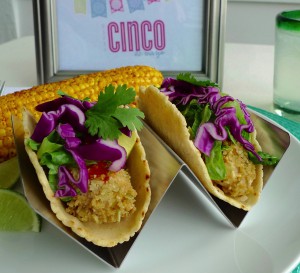 Homemade Corn Tortillas
Based on a recipe from the New York Times
1 1/2 cups masa harina
1/4 teaspoon kosher salt
2 tablespoons high heat cooking oil, such as safflower
1 cup hot water
Stir the masa and salt in a medium bowl, and then stir in the oil until incorporated. Slowly stream the water into the masa mixture while continuing to stir. Bring the dough together with your hands until it is in the shape of a ball. Knead the dough in the bowl for a couple of minutes until it is smooth and cohesive. Cover the bowl in plastic wrap and let the dough rest for at least 30 minutes at room temperature.
Cut a gallon-sized zip lock bag up both sides, so it is one long piece of plastic with the zip portion on the top and bottom. Lay the plastic on a tortilla press so the seam is where the press folds down. (It will cover the top and bottom of the press so nothing sticks.)
Preheat a large skillet over high heat.
Break off small pieces of dough and roll until they are approximately the size and shape of golf balls. Place each ball in the tortilla press covered in the plastic bag, and press until flat.
Cook the tortillas in the skillet (without added oil) until they have small brown spots. Flip and cook the other side in the same way.
Wrap the tortillas in a kitchen towel to keep them warm. They are best served immediately, but they will keep in the refrigerator for a couple of days in a sealed container.
The cute little Cinco de Mayo sign is from Squareview Studios. It was the perfect added touch to dress up our fiesta!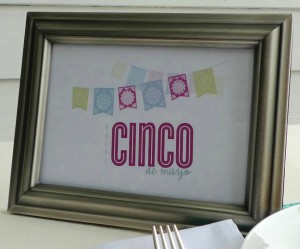
A Fresh New Color ~ White Pepper Crème Brûlée
/0 Comments/in Dessert /by LauraTo celebrate the new look, I baked a dessert! I made a unique and delicious flavor of crème brûlée by adding a little white pepper to the custard. The pepper is very subtle. It shows up as an understated flavor at the end of a bite, and after a couple of bites, you start to sense a peppery heat on your tongue. It is unexpected but delightful!
A crème brûlée recipe from Bon Appétit magazine inspired me, but I used my lighter recipe as the base.
White Pepper Crème Brûlée
Serves 2
8 ounces 2% milk
3 tablespoons granulated sugar, plus about 2 tablespoons for the top
3 egg yolks
1/2 teaspoon ground white pepper
1/2 teaspoon vanilla extract
Preheat your oven to 325 F.
Whisk together the milk and 3 tablespoons of sugar in a saucepan with a heavy bottom. Heat until the sugar is dissolved, taking care not to bring the mixture to a boil. Remove the pan from the heat and pour the mixture into a large bowl over ice. Cool down until lukewarm. Then whisk in the egg yolks, pepper, and vanilla extract.
Strain the mixture into a container with a spout. Pour the custard into 2 4-ounce ramekins or 4 2-ounce ramekins. Place the ramekins in a baking dish. Heat some water until almost boiling, and pour the water carefully around the ramekins until it reaches about halfway up the sides. (Make sure none of the water gets into the custard.)
Bake for about 38 minutes for the smaller ramekins, or 45 minutes for the larger ramekins, or until set. They should still have a slight jiggle in the middle when tapped.
Cool in the refrigerator at least 2 hours before serving, or overnight.
Right before serving, dust a little sugar evenly over the top of the custards so they are covered. Caramelize the sugar with a kitchen torch.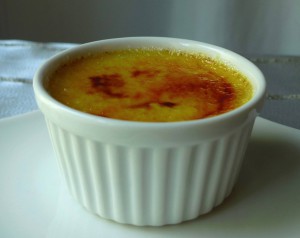
It’s April Fool’s Day! ~ Meatloaf Cake
/0 Comments/in April Fool's Day, Dinner, Main dish, Other poultry /by LauraI hope April is the start of a spring filled with good things!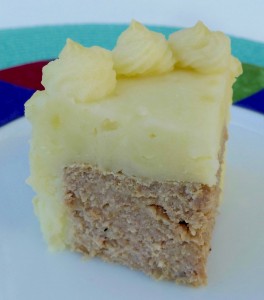
Easter Brunch Addition ~ Quail Scotch Eggs with Smoked Halibut Mashed Potatoes
/0 Comments/in Appetizer, Easter, Seafood, Side dish /by LauraInspired by a recipe from BBC Good Food
1 large russet potato
Skim milk, to taste
Smoked halibut, to taste
Salt and pepper, to taste
10 quail eggs
1 cup (approximately) all-purpose flour
2 beaten eggs
1 cup (approximately) panko
Peel and coarsely chop the potato. Add to a medium saucepan. Fill the pan with cold water so the potatoes are covered. Bring the water to a boil. Cook the potatoes until they are tender. Drain the water. Mash the potatoes, adding the milk a little at a time to thin them out into a thick and creamy texture that will hold up around the eggs. Flake the smoked fish with your fingers and add it to the potatoes. Mix well. Season the potatoes with salt and pepper.
In the meantime, fill a medium saucepan with water, and bring to a boil. Once boiling, adjust the heat so the water stays at a gentle boil. Add the quail eggs. Cook for 3 minutes. Remove the eggs immediately after 3 minutes and run under cold water to stop the cooking. Carefully remove the shells.
Gently press and shape a couple of tablespoons of the fish and potato mixture around each egg. The result should be in the shape of an egg.
Preheat oven to 475 F. Line a sheet pan with parchment paper.
Add the flour, beaten eggs, and panko to three separate shallow bowls.
Roll the potato-covered eggs in the flour, making sure they are completely coated. Gently knock off the excess flour. Then roll the eggs into the beaten egg until they are fully coated. Let the excess beaten egg drip off. Finally, roll the eggs in the panko. Press gently to make sure the crumbs stick.
Lay the panko-covered eggs slightly apart on the prepared baking sheet. Spray the tops of the eggs lightly with cooking spray to help them brown. Bake until lightly golden brown, about 20 minutes. Serve immediately.
PS. I made mine with smoked halibut, but I think hot smoked salmon would also be delicious.
PPS. Here’s sending you one final happy Easter wish!!