 These festive little cookie cups will make a perfect dessert for your Christmas meal. I think Santa might like them too! 😉
 I made a simple whole-wheat sugar cookie dough for the cups and handles. They have a lot less sugar and butter than many recipes to keep them a little lighter. Then I filled the cute little cups with my favorite chocolate mint pudding that is a regular at our house.
If you are looking for a fun way to spend a few hours in the kitchen, I think you’ll enjoy these. (Or if your holiday schedule is already full, make them next month. 🙂 I think hot cocoa is just as fitting in January as it is in December! Why should December get all the fun cookies? 😉 ) Either way, I hope you’ll enjoy giving these a try.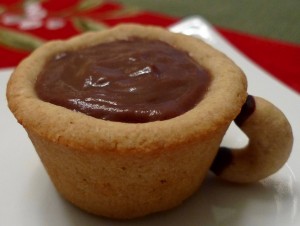 Peppermint Hot Cocoa Cookie Cups
Cookies:
2 cups whole-wheat pastry flour
Pinch of salt
1/2 cup unsalted room temperature butter
1/2 cup granulated sugar
1 teaspoon vanilla extract
2 eggs
Approximately 1/8 cup milk, dark, or white chocolate (to attach the cup handles)
Pudding:
2/3 cup granulated sugar
1/4 cup cornstarch
Pinch of salt
1/3 cup unsweetened cocoa powder
2 1/2 cups skim milk
2 egg yolks
1 teaspoon vanilla extract
1/2 teaspoon peppermint (or mint) extract
To make the cookies:
In a large bowl, whisk together the flour and salt. In a second large bowl, beat the butter and sugar with an electric mixer until light and fluffy. Add the vanilla. Beat in the eggs, one at a time. Add the flour mixture, and beat until just combined. You may need to hand mix the last bit if the dough becomes too thick for the mixer.
Wrap the dough in plastic wrap and refrigerate for at least an hour.
Preheat oven to 350 F.
Prepare a mini muffin pan by greasing it very well. Prepare a baking sheet with parchment paper.
Reserve about 1/4 cup of the dough for the cup handles.
With the remaining dough, roll approximately 1-inch balls between your hands, and place them in the prepared muffin tin. Push the center of each ball until it squishes up the side of each hole. Make sure to press the sides and bottom firmly so there are no gaps in between the dough and the pan, and make sure the top is neat. The sides and top will be visible in the final product.
With the reserved dough, roll small pieces into thin lines, and fashion them into tiny cup handles. Place the handles on the prepared baking sheet.
Bake the cups for about 15 minutes, or until firm, rotating the pan halfway though. Let cool for a couple of minutes before removing the cookies from the pan. Bake the handles for about 7 minutes, or until firm, rotating the pan halfway through. Cool the cups and handles completely on a wire rack.
To attach the cup handles:
Over a double boiler, melt the chocolate. Place all of your cups on their sides in the cleaned mini muffin pan to prop them up. The side of each cup should be facing up. Dip the edges of the cup handles in the chocolate, and gently place on the side of the cups. Let stand to dry for at least an hour.
To make the pudding:
Begin by placing a fine mesh strainer over a medium bowl. Set aside.
Off the heat, in a medium saucepan, whisk the sugar, cornstarch, salt, and cocoa powder. Turn the heat onto medium high. Gradually add the milk, whisking well to dissolve the cornstarch. Add the egg yolks, and whisk until incorporated.
Continue to whisk occasionally, until big bubbles begin to form. At that point, reduce the heat to low. Cook one more minute, whisking constantly. The consistency should be creamy and thick.
Remove the pudding from the heat and pour it through the strainer into the bowl. Add the vanilla and mint to the hot pudding, and whisk until well incorporated.
Cover the pudding directly on the surface with plastic wrap. Refrigerate for at least three hours. Before serving, whisk it one more time to make sure the consistency is smooth.
To assemble:
Place the pudding into a piping bag to neatly fill the hot cocoa cups. Use the back of a small spoon to smooth the top.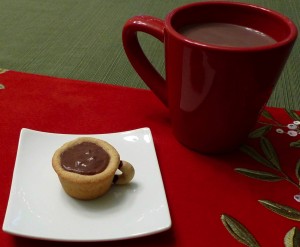
Easter Brunch ~ Crab Scotch Eggs
/1 Comment/in Breakfast/Brunch, Easter, Seafood /by LauraThis year I made a couple different Scotch egg recipes to get into the spirit of the holiday. 🙂 A traditional Scotch egg is a boiled egg surrounded by pork sausage, breaded, and deep-fried. To make a lighter and more Pacific Northwestern version that also felt like a dish worthy of Easter Sunday, I made crab Scotch eggs. 🙂 Yum! My favorite crab cake recipe transformed (and got a little British!) to make this special dish. I made my Scotch eggs hard-boiled, but I’m sure the molten center of a soft-boiled egg would also be lovely.
Crab Scotch Eggs
6 large eggs
For the crab cake mixture:
1 pound cooked and shelled Dungeness crab meat
1/4 cup finely diced celery
2 tablespoons minced fresh chives
2 tablespoons mayonnaise
1 large egg
2 teaspoons Dijon mustard
1/4 teaspoon hot sauce
1/4 cup panko
For the coating:
1 cup (approximately) all-purpose flour
2 beaten eggs
1 cup (approximately) panko
Preheat your oven to 475 F. Line a sheet pan with parchment paper.
Gently place the eggs in a medium saucepan and cover with cold water. Heat the pan over high heat. Once the water starts to boil, cook the eggs for 5 minutes. (Turn the heat down accordingly so the eggs don’t bounce around too much in the boiling water, but make sure the water continues to boil gently.) Remove the eggs immediately after 5 minutes and submerge in an ice water bath to stop the cooking. Peel the eggs. Set aside.
For the crab cake mixture:
Make sure your crab doesn’t have any hidden bits of shell mixed in before you begin. In a large bowl, mix the celery, chives, mayonnaise, egg, mustard, and hot sauce with a fork. Then add the crab and panko. Stir gently until everything is well blended.
Shape and gently press the crab mixture around the boiled eggs until they are completely encased.
For the coating:
Add the flour, beaten eggs, and panko to three separate shallow bowls.
Once the boiled eggs are coated in the crab cake mixture, roll them in the flour, making sure they are completely coated. Gently knock off the excess flour. Then roll the eggs into the beaten egg until they are fully coated. Let the excess beaten egg drip off. Finally, roll the eggs in the panko. Press gently to make sure the crumbs stick.
Lay the panko-covered eggs slightly apart on the prepared baking sheet. Bake until lightly golden brown, about 25 minutes. Serve immediately.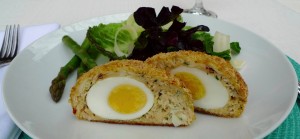
Happy Easter! ~ Bird’s Nest Sugar Cookies
/0 Comments/in Cookie, Dessert, Easter /by LauraBird’s Nest Sugar Cookies
2 cups whole-wheat pastry flour
Pinch of salt
1/2 cup unsalted room temperature butter
1/2 cup granulated sugar
1 teaspoon vanilla extract
2 eggs
Unsweetened shredded coconut (approximately 1 1/2 cups)
White chocolate (approximately 1/4 cup to attach the jelly beans)
Jelly beans (approximately 1 cup) (I used the naturally flavored and colored beans from Trader Joe’s)
In a large bowl, whisk together the flour and salt. In a second large bowl, beat the butter and sugar with an electric mixer until light and fluffy. Add the vanilla. Beat in the eggs, one at a time. Add the flour mixture, and beat until just combined. You may need to hand mix the last bit if the dough becomes too thick for the mixer.
Wrap the dough in plastic wrap and refrigerate for at least an hour.
Preheat oven to 350 F.
Prepare a baking sheet with parchment paper.
Roll the dough into approximately 1-inch balls between your hands. Flatten the balls slightly and form a small well in the center of each so they are the shape of nests. Roll each cookie into the coconut, gently pressing the coconut into the dough to make sure it sticks. Place the cookies on the prepared baking sheet.
Bake for about 12 minutes, or until slightly firm, rotating the pan halfway through. Cool the cookies completely on a wire rack.
In a double boiler, melt the white chocolate. Spoon a small amount of the melted chocolate into the middle of each cooled cookie, and attach three jelly beans to the chocolate. Allow to set completely before serving.
I hope you all have a lovely Easter Sunday!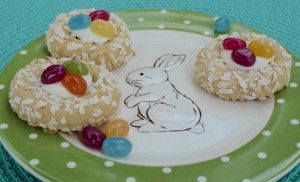
Happy St. Patrick’s Day! ~ Homemade Irish Cream
/0 Comments/in Cocktail/Drink, St. Patrick's Day /by LauraI filled tiny liquor bottles with the Irish cream and pasted festive little St. Patrick’s Day labels on the front. The free (and super cute!) artwork can be found at the website How to Nest for Less.
Homemade Irish Cream
1 can (approximately 14 ounces) full-fat coconut milk
1 teaspoon cocoa powder
1/2 teaspoon espresso powder
1/2 teaspoon vanilla extract
1/4 cup + 2 tablespoons Irish whiskey (or more if you’d like it a little boozier)
2 tablespoons maple syrup (or more if you’d like it a little sweeter)
In a blender, add all of the ingredients. Blend until the cocoa and espresso are dissolved and everything is combined, about 15 seconds. Chill before serving. After it is chilled, it will separate a little, so pour into glasses through a strainer to ensure an even consistency.
Sláinte!
The Oscars ~ Steak Oscar Canapés
/0 Comments/in Academy Awards, Appetizer, Beef, Seafood /by LauraHigh heat cooking oil, such as safflower
1 small shallot, minced
Salt, to taste
Freshly ground black pepper, to taste
1/2 cup reduced fat sour cream
1 tablespoon Dijon mustard
1/2 tablespoon champagne vinegar or white wine vinegar
1 1/2 tablespoons fresh tarragon, minced
4 slices artisan bread, crusts removed (I used The Essential Baking Company’s sliced Columbia)
Extra virgin olive oil, to taste
6 ounces beef tenderloin
1 bunch asparagus
2 ounces fresh lump Dungeness crab meat
To begin, make the Béarnaise sour cream sauce. Heat a small pan with a lid over medium heat. Add the high heat cooking oil and the shallot. Season with salt and pepper. Sweat the shallots with the lid on, stirring occasionally, until they are softened but not caramelized. Let cool.
In the meantime, mix together the sour cream, mustard, vinegar, and tarragon in a small bowl. When the shallots are cool, mix them into the sour cream mixture. Season to taste. Set aside.
Preheat oven to 350 F.
Cut the bread into small rectangles. Place the rectangles on a baking sheet lined with parchment paper. Drizzle the bread with a little olive oil and sprinkle with salt. Bake until warm and slightly crisp on the outside, about 5 minutes.
In the meantime, preheat a small skillet over high heat. Season steak on both sides with salt and pepper. Add high heat cooking oil to the hot pan, and when the oil is hot and shimmering, add the steak. Sear on both sides, until caramelized and cooked to your liking. Once cooked, set aside on a cutting board, tented with foil, and let rest for at least 5 minutes. Cut against the grain into thin slices.
In a medium skillet with a lid, add the asparagus and a splash of water. Season with salt and pepper. Steam with the lid on until the asparagus is tender crisp. Cut off the tips, and reserve the remaining asparagus as a side dish for another night.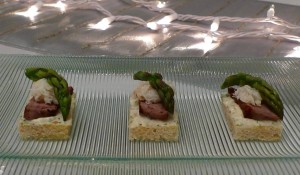 To assemble:
Spread a small amount of the Béarnaise sour cream sauce on each piece of toasted bread. Top with a small slice of beef, a tiny mound of crab, and the tip of an asparagus spear.
Serve immediately.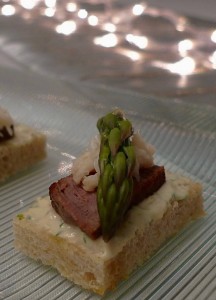
It’s National Margarita Day! ~ Kumquat Margarita
/0 Comments/in Cocktail/Drink, Margarita Day /by LauraI had some kumquats left over in my refrigerator, and I thought this was a perfect use for them. If life gives you kumquats, make margaritas! 😉
Kumquat Margarita
Makes 1 drink
8 kumquats
1/2 ounce lime juice
1 1/2 ounces silver tequila
1/2 ounce orange liqueur
1/4 ounce agave nectar (or more if you would like it a tad sweeter)
Slice the kumquats and remove the seeds. Run one kumquat over the rim of a glass and dip the glass in kosher salt so the rim is evenly salted. Place all of the kumquats into a cocktail shaker and muddle them until their juice is released. Add the remaining ingredients and crushed ice. Shake until cold. Strain into the salt rimmed glass. Serve with more crushed ice.
Cheers!
Valentine’s Day Dinner ~ Seared Duck Breast with Blood Orange Sauce
/0 Comments/in Dinner, Main dish, Other poultry, Valentine's Day /by LauraI ended up with kumquats, blood oranges, Buddha’s hand, and a pomelo. This was my first time playing with Buddha’s hand, which was quite a discovery! I would highly recommend picking one up if you see it at the market. The scent is lovely, and the taste is distinctly different than any other citrus I have tried before. I really enjoyed exploring what I could do with the fruit. A culinary adventure! 🙂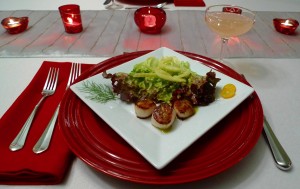 We began our dinner with scallops and fennel salad, all dressed in a tarragon and kumquat vinaigrette. The main course was seared duck breast with a blood orange sauce. Then for dessert we had Buddha’s hand cheesecake with candied Buddha’s hand on top. It was all paired with a sparkling wine pomelo cocktail and a delicious red wine from Orange Coast Winery.
I think our favorite dish of the night was the duck. The recipe was based on a duck bigarade recipe, which is a dish traditionally made with Seville oranges. I used blood oranges that were a little tart since I thought the blood orange color was perfect for Valentine’s Day! Seared Duck Breast with Blood Orange Sauce
Based on a recipe from Epicurious.com
Serves 2
2 duck breasts
Salt, to taste
1 tablespoon all-purpose flour
1 cup low-sodium chicken stock
1/2 cup freshly squeezed blood orange juice
1 tablespoon orange liqueur
1 tablespoon sherry vinegar
Freshly ground black pepper, to taste
Zest of 1/2 blood orange, for garnish
Flesh of 1-2 blood oranges, for garnish
Salt the duck breasts generously on both sides, and allow them to sit at room temperature for about 15 minutes.
Preheat a large skillet over medium high heat. Pat the duck dry with a paper towel. Once the pan is hot, place the duck breasts into the pan, skin side down. Sear about 6 minutes on the skin side, and about 4 minutes on the flesh side, or until golden on the outside and still a little pink (medium) on the inside. (Of course, if you like your red meat cooked more, by all means cook it a little longer.) When the duck is cooked to your liking, set it aside on a cutting board. Tent with foil.
While the duck rests, discard all but 2 tablespoons of the duck fat in the pan. Turn the pan onto medium heat. Add the flour to the hot fat, and whisk until well combined. Cook until it is the color of a café au lait.
Slowly whisk in the stock, orange juice, orange liqueur, and vinegar. Pour any juices that may have accumulated around the duck into the sauce. Boil the sauce until thickened to the consistency of gravy. Salt and pepper to taste. Optional: Strain the sauce through a fine mesh strainer for a smoother consistency.
Remove the fat from the duck breast. Thinly slice the meat, and serve with the sauce, orange zest and orange slices.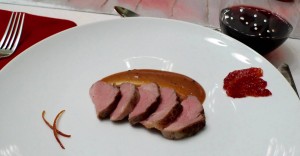
To Top Off Valentine’s Day ~ Chocolate Frosting
/0 Comments/in Cupcake, Dessert, Valentine's Day /by Laura1/2 cup cocoa powder
1/2 teaspoon vanilla extract
1/4 cup confectioner’s sugar (or more if you would like it sweeter)
4 tablespoons skim milk
Whisk all of the ingredients together until smooth. (That’s it!)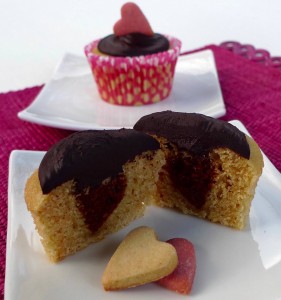 I used a few of my tiny heart-shaped sugar cookies to top these cupcakes. I made sure to place them along the middle so I knew where to cut the cupcakes to reveal the heart inside.
One More Valentine Sweet! ~ Hidden Heart Cupcakes
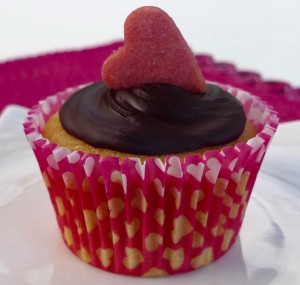
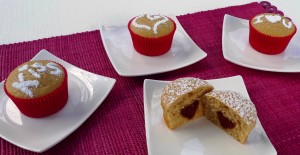
/0 Comments/in Cupcake, Dessert, Valentine's Day /by LauraI made mine with a beet whole-wheat red velvet cake in the middle and a simple whole-wheat yellow cake for the outside. The yellow cake was from a recipe I made before, but the red velvet cake was new for me. I think the red velvet would also be delicious on its own, so you might see more red velvet cakes in the future! Hidden Heart Cupcakes
Red Velvet Cake:
3/4 cup packed beet pulp
1/4 cup light olive oil
3/4 cup granulated sugar
1 large egg
1/2 cup skim milk
1 teaspoon vanilla extract
1 cup whole-wheat pastry flour
Pinch of salt
1 1/2 tablespoons cocoa powder
1 1/2 teaspoons baking powder
Yellow Cake:
1 1/2 cups whole-wheat pastry flour
1 1/2 teaspoons baking powder
Pinch of salt
1/2 cup light olive oil
3/4 cup granulated sugar
2 large eggs
1/2 cup + 2 tablespoons skim milk
1 teaspoon vanilla extract
For the red velvet cake:
Preheat oven to 350 F.
Spray a 9-inch cake pan with oil. Line the bottom with parchment paper. Set aside.
Steam the beet pulp until it is tender. Purée in a food processor. When the beets are puréed, add the oil and sugar, and process until smooth. Add the egg, and process until incorporated. Then add the milk and vanilla, and process until smooth.
In a large bowl, add the flour, salt, cocoa powder, and baking powder. Whisk until well combined. Then add the beet mixture to the dry ingredients, and mix until just combined.
Fill the prepared cake tin, and bake for about 27 minutes, or until a toothpick inserted in the center comes out clean.
Let cool.
Once the cake is cool, invert it onto a cutting board. With a small heart-shaped cookie cutter (approximately 1-inch high), punch hearts out of the cake. Squeeze the cake in the cookie cutter with your fingers so it is compact. Gently work the cake hearts out of the cookie cutters and set aside. The hearts can be made a day ahead and kept in the refrigerator.
For the yellow cake:
Preheat your oven to 350 F.
Line a standard-sized muffin tin with 12 baking liners.
In a small bowl, whisk together the flour, baking powder, and salt.
In a large bowl, whisk together the oil and sugar. Add the eggs, one at a time, and whisk until well incorporated. Add half of the dry ingredients, and whisk until combined. Then add the milk and vanilla, and whisk until combined. Finally, add the remaining dry ingredients, and whisk until just combined. Be careful not to overmix.
To assemble:
Scoop about 2 tablespoons of the yellow cake batter into the bottom of each lined muffin cup. Bake for about 5 minutes, until slightly set, but not completely baked. Place a heart, tip side down, into each muffin cup. The semi-baked batter should hold it upright. Fill the cups with the remaining batter until they are about 4/5 full. The top of the heart will still be visible.
Bake for about 17 minutes, or until a toothpick inserted in the middle of the yellow cake comes out clean. Decorate with powdered sugar or chocolate frosting. (Recipe for the frosting to follow!) For this batch I used my set of Valentine cupcake stencils for the top. A simple dusting of powdered sugar was all they needed. I made sure to keep all of my cakes in alignment and dusted the designs in the same direction so I knew which way to cut into the cakes to reveal the heart.
Valentine Sweets ~ Double Heart Cookies
/2 Comments/in Cookie, Dessert, Valentine's Day /by Laura2 raw beets
Approximately 1/4 cup cinnamon hard candies (if you would like to make some of the stained glass window cookies…otherwise, omit)
2 cups whole-wheat pastry flour
Pinch of salt
1/2 cup unsalted room temperature butter
1/2 cup granulated sugar
1 teaspoon vanilla extract
2 eggs
To make the beet juice to dye the pink cookies, start by putting on latex gloves if you have them. Peel the beets with a vegetable peeler. Grate the beets on a grater or with a grater attachment of a food processor. With cheesecloth or a thin kitchen towel you don’t care about, squeeze out as much juice as you can. (Reserve the pulp for the red velvet cake recipe to follow!)
To prepare the candy for the stained glass cookies, place the hard candy in a plastic zip lock bag. With a meat mallet, smash the candy into fine pieces.
In a large bowl, whisk together the flour and salt. In a second large bowl, beat the butter and sugar with an electric mixer until light and fluffy. Add the vanilla. Beat in the eggs, one at a time. Add the flour mixture, and beat until just combined. You may need to hand mix the last bit if the dough becomes too thick for the mixer.
Divide the dough in half. Into one half of the dough, add as much of the beet juice as you like for the color you desire. (Keep in mind, the color fades slightly when baked.) Thoroughly knead the juice into the dough for an even color.
Wrap the two pieces of dough separately in plastic wrap and refrigerate for at least an hour or overnight.
Preheat oven to 350 F.
On a lightly floured surface, roll out the two pieces of dough until they are between about 1/8 to 1/4 inch thick.
Cut out the dough with a large heart-shaped cookie cutter. In the middle of each large heart use a smaller heart-shaped cookie cutter to cut out a smaller heart in the center. Reserve the smaller hearts.
Transfer the larger hearts to a cookie sheet.
For the stained glass window cookies, fill the center of each large heart with an even layer of the crushed candy. The candy will bubble up slightly when baked, so don’t fill the cookies to the top.
For the remaining cookies, fill the hole with the smaller hearts in the opposite colored dough.
Bake for approximately 7 minutes, turning the pan once, until the cookies are cooked through and the candy is melted.
Happy New Year ~ Cucumber Cups with Crudités and Dip
/0 Comments/in Appetizer, New Year, Snack /by LauraIn addition to the beef Wellington canapés, I also made these cute little cucumber cups yesterday. This is a way to dress up plain vegetables so they are ready for a party! 🙂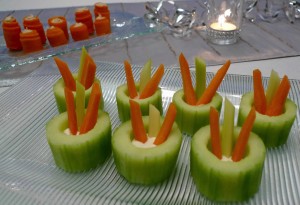 Cucumber Cups with Crudités and Dip
2 large English cucumbers, peeled and cut into 1-inch rounds
Bottled ranch dressing (or any dip of your choice)
2 medium carrots, peeled and cut into thin sticks
2 medium celery stalks, cut into thin sticks
With a small melon baller, scoop out most of the seeds from the cucumbers. Make sure not to scoop all the way to the bottom so the dressing can be contained in the cup.
Add about a ½ teaspoon of dressing to the bottom of each cup. It won’t look like a lot, but when the carrots and celery are added, the dressing will rise up the sides a little.
Add as many of the carrots and celery sticks as you like to each cup.
PS. The appetizer in the background was another fun way to dress up carrots for the party. 🙂 I simply peeled a large carrot lengthwise so I ended up with long strips. Then I piped a small bit of store-bought hummus along each strip and rolled them up. The hummus acted as the glue. The finishing touch was a little more hummus piped inside the middle, and a thin round slice of carrot on the bottom as the base.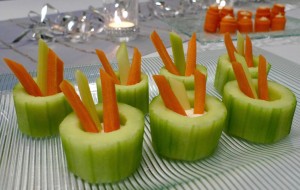
New Year’s Eve Party! ~ Beef Wellington Canapés
/1 Comment/in Appetizer, Beef, New Year, Snack /by Laura6 ounces crimini mushrooms
1 sprig thyme
1 splash dry white wine
1 sheet puff pastry, refrigerated
1 egg, beaten
4 ounces beef tenderloin
Approximately 5 pieces thinly sliced prosciutto
Salt and pepper, to taste
In a food processor, pulse the mushrooms until they are approximately the size of coarse breadcrumbs. In a medium sauté pan over medium heat, cook the mushrooms (without oil) with the sprig of thyme until the mushrooms are dry. Add a splash of white wine, and cook until the pan is dry once again. Remove the thyme. Season to taste with salt and pepper. Set aside.
Preheat oven to 400 F. Line a sheet pan with parchment paper. Roll out the puff pastry on a floured work surface until it is about double in height and width. With a pizza wheel or pasta roller, cut the pastry into small squares. Place the squares on the prepared sheet pan. Cover the pastry with another piece of parchment, and cover the sheet pan with another sheet pan so they are nesting. This will ensure that your puff pastry won’t puff too much. Bake for 8 minutes. Remove the top pan and top parchment paper. Let the pastry cool enough so you can handle it, and then lightly brush the beaten egg on each piece. Bake for 3 minutes more, or until shiny and golden.
Season the steak with salt and pepper. Sear until the meat is done to your liking. After it has rested for 5 minutes, slice as thinly as possible.
To assemble, scoop a small spoonful of the mushroom mixture on the top of each piece of puff pastry. Top with a thin slice of steak. Roll a small piece of prosciutto into a tiny tube, and place it on top of the steak. Serve immediately.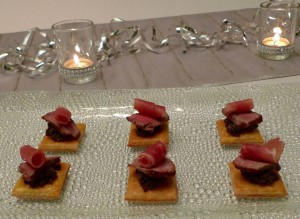
Happy Christmas! ~ Star-Topped Mince Pies
/0 Comments/in Christmas, Dessert, Winter /by LauraThese sweet little star-topped mince pies were the grand finale of my Christmas dinner this year. They were the perfect finish, and just the right size after a beef Wellington feast.
I used Nigella Lawson’s cranberry mincemeat recipe with a few small changes. I replaced the brown sugar with a diced apple and a little extra honey, I used two oranges rather than one, and I added a dash more of brandy, since it was Christmas after all! 😉
For the crust, I used store-bought pastry cups, but I also made my own pastry. I could have just used the ready made cups, but I really wanted to make stars for the top. 🙂 Then I had a lot of extra dough after making the stars, so I made some homemade shells, as well. They weren’t as fancy as the ones I bought, but I actually preferred the texture and taste. Using a food processor, the pastry is very easy to make…It literally only takes 5 minutes, so I figured I could fit that into my holiday schedule. 😉 This is the same short crust pastry dough I used for my meat pies this September, and it worked as beautifully for sweet as it did for savory. Star-Topped Mince Pies
Cranberry Mincemeat
Recipe based on Nigella Lawson’s cranberry studded mincemeat
¼ cup port
½ apple, peeled and diced
3 cups fresh or frozen cranberries
1 teaspoon ground cinnamon
1 teaspoon ground ginger
½ teaspoon ground cloves
½ cup currants
½ cup raisins
¼ cup dried cranberries
2 clementine oranges, zested and juiced
3 tablespoons brandy
3 drops almond extract
½ teaspoon vanilla extract
4 tablespoons honey
In a medium saucepan over medium heat, add the port, apple, fresh (or frozen) cranberries, and spices. Cook until the cranberries begin to bubble and pop. Then add the currants, raisins, dried cranberries, and the orange zest and juice. Bring the mixture to a simmer. Cook for about 20 minutes, until the fruit has absorbed most of the liquid. If you still have many whole cranberries, you can squish them with your spoon to help them incorporate into the mixture. Remove the pan from the heat. Then add the brandy, extracts, and honey. Stir until everything is well incorporated.
Let the mincemeat cool before using in your pies.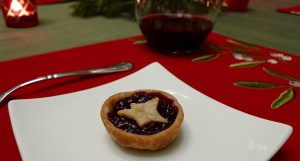 Whole-Wheat Short Crust Pastry
Based on a recipe from BBC
125 grams ivory whole-wheat flour
Pinch of salt
55 grams cold unsalted butter, cubed
Approximately 5 tablespoons ice water
With a food processor, pulse the flour, salt, and butter until the butter is the size of small peas. Gradually add the water until the mixture comes together. Add only enough water to combine everything. You may not need a full 5 tablespoons. Form the dough into a disc, and wrap in plastic wrap. Refrigerate at least 15 minutes before rolling it out. It also freezes well. Just take it out of the freezer and refrigerate the night before you will need it.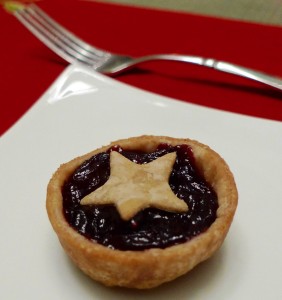 To assemble, grease a mini muffin pan very well, and set aside.
Preheat your oven to 425 F.
On a floured surface, roll out the pastry into a very thin sheet. Cut out circles for the crust and stars for the top. Carefully fill the muffin pan with the crusts, fill each crust with the cooled mincemeat, and top with a pastry star. Bake for about 10 minutes, or until the pastry is golden, and the bottom crusts are baked through. Let cool before serving.
Merry Christmas! ~ Peppermint Hot Cocoa Cookie Cups
/3 Comments/in Christmas, Cookie, Dessert, Winter /by LauraIf you are looking for a fun way to spend a few hours in the kitchen, I think you’ll enjoy these. (Or if your holiday schedule is already full, make them next month. 🙂 I think hot cocoa is just as fitting in January as it is in December! Why should December get all the fun cookies? 😉 ) Either way, I hope you’ll enjoy giving these a try. Peppermint Hot Cocoa Cookie Cups
Cookies:
2 cups whole-wheat pastry flour
Pinch of salt
1/2 cup unsalted room temperature butter
1/2 cup granulated sugar
1 teaspoon vanilla extract
2 eggs
Approximately 1/8 cup milk, dark, or white chocolate (to attach the cup handles)
Pudding:
2/3 cup granulated sugar
1/4 cup cornstarch
Pinch of salt
1/3 cup unsweetened cocoa powder
2 1/2 cups skim milk
2 egg yolks
1 teaspoon vanilla extract
1/2 teaspoon peppermint (or mint) extract
To make the cookies:
In a large bowl, whisk together the flour and salt. In a second large bowl, beat the butter and sugar with an electric mixer until light and fluffy. Add the vanilla. Beat in the eggs, one at a time. Add the flour mixture, and beat until just combined. You may need to hand mix the last bit if the dough becomes too thick for the mixer.
Wrap the dough in plastic wrap and refrigerate for at least an hour.
Preheat oven to 350 F.
Prepare a mini muffin pan by greasing it very well. Prepare a baking sheet with parchment paper.
Reserve about 1/4 cup of the dough for the cup handles.
With the remaining dough, roll approximately 1-inch balls between your hands, and place them in the prepared muffin tin. Push the center of each ball until it squishes up the side of each hole. Make sure to press the sides and bottom firmly so there are no gaps in between the dough and the pan, and make sure the top is neat. The sides and top will be visible in the final product.
With the reserved dough, roll small pieces into thin lines, and fashion them into tiny cup handles. Place the handles on the prepared baking sheet.
Bake the cups for about 15 minutes, or until firm, rotating the pan halfway though. Let cool for a couple of minutes before removing the cookies from the pan. Bake the handles for about 7 minutes, or until firm, rotating the pan halfway through. Cool the cups and handles completely on a wire rack.
To attach the cup handles:
Over a double boiler, melt the chocolate. Place all of your cups on their sides in the cleaned mini muffin pan to prop them up. The side of each cup should be facing up. Dip the edges of the cup handles in the chocolate, and gently place on the side of the cups. Let stand to dry for at least an hour.
To make the pudding:
Begin by placing a fine mesh strainer over a medium bowl. Set aside.
Off the heat, in a medium saucepan, whisk the sugar, cornstarch, salt, and cocoa powder. Turn the heat onto medium high. Gradually add the milk, whisking well to dissolve the cornstarch. Add the egg yolks, and whisk until incorporated.
Continue to whisk occasionally, until big bubbles begin to form. At that point, reduce the heat to low. Cook one more minute, whisking constantly. The consistency should be creamy and thick.
Remove the pudding from the heat and pour it through the strainer into the bowl. Add the vanilla and mint to the hot pudding, and whisk until well incorporated.
Cover the pudding directly on the surface with plastic wrap. Refrigerate for at least three hours. Before serving, whisk it one more time to make sure the consistency is smooth.
To assemble:
Place the pudding into a piping bag to neatly fill the hot cocoa cups. Use the back of a small spoon to smooth the top.
Healthy Holiday Hors d’Oeuvre ~ Cauliflower Flatbread
/0 Comments/in Appetizer, Snack, Thanksgiving /by LauraThis unique spin on flatbread can be used in any way traditional flatbread is served — with an olive tapenade, with melted cheese, or even with your favorite pizza toppings. I’d recommend it as an appetizer that is out of the ordinary to start off your Thanksgiving meal!
Cauliflower Flatbread
1 ounce Parmesan cheese, cut into approximately 1/2 inch pieces
1 large head of cauliflower, cut into approximately 1 inch pieces
3 eggs, lightly beaten
2 teaspoons dried oregano
Salt and pepper to taste
Preheat oven to 400 F. Line a rimmed baking sheet with parchment paper.
In a food processor, grate the cheese until it is the size of tiny pebbles. Transfer the cheese to a large bowl. In the same processor, (no need to clean the bowl), process the cauliflower in two batches until you have fine pieces that look a little like rice. Transfer the cauliflower to a clean dishtowel. Squeeze as much excess moisture as you can out of the cauliflower. Discard the liquid. Add the cauliflower to the bowl with the cheese. Then add the eggs, oregano, salt, and pepper to the bowl. Combine until all of the ingredients are well incorporated.
On the prepared baking sheet, spread the mixture into a thin layer, about 1/8 inch thick. Bake for about 45 minutes, turning the pan half way through, until the cauliflower is golden and crisp on the edges.
Cut with a pizza wheel and serve immediately.
One More November Holiday ~ Indian Pudding
/0 Comments/in Dessert, Thanksgiving /by LauraI based this recipe on one from Bon Appétit magazine. I cut the recipe in half to make only 4 servings. I used skim milk rather than whole, I reduced the sugar a little, and I added more spices and seasoning.
Indian Pudding
Based on a recipe from Bon Appétit magazine
2 3/4 cups skim milk
1/2 cup lightly packed light brown sugar
1/3 cup cornmeal
1 tablespoon molasses
1 teaspoon ground ginger
1 teaspoon ground cinnamon
2 tablespoons unsalted butter, plus more for greasing the pan
1/2 teaspoon vanilla extract
Whipped cream for serving
Preheat your oven to 325 F. Grease a 9-inch casserole dish. Set aside. In a medium saucepan over medium high heat, combine the milk through the cinnamon. Whisk occasionally to prevent lumps. Once the mixture is hot, cook for about 15 minutes, or until thickened. Remove the saucepan from the heat, and add the butter and vanilla. Whisk until well combined. Pour the mixture into the prepared casserole dish. Bake until the pudding is golden and set in the middle, about 1 hour and 15 minutes. Cool slightly before serving with whipped cream.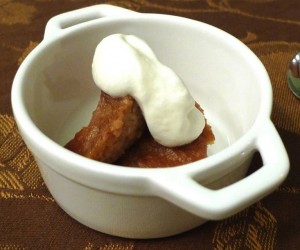
A Reason to Celebrate ~ Brisket Braised in Stout
/0 Comments/in Beef, Dinner, Lunch, Main dish /by LauraIn honor of the day, this brisket braised in stout seemed like a fitting dish. It is a perfect meal to warm up before a chilly fall evening outside by a bonfire, and of course, stout plays a starring role! The original recipe was from Bon Appétit magazine. I used Guinness, since it pairs beautifully with beef. I also used oil rather than bacon fat, and trimmed the meat of as much excess fat as possible. It is one of the most delicious beef recipes I have made in awhile, and I would highly recommend giving it a try!
Brisket Braised in Stout
Based on a recipe from Bon Appétit magazine
1 tablespoon kosher salt, plus more if desired
2 teaspoons freshly ground black pepper, plus more if desired
2 teaspoons dry mustard
2 teaspoons chopped fresh sage
2 teaspoons chopped fresh thyme
6 pounds beef brisket, trimmed of all excess fat
2 tablespoons high heat oil, such as safflower
4 cups low-sodium chicken broth, plus more if needed
12 ounces Guinness stout
6 whole pitted prunes
4 bay leaves
2 teaspoons dark brown sugar
6 cups thinly sliced onions
8 whole garlic cloves, peeled
1 pound crimini mushrooms, sliced
1 pound medium carrots, peeled, cut into 1 ½ inch pieces
2 tablespoons whole-grain Dijon mustard
1 tablespoon red wine vinegar, plus more if desired
It is best if the first part of this recipe is done the day before you are planning to serve the dish.
Day 1: Preheat your oven to 350°F. Combine all of the ingredients from the salt through the thyme in a small bowl. Rub the mixture over the beef. Preheat a large pot over medium high heat. Add the oil, and wait until hot and shimmering. Add the beef and cook until caramelized on both sides. Once brown, move the beef to a plate. (It will not be cooked through.) Pour 2 cups of the chicken broth into the pot. Scrape the fond from the bottom of the pot, and bring the broth to a boil. Once boiling, add all of the ingredients from the stout through the sugar. Bring to a boil once again. Return the beef to the pot. Add the onion slices and garlic over the top of the meat.
Cover the pot and put it in the oven. Braise the beef for about 1 hour. Remove the pot from the oven, and remove the cover. Turn the beef over. (The onions and garlic will fall into the broth.) Return the pot without the cover to the oven. Braise for about 30 minutes more. After 30 minutes, add 1 more cup of the broth. Cover the pot again, and braise for another 1 hour and 30 minutes.
Transfer the beef to a plate. Add 1 more cup of chicken broth to the remaining liquid in the pot. Add the mushrooms and carrots, and then return the beef to the pot. You may need to add a little more broth to cover the vegetables. Cover and return the pot to the oven. Braise for about 45 minutes longer, or until the meat and vegetables are tender. Refrigerate overnight.
Day 2: Preheat your oven to 350°F. Spoon off any excess fat from the surface of the broth. Move the beef to a cutting board, and thinly slice across the grain. Bring the broth with the vegetables to a boil. Add the mustard and 1 tablespoon of vinegar, and whisk to combine. If desired, season with salt, pepper, and more vinegar to taste. Add the meat back to the pan. Cover the pan with the lid. Place the pot in the oven and cook until everything is hot, about 1 hour and 15 minutes. Serve.
Happy Halloween! ~ Creole Pumpkin Soup with Shrimp, Chicken, and Andouille Chicken Sausage
/0 Comments/in Autumn, Chicken, Dinner, Halloween, Lunch, Main dish, Seafood, Soup /by LauraFirst I roasted a little sugar pumpkin. A friend of mine brought a larger version filled with fondue to a party, and it was a showstopper! I just had to try it! (Thank you for the idea and the tips, Karen!)
Just cut off the top of the pumpkin, scoop out the seeds and goop, and then replace the top. Spread olive oil evenly all over the outside of the pumpkin, including the stem. Place the pumpkin on a cookie sheet lined with parchment paper, and roast at 450 until the flesh inside is soft. My little sugar pumpkin only took 40 minutes, but a larger pumpkin would take a little longer.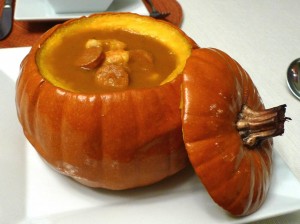 You could use this pumpkin serving bowl with any favorite pumpkin soup recipe. The Creole pumpkin soup I made tonight was based on a recipe from a restaurant in New Orleans called Tableau. The unique soup was a little spicy, and perfect for our Halloween dinner!
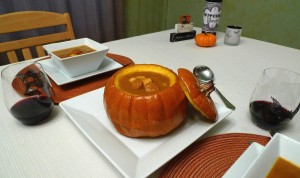
Creole Pumpkin Soup with Shrimp, Chicken, and Andouille Chicken Sausage
Based on a recipe from Tableau
2 pounds shrimp, peeled and deveined, shells reserved
8 cups water
1 tablespoon high heat oil, such as safflower
12 ounces andouille chicken sausage, sliced
1 medium yellow onion, diced
1 stalk celery, diced
1/2 teaspoon dried thyme
2 garlic cloves, minced
1 15-ounce can puréed pumpkin
1 teaspoon mixed Creole or Cajun seasoning
1/8 teaspoon ground nutmeg
1/8 teaspoon ground cinnamon
Salt and pepper to taste
1 rotisserie chicken breast, shredded
In a large stock pot, add the shrimp shells and the water. Bring to a boil. Once it is boiling, reduce the heat to low, and simmer for about 20 minutes. Strain. Reserve the liquid and discard the shells.
Preheat a large stock pot over medium high heat. Once the pot is hot, add the oil. Once the oil is hot and shimmering, add the sausage. Brown the sausage on both sides. Remove the sausage from the pot, and set aside onto a plate lined with a paper towel.
In the same pot, add the onion, celery, and thyme. Cook until the onion is translucent. Then add the garlic, and cook until just fragrant, about 30 seconds. Add the pumpkin and cook until it starts to darken slightly, about 3 minutes. Add the shrimp stock, and scrape up the brown bits from the bottom of the pot. Bring to a boil, and then reduce heat to low. Simmer, stirring often, until the mixture starts to thicken, about 20 to 25 minutes.
Working in small batches, transfer the mix to a blender, and blend until smooth. Return to a pot. Add the Creole seasoning, nutmeg, and cinnamon. Season to taste with salt and pepper. Add the chicken sausage and the chicken breast. Simmer over low heat to combine all of the flavors, about 10 minutes. Add the shrimp, and cook until the shrimp are just cooked through. Serve immediately.
The Witches’ Brew wine bottle printable came from TheGraphicsFairy.com. They are free to use, and oh so cute! I hope you’ll check it out!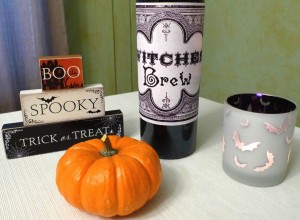
National Candy Corn Day ~ Candy Corn Fruit Parfait
/0 Comments/in Autumn, Dessert, Halloween, Snack /by LauraI hope you have a fun and safe kickoff to the Halloween weekend!
National Pumpkin Day ~ Ghostly Pumpkin Custard
/0 Comments/in Autumn, Dessert, Halloween /by LauraHave a happy Pumpkin Day!
Everything Pumpkin! ~ Pumpkin Deviled Eggs
/0 Comments/in Appetizer, Autumn, Halloween, Snack, Thanksgiving /by Laura8 hard boiled eggs, cooled, sliced in half, yolks removed, 1/2 of the yolks reserved
3 tablespoons nonfat plain Greek yogurt
1 teaspoon Dijon mustard
1 tablespoon mayonnaise
1/2 teaspoon paprika, plus more for garnish
Salt to taste
1 or 2 fresh chives, cut into one-inch lengths
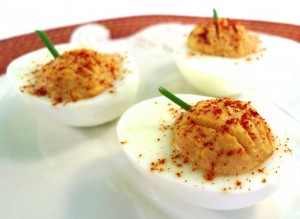
In a small bowl, stir together the yolks, yogurt, mustard, mayonnaise, paprika, and salt until smooth. With a small spoon, fill the holes in the egg whites with the yolk mixture. (FYI, you will have more whites than yolk mixture if you mound the filling as I did. But no worries, whites are a great snack!) Smooth the mixture with your finger. With the back of a butter knife, make 4 small little lines in each yolk filling to imitate the lines of a pumpkin. Place the cut chives into the yolks to make a “stem.” Sprinkle extra paprika over the top as a garnish.