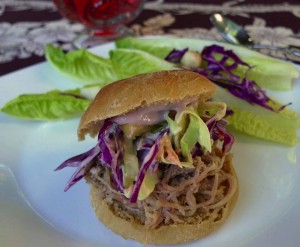
 When summer rolls around, my backyard starts to feel a little tropical. Seattle’s temperatures are about the same as Lahaina’s this week. 🙂 I absolutely love the Hawaiian Islands, and so this warm weather gets me in the mood to cook Hawaiian-style dishes!
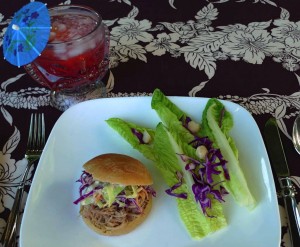 I based this dish on a recipe I found on CookingHawaiianStyle.com. It’s a really fun recipe that uses a few of Hawaii’s most famous ingredients in a fresh new way.
I made a few tweaks to make the recipes a little healthier. For the taro rolls, I used whole-wheat pastry flour and skim milk, I replaced the butter with coconut oil, and I reduced the amount of sugar. For the slaw, I used nonfat Greek yogurt in place of the sour cream, and I omitted the sugar altogether. I also reduced the amount of dressing by half, and added a little extra pineapple. (After all, the pineapple is one of the stars of the dish!) For the spread, I used fresh horseradish root rather than prepared horseradish.
And since I don’t have an imu in my backyard to cook the pork, I chose a frozen kalua pork imported from Hawaii to keep it authentic. 😉 (I was able to find all of the ingredients I needed, including the pork and the poi, at my local Asian grocery store.)
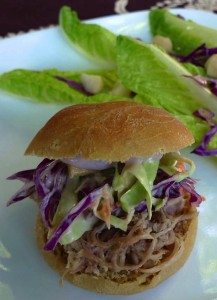 Kalua Pork on Whole-Wheat Taro Rolls with Poi Spread and Pineapple Slaw
Based on a recipe from Cooking Hawaiian Style
Taro Rolls:
1 (1/4 oz.) packet active dry yeast
1/4 cup lukewarm water
1/2 cup skim milk
1/3 cup coconut oil
2 tablespoons sugar
1/2 teaspoon kosher salt
2 large eggs, beaten
1/2 cup cooked taro, mashed
3 cups whole-wheat pastry flour
All-purpose flour for dusting hands and work surface
In a small mixing bowl, dissolve the yeast in lukewarm water. Let sit for a few minutes until the mixture is a little frothy on the top. (If there is no froth forming after 10 minutes or so, start again with a fresh packet of yeast. This means your yeast was not alive.) Scald milk by heating in a small saucepan over medium heat until bubbles appear around the inside edge of the pan and the milk is just about to boil. Pour milk into a mixing bowl. Combine the milk with the oil, sugar, and salt. Allow to cool, about 2 minutes. Into milk mixture, stir in the eggs, taro, and yeast mixture. In a large bowl, add the flour. Make a well in the center. Add the liquid mixture to the flour. Mix thoroughly until the dough comes together. On a floured work surface, turn the dough out. Knead until smooth. Transfer the dough into a well greased bowl. Cover with a damp towel, and let rise in a warm area until doubled in size, about 1 hour. Flour hands, and punch down the dough. Divide into 16-17 even portions. Shape into small balls and place onto two baking sheets lined with parchment paper. Cover with a damp towel, and let rise in a warm area until doubled in size, about 1 hour. Preheat oven to 350°. Bake until golden brown, about 15-20 minutes. Serve immediately and freeze the extras. Makes approximately 16-17 rolls.
Poi Horseradish Mayonnaise Spread:
1/2 cup fresh poi
1/4 cup water
Fresh horseradish, grated (to taste)
2 tablespoons mayonnaise
Slaw Dressing:
1/4 cup nonfat Greek yogurt
1/4 cup mayonnaise
1 green onion, green part only, finely chopped
1/2 teaspoon lemon juice
Slaw:
1 cup red cabbage, shredded
2 cups green cabbage, shredded
1 cup carrots, shredded
1 cup fresh pineapple, chopped
Pork:
12 oz. store-bought kalua pork
Poi Horseradish Mayonnaise Spread
In small mixing bowl, combine the poi and water and mix well using a wire whisk. Add the horseradish and mayonnaise, and whisk until smooth. Chill before serving.
Pineapple Slaw
In small bowl, combine all of the dressing ingredients. Blend well. In large bowl, combine all of the salad ingredients. Toss lightly. Pour dressing over salad. Mix well. Cover and refrigerate.
How to serve:
Take a taro roll and spread with the poi mayonnaise. Add kalua pork and top with pineapple coleslaw.
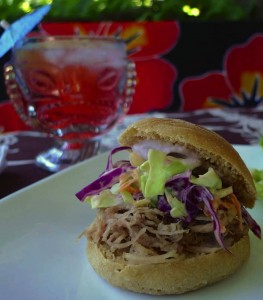
This pairs well with any drink served in a tiki glass! 🙂
October Teashop Mystery ~ Country Captain
/0 Comments/in Chicken, Dinner, Halloween, Lunch, Main dish /by LauraI love to learn about the history behind classic dishes, so I dug a little deeper online. The Oxford Encyclopedia of Food and Drink in America describes the origin of Country Captain in this way: “Legend has it that a British sea captain who served it in India introduced the dish to locals either in Charleston or Savannah, port cities accustomed to both spices and sailors.”
I used a recipe from Saveur magazine, but I tweaked it a little. First, I used all chicken thighs since they stew beautifully. Make sure to remove the skin or the dish will be far too greasy. I reduced the amount of oil, and omitted the butter and the bacon. I also served it with brown rice rather than white.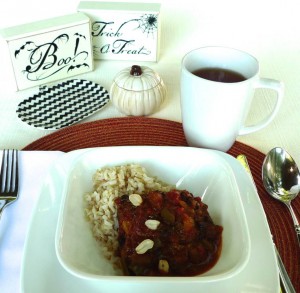 Country Captain
Based on a recipe from Saveur magazine
3 pounds bone-in chicken thighs, skin removed
1 teaspoon dried thyme
Kosher salt and freshly ground black pepper, to taste
2 tablespoons high heat oil, such as safflower
3 stalks celery, chopped
2 green bell peppers, cored, seeded, and chopped
1 large yellow onion, chopped
4 cloves garlic, minced
1 (28-ounce) can whole peeled tomatoes, drained, 3/4 cup tomato juice reserved
3 tablespoons curry powder
1/3 cup dried currants
2 bay leaves
2 cups steamed brown rice, for serving
Roasted peanuts, for garnish
Season chicken with thyme, salt, and pepper. Preheat a large stock pot or Dutch oven over high heat. Add the oil. When the oil is hot and shimmering, add the chicken. Sear on both sides until golden brown. Transfer the chicken to a plate and set aside.
Lower the heat to medium. Add the celery, peppers, and onion to the pot, and cook until softened. Add the garlic, and cook until fragrant, about 30 seconds. Add the tomatoes and juice and cook until the juice thickens, about 10 minutes. Stir in the curry powder, currants, and bay leaves. Reduce heat to medium-low, cover, and simmer for about 30 minutes, or until the sauce is thick. Season to taste with salt and pepper.
In the meantime, heat your oven to 325˚.
After the sauce is thickened, add the chicken back to the pot. Spoon the sauce over the meat. Cover and cook in the oven for about 1 hour and 15 minutes, or until the meat can easily be shredded off the bone with a fork.
In the meantime, prepare the rice according to the package instructions.
Serve the chicken with the sauce and rice, and garnish with peanuts.
It’s Oktoberfest! ~ Beer, Sauerkraut, and Cheese Muffins
/0 Comments/in Autumn, Bread, Muffin, Oktoberfest, Snack /by LauraEven though I am typically a wine kind of girl, when Oktoberfest rolls around, I love to try the autumn beer at the market. Many of our local breweries make special beer just for the season. I picked up one from Pyramid Brewery, and instead of just drinking it, I decided to use it in some muffins. 🙂 Then I took these muffins one step further…I wanted to add one more Oktoberfest flavor, so I added a little sauerkraut! I know it sounds a little odd, but it actually added a lot of moisture and flavor to the muffins without making them taste like pickles. These go well with chili, or they are great just as a snack (with a little beer of course! 😉 )
Makes 12
1 tablespoon olive oil
1/2 yellow onion, minced
3 cups ivory whole-wheat flour
1 tablespoon granulated sugar
2 teaspoons baking powder
1 teaspoon kosher salt
1/4 teaspoon freshly ground black pepper
4 ounces sharp cheddar cheese, shredded
1/2 cup sauerkraut, squeezed to remove excess brine and finely chopped
12 ounces Oktoberfest beer
1/4 cup skim milk
Cooking spray
Preheat your oven to 375.
Heat a small sauté pan over medium heat. Add the oil and onion, and cook until the onion is slightly caramelized. Set aside.
In a medium bowl, whisk together the flour, sugar, baking powder, salt, and pepper. Then stir in the caramelized onions, cheese, sauerkraut, beer, and milk. You may need to work it with your hands to make sure everything is well combined because the batter is very thick.
Spray a muffin tin with cooking spray. Divide the batter evenly into 12 muffins.
Bake for about 35 minutes, until cooked through but still moist.
The cute little flags came from PreppingParties.com. I actually used the artwork for the party banner, but printed it very small to make muffin flags instead. There are a lot of other sweet Oktoberfest printables in the same place that you might want to check out this season. 🙂
Prost!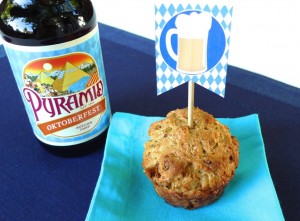
Savoring the End of Summer ~ Summer Vacation Crumble
/0 Comments/in Dessert, Summer /by LauraThis recipe is more of an inspiration rather than a hard and fast recipe. I think it would even be great with different fruits like blackberries or plums. Use whatever store-bought cookies sound good to you. I have used almond cookies and snickerdoodles, but I think ginger snaps and sugar cookies would also be delicious.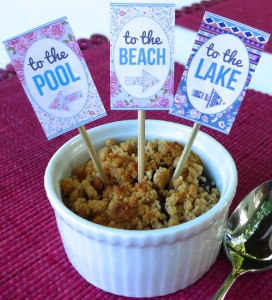 Summer Vacation Crumble
Serves 6
4 ripe peaches, peeled and sliced
½ pint blueberries
Enough maple syrup to sweeten the fruit to your liking
2 handfuls of all-natural store-bought cookies, crumbled (almond, snickerdoodle, or whatever sounds good to you!)
2 tablespoons cold butter, cut into pieces
Preheat oven to 425.
Mix the peaches and blueberries together with the maple syrup. Transfer the mixture into one large baking dish or 6 small ones.
Work the cookie crumbs and the butter with your fingers until incorporated.
Evenly top the fruit with the cookie mixture.
Bake until the top is golden, and the fruit is bubbly and softened. Check the crumble after 10 minutes, and bake longer if needed. The individual ones will take less time to bake than one large one, and the time also depends on the ripeness of the fruit.
The cute little flags came from SmartSchoolHouse.com. I thought they added the perfect touch to the summery crumbles!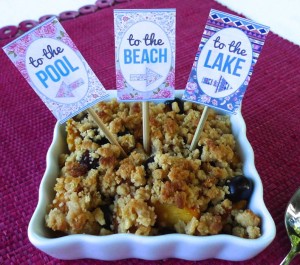
Happy Labor Day! ~ Printable Celebration Decorations
/0 Comments/in Labor Day /by LauraI discovered the cutest little Labor Day decorations to add a little something extra to my mini apple pies. They could be used to top anything you like…cupcakes, drinks, or even hot dogs. Aren’t they adorable? The printables came from my favorite decoration website, CatchMyParty.com. I hope you’ll check out the site. (The next big holiday is Halloween, and they have so many sweet decorations for the occasion!)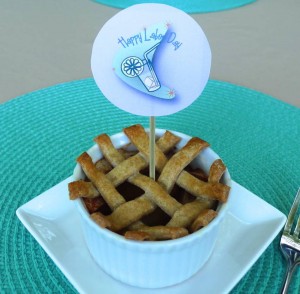
British Wedding Anniversary Dinner ~ Dessert ~ Lemon Syllabub Trifle
/0 Comments/in Anniversary, Cupcake, Dessert, Dinner, Lunch /by LauraThe lemon drizzle cupcakes were based on a recipe from BBC Good Food. I replaced half of the butter with coconut oil and the other half with nonfat Greek yogurt. I cut the sugar in half, and I replaced the self-rising flour with a combination of whole-wheat pastry flour, baking powder, and a pinch of salt. (I put the leftovers in the freezer, and after thawing in the microwave for 30 seconds, they make a nice little treat with afternoon tea. 🙂 )
Lemon Drizzle Cupcakes
Based on a recipe from BBC Good Food
For the cakes:
1/2 cup coconut oil
1/2 cup nonfat Greek yogurt
1/2 cup caster or fine sugar
Zest of 1 lemon, finely grated
4 eggs
1 cup whole-wheat pastry flour
1 1/2 teaspoons baking powder
Pinch of salt
For the drizzle:
Juice of 2 lemons
Powdered sugar, to taste (Maybe start with 2 tablespoons and add from there if you like it sweeter)
Preheat oven to 350. Line a muffin tin with 12 cupcake papers. Whisk together the coconut oil, yogurt, sugar, and lemon zest until well blended. Then add the eggs, one at a time, and whisk until incorporated. In a separate bowl, whisk together the flour, baking powder, and salt. Add the dry ingredients into the wet ingredients, and mix until well combined, being careful not to over mix. Spoon the mixture into the lined muffin tin.
Bake for about 20 minutes, or until a toothpick inserted in the middle of a cupcake comes out clean.
While the cakes are cooling, make the glaze drizzle. Whisk together the lemon juice and enough powdered sugar to your liking. Prick the warm cakes in several places with a skewer, and then pour the drizzle over the top. Let cool completely.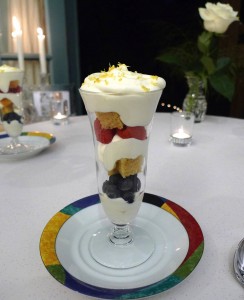 For the syllabub, I started with one more recipe from BBC Good Food. I replaced half of the heavy cream with nonfat Greek yogurt, and I cut back on the sugar. It was a delicious, creamy dessert on its own with a lovely little tang from the yogurt, wine, and lemon.
Lemon Syllabub
Based on a recipe from BBC Good Food
2/3 cup heavy whipping cream
3 tablespoons caster or fine sugar
2/3 cup nonfat Greek yogurt
3 tablespoons dry white wine
Zest of 1/2 lemon, finely grated
Juice of 1/2 lemon
Whip the cream and sugar together until stiff peaks form. Stir in the yogurt, and blend well. Add the wine, the lemon zest, and the lemon juice. Mix until everything is evenly incorporated.
Trifle
Lemon syllabub
Small berries, such as raspberries or blueberries
Lemon drizzle cupcakes, cut into small cubes
Zest of 1/2 lemon, finely grated
For ease, place the syllabub into a piping bag. In the base of a tall glass, pipe a shallow layer of syllabub in the bottom. Top with a few berries and then a few cubes of cake. Repeat until you finish at the top with the syllabub. Sprinkle with lemon zest on top.
That is the last stop on our virtual culinary getaway to the UK. 🙂 Cheerio for now!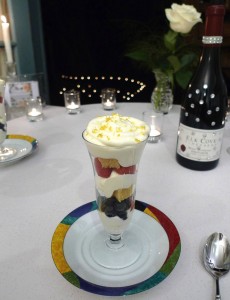
British Wedding Anniversary Dinner ~ Pie 3 ~ Pheasant, Leek, and Parsley Pie
/1 Comment/in Anniversary, Dinner, Lunch, Main dish, Other poultry /by LauraAgain, I did a slow braise with the pheasant, just as I did with the rabbit, which resulted in very tender meat and a bunch of extra pheasant stock to use for future recipes.
Pheasant, Leek, and Parsley Pie
Based on a recipe from BBC Good Food
Cooking the pheasant and the stock:
1 tablespoon high heat oil, such as safflower
1 pheasant, about 3 pounds, cleaned
2 carrots, roughly chopped
1 onion, roughly chopped
1 stalk of celery, roughly chopped
1 bay leaf
1 tablespoon whole peppercorns
2 garlic cloves, crushed
½ tablespoon kosher salt
Preheat oven to 220 degrees. Preheat a large stockpot on medium high heat. When hot, add oil, and wait until the oil is hot and shimmering. Add the whole pheasant, and brown on all sides. Add the remaining ingredients and cover everything with water. Bring to a boil. Once the water is boiling, cover the pot and place it in the oven. Cook for about 2 hours, or until the pheasant meat is easily shredded with a fork.
Strain the stock, and discard the vegetables and seasonings.
Shred all of the meat, and reserve 2 ¼ cups of the stock for the pie. Freeze the rest of the stock for future recipes.
Cooking the pie:
1 tablespoon high heat oil, such as safflower
2 leeks, thinly sliced
2 tablespoons all-purpose flour
2 ¼ cups pheasant stock
¼ cup dry white wine
1 3-pound cooked pheasant, shredded
Zest of 1 lemon
1 small bunch Italian flat leaf parsley, chopped
Salt and pepper, to taste
Preheat a large sauté pan over medium high heat. When hot, add the oil, and wait until hot and shimmering. Add the leeks, and cook until softened. Add the flour, stir well, and cook for about a minute. Gradually stir in the stock and wine, cooking until the sauce is thickened slightly. Add the pheasant meat, and heat until warmed through. Take the pan off the heat, and add the lemon zest and parsley. Season to taste with salt and pepper.
To serve, add the stew to small ramekins and top with the pre-baked shortcrust pastry. (The instructions for the pastry can be found here in the first beef pie blog entry.)
The sweet ending to our meal is up next. 🙂 A lemon syllabub trifle!
British Wedding Anniversary Dinner ~ Pie 2 ~ Rabbit Pie with Cider and Mustard
/1 Comment/in Anniversary, Dinner, Lunch, Main dish /by LauraI started with a basic braise that left me with very tender meat and enough rabbit stock to freeze for later. (I use this method with chicken frequently. It’s a nice way to stock your freezer for the coming winter soup months! 🙂 )
Rabbit Pie with Cider and Mustard
Based on a recipe from BBC Good Food
Cooking the rabbit and the stock:
1 tablespoon high heat oil, such as safflower
1 rabbit, about 3 pounds, cleaned
2 carrots, roughly chopped
1 onion, roughly chopped
1 stalk of celery, roughly chopped
1 bay leaf
1 tablespoon whole peppercorns
2 garlic cloves, crushed
½ tablespoon kosher salt
Preheat oven to 220 degrees. Preheat a large stockpot on medium high heat. When hot, add oil, and wait until the oil is hot and shimmering. Add the whole rabbit, and brown on all sides. Add the remaining ingredients and cover everything with water. Bring to a boil. Once the water is boiling, cover the pot and place it in the oven. Cook for about 2 hours, or until the rabbit meat is easily shredded with a fork.
Strain the stock, and discard the vegetables and seasonings.
Shred all of the meat, and reserve 2 cups of the stock for the pie. Freeze the rest of the stock for future recipes.
Cooking the pie:
1 tablespoon high heat oil, such as safflower
1 small leek, finely sliced
1 teaspoon fennel seed
3 tablespoons all-purpose flour
½ cup dry hard cider
2 cups rabbit stock
1 tablespoon wholegrain mustard
Salt and pepper, to taste
1 3-pound cooked rabbit, shredded
Preheat a large sauté pan over medium high heat. When hot, add the oil, and wait until hot and shimmering. Add the leek and fennel seeds, and cook until caramelized and softened. Stir in the flour, and cook for about a minute. Add the cider, stir well to fully incorporate the flour and scrape up the brown bits from the bottom of the pan. Add the stock, and bring to a simmer. Reduce the cooking liquid by half.
Stir in the mustard, add salt and pepper to taste, and then add the rabbit meat. Cook until warmed through.
To serve, add the stew to small ramekins and top with the pre-baked shortcrust pastry. (The instructions for the pastry can be found here in the previous beef pie blog entry.)
Up next, pheasant pie!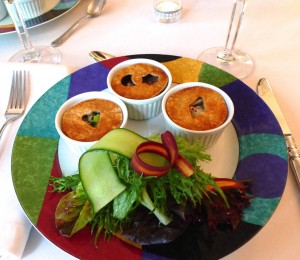
British Wedding Anniversary Dinner ~ Pie 1 ~ Beef, Ale, and Mushroom Pie
/3 Comments/in Anniversary, Beef, Dinner, Lunch, Main dish /by LauraI used the same shortcrust pastry for all three pies. The recipe I used came from the BBC recipe website. I replaced the plain flour with ivory whole-wheat flour, and I ended up using a little more water than the recipe called for to properly moisten the whole grain flour. I ended up using 5 tablespoons, but add just enough for the crust to come together. This crust also freezes well for future use. I served my pies in little ramekins and just topped them with crust. Not only was it a cute presentation, but also I only needed a small amount of the rich pastry for each pie. To make the little interchangeable and removable crusts like I did, line a sheet pan with parchment paper. On a lightly floured surface, roll out the refrigerated crust to about 1/8 inch thick, and cut it into the shapes you want with cookie cutters. Brush the pieces with an egg wash and bake at 350 for about 15-18 minutes, or until golden, turning halfway through for even cooking.
The first pie I made was a beef, ale, and mushroom pie. I used a round roast, which is a fairly lean cut that braises well. I also used Canadian bacon rather than traditional bacon, and omitted the sugar completely. I replaced the chestnut mushrooms with criminis, since they are easier for me to find in the States. I also made several tweaks to the recipe for my American kitchen, converting grams to ounces and changing the temperature from Celsius to Fahrenheit.
Beef, Ale, and Mushroom Pie
Based on a recipe from BBC Good Food
1/3 ounce dried porcini mushrooms
3/4 cup boiling water
2-4 tablespoons high heat cooking oil, such as safflower
2 1/2 pounds round roast, trimmed of excess fat, cut into inch-sized cubes
1 large onion, diced
4 large carrots, diced
4 tablespoons all-purpose flour
10 ounces dark ale, such as Guinness
14 ounces low-sodium beef stock
Salt and pepper, to taste
1 small bunch of mixed herbs (thyme, bay leaf, and parsley), tied together
6 ounces Canadian bacon, small diced
8 ounces crimini mushrooms, sliced
Cover the porcini mushrooms in the boiling water for about 20 minutes, or until they are tender. Then remove the mushrooms, squeeze out the excess moisture, and reserve the liquid.
Preheat oven to 320 degrees. Using a large pot with a lid and a heavy bottom, preheat on medium high heat. When it is hot, add some of the oil to coat the bottom, and wait until the oil is hot and shimmering. Add the beef in small batches, and brown on all sides. Set aside. Add the onion and carrots, and cook until caramelized and softened. Add the soaked mushrooms, and cook for about a minute more. Add the flour, stirring until it turns slightly golden. Place the meat and any juices back into the pan and stir well. Add the ale, stock, and porcini soaking liquid. Stir well to fully incorporate the flour into the liquid. Season the stew with salt and pepper to taste. Add the herbs. Bring the stew to a simmer. Cover the pot with a lid and place it in the oven for about 2 hours, or until the meat is tender enough to shred with a fork.
Meanwhile, preheat a sauté pan over medium high heat. Add a little more oil. Add the Canadian bacon, and cook until caramelized. Then add the crimini mushrooms and cook until they release most of their moisture. Remove from the heat. When the stew is cooked, stir the bacon and mushrooms into the stew.
To serve, add the stew to small ramekins and top with the pre-baked shortcrust pastry.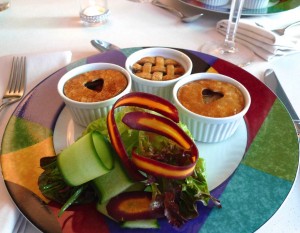
British Wedding Anniversary Dinner ~ Soup ~ Rocket and Courgette Soup (Arugula and Zucchini Soup)
/0 Comments/in Anniversary, Appetizer, Dinner, Lunch, Soup, Summer /by LauraWe started with a simple summery soup called rocket and courgette soup in the UK, but here in the States, we would call it arugula and zucchini soup. 🙂 I based the dish on a recipe from BBC Good Food, and then added a couple touches of my own.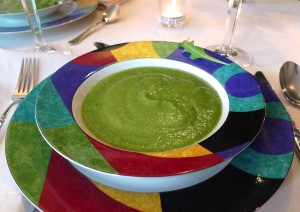 Rocket and Courgette Soup
Based on a recipe from BBC Good Food
1 teaspoon high heat oil, such as safflower
1 onion, finely chopped
1 medium russet potato, finely chopped
2 cloves of garlic, minced
4 courgettes (zucchini), roughly chopped
4 cups vegetable or chicken stock
About 3 1/5 ounces, or 2 large handfuls, rocket (arugula)
Salt and pepper, to taste
Preheat a large sauté pan. Add oil. When the oil is hot and shimmering, add the onion and potato. Cook until the vegetables are softened. Add the garlic, and cook until fragrant, about 30 seconds. Then add the courgettes and stock. Scrape the bottom of the pan to release the brown bits. Bring to a boil. Cook until the courgettes are tender. Next, add the rocket, and cook until wilted, about 30 seconds. In small batches, blend the soup in a blender until smooth. Season to taste with salt and pepper. Serve warm.
Stay tuned for the main course…A trio of mini British meat pies!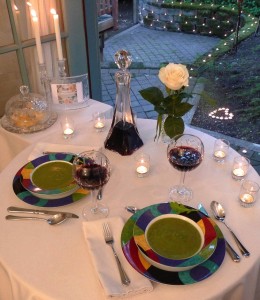
A Night of Gumbo and Dancing ~ Chicken Gumbo
/0 Comments/in Chicken, Dinner, Lunch, Main dish, Mardi Gras /by LauraI started with a recipe from Southern Living magazine, which was quick and easy compared to many other gumbo recipes. To make it a little healthier, I used half of the amount of oil that the recipe called for, and I only used one link of andouille sausage for the whole stew. If you can, use homemade chicken stock, since it is one of the stars of the dish.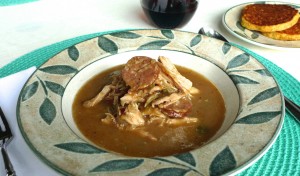 Chicken Gumbo
Based on a recipe from Southern Living magazine
1/4 cup high heat oil, such as safflower
1/4 cup all-purpose flour
1 yellow onion, chopped
1 green bell pepper, chopped
2 stalks of celery, chopped
2 teaspoons blended Cajun seasoning
2 garlic cloves, minced
5 cups low-sodium chicken stock
1 link chicken andouille sausage, cut into thin slices
1/2 precooked rotisserie chicken, shredded
Heat the oil in a large pot over medium-high heat. When the oil is hot and shimmering, whisk the flour slowly into the pot. While constantly whisking, cook until the flour is the color of dark caramel. Watch very closely, so the mixture doesn’t get too dark.
Once the flour is a dark shade of caramel, reduce the heat to medium. Stir in the onion, bell pepper, celery, and Cajun seasoning. Cook until the vegetables are softened. Add the garlic, and cook until fragrant, about 30 seconds. Add the chicken stock and sausage. Increase the heat again to medium-high, and bring to a boil. Reduce heat to low, and simmer for about 20 minutes, stirring occasionally.
Stir the chicken into the pot, and continue cooking until warmed through.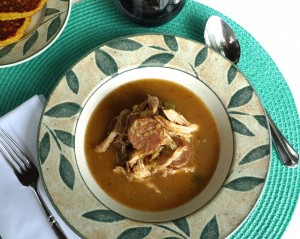
A Week at the Lake ~ Maple and Star Anise Crème Brûlée
/0 Comments/in Dessert /by LauraI based my recipe on a lightened crème brûlée I made several years ago. I just played around with the recipe to make it a maple and star anise flavor rather than the original orange flavor.
Serves 2
8 ounces 2% milk
4 pods of star anise
2 ½ tablespoons maple syrup
3 egg yolks
1/2 teaspoon vanilla extract
2 tablespoons granulated sugar for the top
Combine the milk, anise, and maple syrup in a saucepan with a heavy bottom. Heat until it almost comes to a boil. Refrigerate the mixture overnight in an airtight container.
The next day, preheat your oven to 325 degrees.
Strain the milk mixture to remove the anise pods. Add the egg yolks and vanilla extract, and whisk until well combined.
Pour the custard mixture into 2 4-ounce ramekins. (A little trick for getting rid of any little bubbles on top is to take your kitchen torch and lightly torch them. They will easily pop. The final result looks better without bubbles.) Place the ramekins in a baking dish. Heat some water until almost boiling, and pour the water carefully around the ramekins until it reaches about half way up the sides. (Make sure none of the water gets inside of the custard.)
Bake the custards for 45 minutes, or until set, but with a slight jiggle in the middle when they are tapped.
Cool in the refrigerator at least 2 hours before serving, or overnight.
Right before serving, dust a tablespoon of sugar evenly over the top of each custard. Take a kitchen torch to the sugar until it is caramelized evenly.
Seafair Weekend Anniversary ~ Hibiscus Summer Party Wine Labels and Markers
/0 Comments/in Anniversary, Seafair /by LauraToday also marks 17 years that I’ve lived in this neighborhood with my hubby, and 20 years that I’ve been in Seattle. Wow!
Between Seafair and our anniversaries, we had lots of reasons to celebrate today…and we celebrated all day long! We started with our favorite crab cake breakfast in the morning. Then I went swimming in Lake Washington while the Blue Angels roared overhead. Awesome! They came to Seattle as a part of the Seafair air show. In the evening, we enjoyed some fresh steamed Dungeness crab for dinner, which has become our tradition on this anniversary.
I made these cute little wine bottle labels to dress up the occasion a bit. They are from Catch My Party, which is one of my favorite websites for free printable decorations. They have so many adorable designs. These labels came with matching wine glass markers, too. Cute! I hope you’ll check out the website the next time you need some festive decorations. 🙂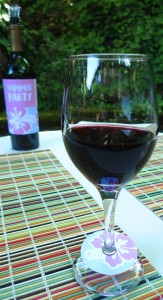
Seafair Weekend ~ Once in a Blue Moon Wine Labels
/0 Comments/in Seafair /by LauraI made these cute little wine bottle labels to mark the occasion. 🙂 The design can be found on a website called At Home on the Bay. So cute! I hope you’ll visit the site to check it out.
We enjoyed our favorite clam dish under the bright moon and our tiki torches with the bottle of wine I decorated for the evening. It was a lovely way to end our fun day by the lake!
Cheers!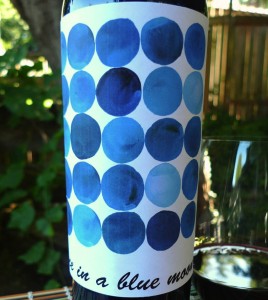
Polynesian Adventure ~ Tuvalu Tuna, Samoan Tropical Salad, and ‘Otai
/1 Comment/in Cocktail/Drink, Dinner, Lunch, Main dish, Salad, Seafood, Summer /by LauraAll of the recipes were from an inspiring food blog I admire called Global Table Adventure. I discovered the blog when I read the author’s memoir in which she shared her journey to make the website. She went on a culinary voyage in her own kitchen, cooking a meal from every country in the world. (That is 195 countries!) Then she wrote about the recipes and her experiences making them, as well as facts about the countries from which they came. She also added beautiful photos of the food as well as the countries she featured. I have already tried a few of the recipes ranging from a chicken dish from Panama (Arroz con Pollo) to a breakfast dish from Israel (Shakshouka). I have learned about dishes I have never heard of before, and even countries that I wasn’t aware existed. The blog has helped to open up my corner of the world to the greater world, filled my wanderlust, and ignited my passion for cooking on days when I’m not feeling very enthusiastic about making dinner. It really is a wonderful website, and I hope you’ll check it out. 🙂 I plan to cook many more adventures from this collection of recipes.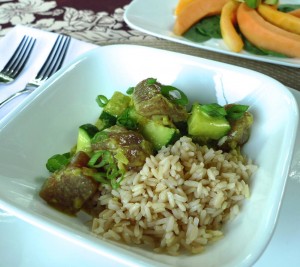 On tonight’s Polynesian adventure, the main course was called Tuvalu Tuna. Before perusing through the collection of recipes on Global Table Adventure, I wasn’t familiar with the island of Tuvalu. I learned that it is the smallest member of the Commonwealth of Nations. (Coincidentally, all of the nations featured in this meal are a part of the Commonwealth.) In fact, the Duke and Duchess of Cambridge (Will and Kate) visited Tuvalu a few years back, and they experienced a little of the local food and dance. (If you need a smile, check out the second half of this video. 🙂 )
I lightened the dish a little from the original recipe by reducing the amount of oil to only 1 tablespoon, and using light coconut milk. I also served it with brown rice instead of white.
Tuvalu Tuna – Follow this recipe link to Global Table Adventure
I served the tuna dish with a simple salad from Samoa, which was the perfect accompaniment. It consisted of an unlikely combination of spinach, papaya, avocado, and cantaloupe, which worked together nicely.
Samoan Tropical Salad – Follow this recipe link to Global Table Adventure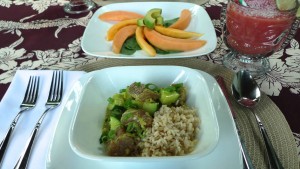 I paired our dinner with a classic drink from Tonga called ‘Otai. I can’t think of anything that is more summery than watermelon, coconut, and lime blended together! (This was my second batch of ‘Otai, since it is that good!) I used a light coconut milk beverage like this, rather than a can of coconut milk. Serve in a tiki glass for the full Polynesian effect! I think this would also be lovely with a little rum to kick it up a bit. 😉
‘Otai – Follow this recipe link to Global Table Adventure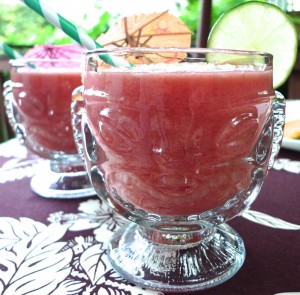
Makeover for Noon Café ~ Cappuccino Cupcakes
/0 Comments/in Cupcake, Dessert /by LauraTo celebrate the new look and the new cappuccino logo, I thought I would bake a batch of cappuccino cupcakes! I based my cupcakes on a recipe from Cooking Light magazine. I made three notable changes to the original recipe…I reduced the sugar, replaced the butter with light olive oil, and replaced the all-purpose flour with whole-wheat pastry flour. Then I dressed them up a bit. (After all, this recipe is about makeovers!) Instead of making the espresso syrup in the original recipe, I made a Greek yogurt frosting with a little espresso mixed in. This transformed these coffee cupcakes into cappuccino cupcakes. I also made little coffee cup handles out of chocolate for the side of the cakes. They are cute little cupcakes that are perfect for an afternoon pick-me-up or even for breakfast. (And I promise I won’t tell anyone if you decide to have a cupcake for breakfast! 😉 )
Cappuccino Cupcakes
Based on a recipe from Cooking Light magazine
2 tablespoons boiling water
4 teaspoons instant espresso granules
1/3 cup low-fat buttermilk
1 1/4 cups whole-wheat pastry flour
1/2 teaspoon baking soda
Pinch of salt
1/2 cup granulated sugar
5 tablespoons light olive oil
2 teaspoons vanilla extract
2 large eggs
12 baking liners
Preheat oven to 350°.
To prepare cupcakes, combine boiling water and espresso granules, stirring until espresso dissolves. Stir in buttermilk.
Lightly spoon flour into dry measuring cups; level with a knife. Combine flour, baking soda, and salt, stirring well with a whisk.
Place granulated sugar, oil, and vanilla extract in a large bowl; whisk until well blended. Add eggs, 1 at a time, whisking well after each addition. Add flour mixture and buttermilk mixture alternately to sugar mixture, beginning and ending with flour mixture.
Spoon batter into 12 muffin cups lined with paper liners. Bake at 350° for 20 minutes or until a wooden pick inserted in center comes out clean. Cool cupcakes in pan 10 minutes on a wire rack; remove from pan.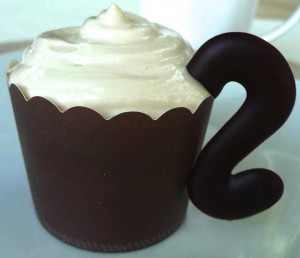 Espresso Frosting
1 cup plain nonfat Greek yogurt
¼ cup Neufchatel cream cheese, room temperature
2 tablespoons powdered sugar, (or more if you prefer a sweeter frosting)
¼ teaspoon instant espresso granules, (or more if you would like the frosting to have a more pronounced coffee flavor)
In a food processor, mix all of the ingredients until the espresso is incorporated and no longer grainy. Chill until ready to use.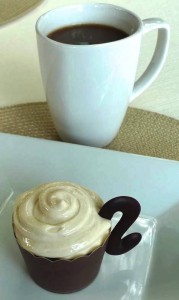 Coffee Cup Handles
8 ounces dark chocolate (approximately)
Piping bag or zip lock bag
Small piping tip (optional)
Waxed paper
Place the chocolate in a microwave safe bowl. Heat at 30 second increments, stirring in between, until just melted and smooth. Place piping tip (if using) in a corner of the piping bag or zip top bag. Fill the bag with the melted chocolate. Snip a small hole in the corner of the bag. Pipe the “handles” onto the waxed paper and freeze until hardened. (About 10 minutes.) Place one chocolate handle on the side of each cupcake.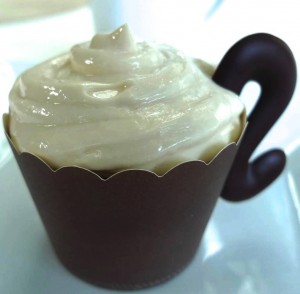
Happy Fourth of July ~ Part 3 ~ Strawberry Cheesecake Tart (Updated!)
/0 Comments/in Dessert, Dinner, Fourth of July, Lunch, Snack, Summer /by LauraSince I am always trying to improve and learn, I made a couple of small tweaks to the original recipe. Opting for an all natural ingredient, I exchanged the nonfat sour cream with nonfat Greek yogurt. I also omitted the sugar in the crust since I try to cut back on sugar where I can, and the graham crackers are sweet enough on their own.
You can make a few small cheesecakes, or one big one! For the tiny ones, I piped seedless strawberry jam to make the stripes, and placed a few little blueberries in the corner for the stars. So cute! I got the idea from MyRecipes.com. 🙂 For the big one, I topped it with fresh summer strawberries arranged in a pretty pattern. I also added a few blueberries this time around to make it a little more patriotic.
Based on a recipe from Martha Stewart
6 full graham cracker sheets
1/3 cup almonds
4 tablespoons unsalted melted butter, or just enough until the crust is moistened
2 8-oz bars of Neufchatel cream cheese
1/2 cup nonfat Greek yogurt
1/2 cup sugar
1 egg
1/2 teaspoon vanilla extract
Pinch of salt
Pint of fresh strawberries, or blueberries, or whatever you’d like to use for your topping
Preheat your oven to 350 degrees.
In a food processor, grind the graham crackers and almonds until they are finely ground. Add the butter slowly, and process until moistened. (You may not need the full 4 tablespoons.) Transfer to a 9-inch tart pan or three 3-inch tart pans. Press the mixture firmly into the pan(s) and up the sides. Freeze for 15 minutes.
If you have a second food processor bowl, I’d recommend using it now. Otherwise, just clean your bowl and blade very well. Then process the cream cheese, yogurt, sugar, egg, vanilla, and salt until the mixture is smooth.
Place your tart pan on a rimmed baking sheet and fill with the cheesecake mixture.
Bake until filling is set, about 30 to 35 minutes for the large tart. For the smaller tarts, check the progress at about 20 minutes to ensure you don’t overbake.
Cool completely and decorate as you wish!
Happy Fourth of July ~ Part 2 ~ Trout Burgers with Tarragon Mayonnaise
/0 Comments/in Bread, Dinner, Fourth of July, Lunch, Main dish, Seafood, Summer /by LauraI based my recipe on a salmon burger recipe from Bon Appétit magazine. The two fish are related, so they can be swapped with each other in most cases. I also changed a few things besides the fish. Most notably, I reduced the amount of mayonnaise and increased the amount of nonfat yogurt for the tarragon mayonnaise spread. I also added lemon zest in addition to the juice, and I used freshly grated horseradish rather than the prepared variety. To serve, I used homemade whole-wheat brioche buns rather than buns made with white flour.
Trout Burgers with Tarragon Mayonnaise
Based on a recipe from Bon Appétit magazine
Serves 4
1 pound skinless trout fillet, cut into 1/4-inch pieces (about 2 1/4 cups)
4 green onions, chopped
1 tablespoon drained small capers
1 tablespoon fresh lemon juice
1 tablespoon fresh tarragon, chopped
1 teaspoon Dijon mustard
1 teaspoon fresh white horseradish, grated
1/2 teaspoon kosher salt
1/2 teaspoon freshly ground black pepper
2 tablespoons mayonnaise
1/4 cup dry breadcrumbs
1 tablespoon high heat oil, such as safflower
4 whole-wheat buns
4 large tomato slices
8 butter lettuce leaves
Tarragon mayonnaise (recipe follows)
To make burgers:
Combine first 10 ingredients in medium bowl, and mix well. (Can be prepared 6 hours ahead. Cover and refrigerate.)
Mix breadcrumbs into salmon mixture. Form into four 1-inch-thick patties. Preheat a heavy large skillet over medium-high heat. Add oil when the pan is hot. Add salmon patties; cook until just firm to touch and brown and crusty, about 3 minutes per side.
Assemble each burger on a bun with a generous amount of tarragon mayonnaise, a trout patty, a slice of tomato, and lettuce leaves. Serve immediately.
Tarragon Mayonnaise
1/4 cup mayonnaise
1/4 cup plain nonfat Greek yogurt
2 green onions, chopped
1/2 tablespoon drained small capers
Zest of 1/2 a lemon
1/2 tablespoon fresh lemon juice
1 tablespoon chopped fresh tarragon
1 teaspoon Dijon mustard
1 teaspoon freshly grated white horseradish, or more to taste
To make mayonnaise:
Combine all ingredients in bowl and mix well. Season with salt and pepper. (Can be made 1 day ahead. Cover; chill.)
My festive Fourth of July wine bottle label came from Catch My Party. They have the cutest free downloads to kick up your celebration a notch. 🙂
Happy Fourth of July ~ Part 1 ~ Homemade Dill Pickles
/0 Comments/in Appetizer, Dinner, Fourth of July, Lunch, Side dish, Snack, Summer /by LauraTo celebrate the occasion this year, I made fresh dill pickles from the farmers’ market, trout burgers with a tarragon mayonnaise, and my hubby’s favorite summer strawberry cheesecake tart. I’ll share all three recipes since we really enjoyed them all, starting with the pickles. 🙂
I stumbled upon a farmers’ market last week where I saw some beautiful Kirby cucumbers that I couldn’t resist, along with a big bunch of fresh dill. (I must admit, I’m one of those people who gets much more excited about beautiful cucumbers and herbs than I do about beautiful shoes and purses. 😉 ) For a couple of dollars, I knew I could make something fresh and delicious with my discoveries.
I used a dill pickle recipe from Food and Wine magazine with only a few small changes. I reduced the amount of sugar by half and added some whole peppercorns for added seasoning. I also omitted the dill seeds and used more fresh dill than the recipe called for (since I had a huge bunch). These pickles were so flavorful and delicious! I have a feeling I’ll be making this recipe again and again. Maybe I’ll try radishes or green beans next time? I can see what my local farmers’ market has to play with next week!
Dill Pickles
Based on a recipe from Food and Wine magazine
1 1/2 cups distilled white vinegar
2 tablespoons granulated sugar
4 teaspoons kosher salt
1 teaspoon mustard seeds
1 teaspoon coriander seeds
1 teaspoon whole peppercorns
2 cups hot water
2 pounds Kirby cucumbers, cut in half lengthwise or sliced 1/2 inch thick
1 1/2 cups fresh dill, coarsely chopped
3 garlic cloves, coarsely chopped
In a large, heatproof measuring cup, combine the vinegar, sugar, salt, mustard seeds, coriander seeds, and peppercorns with the hot water and stir until the sugar and salt are dissolved. Let the brine cool.
In a large bowl, toss the cucumbers with the dill and garlic. Pour the brine over the cucumbers and turn to coat. Place a small plate over the cucumbers to keep them submerged, then cover the bowl with plastic wrap. Refrigerate the pickles overnight, stirring once or twice. Serve cold.
The dill pickles can be refrigerated in an airtight container for up to 1 week.
Stay tuned for the trout burger recipe next! 🙂
It’s officially summer! ~ Kalua Pork on Whole-Wheat Taro Rolls with Poi Spread and Pineapple Slaw
/0 Comments/in Bread, Dinner, Lunch, Main dish, Pork, Summer /by LauraI made a few tweaks to make the recipes a little healthier. For the taro rolls, I used whole-wheat pastry flour and skim milk, I replaced the butter with coconut oil, and I reduced the amount of sugar. For the slaw, I used nonfat Greek yogurt in place of the sour cream, and I omitted the sugar altogether. I also reduced the amount of dressing by half, and added a little extra pineapple. (After all, the pineapple is one of the stars of the dish!) For the spread, I used fresh horseradish root rather than prepared horseradish.
And since I don’t have an imu in my backyard to cook the pork, I chose a frozen kalua pork imported from Hawaii to keep it authentic. 😉 (I was able to find all of the ingredients I needed, including the pork and the poi, at my local Asian grocery store.)
Based on a recipe from Cooking Hawaiian Style
Taro Rolls:
1 (1/4 oz.) packet active dry yeast
1/4 cup lukewarm water
1/2 cup skim milk
1/3 cup coconut oil
2 tablespoons sugar
1/2 teaspoon kosher salt
2 large eggs, beaten
1/2 cup cooked taro, mashed
3 cups whole-wheat pastry flour
All-purpose flour for dusting hands and work surface
In a small mixing bowl, dissolve the yeast in lukewarm water. Let sit for a few minutes until the mixture is a little frothy on the top. (If there is no froth forming after 10 minutes or so, start again with a fresh packet of yeast. This means your yeast was not alive.) Scald milk by heating in a small saucepan over medium heat until bubbles appear around the inside edge of the pan and the milk is just about to boil. Pour milk into a mixing bowl. Combine the milk with the oil, sugar, and salt. Allow to cool, about 2 minutes. Into milk mixture, stir in the eggs, taro, and yeast mixture. In a large bowl, add the flour. Make a well in the center. Add the liquid mixture to the flour. Mix thoroughly until the dough comes together. On a floured work surface, turn the dough out. Knead until smooth. Transfer the dough into a well greased bowl. Cover with a damp towel, and let rise in a warm area until doubled in size, about 1 hour. Flour hands, and punch down the dough. Divide into 16-17 even portions. Shape into small balls and place onto two baking sheets lined with parchment paper. Cover with a damp towel, and let rise in a warm area until doubled in size, about 1 hour. Preheat oven to 350°. Bake until golden brown, about 15-20 minutes. Serve immediately and freeze the extras. Makes approximately 16-17 rolls.
Poi Horseradish Mayonnaise Spread:
1/2 cup fresh poi
1/4 cup water
Fresh horseradish, grated (to taste)
2 tablespoons mayonnaise
Slaw Dressing:
1/4 cup nonfat Greek yogurt
1/4 cup mayonnaise
1 green onion, green part only, finely chopped
1/2 teaspoon lemon juice
Slaw:
1 cup red cabbage, shredded
2 cups green cabbage, shredded
1 cup carrots, shredded
1 cup fresh pineapple, chopped
Pork:
12 oz. store-bought kalua pork
Poi Horseradish Mayonnaise Spread
In small mixing bowl, combine the poi and water and mix well using a wire whisk. Add the horseradish and mayonnaise, and whisk until smooth. Chill before serving.
Pineapple Slaw
In small bowl, combine all of the dressing ingredients. Blend well. In large bowl, combine all of the salad ingredients. Toss lightly. Pour dressing over salad. Mix well. Cover and refrigerate.
How to serve:
Take a taro roll and spread with the poi mayonnaise. Add kalua pork and top with pineapple coleslaw.
This pairs well with any drink served in a tiki glass! 🙂
One more culinary stop in Asia ~ Vietnamese Baby Clams with Sesame Rice Crackers
/0 Comments/in Appetizer, Cracker, Seafood, Side dish, Snack /by LauraThis is a dish I order over and over again at one of my favorite Vietnamese restaurants, so I decided to figure out how to make it at home! Turns out, it is really easy! It just requires two special ingredients from the Asian grocery store. The first is a Vietnamese herb that is sort of like mint or cilantro called rau ram. The pretty little leaves are a little peppery and delicious. I also used black sesame rice crackers on the side to scoop up the clams. They puff up when they are cooked, which is so much fun to watch!
Baby Clams with Rice Crackers
Inspired by a recipe from Danang Cuisine
1 tablespoon safflower oil (or other high heat cooking oil)
2 small shallots, finely sliced
1 teaspoon lemongrass, minced
1 teaspoon fresh chili pepper, seeds and ribs removed, minced (I like jalapeño or serrano)
1 garlic clove, minced
5 oz canned baby clams or chopped clams, drained and rinsed (Just try to find an all-natural brand, without any added preservatives)
4 tablespoons (approximately) of rau ram, roughly chopped (Fresh basil also works if you can’t find rau ram)
1/2 teaspoon fish sauce
1/2 teaspoon soy sauce
Freshly ground black pepper to taste
1-2 sesame rice crackers
Preheat a wok or nonstick pan. Add oil. When the oil is shimmering and hot, add the shallots, and cook until caramelized. Add the lemongrass and chili pepper, and cook until fragrant. Add the garlic and cook until just fragrant, about 15 seconds. Add the clams. Toss until warmed through. Turn off the heat and add rau ram, fish sauce, soy sauce, and black pepper. Toss and serve.
Take one rice cracker and microwave for one minute until puffy. Break into pieces. Serve as a “spoon” with the clams.