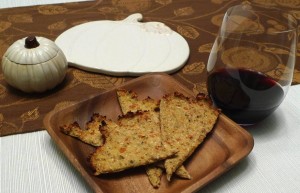
Healthy Holiday Hors d’Oeuvre ~ Cauliflower Flatbread

Cauliflower FlatbreadCauliflower is usually a part of my holiday table, whether the occasion is Thanksgiving or Easter. It is so versatile that it can be made into anything from a mash that rivals mashed potatoes (like I made last St. Patrick’s Day) to an appetizer that is very much like a flatbread! It really is a pretty amazing vegetable for which I am thankful today. 🙂

This unique spin on flatbread can be used in any way traditional flatbread is served — with an olive tapenade, with melted cheese, or even with your favorite pizza toppings. I’d recommend it as an appetizer that is out of the ordinary to start off your Thanksgiving meal!

Cauliflower Flatbread

1 ounce Parmesan cheese, cut into approximately 1/2 inch pieces

1 large head of cauliflower, cut into approximately 1 inch pieces

3 eggs, lightly beaten

2 teaspoons dried oregano

Salt and pepper to taste

Preheat oven to 400 F. Line a rimmed baking sheet with parchment paper.

In a food processor, grate the cheese until it is the size of tiny pebbles. Transfer the cheese to a large bowl. In the same processor, (no need to clean the bowl), process the cauliflower in two batches until you have fine pieces that look a little like rice. Transfer the cauliflower to a clean dishtowel. Squeeze as much excess moisture as you can out of the cauliflower. Discard the liquid. Add the cauliflower to the bowl with the cheese. Then add the eggs, oregano, salt, and pepper to the bowl. Combine until all of the ingredients are well incorporated.

On the prepared baking sheet, spread the mixture into a thin layer, about 1/8 inch thick. Bake for about 45 minutes, turning the pan half way through, until the cauliflower is golden and crisp on the edges.

Cut with a pizza wheel and serve immediately.

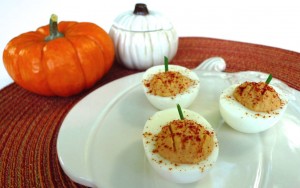
Everything Pumpkin! ~ Pumpkin Deviled Eggs

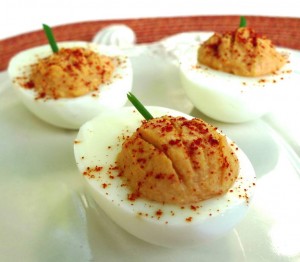
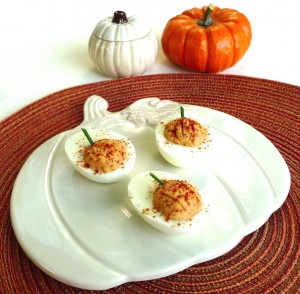
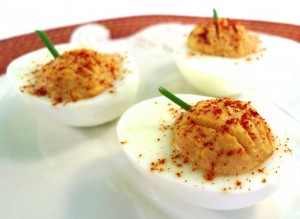
Pumpkin Deviled EggsI absolutely love anything and everything pumpkin at this time of the year! (Almost as much as these little squirrels. 😉 ) I love pumpkin muffins, pumpkin custard, pumpkin curry, and now, pumpkin deviled eggs! Mind you, they aren’t pumpkin flavored eggs. That might be a little too much, even for me. 😉 They would be perfect for Halloween or even Thanksgiving.Pumpkin Deviled EggsYou can use your favorite classic deviled egg recipe, or use my lightened version below. The extra paprika mixed in is what gives them their pumpkin color.Pumpkin Deviled EggsPumpkin Deviled Eggs

8 hard boiled eggs, cooled, sliced in half, yolks removed, 1/2 of the yolks reserved

3 tablespoons nonfat plain Greek yogurt

1 teaspoon Dijon mustard

1 tablespoon mayonnaise

1/2 teaspoon paprika, plus more for garnish

Salt to taste

1 or 2 fresh chives, cut into one-inch lengths

In a small bowl, stir together the yolks, yogurt, mustard, mayonnaise, paprika, and salt until smooth. With a small spoon, fill the holes in the egg whites with the yolk mixture. (FYI, you will have more whites than yolk mixture if you mound the filling as I did. But no worries, whites are a great snack!) Smooth the mixture with your finger. With the back of a butter knife, make 4 small little lines in each yolk filling to imitate the lines of a pumpkin. Place the cut chives into the yolks to make a “stem.” Sprinkle extra paprika over the top as a garnish.Pumpkin Deviled Eggs

British Wedding Anniversary Dinner ~ Soup ~ Rocket and Courgette Soup (Arugula and Zucchini Soup)

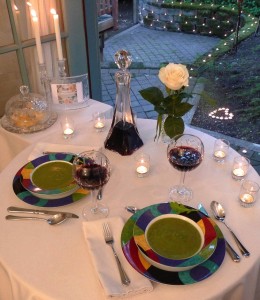
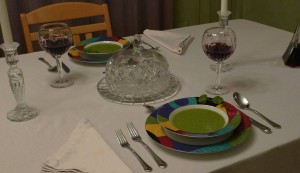
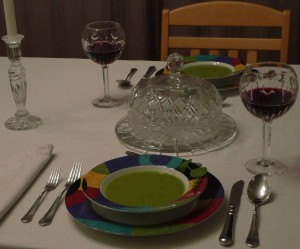
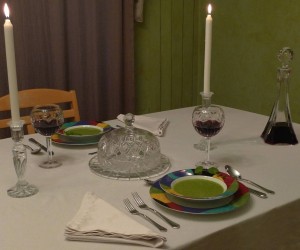
Rocket and Courgette SoupThis week marks our 15th wedding anniversary, and since it’s a big year, we wanted to celebrate in a big way! We had an extravagant British-themed dinner that took me several days to complete, but it was a fun project that was well worth the effort. I wanted to tie this anniversary back to our engagement anniversary/Valentine’s Day celebration when we enjoyed a Downton Abbey themed dinner. Given that the traditional gift for the 15th wedding anniversary is crystal, I thought another classic British meal with all the trimmings would also give us a great excuse to get out the crystal pieces we were given as wedding gifts but don’t use as often as we could. This crystal-studded celebration dinner was my anniversary gift to my hubby. 🙂

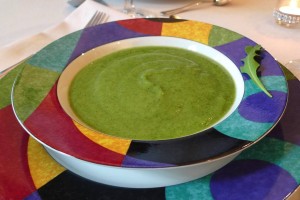
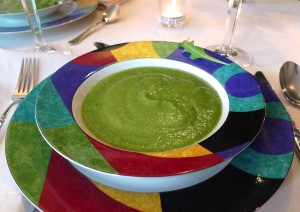
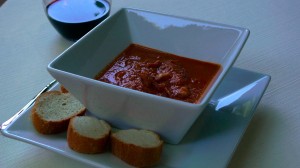
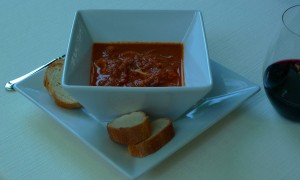
We started with a simple summery soup called rocket and courgette soup in the UK, but here in the States, we would call it arugula and zucchini soup. 🙂 I based the dish on a recipe from BBC Good Food, and then added a couple touches of my own.Rocket and Courgette SoupRocket and Courgette Soup

Based on a recipe from BBC Good Food

1 teaspoon high heat oil, such as safflower

1 onion, finely chopped

1 medium russet potato, finely chopped

2 cloves of garlic, minced

4 courgettes (zucchini), roughly chopped

4 cups vegetable or chicken stock

About 3 1/5 ounces, or 2 large handfuls, rocket (arugula)

Salt and pepper, to taste

Preheat a large sauté pan. Add oil. When the oil is hot and shimmering, add the onion and potato. Cook until the vegetables are softened. Add the garlic, and cook until fragrant, about 30 seconds. Then add the courgettes and stock. Scrape the bottom of the pan to release the brown bits. Bring to a boil. Cook until the courgettes are tender. Next, add the rocket, and cook until wilted, about 30 seconds. In small batches, blend the soup in a blender until smooth. Season to taste with salt and pepper. Serve warm.

Stay tuned for the main course…A trio of mini British meat pies!Rocket and Courgette Soup

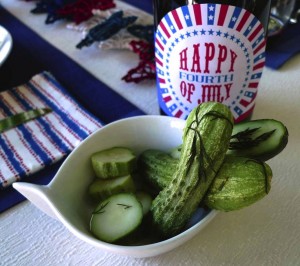
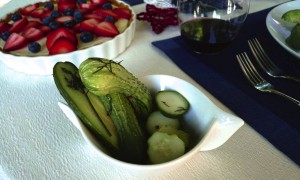
Happy Fourth of July ~ Part 1 ~ Homemade Dill Pickles

Dill PicklesI hope you had a lovely Fourth of July weekend!

To celebrate the occasion this year, I made fresh dill pickles from the farmers’ market, trout burgers with a tarragon mayonnaise, and my hubby’s favorite summer strawberry cheesecake tart. I’ll share all three recipes since we really enjoyed them all, starting with the pickles. 🙂

I stumbled upon a farmers’ market last week where I saw some beautiful Kirby cucumbers that I couldn’t resist, along with a big bunch of fresh dill. (I must admit, I’m one of those people who gets much more excited about beautiful cucumbers and herbs than I do about beautiful shoes and purses. 😉 ) For a couple of dollars, I knew I could make something fresh and delicious with my discoveries.

I used a dill pickle recipe from Food and Wine magazine with only a few small changes. I reduced the amount of sugar by half and added some whole peppercorns for added seasoning. I also omitted the dill seeds and used more fresh dill than the recipe called for (since I had a huge bunch). These pickles were so flavorful and delicious! I have a feeling I’ll be making this recipe again and again. Maybe I’ll try radishes or green beans next time? I can see what my local farmers’ market has to play with next week!

Dill Pickles

Based on a recipe from Food and Wine magazine

1 1/2 cups distilled white vinegar

2 tablespoons granulated sugar

4 teaspoons kosher salt

1 teaspoon mustard seeds

1 teaspoon coriander seeds

1 teaspoon whole peppercorns

2 cups hot water

2 pounds Kirby cucumbers, cut in half lengthwise or sliced 1/2 inch thick

1 1/2 cups fresh dill, coarsely chopped

3 garlic cloves, coarsely chopped

In a large, heatproof measuring cup, combine the vinegar, sugar, salt, mustard seeds, coriander seeds, and peppercorns with the hot water and stir until the sugar and salt are dissolved. Let the brine cool.

In a large bowl, toss the cucumbers with the dill and garlic. Pour the brine over the cucumbers and turn to coat. Place a small plate over the cucumbers to keep them submerged, then cover the bowl with plastic wrap. Refrigerate the pickles overnight, stirring once or twice. Serve cold.

The dill pickles can be refrigerated in an airtight container for up to 1 week.

Stay tuned for the trout burger recipe next! 🙂

Dill Pickles

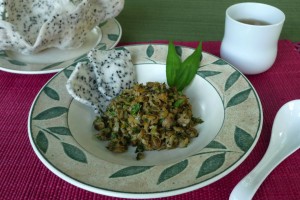
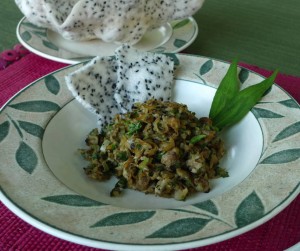
One more culinary stop in Asia ~ Vietnamese Baby Clams with Sesame Rice Crackers

Baby Clams with Rice CrackersAfter my virtual stop in South Korea to try their famous bibimbap, I decided to try a Vietnamese dish on my next stop. After all, it’s only a 4 ½ hour plane ride from Seoul to Da Nang, so I’ll make a quick culinary visit, just long enough for an appetizer in Vietnam. 😉

This is a dish I order over and over again at one of my favorite Vietnamese restaurants, so I decided to figure out how to make it at home! Turns out, it is really easy! It just requires two special ingredients from the Asian grocery store. The first is a Vietnamese herb that is sort of like mint or cilantro called rau ram. The pretty little leaves are a little peppery and delicious. I also used black sesame rice crackers on the side to scoop up the clams. They puff up when they are cooked, which is so much fun to watch!

Baby Clams with Rice Crackers

Inspired by a recipe from Danang Cuisine

1 tablespoon safflower oil (or other high heat cooking oil)

2 small shallots, finely sliced

1 teaspoon lemongrass, minced

1 teaspoon fresh chili pepper, seeds and ribs removed, minced (I like jalapeño or serrano)

1 garlic clove, minced

5 oz canned baby clams or chopped clams, drained and rinsed (Just try to find an all-natural brand, without any added preservatives)

4 tablespoons (approximately) of rau ram, roughly chopped (Fresh basil also works if you can’t find rau ram)

1/2 teaspoon fish sauce

1/2 teaspoon soy sauce

Freshly ground black pepper to taste

1-2 sesame rice crackers

Preheat a wok or nonstick pan. Add oil. When the oil is shimmering and hot, add the shallots, and cook until caramelized. Add the lemongrass and chili pepper, and cook until fragrant. Add the garlic and cook until just fragrant, about 15 seconds. Add the clams. Toss until warmed through. Turn off the heat and add rau ram, fish sauce, soy sauce, and black pepper. Toss and serve.

Take one rice cracker and microwave for one minute until puffy. Break into pieces. Serve as a “spoon” with the clams.

Baby Clams with Rice Crackers

Downton Abbey Valentine Dinner, First Course ~ Cream of Watercress Soup

Cream of Watercress SoupHappy Valentine’s Day!

My hubby and I enjoyed another themed dinner at home for Valentine’s Day, which is the way we like to celebrate this holiday every year. 🙂 We love to try new things together in the kitchen, and we have had a lot of fun over the years making new and different recipes – Most recently, for Valentine’s Day two years ago we made two kinds of ravioli (beet and lobster), and last year we made sushi with miso soup. This year we decided to try a Downton Abbey theme! I made three vintage British dishes the characters might have enjoyed at one of their elaborate dinner parties on the show.

I learned that for a grand dinner, there could be as many as nine courses. Since I was playing the part of both Mrs. Patmore while cooking the dinner, and Lady Grantham while enjoying the dinner, I limited our meal to three courses. 😉 Our first course was a cream of watercress soup based on a recipe I found in A Year in the Life of Downton Abbey: Seasonal Celebrations, Traditions, and Recipes. I replaced the butter with safflower oil, and replaced the cream with 2% milk, but otherwise followed the recipe rather closely. I ended up using three bunches of watercress. Remember to save a few sprigs to garnish the plate. 🙂 Also, this can be made a day or two ahead of time, which is always a plus.

Cream of Watercress SoupCream of Watercress Soup

Based on a recipe from A Year in the Life of Downton Abbey

Serves 4

1 tablespoon light high heat oil, such as safflower oil

1 large onion, peeled and chopped

1 large leek (white part only), washed and sliced

1 large potato, peeled and chopped

Salt and pepper

3 cups hot chicken stock

9 cups watercress, de-stalked and chopped

A large pinch of freshly grated nutmeg

⅔ cup 2% milk

Heat the oil in a heavy-based saucepan, then add the onion, leek and potato and stir to coat them in the oil. Season with salt and pepper and let the vegetables sweat with the lid on over a low heat for about 10 minutes, stirring occasionally. When the vegetables are tender, add the hot stock. Bring back to the boil, then add the watercress and cook for a further 5 minutes. Season with salt, pepper and nutmeg. Take the pan off the heat and liquidise the soup. Stir in the milk and pour into bowls to serve.

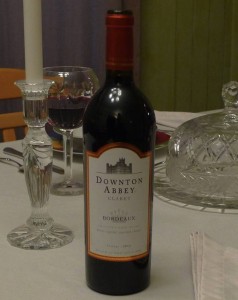
Cream of Watercress SoupWe paired our dinner with the perfect wine: Downton Abbey Bordeaux Claret 2012. I learned that great English houses of the Downton era enjoyed many French wines and foods, so this was similar to the wine the characters on the show may have paired with their fine meals.

Stay tuned for episode 2 of our Downton Abbey dinner – The main course!

Cream of Watercress Soup

Wedding Anniversary, Part 1 ~ Martini of Spicy Tuna Poke and Dragon Fruit Lychee Sparkling Wine Cocktails

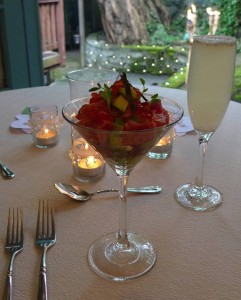
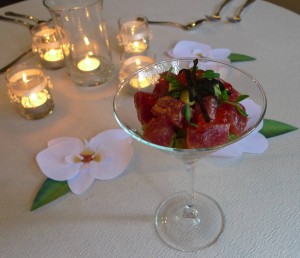
Ahi Poke Martini

We celebrated our wedding anniversary this year with a special Hawaiian-style dinner. We love to explore foods from all around the world. For Valentine’s Day (also our engagement anniversary), we made a sushi dinner, so we decided to go with a twist on that theme for our wedding anniversary by making a few Japanese-influenced dishes from Hawaii. It was a summery meal from the land of endless summers!

The weather was not very Hawaiian-like for our celebration, though. Ha! (But it was very Seattle-like!) It was a little drizzly, and cooler than it usually is around our anniversary. We decided to use that opportunity to set the dinner table in a new place…We kicked open the French doors in the guest room, and ate inside overlooking a sea of candles and tiki torches. 🙂 Luckily it wasn’t too rainy, so the candles stayed lit. It was really beautiful!

I also found some sweet little printable paper orchids on Elli.com. They were free, very easy to assemble, and I think they added a fun tropical touch to our table.

Ahi Poke Martini

I based two of our dishes on recipes from a cookbook called Roy’s Fish and Seafood: Recipes from the Pacific Rim. Chef Roy Yamaguchi has several restaurants in Hawaii and the mainland, and this book is a nice collection of a few of his Hawaiian seafood recipes. It was hard to choose what I wanted to make! I may continue to explore the recipes throughout our anniversary month. 🙂

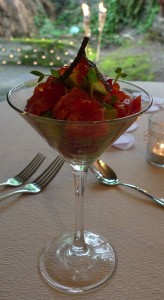
We started our meal with a classic ahi poke, one of our favorite Hawaiian dishes. 🙂 I loved the cookbook’s idea to serve it in layers in a martini glass, and then garnish with micro-greens, fish eggs, and thin strips of nori seaweed. I dressed the ahi much more lightly than the recipe called for. I used salmon roe instead of tobiko, because it’s local and also natural. I also doubled the avocado, since we love avocado. 🙂

Martini of Spicy Tuna Poke

Based on a recipe from Roy’s Fish and Seafood cookbook

Serves 2 as an appetizer

6 oz center-cut ahi tuna, cut into ½ inch dice

¼ cup mayonnaise

2 teaspoons sriracha

½ teaspoon fish sauce

A few micro-greens

¼ sheet nori, cut with scissors into thin strips

1 tablespoon salmon roe

1 avocado, cut into ½ inch dice

Juice of ½ lemon

Salt and pepper to taste

Combine mayonnaise, sriracha, and fish sauce. Salt and pepper to taste. Add as much or as little of the mixture to the ahi as you like. Stir to combine, and set aside.

Combine the avocado with the lemon juice and salt and pepper to taste.

Chill 2 martini glasses. Layer a few pieces of avocado in the bottom of the glass, then add a layer of ahi, another of avocado, and finish with a layer of ahi. Top with micro-greens, roe, and nori strips.

We also made fun dragon fruit and lychee sparkling wine cocktails to go with our first course. The dragon fruit added pretty little seeds and a very mild flavor, and the lychee gave the cocktail a nice sweetness. In a blender, I added a couple of slices of dragon fruit with about a ½ cup of lychee juice. Then I strained the mix, added a little to each champagne glass, and topped the juice with sparkling wine.

Stay tuned for the main course in my next entry!

Ahi Poke Martini

Dos de Junio ~ Elote from Elote Cafe

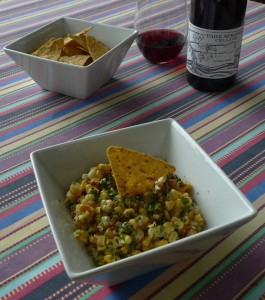
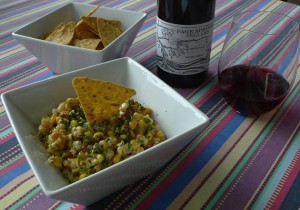
Happy Dos de Junio! OK, it isn’t really a Mexican holiday today. But it is a gorgeous Monday, the sun is shining, and I think there is a reason to celebrate every day. 🙂 I didn’t make a Mexican dish this year for Cinco de Mayo, so I made up for that today. This recipe for Elote has been on my list to try for quite some time, and now that corn is starting to come into the markets, today seemed like a perfect time to make it.

I had this dish in Arizona at a place called Elote Café. If you are ever in the Sedona area, I would highly recommend checking them out! It is such a popular place that people will wait in a long line outside just to experience the food. Get there early is all I have to say! 🙂

This recipe is based on the signature dish at Elote Café with a couple of small changes to make it a bit healthier. I used reduced fat mayonnaise instead of the full fat version. I also didn’t use the entire amount of the mayonnaise mixture on the corn. I just added a little at a time and tasted as I went until I was happy with the flavor. I had a couple tablespoons left of the sauce in the end. I also grilled the corn inside on a grill pan, since I don’t have an outdoor grill. It worked just fine!  Just make sure you have a fan on, since the husks get a little smoky.

Elote

Based on a recipe from Elote Café

2 ears corn, husks intact

1/4 cup light mayonnaise

1/4 tablespoon Cholula brand hot sauce

1/2 tablespoon fresh lime juice

Pinch of kosher salt

1/4 teaspoon fresh ground black pepper

1/4 teaspoon sugar

1 tablespoon chicken stock

1 tablespoon Cotija cheese, crumbled for garnish

1 tablespoon cilantro, chopped, for garnish

Tortilla chips, for serving

Over a medium-high grill or on a grill pan over high heat, roast the corn until the husks are well charred, about 5 minutes. Turn occasionally so as not to burn the side contacting the direct heat.

Set the roasted ears aside until cool enough to handle, then shuck them.

Cut the kernels off the cob.

When ready to eat, mix the mayonnaise and all the other ingredients through chicken stock in a sauté pan over medium heat.

Add the corn kernels and warm through.

Pour into a bowl and garnish with the cheese, and cilantro.

Serve immediately with tortilla chips.

When I was in Arizona, I also picked up a bottle of local wine by Page Springs Cellars called Mule’s Mistake. It doesn’t sound like a fancy wine, but it is actually quite lovely! It reminds me a little of Oregon Pinot Noirs that we love so much.

Winter Olympics ~ Smoked Salmon Blini

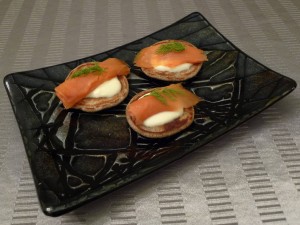
As the winter Olympics in Sochi, Russia are coming to a close, I wanted to try a Russian recipe to celebrate the occasion! I made blini with smoked salmon. 🙂

I used Ina Garten’s recipe as the base, but I made it a little healthier. I substituted the butter with Earth Balance, and used much less of it than the original recipe called for. Rather, I used a good non-stick pan, so the butter was unnecessary to keep the pancakes from sticking. I also used nonfat milk and reduced fat sour cream rather than the full fat versions.

Blini with Smoked Salmon

Based on a recipe from Ina Garten

1/3 cup buckwheat flour

2/3 cup all-purpose flour

1/2 teaspoon baking powder

3/4 teaspoon kosher salt

3/4 cup plus 2 tablespoons nonfat milk

1 extra-large egg

2 tablespoons Earth Balance

1/2 pound smoked salmon, thinly sliced

1/4 cup reduced fat sour cream

Fresh dill sprig, for garnish

Combine both flours, baking powder, and salt in a bowl. In a separate bowl, whisk together the milk, egg, and 1 tablespoon of Earth Balance. Whisk the wet ingredients into the flour mixture. Heat 1 tablespoon of the Earth Balance in a medium non-stick sauté pan and drop the batter into the hot skillet, 1 tablespoon at a time. Cook over medium-low heat until bubbles form on the top side of the blini, about 2 minutes. Flip and cook for 1 more minute, or until brown. Repeat with the remaining batter. Set aside.

To serve, top the blini with a piece of smoked salmon. Add a dollop of sour cream and a sprig of dill.

Blini are often served with caviar on top rather than the smoked salmon. That could be something to try for the Oscars next week! 🙂

Happy Valentine’s Day! ~ Crab Cakes

Happy Valentine’s Day!

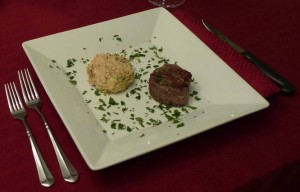
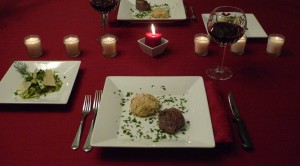
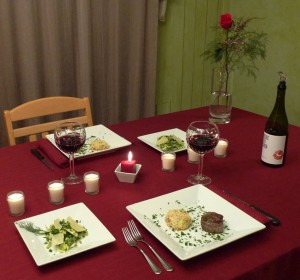
We enjoyed a low key, but special dinner tonight. Since I worked later in the evening, we just made a couple of our favorite dishes that are easy to put together. My Valentine requested his favorite crab cakes, which I wrote about a few years ago. They always feel like a special occasion dish. That with a little filet mignon and a fennel salad, and we had a gourmet meal in about 30 minutes! It really didn’t take any longer than that.

Since the crab cakes are one of our favorite dishes, I will reprint the recipe here. They are worth repeating! 🙂

Dungeness Crab Cakes

Based on a recipe from Sunset magazine

1 pound cooked and shelled Dungeness crab meat

1/4 cup finely diced celery

2 tablespoons minced fresh chives

2 tablespoons mayonnaise

1 large egg

2 teaspoons Dijon mustard

1/4 teaspoon hot sauce

1 1/4 cups panko, divided

Preheat your oven to 475 F. Make sure your crab doesn’t have any hidden bits of shell mixed in before you begin. In a large bowl, mix the celery, chives, mayonnaise, egg, mustard, and hot sauce with a fork. Then add the crab and 1/4 cup panko. Stir gently until everything is well blended.

Place the remaining 1 cup of panko in a shallow bowl. Shape the crab mixture into cakes. (I usually get about 6 or 7 large cakes, but make them the size you prefer. Whatever size you choose, they should be about 1/2 inch thick.) Place each cake in the panko and coat on all sides. Press gently to make sure the crumbs stick. Lay the panko-covered cakes slightly apart on a parchment-lined baking sheet. (You can make them up to this point earlier in the day. Just cover the pan lightly with plastic wrap and refrigerate until you are ready to bake.)

Bake until golden brown, 15 to 18 minutes. Serve immediately.

I gave Rob a bottle of wine from a new Washington winery called Result of a Crush. He was nice enough to share it with me. 😉 It was a perfect wine for Valentine’s Day!  Delicious, too. 🙂

First Day of Summer ~ Calamari in a Zingy Tomato Sauce


We have a romantic little Italian restaurant in Seattle underneath Pike Place Market called Il Bistro that has one of our favorite calamari dishes in the city. They serve it in a tomato sauce instead of frying it, as most places do. Since we can’t go downtown everyday, I worked on replicating the dish at home to enjoy on our patio on warm summer nights. I finally made a version that is fairly close to the flavors at the restaurant, and I’d like to share it with you! 🙂

We enjoyed it on the first day of summer, outside with a glass of wine.

Calamari in a Zingy Tomato Sauce

1 lb calamari (I buy pre-cleaned, pre-sliced, frozen calamari to make this nice and easy. Just put as many as you would like in a bowl of cold water to thaw quickly.)

1 14.5 oz can tomatoes

2 oz can anchovies in oil, drained

2 garlic cloves, minced

1 small shallot, minced

¼ cup dry white wine

2 tablespoons extra virgin olive oil

15 medium sized green olives

1 tablespoon capers (I use the kind packed in brine rather than salt)

Salt and pepper to taste (I recommend you wait until everything is blended to add very much seasoning, since the other ingredients have a lot of salt. It is easier to tell if you need more after everything is blended together.)

Rustic bread slices, for serving

Heat the oil in a medium sauté pan, and add the garlic and shallot. Cook until fragrant. Stir in the remaining ingredients, except for the calamari (or bread.) Heat through, until it just begins to boil. Then place everything into a blender and pulse until smooth. Adjust the seasoning to your liking. Pour everything back into the pan. Bring to a boil again, and add the calamari. Cook until the calamari turn opaque, about 1 to 2 minutes.

Serve in a big bowl with sliced bread for dipping into the sauce.

Valentine’s Day Dinner, Part 1 ~ Beet Ravioli with Pine Nut “Goat Cheese,” Rosemary-Cream Sauce, and Aged Balsamic Vinegar

We jetted off to New York City to explore their world-class restaurants this Valentine’s Day. Well, not literally, but in our own way. I found two recipes that I was excited to try, and they both happened to be from chefs in NYC. They couldn’t be more different, but they are both types of ravioli.

The first course was a raw beet ravioli filled with “goat cheese” that was made of pine nuts over a “cream” sauce flavored with rosemary and garlic. All of it was vegan, and uncooked. I love to play with food in new and different ways like this. It keeps the kitchen interesting and exciting for me. And tonight I had the chance to play with my best playmate…My hubby! 🙂

I followed the recipe closely, which can be found at Epicurious.com.

Beet Ravioli with Pine Nut “Goat Cheese,” Rosemary-Cream Sauce, and Aged Balsamic Vinegar

Pine Nut “Goat Cheese:”

4 cups pine nuts, soaked 1 hour or more

1/2 cup extra-virgin olive oil

2 medium shallots, peeled and diced

Zest of 1 lemon

1/2 cup freshly squeezed lemon juice

4 teaspoons nutritional yeast

2 1/2 teaspoons sea salt

Freshly ground black pepper

Rosemary-Cream Sauce:

1 teaspoon minced rosemary

1 tablespoon freshly squeezed lemon juice

3/4 cup filtered water

Pinch of sea salt

1 clove garlic, peeled

Freshly ground black pepper

Beet “Pasta:”

2 medium beets (2 inches in diameter or more), peeled

2 tablespoons macadamia oil, or other nut oil, or extra-virgin olive oil

1 tablespoon freshly squeezed lemon juice

1/2 teaspoon sea salt

2 tablespoons high-quality aged balsamic vinegar

Microgreens or other herbs, for garnish


Pine Nut “Goat Cheese”

Process all ingredients in a food processor until as smooth as possible.

You should have about 4 cups. Reserve 2 cups for the sauce, and set aside the remainder.

Rosemary-Cream Sauce

Puree all the ingredients in a high-speed blender until smooth.

To Finish

Using a mandoline, slice the beets very thin (so they are pliable and not stiff, approximately 1/16 of an inch or less).

Make small stacks of the larger pieces and use a sharp knife to cut into squares—the size doesn’t matter much, as long as they are all roughly the same. Alternatively, use a round-, heart-or other- shaped cookie cutter to cut the slices. Cut at least 40 slices—10 per serving, with a few extra to spare.

In a medium bowl, place the beet slices, oil, lemon juice, and salt and toss gently to coat evenly. Allowing the beets to sit for a half hour or more will soften them; this is optional but a good idea if your slices are on the thicker side and still a bit stiff.

Lay half the beet slices on a clean work surface and top each with a rounded teaspoonful of the cheese. Top with the remaining beet slices and press down gently.

Spoon the sauce onto serving plates, and arrange the ravioli on top. Garnish with a few drops of aged balsamic vinegar and a few sprigs of either microgreens or fresh herbs.

Happy wedding anniversary ~ Part 2 ~ Pepper-Crusted Steak with Horseradish Cream on Grilled Garlic Crostini

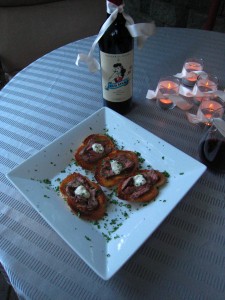
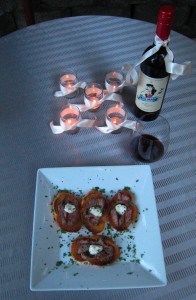
We enjoyed an Italian steak dish to compliment our crab ravioli on our anniversary. Surf and turf :). We just wanted a little something to snack on as we lingered at the table, enjoyed the candles surrounding us, and sipped our wine. These were perfect.

The original recipe was from Epicurious.com. I replaced the heavy cream with light sour cream, which is a different flavor, but delicious all the same. I also trimmed the steak very well before I cooked it.

Pepper-Crusted Steak with Horseradish Cream on Grilled Garlic Crostini

Based on a recipe from Epicurious.com

For the crostini:

1/2 cup extra virgin olive oil

2 garlic cloves, crushed

Salt and pepper to taste

15 1/3-inch slices cut from a French baguette

Italian parsley, minced

Mix the olive oil, garlic, salt, and pepper together in a small bowl and brush lightly on both sides of the bread slices. To broil, position the rack so the slices are 2 inches from the top and turn when the crostini starts to brown at the edges. It will only take a couple of minutes, so watch them very closely.

For the cream:

1/3 cup freshly grated horseradish

1 teaspoon white wine vinegar

1 teaspoon Dijon mustard

Salt and pepper to taste

1/2 cup light sour cream

Use a microplane grater to grate the horseradish root, and then mix the horseradish with the vinegar. Add the mustard, salt, and pepper, and mix again. Then fold into the sour cream.

For the marinated beef:

3 cloves garlic, crushed

1/2 teaspoon hot red pepper flakes

1 tablespoon whole black peppercorns, cracked

1 tablespoon minced fresh rosemary leaves

1/3 cup olive oil

2 pounds London broil (top sirloin), cut 1 1/2 inches thick

Kosher salt

Combine the garlic, hot red pepper flakes, peppercorns, rosemary, and olive oil in a Zip-loc bag. Add the beef, coating it with the marinade. Squeeze all the air out of the bag so the marinade envelops the beef, and refrigerate for at least 6 hours, or overnight.

Preheat the grill or broiler for 15 to 20 minutes. Sprinkle the steak with the salt and grill or broil to rare or medium rare, depending on your preference. (Our steak took about 6 minutes in the broiler to cook to our liking).

Let the steak rest for at least 20 minutes, to get the juices back into the meat, and then cut into short, very thin slices.

Arrange a few shaved slices of beef on each piece of bread, top with a dot of horseradish cream, scatter with minced Italian parsley, and finish with a little kosher salt.

The wine we paired with dinner was called Red Silk 2010 Shiraz by Oliverhill Winery in Australia. Since the traditional anniversary gift for the 12th anniversary is silk, this was our twist on it. Funny thing, out of all of the wines to choose from in the world, I chose this one for Rob, and my mom happened to choose the very same wine as a gift to us! What are the chances? 😉  So we still have one bottle to enjoy after our anniversary. Let the celebration continue!

Happy 100th Birthday, Julia Child ~ Cheese Soufflé

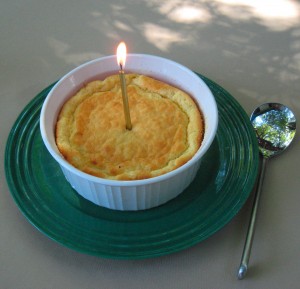
Julia Child would have turned 100 years old today. That milestone has inspired cooks everywhere to remember her and to cook something a little French this evening :).

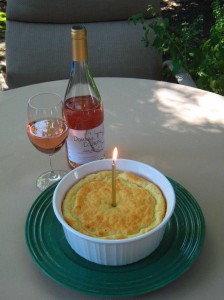
Sur La Table is hosting cooking classes this month to celebrate her birthday including 4 of Julia’s recipes. I recreated my favorite of the 4 at home ~ The cheese soufflé. The original is published in The Way to Cook, and Bon Appétit magazine also published an adaptation of the recipe a few years ago.

I used Earth Balance instead of butter, because ever since I discovered it, I don’t buy butter anymore. It does everything I need. I also used skim milk instead of whole. Other than that, I followed the recipe closely, since Julia was known for testing her recipes thoroughly. Don’t want to question the master! 😉

Cheese Soufflé

Adapted from The Way to Cook

2 tablespoons finely grated Parmesan cheese (or other hard cheese)

1 cup skim milk

2 1/2 tablespoons Earth Balance, plus more for greasing pan

3 tablespoons unbleached all purpose flour

1/2 teaspoon paprika

1/2 teaspoon salt

3 grinds of pepper

Speck of ground nutmeg

4 large egg yolks

5 large egg whites

1 cup (packed) coarsely grated Gruyère cheese (about 4 ounces)

Position rack in lower third of oven and preheat to 400 F.

Grease 6-cup (1 1/2-quart) soufflé dish with Earth Balance. Add Parmesan cheese and tilt dish, coating bottom and sides.

Warm milk in heavy small saucepan over medium-low heat until steaming.

Meanwhile, melt Earth Balance in heavy large saucepan over medium heat. Add flour and whisk until mixture begins to foam and loses raw taste, about 3 minutes (do not allow mixture to brown). Remove saucepan from heat; let stand 1 minute. Pour in warm milk, whisking until smooth. Return to heat and cook, whisking constantly until very thick, 2 to 3 minutes. Remove from heat; whisk in paprika, salt, pepper, and nutmeg. Add egg yolks 1 at a time, whisking to blend after each addition. Scrape soufflé base into large bowl. Cool to lukewarm. DO AHEAD: Can be made 2 hours ahead. Cover and let stand at room temperature.

Using electric mixer, beat egg whites in another large bowl until stiff but not dry. Fold 1/4 of whites into lukewarm or room temperature soufflé base to lighten. Fold in remaining whites in 2 additions while gradually sprinkling in Gruyère cheese. Transfer batter to prepared dish.

Place dish in oven and immediately reduce oven temperature to 375_F. Bake until soufflé is puffed and golden brown on top and center moves only slightly when dish is shaken gently, about 25 minutes (do not open oven door during first 20 minutes). Serve immediately.

This pairs well with a summery rosé wine. French of course ;-). Our house rosé at the moment is Domaine Couron Grenache Rosé from France, which was perfect.

Bon appétit!

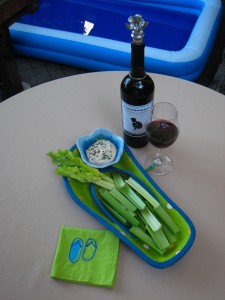
Poolside Snack ~ Smoked Salmon Dip with Celery

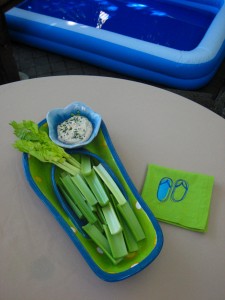
We have been thoroughly enjoying our little pool this summer :). Even when it’s too chilly to put my feet in, I like to sit beside the water with a magazine (or my blog!) since it makes me feel like I am on a little vacation at home. I am soaking up all of the summertime sunshine I can!

I made a little salmon dip to nibble on these warm summer days. The original recipe came from MarthaStewart.com. I reduced the mayonnaise a tad, and I replaced the cream cheese with Neufchatel. I also served this creamy rich dip with celery stalks instead of bagel chips, since that is a little more bikini friendly :).

Smoked Salmon Dip

Adapted from MarthaStewart.com

3 tablespoons mayonnaise

4 ounces Neufchatel cheese

1 tablespoon capers, rinsed and drained

1 tablespoon red onion, diced small

1 to 2 teaspoons fresh lemon juice

1/2 teaspoon prepared horseradish

2 ounces plus 2 more ounces smoked salmon, crumbled

1 tablespoon chopped fresh parsley

Celery, for serving

In a food processor, combine mayonnaise, Neufchatel, capers, red onion, lemon juice, horseradish, and 2 ounces smoked salmon. Process until smooth, about 20 seconds. Transfer to a small bowl and stir in remaining 2 ounces smoked salmon. Top with fresh parsley and serve with celery.

I was inspired to pair this recipe with Cannonball Cabernet Sauvignon….The perfect poolside wine!

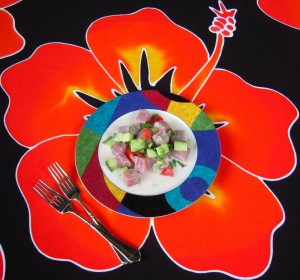
The Bungalow ~ Poisson Cru

I can’t put down the new book by Sarah Jio called The Bungalow. I would highly recommend it if you are looking for your next summery book to read at the beach (as long as you don’t have anything else on your calendar to do, since it is a page-turner! ;)) The story starts in Seattle in the 1940s, but it quickly moves to Bora Bora. I feel as if I am on a trip to that part of the world when I open the pages!

The story inspired me to research dishes from French Polynesia, and I stumbled upon one called Poisson Cru, which means “raw fish” in French. The way I like to travel (virtually or in reality) is to make and sample foods from different places. Since I can’t make it to Bora Bora this week, this is something I could enjoy in my own back yard in Seattle with the tiki torches burning. 🙂 I think a mai tai would be the perfect accompaniment!

Poisson Cru

From Epicurious.com

(6 appetizers or 4 entrees)

1 pound very fresh high-grade ahi tuna, diced in neat 1/2-inch cubes

1/2 cup fresh lime juice

1/2 cup coconut milk (I used light coconut milk)

1/2 cup diced peeled and seeded cucumber

4 to 5 scallions, green and white portions, split lengthwise and minced

1 fresh hot small green or red chile, seeded and minced, optional

Several tablespoons shredded coconut, optional

3/4 teaspoon salt, or more to taste

Freshly ground pepper

1 medium tomato, seeded and squeezed to eliminate liquid, diced

Combine in a medium bowl the tuna, lime juice, coconut milk, cucumber, scallions, optional chile and coconut, salt, and pepper. Refrigerate 30 minutes to 1 hour. Mix in the tomato and serve right away.

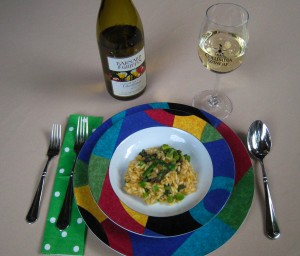
The School of Essential Ingredients ~ Spring Risotto

I’ve been working at two separate cooking schools this spring, which inspired me to pick up a book about a group of people who meet every week for a cooking class. It is entitled The School of Essential Ingredients by Erica Bauermeister. The way she writes about cooking and food is so descriptive that it encouraged me to stop and really take in all of the experiences at my own cooking schools…The smells, textures, colors and tastes, as well as the people, places and experiences associated with every dish.

Her website includes a few recipes to bring the experience home, so I decided to try her spring risotto to celebrate the end of the season :).

Spring Risotto

From www.EricaBauermeister.com

4 cups chicken or vegetable broth

1/2 lb asparagus

3 T butter (I actually used Earth Balance instead, which worked beautifully)

3 T olive oil

1 cup chopped onions

1 1/3 cup arborio rice

1/2 cup white wine

1 bay leaf

salt and pepper (to taste)

lemon zest (optional)

shaved parmesan

Cut asparagus tips into 1 1/2 inch pieces. Cut half of the stocks into finely chopped pieces; cut the other half into 1 inch pieces.

Heat broth in a heavy saucepan. When boiling, add asparagus and cook until just tender (3-5 minutes). Take out asparagus with a slotted spoon and set aside in a bowl. Turn down heat under broth to a low simmer.

In a different heavy saucepan, melt butter and add olive oil. Add chopped onions and saute until translucent (about 5 minutes). Add rice and bay leaf and stir until well coated with the butter. Add wine and cook, stirring, until liquid has evaporated.

Add a ladleful of heated broth to the rice, stirring until liquid is absorbed. Continue adding a ladleful at a time, until broth is gone and rice is creamy but grains are still firm.

Add the asparagus and a pinch of lemon zest (optional). Add salt and pepper to taste. Put in a serving bowl and top with Parmesan shavings.

Prep time: 45-50 minutes (with much contemplative stirring)

Serves 6

I paired it with a local wine called Barnard Griffin 2010 Chardonnay. The tulips on the label always remind me of spring :). I also used this wine in the dish.

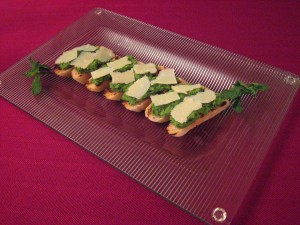
It’s Spring ~ Pea, Mint and Parmesan Crostini

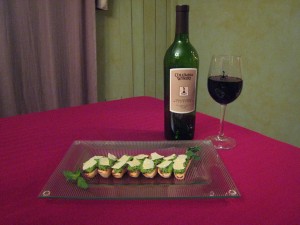
I brought home some delicious homemade bread from Sur La Table’s artisan bread class, so we decided to make a spring crostini dish with one of the baguettes. I think there is something extraordinary about peas and fresh mint together. Top that slightly sweet combination with salty Parmesan, and it’s a really special dish. Simple, fresh and delicious. A recipe from Bon Appétit magazine inspired me, but we made it our own. Just add as much or as little of each component until it tastes good to you. 🙂 This is really more of an idea than an actual recipe to follow.

Pea, Mint and Parmesan Crostini

Adapted from Bon Appétit magazine

Fresh baguette

1 ½ cups frozen peas

Handful of fresh mint

Salt and pepper

Drizzle of extra virgin olive oil

Blanch the peas in salty water for about a minute. Drain well. In a food processor, add blanched peas, mint, olive oil, salt and pepper to taste. Process until it is blended, but still has some texture. Scrape down the bowl to ensure it is all evenly mixed.

Slice the baguette into thin slices, and grill lightly on a grill pan.

Spread a dollop of the pea mixture onto the baguette slices, and then top with thinly sliced Parmesan cheese. Garnish with extra mint and some freshly ground pepper if you’d like.

These would be great appetizers for a spring cocktail party, or even for an Easter meal. They are so easy to make that they would also be perfect for a late night snack with a nice bottle of wine. Or in this case, they were a part of one of our little anniversary celebrations. Saturday marked the day that Rob and I met 14 years ago. We do something special every year on that date when we unknowingly met our future spouse. 🙂 These little crostini definitely felt like a treat fitting for a special celebration.

Happy Heart Day ~ Smoked Salmon and Crispy Potato Tian with Sour Cream

Happy Valentine’s Day!

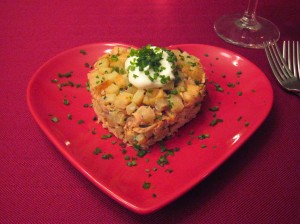
We had a special little heart shaped appetizer to celebrate Heart Day :). The original recipe was from one of Sur La Table’s cooking classes entitled Great Restaurant Recipes of Seattle, and this one was courtesy of Rover’s. I streamlined it to make it a little more weeknight friendly, and I also made it a little healthier with a couple of substitutions. I replaced the crème fraiche with reduced fat sour cream, and I used Earth Balance in place of the butter. The original recipe mixes salmon with several other ingredients, but smoked salmon is so flavorful on its own that it really doesn’t need more flavor to be delicious. By streamlining the recipe this way, I’m more likely to make it again for a special weeknight appetizer. The recipe below only took about 15 minutes to put together, and it has a great “wow” factor ;).

Smoked Salmon and Crispy Potato Tian with Sour Cream

2 servings

3 oz smoked salmon

6 oz Yukon Gold potatoes

2 tbsp Earth Balance buttery spread

1/8 tsp minced garlic

Pinch of thyme

1 tbsp minced fresh chives, plus more for garnish

1 tbsp reduced fat sour cream, plus more for garnish

Salt and pepper to taste

Crumble the salmon into fine bits, and set aside.

Cut the potatoes into a ¼ inch dice. (You may peel them if you wish, but the skin is just fine). Heat a large sauté pan over medium high heat, and then add the Earth Balance. Add the potatoes and sauté until they are golden and cooked through. Add the garlic and thyme and toss for 30 seconds. Transfer the potatoes to a plate lined with a paper towel to drain and cool slightly. Combine the potatoes, chives and sour cream in a small bowl and season with salt and pepper to taste.

To serve, set a 3-inch ring mold (or I used a heart shaped cookie cutter) in the center of a plate. Spoon the smoked salmon into the mold, pressing to form an even layer. Top with the potato mixture, again pressing lightly for an even layer. Repeat with the remaining salmon and potatoes. Top with a little sour cream and garnish with more chives.

Lots to be thankful for ~ Roasted Pheasant with Chestnuts, Wild Rice and Fennel, Frisée Salad with Blue Cheese, Walnut and Cranberry Crostini and a Pumpkin Cake Roll with Cream Cheese Frosting

Happy Thanksgiving!

We celebrated a little early with family this year, so Rob and I had a quiet and cozy Thanksgiving for two on the actual holiday. I decided to shake things up a bit since we had the traditional turkey and sweet potatoes and all of that last week. For our own little celebration, we had Roasted Pheasant with Chestnuts, Wild Rice and Fennel, Frisée Salad with Blue Cheese, Walnut and Cranberry Crostini and a Pumpkin Cake Roll with Cream Cheese Frosting. If you would like to try something off the beaten path for your holidays, we both thought all three were exceptional! The recipes were twists on the traditional fare, so it still felt like Thanksgiving, but it was fun to try a few new things.

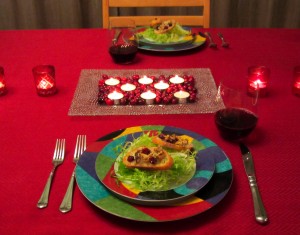
The frisée salad was a festive little starter for our meal. I have to admit, I am not a big cranberry sauce fan, and so the addition of dried cranberries on the crostini was my version of “cranberry sauce.” 😉 I used quite a bit less blue cheese than the original recipe called for, and I was actually able to find a reduced fat cheese by Stella that had a very full flavor. I also used a baguette instead of ciabatta since I liked the size better, and it has fewer holes to let the goodies fall through ;). I made the whole recipe for the crostini, so as to have leftovers as snacks in the coming days.


Frisée Salad with Blue Cheese, Walnut, and Cranberry Crostini

Adapted from Bon Appétit magazine

24 ½ or ¼ inch-thick slices of a French baguette, depending on your preference

3 tablespoons walnut oil, divided

1/2 cup chopped toasted walnuts

1/4 cup reduced fat blue cheese, crumbled

5 tablespoons minced shallots, divided

1/3 cup dried cranberries

1 bunch of frisée lettuce

1 teaspoon red wine vinegar

Preheat oven to 400°F. Arrange bread slices on baking sheet. Brush bread slices on top side with 2 tablespoons walnut oil. Bake until crisp, about 5 minutes.

Mix walnuts, cheese, 4 tablespoons shallots, and dried cranberries in medium bowl. Sprinkle mixture on toasts. Bake until cheese melts, about 4 minutes.

Meanwhile, combine frisée, 1 tablespoon shallots, 1 tablespoon walnut oil, and vinegar in bowl. Serve with crostini on top of the frisée.
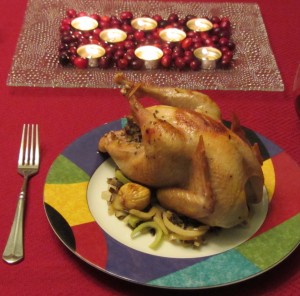
For the pheasant dish, I followed the recipe pretty closely. I did omit the butter when called for and used olive oil instead. I also needed to cook the pheasant longer than 40 minutes to get the breast meat to 160 degrees. If you haven’t ever had pheasant before (like we hadn’t) it has a very mild taste, but it is definitely not chicken or turkey. It was less gamey than I expected. A nice refreshing change from our usual poultry choices :). The sizes of the pheasants were also perfect for two with leftovers. I used two little 2 lb birds. (If you are in the Seattle area, Don and Joe’s Meats in Pike Place Market carries pheasant along with many other specialty meats. It’s a fun place to visit if you are looking for a little culinary adventure!)


Roasted Pheasant with Chestnuts, Wild Rice and Fennel

Adapted from MarthaStewart.com

2 cups fresh chestnuts

3/4 cup wild rice

1 teaspoon salt, plus more to taste

2 pheasants (about 2 pounds each)

1/4 cup fresh rosemary, finely chopped

1 clove garlic, minced

6 shallots, 2 minced and 4 slivered lengthwise

Freshly ground pepper

2 tablespoons plus 2 teaspoons olive oil

2 fennel bulbs (about 8 ounces each), sliced thinly crosswise

1 cup homemade chicken stock, or canned low-sodium chicken broth, skimmed of fat

Preheat oven to 425 degrees. With a sharp knife, make two crosscut gashes on flat side of chestnuts. Place on a baking sheet, and roast for 15 to 20 minutes. When cool enough to handle, peel off skins and set aside.

Rinse rice well. In a medium saucepan, combine with 3 cups water. Bring to a boil, reduce heat, cover loosely, and allow to simmer for 25 minutes. Remove from heat, add 1/2 teaspoon salt, and let sit for 10 minutes. Drain, and set aside.

Rinse pheasant, and pat dry. Combine rosemary, garlic, minced shallots, and salt and pepper to taste. Rub cavity with mixture. Season outside with salt and pepper. Tie pheasant’s legs together with kitchen twine. Tuck wings under breast.

Reduce heat to 350 degrees. Pour 1 tablespoon oil in a roasting pan over medium heat. Brown bird evenly on all sides, about 15 minutes. Place breast side up; transfer to oven. Cook for about 40 more minutes, basting often, until legs are a little loose when you shake them.

Meanwhile, pour 1 teaspoon oil in a skillet. Add slivered shallots, and cook over medium heat for 5 to 6 minutes. Transfer shallots to a bowl.

Pour another 1 teaspoon oil in skillet. Add fennel slices, and cook for 5 minutes. Transfer to bowl.

Pour remaining tablespoon oil in skillet. Add chestnuts; cook for 2 minutes. Add 1/2 cup stock and 1/2 teaspoon salt. Bring to a boil and simmer until reduced to a glaze, about 10 minutes. Add remaining stock; simmer until again reduced to a glaze, about 5 minutes. Transfer to a plate.

Add rice, shallots, fennel, and 1 cup water to skillet and cook for 5 minutes. Add chestnuts. Season to taste with salt and pepper. Serve with pheasant.

For dessert, we had a pumpkin cake roll with cream cheese frosting. I reduced the sugar from the original recipe and I made a simple Neufchatel frosting for the middle instead of the traditional full fat cream cheese filling. The presentation was quite beautiful, but I must say, it looks harder to make than it actually was. My favorite kind of recipe! 😉


Pumpkin Cake Roll with Cream Cheese Frosting

Adapted from Cook’s Country magazine

1
cup cake flour, sifted

2
teaspoons pumpkin pie spice

1/2
teaspoon baking soda

Pinch of salt

5
large eggs

1
cup sugar

1
cup canned pumpkin puree

16 ounces Neufchatel, room temperature

3/4 cup confectioners’ sugar, plus more for garnish

For the Cake: Adjust oven rack to middle position and heat oven to 350 degrees. Grease 18- by 13-inch rimmed baking sheet and line with greased parchment paper. Whisk flour, spice, baking soda, and salt in medium bowl; set aside. With electric mixer on medium-high speed, beat eggs and sugar until pale yellow and thick, 6 to 10 minutes. Add pumpkin and mix on low until incorporated. Fold in flour mixture until combined. Spread batter evenly in prepared pan. Bake until cake is firm and springs back when touched, about 15 minutes. Before cooling, run knife around edge of cake to loosen, and turn out onto clean sheet of parchment paper that has been dusted with confectioners’ sugar. Gently peel off parchment attached to cake and discard. Roll cake and fresh parchment into log and cool completely, about 1 hour.

For the Filling: Place the room temperature Neufchatel cheese in a food processor, and blend with ¾ cup confectioner’s sugar until smooth.

To Assemble: Gently unroll cake and spread with frosting, leaving 1-inch border at edges. Re-roll cake snugly, leaving parchment behind. Wrap cake firmly in plastic wrap and chill completely, at least 1 hour or up to 2 days. Remove plastic, dust with confectioners’ sugar.